
https://nomadcoders.co/typescript-for-beginners
노마드 코더 무료강의 'Typescript로 블록체인 만들기' 강좌를 보고 정리한 내용입니다.
일부 내용이 다를 수 있습니다.
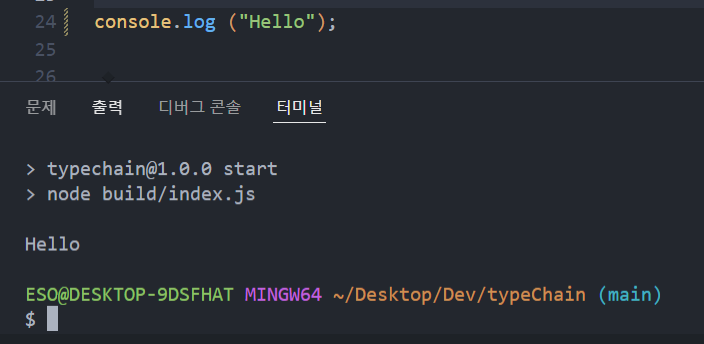
pacakge.json 안에 scripts 추가
start 명령시 빌드안의 index.js 실행
  "scripts": {
    "build": "tsc",
    "start": "node build/index.js"
  },
워크플로우 -> 빌드 && 실행 -> npm run build && npm run start 로 실행
효율적인 작업을 위해 ts-node 설치
ts-node : 빌드없이 ts실행 가능 프로덕션 패키지 x 개발환경에서만 사용
설치: npm i -D ts-node
package.json 안에 ts-node 실행 스크립트 dev 추가
 "scripts": {
    "build": "tsc",
    "dev": "ts-node src/index",
    "start": "node build/index.js"
  },
노드 자동 리스타트를 위한 노드몬도 설치
npm i -D nodemon
package.json의 dev를 다음과 같이 수정
  "scripts": {
    "build": "tsc",
    "dev": "nodemon --exec ts-node src/index.ts",
    "start": "node build/index.js"
  },
Blockchain
여러개의 블록이 사슬처럼 묶인것
블록 -> 데이터가 들어있음 -> 블록체인으로 보호하고 싶은 데이터
블록 -> 다른 블록에 묶여(chain)있음
묶여있는 연결고리 -> hashes
Block class 작성
Block class와 class 모양을 결정하는 인터페이스 BlockSaphe 작성
interface BlockShape {

}

class Block {

}
블록에 필요한것
hash해쉬값
블록의 고유서명 ->prevHash,height,data값을 이용해 계산됨prevHash이전해쉬값heigth블록의 위치 표시data블록이 보호하고 있는 데이터
interface BlockShape {
    hash:string;
    prevHash:string;
    height:number;
    data: string;
}

class Block implements BlockShape{
    constructor(
        public prevHash: string,
        public height: number,
        public data: string,
    ) {}
}
Block 클래스에 implements하기
constructor 안에 받을 Blockshpae을 넣어줌
hash값 - 특정 입력값이 입력되면 똑같은 과정을 거쳐 똑같은 결과값이 나옴 -> 결정론적 알고리즘
어느 컴퓨터에서나 abc라는 hash를 생성해도 같은 해쉬 문자열이 나옴
abc => BA7816BF8F01CFEA414140DE5DAE2223B00361A396177A9CB410FF61F20015AD
만약 값을 바꾸게 되면 완전히 다른 값이 나옴
abcd => 88D4266FD4E6338D13B845FCF289579D209C897823B9217DA3E161936F031589
데이터가 변하지 않으면 해쉬값도 변하지 않는다.
-> 블록체인이 블록을 보호하는 방법
-> 블록정보가 수정되지 않았다는 걸 확인가능
hash 값 implements
constructor 바깥에서 선언 후 수동으로 초기화
hash값 계산을 위한 calculateHash 함수 작성
계산을 위한 인수로 prevHash, height, data를 넘겨줌
class instance가 없어도 호출 가능한 static 메소드로 선언

static으로 선언된 메소드는 this로 불러올 수 없음 class명을 호출해서 직접 불러와야함
interface BlockShape {
    hash:string;
    prevHash:string;
    height:number;
    data: string;
}

class Block implements BlockShape{
    public hash: string;
    constructor(
        public prevHash: string,
        public height: number,
        public data: string,
    ) {
        this.hash = Block.calculateHash(prevHash, height, data)
    }
    static calculateHash(prevHash:string, height:number, data:string) {

    }
}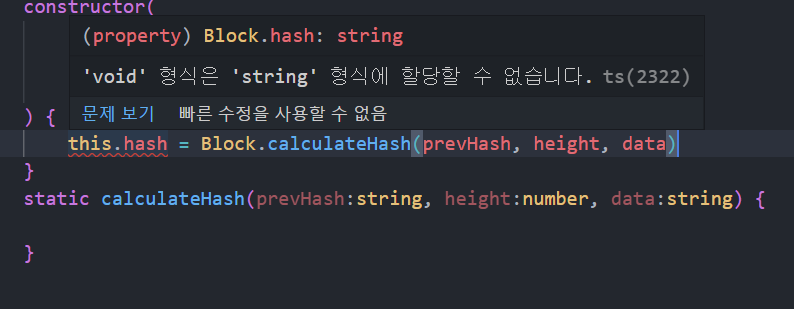
리턴값이 없기때문에 void라 나옴 리턴할 해쉬값 계산을 작성해줌
모든 값을 문자열로 연결해준 다음 crypto로 hashing
모듈을 불러올 때 에러가 발생하면

tsconfig.json 에 esModuleInterop을 true로 해주거나
{
"include":["src"],
"compilerOptions": {
"outDir": "build",
"esModuleInterop": true,
"target": "ES6",
"lib":["ES6", "DOM"],
"strict": true,
"allowJs": true,
}
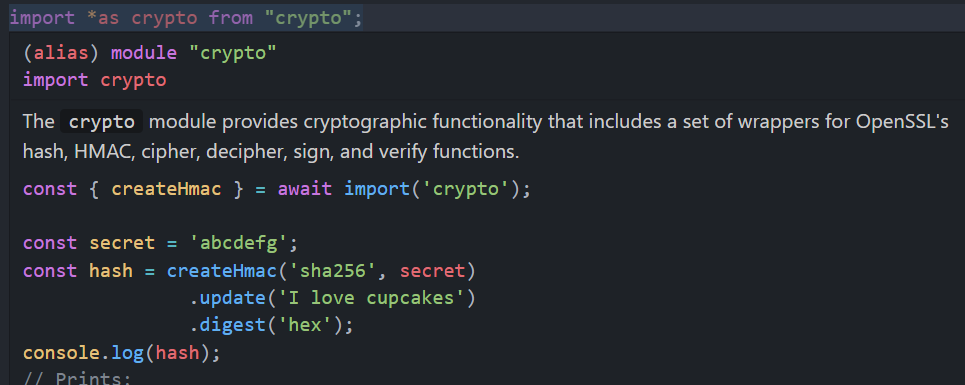
}import * as crypto from "crypto" 로 모두 불러오거나
JS에는 여러 시스템과 모듈이 존재하기 때문에(...CommonJS, UMD, ESModule)
import export 같은 방식을 지정해줘야함
package.json을 다음과 같이 수정
{
    "include":["src"],
    "compilerOptions": {
        "outDir": "build",
        "esModuleInterop": true,
        "target": "ES6",
        "lib":["ES6"],
        "strict": true,
        // "allowJs": true,
        "module": "CommonJS"
    }
}
lib에서 필요없는 dom 삭제
CommonJS 모듈시스템 사용
(브라우저 앱을 만든다면 umd or 웹팩)
allowJS를 지우개 되면 모듈을 불러올때 타입이 정해져 있지 않은것 처럼 에러가 발생한다.
지난시간에 만든 d.ts 파일을 만들어야 하는데 패키지가 방대한 경우(ex:React) 비효율적임
js로 만든 스크립트를 받았는데 type이 하나도 정해져있지 않을때
-> DefinitelyTyped 사용
DefinitelyTyped
https://definitelytyped.org/
https://github.com/DefinitelyTyped/DefinitelyTypednpm패키지 타입들을 모아놓은 곳
설치하거나 찾아서 type사용오래된 npm 패키지들도 type을 지원하고 있음
npm i -D @types/패키지이름로 설치
ex)npm i -D @types/node,npm i -D @types/express요즘은 패키지 배포자가 type을 넣어서 배포하는 경우가 많음
다시 돌아와서 return 값(해쉬생성) 작성
import crypto from "crypto";

interface BlockShape {
    hash:string;
    prevHash:string;
    height:number;
    data: string;
}

class Block implements BlockShape{
    public hash: string;
    constructor(
        public prevHash: string,
        public height: number,
        public data: string,
    ) {
        this.hash = Block.calculateHash(prevHash, height, data)
    }
    static calculateHash(prevHash:string, height:number, data:string) {
        const toHash = `${prevHash}${height}${data}`
        return crypto.createHash("sha256").update(toHash).digest("hex")
    }
}
https://nodejs.org/api/crypto.html#class-hash
https://nodejs.org/api/crypto.html#cryptocreatehashalgorithm-options
crypto.createHash("sha256") sha-256 해쉬생성
https://nodejs.org/api/crypto.html#hashupdatedata-inputencoding
update(toHash) 해싱할 원본데이터 toHash
digest 생성된 해쉬를 16진수로 인코딩하여 출력
BlockChain class 작성
private으로 block이란 프로퍼티를 생성, Block class를 배열로 받음
private blocks: Block[]

construtor엔 아무것도 지정하지 않고 block만 초기화해줌
constructor() {
        this.block = [];
    }
addBlock 메서드 추가하기
새로운 블록을 추가할때 블록에 저장하고 싶은 데이터를 보내줘야 함
addBlock(data:String)
class BlockChain {
    private blocks: Block[];
    constructor() {
        this.block = [];
    }
    public addBlock(data:String) {

    }
}
addBlock 함수 작성
새로운 Block 인스턴스 block 생성
class BlockChain {
    private blocks: Block[];
    constructor() {
        this.block = [];
    }
    public addBlock(data:String) {
        const block = new Block()
    }
}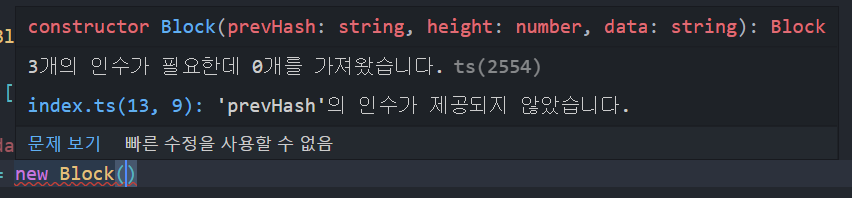
필요한 인수들 prevHash height data를 넘겨줘야 함
prevHash를 받을 getPrevHash 함수작성
class BlockChain {
    private blocks: Block[];
    constructor() {
        this.block = [];
    }
    private getPrevHash() {
        if(this.blocks.length === 0) return ""
        return this.blocks[this.blocks.length - 1].hash;
    }
    public addBlock(data:String) {
        const block = new Block()
    }
}
if(this.blocks.length === 0) return ""
연결된 이전 블록들이 없다면 빈 문자열 반환
return this.blocks[this.blocks.length - 1].hash;
연결된 이전 블록들이 있다면 블록들 중 마지막 블록의 해쉬 반환
이제 addBlock에 이전 블록값을 넘겨줌
class BlockChain {
    private blocks: Block[];
    constructor() {
        this.blocks = [];
    }
    private getPrevHash() {
        if(this.blocks.length === 0) return ""
        return this.blocks[this.blocks.length - 1].hash;
    }
    public addBlock(data:string) {
        const newBlock = new Block(this.getPrevHash(), this.blocks.length + 1, data)
        this.blocks.push(newBlock)
    }
}this.getPrevHash()이전 블록해시값
this.blocks.length + 1 새 블록의 height값(새 블록위치) == 새로운 블록이 추가되므로 블록배열의 현재길이 + 1
data 새 블록이 가질 데이터
새로운 블록은 즉시 Block class의 constructor에 의해서 initilized됨 === 해쉬로 변환됨
this.hash = Block.calculateHash(prevHash, height, data)
마지막으로 새로운 블록을 블록배열에 push
this.blocks.push(newBlock)
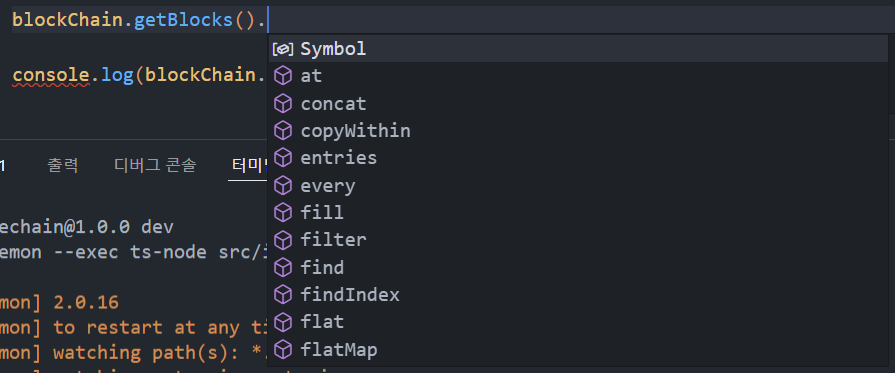
block에 엑세스 할 수 있는 public 함수 getBlocks()만들기
class BlockChain {
    private blocks: Block[];
    constructor() {
        this.blocks = [];
    }
    private getPrevHash() {
        if(this.blocks.length === 0) return ""
        return this.blocks[this.blocks.length - 1].hash;
    }
    public addBlock(data:string) {
        const newBlock = new Block(this.getPrevHash(), this.blocks.length + 1, data)
        this.blocks.push(newBlock)
    }
    public getBlocks() {
        return this.blocks;
    }
}
새 블록체인 만들고 테스트 해보기
const blockChain = new BlockChain();

blockChain.addBlock("First one");
blockChain.addBlock("Second one");
blockChain.addBlock("Third one");

console.log(blockChain.getBlocks())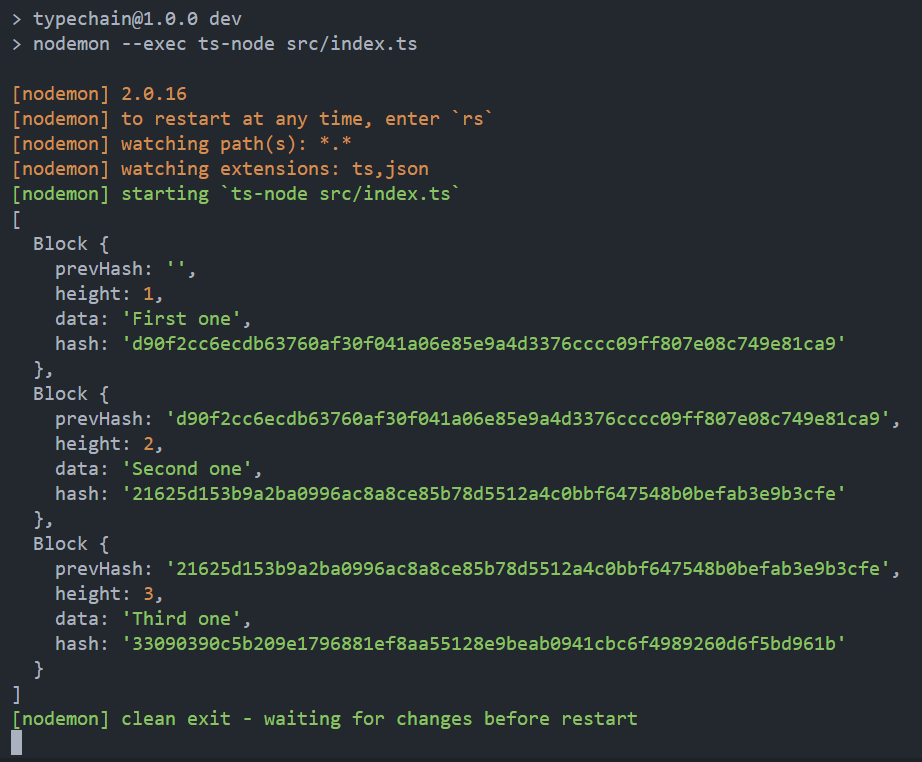
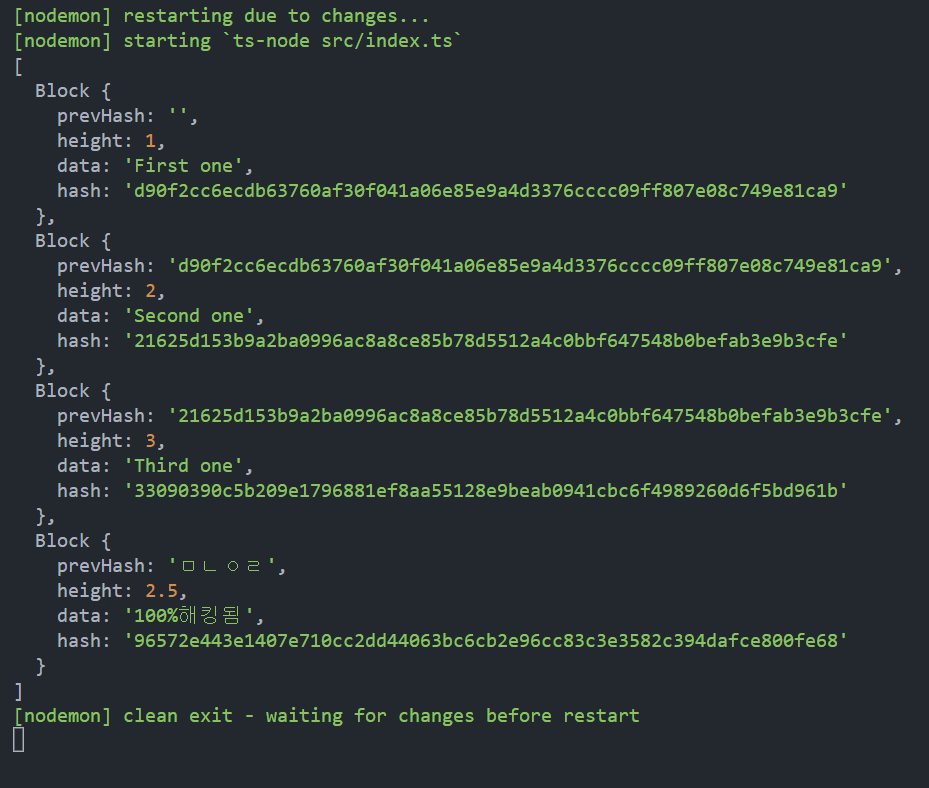
보안문제
임의의 누군가가 여러단계를 거치지 않고 새로운 블록을 추가 할 수 있음
blockChain.getBlocks().push(new Block("ㅁㄴㅇㄹ", 123456, "100%해킹됨")
이런식으로 private 값인 블록을 리턴해주는 public메서드 getBlock()메서드를 통해 배열에 접근할 수 있게 때문에 위험

blockChain.getBlocks().push(new Block("ㅁㄴㅇㄹ", 123456, "100%해킹됨")를 입력 후 재실행
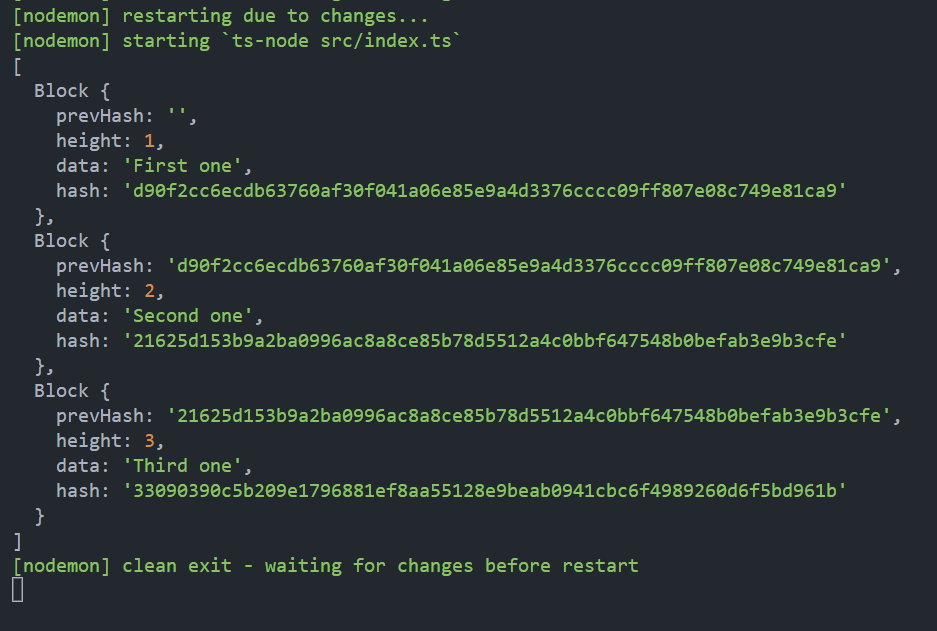
따라서 getBlocks()메서드에서 블록을 리턴해줄때 새 블록배열을 리턴해주도록 바꿔야 함
return [...this.blocks];
이렇게 되면 새 배열을 리턴해줄 뿐이고 실제 블록배열(블록체인의 state)엔 접근 할 수 없기 때문에 정상적으로 출력됨
최종코드와 실행결과
import crypto from "crypto";

interface BlockShape {
    hash:string;
    prevHash:string;
    height:number;
    data: string;
}

class Block implements BlockShape{
    public hash: string;
    constructor(
        public prevHash: string,
        public height: number,
        public data: string,
    ) {
        this.hash = Block.calculateHash(prevHash, height, data)
    }
    static calculateHash(prevHash:string, height:number, data:string) {
        const toHash = `${prevHash}${height}${data}`
        return crypto.createHash("sha256").update(toHash).digest("hex")
    }
}

class BlockChain {
    private blocks: Block[];
    constructor() {
        this.blocks = [];
    }
    private getPrevHash() {
        if(this.blocks.length === 0) return ""
        return this.blocks[this.blocks.length - 1].hash;
    }
    public addBlock(data:string) {
        const newBlock = new Block(this.getPrevHash(), this.blocks.length + 1, data)
        this.blocks.push(newBlock)
    }
    public getBlocks() {
        return [...this.blocks];
    }
}

const blockChain = new BlockChain();

blockChain.addBlock("하나");
blockChain.addBlock("둘");
blockChain.addBlock("셋");
blockChain.addBlock("넷");
blockChain.addBlock("다섯");
blockChain.addBlock("다섯");

blockChain.getBlocks().push(new Block("ㅁㄴㅇㄹ",2.5,"100%해킹됨"))

console.log(blockChain.getBlocks())
실행 결과
//터미널
[
  Block {
    prevHash: '',
    height: 1,
    data: '하나',
    hash: 'ae7e27c92a67b0a5c448acb0cf4905fd163e776f770974b45f4c0ac9522facd0'
  },
  Block {
    prevHash: 'ae7e27c92a67b0a5c448acb0cf4905fd163e776f770974b45f4c0ac9522facd0',
    height: 2,
    data: '둘',
    hash: '9cc34abbc2dc4b6c386b88faa38d1544fdc14b1fd4cf2ebc12ee2f8718d1c613'
  },
  Block {
    prevHash: '9cc34abbc2dc4b6c386b88faa38d1544fdc14b1fd4cf2ebc12ee2f8718d1c613',
    height: 3,
    data: '셋',
    hash: 'af56b9158c6e3e7bf5599947229d46da747dfb612745ba1f659864f99c20fc8a'
  },
  Block {
    prevHash: 'af56b9158c6e3e7bf5599947229d46da747dfb612745ba1f659864f99c20fc8a',
    height: 4,
    data: '넷',
    hash: '326651360a62ff8fdd0d1606fb5bda97a0607e240f5ec0bbc93d4ea526560e59'
  },
  Block {
    prevHash: '326651360a62ff8fdd0d1606fb5bda97a0607e240f5ec0bbc93d4ea526560e59',
    height: 5,
    data: '다섯',
    hash: 'fe79e0705302677b81835cf1563cb0db981718a50147471510c8ea92800359ba'
  },
  Block {
    prevHash: 'fe79e0705302677b81835cf1563cb0db981718a50147471510c8ea92800359ba',
    height: 6,
    data: '다섯',
    hash: '3b5a54b6afeee51ff1b59ee2fca9a6accb7c7d0a9dc248bcad26587226f468f8'
  }
]
정리
TypeScript는 JS의 슈퍼셋이다
생산성을 늘려주고 버그를 줄여준다.
큰 프로젝트에 새로운 기능을 추가할때 유용하다.
https://www.typescriptlang.org/ko/docs/handbook/intro.html
심도있는 타입스크립트를 배우고 싶다면 타입스크립트 핸드북을 읽어라.