joi의 에러메시지를 커스텀 할 수 있다는 것을 알게 되었다.
messages() 메소드 안에 객체로 키는 에러 이름으로 밸류는 오버라이드할 에러 메세지를 넣어주면 된다.
이 때 에러 이름의 종류는
https://joi.dev/api/?v=17.6.0#list-of-errors
이 링크의 List of errors 항목을 참조하면 된다.
await joi
        .object({
          email: joi.string().required().messages({
            "string.base": "휴대폰 번호는 문자열이어야 합니다.",
            "any.required": "휴대폰 번호를 입력해주세요.",
          }),
          nickname: joi.string().required().messages({
            "string.base": "닉네임은 문자열이어야 합니다.",
            "any.required": "닉네임을 입력해주세요.",
          }),
          password: joi.string().required().messages({
            "string.base": "비밀번호는 문자열이어야 합니다.",
            "any.required": "비밀번호를 입력해주세요.",
          }),
          confirm: joi.string().required().messages({
            "string.base": "비밀번호 확인은 문자열이어야 합니다.",
            "any.required": "비밀번호 확인을 입력해주세요.",
          }),
          name: joi.string().required().messages({
            "string.base": "이름은 문자열이어야 합니다.",
            "any.required": "이름을 입력해주세요.",
          }),
          phone: joi.string().required().messages({
            "string.base": "휴대폰 번호는 문자열이어야 합니다.",
            "any.required": "휴대폰 번호를 입력해주세요.",
          }),
          image: joi.string().messages({
            "string.base": "image URL은 문자열이어야 합니다.",
          }),
        })
        .validateAsync({ name, password, confirm, phone, image });
그래서 이와 같이 변수별로 그리고 제한사항별로 메세지를 넣어주었는데 너무 길어졌다. 그래서 이 것들을 따로 함수로 빼서 재사용할 수 있게 하기로 하였다.
joi = require("joi");

module.exports = class Validation {
  /** @returns { } */
  getEmailJoi = () => {
    const emailRegExp =
      /^[0-9a-zA-Z]([-_.]?[0-9a-zA-Z])*@[0-9a-zA-Z]([-_.]?[0-9a-zA-Z])*\.[a-zA-Z]{2,3}$/;
    return joi.string().max(30).required().regex(emailRegExp).messages({
      "string.base": "Email은 문자열이어야 합니다.",
      "any.required": "Email을 입력해주세요.",
      "string.pattern.base": "Email이 형식에 맞지 않습니다.",
      //"string.min": "Email은 최소 5글자여야 합니다.",
      "string.max": "Email은 최대 30글자여야 합니다.",
    });
  };
//...생략
joi_storage.js를 위와 같이 작성. 위는 email이라는 변수만을 검증하는 함수이고 나머지도 각각 만들어짐.
그리고 controller의 회원가입 함수에서
await joi
        .object({
          email: this.validation.getEmailJoi(),
          nickname: this.validation.getNicknameJoi(),
          password: this.validation.getPasswordJoi(),
          confirm: this.validation.getConfirmJoi(),
          name: this.validation.getNameJoi(),
          phone: this.validation.getPhoneJoi(),
          image: this.validation.getImageJoi(),
        })
        .validateAsync({
          email,
          nickname,
          password,
          confirm,
          name,
          phone,
          image,
        });
이와 같이 작성. 아까보다 본문이 훨씬 간결해졌다.
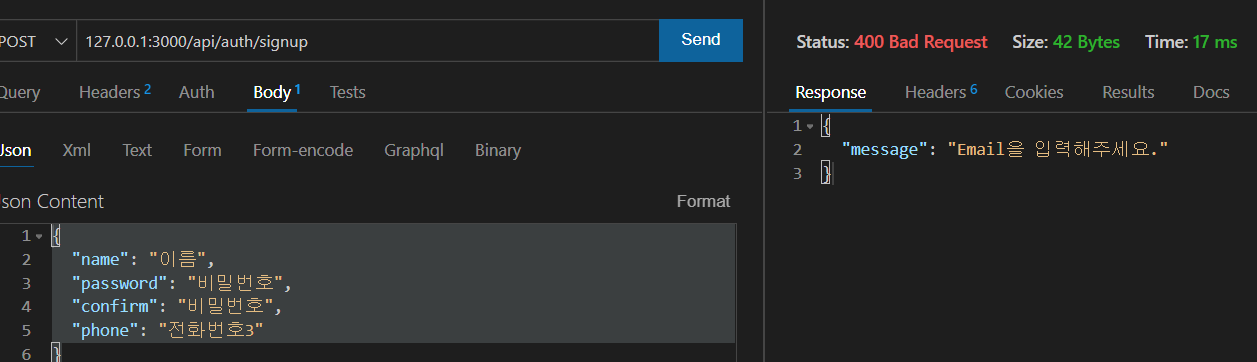
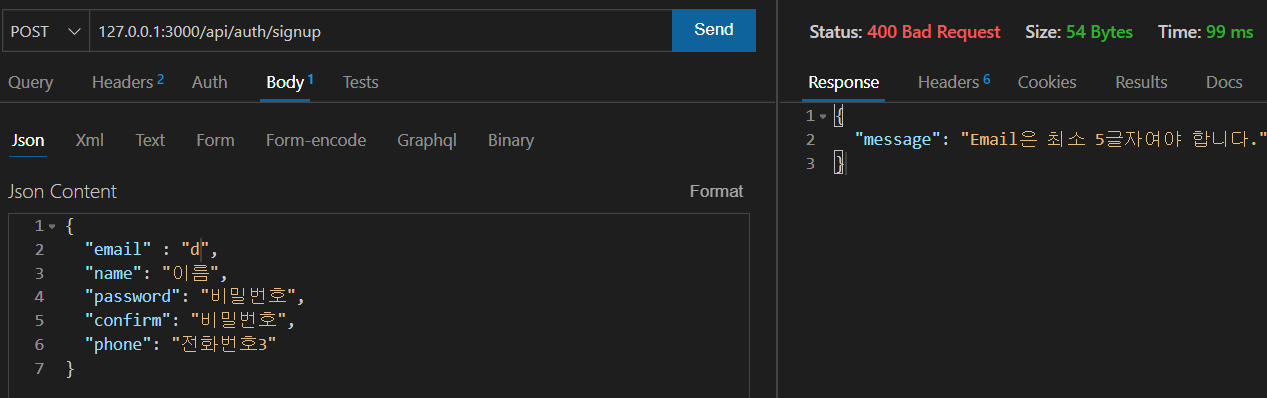
그리고 테스트 해보았다.
email을 입력 안하면,
email이 문자열이 아니고 boolean이라면,

email 길이가 너무 짧으면,
email이 정규표현식에 맞지 않으면,

문제 없이 잘 동작.

코딩 공부 ing..