엔티티를 노출하지 않고 dto를 만들어서 아래와 같은 구조적인 Dto를 만들기
생성자를 이용한 방법
두개의 테이블이 있을때
CREATE TABLE user_tb(
    id int auto_increment primary key,
    username varchar unique,
    password varchar,
    email varchar,
    created_at timestamp
);

CREATE TABLE board_tb(
    id int auto_increment primary key,
    title varchar,
    content varchar,
    user_id int,
    created_at timestamp
);
일반적인 평평한 dto는 아래처럼 나오게 되는데
{
  "id": 1,
  "title": "제목1",
  "content": "내용1",
  "createdAt": "2023-03-20T02:12:23.893+00:00",
  "userId": 1,
  "userUsername": "ssar",
  "userPassword": "1234",
  "userEmail": "ssar@nate.com",
  "userCreatedAt": "2023-03-20T02:12:23.893+00:00"
}
구조를 넣는 방법을 알아보자
{
  "id": 2,
  "title": "제목2",
  "content": "내용2",
  "user": {
    "id": 1,
    "username": "ssar",
    "password": "1234",
    "email": "ssar@nate.com",
    "createdAt": "2023-03-20T01:55:34.756+00:00"
  },
  "createdAt": "2023-03-20T01:55:34.757+00:00"
}
Flat Dto를 하나 만들고
public class BoardDetailOutFlatDto {
    private Integer id;
    private String title;
    private String content;
    private Timestamp createdAt;
    private Integer userId;
    private String userUsername;
    private String userPassword;
    private String userEmail;
    private Timestamp userCreatedAt;
}
Structured Dto를 만든다.
@Getter @Setter
public class BoardDetailOutStructuredDto {
    private Integer id;
    private String title;
    private String content;
    private UserDto user;
    private Timestamp createdAt;

    public  BoardDetailOutStructuredDto(BoardDetailOutFlatDto  board) {
        this.id = board.getId();
        this.title = board.getTitle();
        this.content = board.getContent();
        this.user = new UserDto(
                board.getUserId(),
                board.getUserUsername(),
                board.getUserPassword(),
                board.getUserEmail(),
                board.getUserCreatedAt()
        );
        this.createdAt = board.getCreatedAt();
    }

    @Getter @Setter
    public class UserDto {
        private Integer id;
        private String username;
        private String password;
        private String email;
        private Timestamp createdAt;

        public UserDto(Integer id, String username, String password,
        	String email, Timestamp createdAt) {
            this.id = id;
            this.username = username;
            this.password = password;
            this.email = email;
            this.createdAt = createdAt;
        }
    }
}
생성자를 이용해서 내부 클래스도 넣어준다.
서비스에서는 조회를 한 후 생성자를 이용해서 오브젝트를 넣어주면 된다.
@Transactional
public BoardJoinUserDto 게시글상세보기(Integer id) {
    BoardDetailOutFlatDto flatDto = boardRepository.findByIdJoinUser(id);
    BoardDetailOutStructuredDto dto = new BoardDetailOutStructuredDto(flatDto);
    return dto
}
이때 쿼리는 필요한 데이터를 모두 필요로 한다.
    <select id="findByIdJoinUser" resultType="shop.mtcoding.transferdto.dto.BoardDetailOutFlatDto">
        select b.*,
          u.id user_id,
          u.username user_username,
          u.password user_password,
          u.email user_email,
          u.created_at user_created_at
          from board_tb b join user_tb u
          on b.user_id = u.id
          where b.id = #{id}
    </select>
컨트롤러에서 오블젝트를 리턴
	BoardDetailOutStructuredDto dto = boardService.게시글상세보기(id);
return ResponseEntity.ok().body(dto);boardDetailOutFlatDto는 플랫하게 나오지만 boardDetailOutStructuredDto는 구조를 가진 구조로 리턴된다.
{
  "id": 1,
  "title": "제목1",
  "content": "내용1",
  "user": {
    "id": 1,
    "username": "ssar",
    "password": "1234",
    "email": "ssar@nate.com",
    "createdAt": "2023-03-20T03:31:06.877+00:00"
  },
  "createdAt": "2023-03-20T03:31:06.878+00:00"
}
MyBatis resultMap 을 이용한 방법
데이터를 받기 위한 dto 생성
@Getter @Setter
public class BoardJoinUserDto {
    private BoardDto board;
    private UserDto user;
}

@Getter @Setter
public class BoardDto {
    private Integer id;
    private String title;
    private String content;
    private Timestamp createdAt;
}

@Getter @Setter
public class UserDto {
    private Integer id;
    private String username;
    private String password;
    private String email;
    private Timestamp createdAt;
}
매핑해줄 쿼리 작성
	<resultMap id="boardDto" type="shop.mtcoding.transferdto.dto.BoardDto">
        <id property="id" column="id"/>
        <result property="title" column="title"/>
        <result property="content" column="content"/>
        <result property="createdAt" column="created_at"/>
    </resultMap>
    <resultMap id="userDto" type="shop.mtcoding.transferdto.dto.UserDto">
        <id property="id" column="id"/>
        <result property="username" column="username"/>
        <result property="password" column="password"/>
        <result property="email" column="email"/>
        <result property="createdAt" column="created_at"/>
    </resultMap>

    <resultMap id="boardJoinUserDto" type="shop.mtcoding.transferdto.dto.BoardJoinUserDto">
        <association property="board" resultMap="boardDto" />
        <association property="user" resultMap="userDto" />
    </resultMap>

    <select id="findByIdJoinUser2" resultMap="boardJoinUserDto">
        select *
          from board_tb b inner join user_tb u
          ON b.user_id = u.id
          WHERE b.id = #{id}
    </select>
조회는 * 이용해서 편하게 바꿔진다.
findByIdJoinUser2 메소드의 리턴을 resultMap="boardJoinUserDto"으로 지정해서 연결한 후 association 으로 각각의 필드를 다시 resultMap으로 다시 연결시킨다.
필드가 컬렉션이라면 collection 을 이용하면 된다.
그리고 각각의 resultMap="boardDto"을 다시 연결시켜서 테이블의 칼럼과 필드를 연결시킨다.
서비스에서는 단순한 쿼리만 실항하면 아래처럼 오브젝트가 분리되어 리턴된다.
	BoardJoinUserDto dto = boardRepository.findByIdJoinUser2(id);
    return dto;
{
"board": {
"id": 2,
"title": "제목2",
"content": "내용2",
"createdAt": "2023-03-20T02:34:47.143+00:00"
},
"user": {
"id": 2,
"username": "ssar",
"password": "1234",
"email": "ssar@nate.com",
"createdAt": "2023-03-20T02:34:47.143+00:00"
}
}
MyBatis resultMap 을 이용한 방법 2
내부클래스를 가진 dto를 만든다.
@Getter @Setter
public class BoardJoinUserDtoV2 {
    private Integer id;
    private String title;
    private String content;
    private UserDto user;
    private Timestamp createdAt;

    @Getter @Setter
    public static class UserDto { // 내부 클래스로 새로 만들어
        private Integer id;
        private String username;
        private String password;
        private String email;
        private Timestamp createdAt;
    }
} <resultMap id="boardJoinUserDto2" type="shop.mtcoding.transferdto.dto.BoardJoinUserDtoV2">
<id property="id" column="id"/>
<result property="title" column="title"/>
<result property="content" column="content"/>
<result property="createdAt" column="created_at"/>
<association property="user" javaType="shop.mtcoding.transferdto.dto.BoardJoinUserDtoV2$UserDto">
<id property="id" column="id"/>
<result property="username" column="username"/>
<result property="password" column="password"/>
<result property="email" column="email"/>
<result property="createdAt" column="created_at"/>
</association>
</resultMap>
<select id="findByIdJoinUser3" resultMap="boardJoinUserDto2">
select *
from board_tb b inner join user_tb u
ON b.user_id = u.id
WHERE b.id = #{id}
</select>마찬가지로 *을 이용해사 간편하게 조회한다.
resultMap을 이용해서 연결시킨 후 이번에는 resultMap하나로 클래스를 매핑시킨다.
BoardJoinUserDtoV2는 내부 클래스 UserDto를 가지고 있으므로 association의 javaType을 이용해서 내부 클래스를 연결한다.
마찬가지로 내부클래스또한 연결시켜주면 된다.
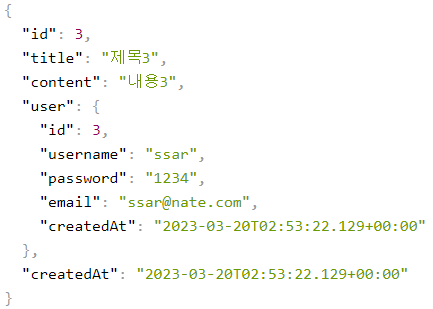
서비스에서 쿼리를 리턴하면
BoardJoinUserDtoV2 dto = boardRepository.findByIdJoinUser3(id);
return dto;
분리된 오브젝트를 하나로 합쳐서 리턴할 수 있다.
{
  "id": 3,
  "title": "제목3",
  "content": "내용3",
  "user": {
    "id": 3,
    "username": "ssar",
    "password": "1234",
    "email": "ssar@nate.com",
    "createdAt": "2023-03-20T02:53:22.129+00:00"
  },
  "createdAt": "2023-03-20T02:53:22.129+00:00"
}