구인구직 사이트를 만들면서 지원한 결과가 나오면 지원자에게 알림을 날리고 싶었다.
해당 구현은 sse를 이용해서 간단하게 해봤고 간소한 버전이라서 특별한건 없다.
서비스 레이어를 분리 시켜야 하는데 작동확인만 한다고 몰아서 만들었다.
EventSource
EventSource는 Server-Sent Events (SSE)를 지원하기 위한 객체
EventSource객체를 이용하면 서버에서 발생하는 이벤트를 실시간으로 감지한다.
    const eventSource = new EventSource('/notify');
    eventSource.onmessage = function (event) {
        const data = event.data;
        alert(data);
    };
이벤트가 감지되면 onmessage 이벤트 핸들러가 호출된다.
서버는 이벤트를 text/event-stream MIME 타입으로 보내야 하고 각 이벤트는 빈라인으로 구분되어야 한다.
-> data: Hello, world\n\n
SseEmitter
@Controller
public class SseController {
@Autowired
private ApplyRepository applyRepository;
@Autowired
private NotifyRepository notifyRepository;
@Autowired
private HttpSession session;
@GetMapping(value = "/notify", produces = "text/event-stream")
public ResponseEntity<SseEmitter> notify(HttpServletRequest request, HttpServletResponse response)
throws IOException {
User principal = (User) session.getAttribute("principal");
if (principal == null) {
return ResponseEntity.badRequest().build();
}
SseEmitter emitter = new SseEmitter();
CompletableFuture.runAsync(() -> {
try {
List<Apply> aDtos = applyRepository.findByUserIdToNotice(principal.getUserId());
Integer count = 0;
for (Apply aDto : aDtos) {
Integer state = 1;
try {
state = notifyRepository.findByApplyId(aDto.getApplyId()).getState();
} catch (Exception e) {
}
if( state == 0){
count ++;
}
try {
notifyRepository.update(aDto.getApplyId(), null);
} catch (Exception e) {
}
}
if ( count > 0 ){
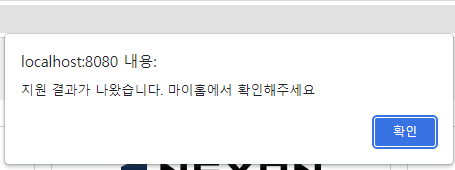
emitter.send("지원 결과가 나왔습니다. 마이홈에서 확인해주세요");
}
count = 0 ;
} catch (Exception e) {
emitter.completeWithError(e);
} finally {
emitter.complete();
}
});
return ResponseEntity.ok(emitter);
}
}text/event-stream을 통해서 서버에서 클라이언트로 단방향 스트림을 생성한다.
먼저 세션을 확인한다. ( 로그인 되어 있을 경우에만 알림을 보내기 위해 )
세션이 없으면 badRequest를 응답한다.
서버에서 클라이언트로 이벤트를 전송하기 위해 SseEmitter 객체를 생성한다.
CompletableFuture 클래스의 runAsync 메소드를 이용하면 발생하는 태스크를 별도의 스레드에서 실행시킨다.
따라서 runAsync를 호출한 코드는 비동기적으로 코드가 진행된다.
사용자를 조회해서 알림이 필요한 상태가 발견되면 메세지를 보낸다. ( send )
비동기 작업이 완료되면 emitter.complete()을 통해 스트림을 종료하고 ResponseEntity 객체에 담아서 반환한다.
SQL
지원 결과가 존재하는지 select 하는 쿼리
  <select id="findByUserIdToNotice" resultType="shop.mtcoding.project.model.Apply">
    SELECT a.apply_id, a.resume_id, a.jobs_id, a.state, r.user_id FROM APPLY_TB a join resume_tb r
      on a.resume_id = r.resume_id join user_tb u
      on u.user_id = r.user_id
      where u.user_id = #{userId}
      and a.state in (-1,1)
  </select>
알림을 한번만 보고 해당 알림을 다시 알리지 않기 위한 쿼리
    <select id="findByApplyId" resultType="shop.mtcoding.project.dto.notify.NotifyRespDto$NotifyRespStateDto">
        select state from notify_tb where apply_id = #{id}
    </select>

    <update id="update">
        update notify_tb set
        <if test="suggestId != null">
            state = 1, created_at = now()
            where suggest_id = #{suggestId}
        </if>
        <if test="applyId != null">
            state = 1, created_at = now()
            where apply_id = #{applyId}
        </if>
    </update>

    <insert id="insert">
        insert into notify_tb set
        <if test="applyId != null">
            apply_id = #{applyId},
        </if>
        <if test="suggestId != null">
            suggest_id = #{suggestId},
        </if>
            state = 0, created_at = now()
    </insert>
연결이 필요한 페이지에서만 js 코드를 추가한다.