시큐리티를 개조해보자
비밀키 환경변수 넣기
환경변수 새롭게 생성 ( 전체 대문자 )
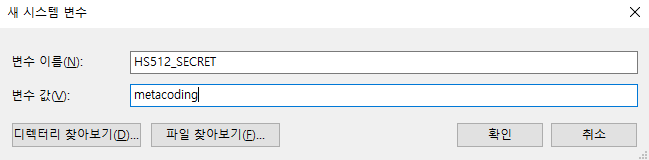
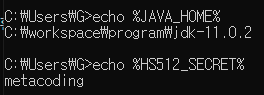
cmd 열어서 확인해본다.
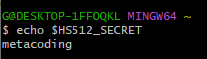
bash로 확인한다면
자바에서 환경변수 가져오기
    @Test
    public void secret_test(){
        String key = System.getenv("HS512_SECRET");
        System.out.println("KEY : " + key);
    }
결과는 
yml 정보 가져오기
meta:
  name: 1234
컨트롤러에서 테스트
import org.springframework.beans.factory.annotation.Value;
// --------
  @Value("${meta.name}")
  private String name;

      @GetMapping("/")
  public ResponseEntity<?> hello() {
      return ResponseEntity.ok().body(name);
  }
결과는 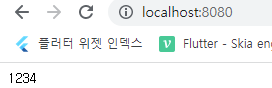
yml + 환경변수
meta:
  name: ${HS512_SECRET}

# 또는
meta:
  name: ${HS512.SECRET}
결과는
일반적으로 JWT의 비밀키는 환경변수를 이용한다.
System.getenv로 환경변수의 비밀키를 가져올 수 있다.
외부에서는 환경변수에 접근하지 못해 보안상 안전하다.
private static final String SECRET = System.getenv("HS512_SECRET");
시큐리티 필터 체인
시큐리티는 아래와 같은 여러 보안필터를 이용해서 보안처리를 진행한다.
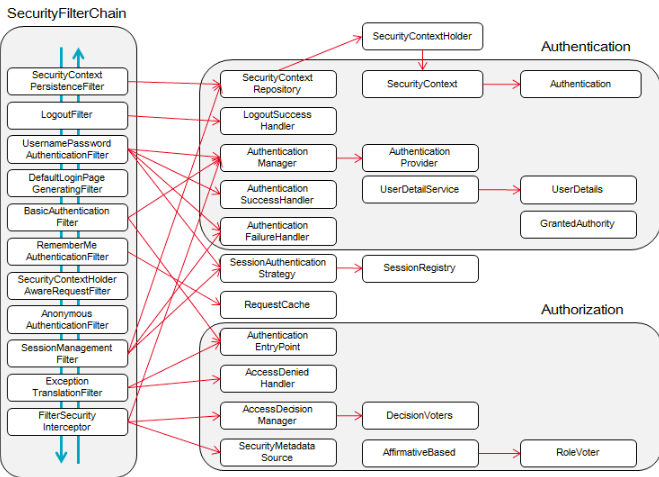
UsernamePasswordAuthenticationFilter
로그인 요청 처리 및, 사용자 정보 추출을 담당한다.
HTTP 요청에서 사용자 이름과 비밀번호를 파싱하여 Authentication 객체를 생성한다.
BasicAuthenticationFilter
HTTP 기본 인증을 처리하는 필터
Authorization 헤더에서 자격 증명을 추출하고 인증 프로세스를 시작한다.
Base64로 인코딩된 인증 정보를 디코딩하여 Authentication 객체를 생성한다.
기본적인 인증을 처리하고 실패시 상태코드 401을 리턴, 성공시 인증정보를 SecurityContextHolder에 저장한다.
SessionManagementFilter
세션 관리를 담당한다.
아래 코드로 쿠키를 읽지 않게 설정가능
http.sessionManagement().sessionCreationPolicy(SessionCreationPolicy.STATELESS);설정하지 않으면 JSESSIONID를 서버 세션과 비교한다. -> 로그인 수행
JWT를 이용하기위해 위처럼 stateless서버로 바꾼다면 세션을 읽지 않고 매 요청마다 인증을 필요로 한다.
세션 비교 조차 하지 않으면 필터는 세션 확인을 하지 못해 인증이 안된것처럼 /login페이지로 보내버린다.
쿠키에서 세션을 꺼내서 비교하지 않도록 설정했으므로(stateless) JWT 토큰 검증을 통해 인증정보를 추출해 SecurityContext 에 인증객체를 저장한다.
ExceptionTranslationFilter
예외를 캐치해서 리다이렉션 해준다. - 인증 실패 처리
FilterSecurityInterceptor
보안 필터 체인을 사용하여 들어오는 요청을 채간다.
요청된 리소스에 필요한 권한을 검색하고 액세스 결정을 AccessDecisionManager에 위임한다.
커스텀 필터를 적용 시켰을때 관리하기 편하게 UPAF( UsernamePasswordAuthenticationFilter )필터에서 UPAT 토큰을 만들고 난후 Authentication 객체를 만든다. -> UserDetailsService를 호출해서 토큰의 유저네임만 주입한다.
  // UserDetailsService 호출
  UsernamePasswordAuthenticationToken authenticationToken =
          new UsernamePasswordAuthenticationToken(
                  "ssar",
                  "1234"
          );
  // UserDetails, password, authories
  Authentication authentication = authenticationManager.authenticate(authenticationToken);
  SecurityContextHolder.getContext().setAuthentication(authentication);
// UserDetailsService 호출하지 않을 경우
User user = userRepository.findbyUsername("username").get();
MyUserDetails myUserDetails = new MyUserDetails(user);
Authentication authentication =
new UsernamePasswordAuthenticationToken(
myUserDetails,
myUserDetails.getPassword(),
myUserDetails.getAuthorities()
);
SecurityContextHolder.getContext().setAuthentication(authentication);JWT를 이용한 필터 체인
인증 객체를 만들기 위해 Bean에 등록된 AuthenticationManager를 의존한다.
CustomSecurityFilterManager 로 커스텀 필터체인을 등록한다.
토큰으로 인가처리를 하는 JwtAuthorizationFilter 를 필터체인에 추가한다.
@Slf4j
@Configuration
public class SecurityConfig {

  @Bean
  AuthenticationManager authenticationManager(
      AuthenticationConfiguration authenticationConfiguration) throws Exception {
      return authenticationConfiguration.getAuthenticationManager();
  }

  public class CustomSecurityFilterManager extends AbstractHttpConfigurer<CustomSecurityFilterManager, HttpSecurity> {
      @Override
      public void configure(HttpSecurity builder) throws Exception {
          AuthenticationManager authenticationManager = builder.getSharedObject(AuthenticationManager.class);
          builder.addFilterAt(new JwtAuthorizationFilter(authenticationManager), JwtAuthorizationFilter.class);
          super.configure(builder);
      }
  }
  // 설정
}
AbstractHttpConfigurer
보안 필터 체인의 다양한 측면에 대한 사용자 지정 구성 클래스를 만드는 데 사용되는 Spring Security 프레임워크의 기본 클래스
HttpSecurity 구성을 위해 재사용 가능하고 구성 가능하며 구성 가능한 구성 요소를 만들기 위한 기반을 제공
필터 체인 커스텀하기
SecurityFilterChain filterChain(HttpSecurity http) throws Exception {
// 1. CSRF 토큰을 숨겨두어서 보안검사
http.csrf().disable(); // postman 으로 접근하기 위해 토큰을 비활성화 - csr 이용 , 반면에 ssr이라면 ?
// ssr은 기본적으로 csrf 토큰을 이용하지 않지만 적용할 수 있다.
// 2. iframe 차단설정
http.headers().frameOptions().disable();
// 3. cors 재설정
http.cors().configurationSource(configurationSource());
public CorsConfigurationSource configurationSource() {
CorsConfiguration configuration = new CorsConfiguration();
configuration.addAllowedHeader("*");
// 개발 테스트 용도로 전부 열어둔다.
configuration.addAllowedMethod("*"); // GET, POST, PUT, DELETE (Javascript 요청 허용)
// 서버 리소스에 액세스할 수 있는 원본(도메인)을 지정합니다.
configuration.addAllowedOriginPattern("*"); // 모든 IP 주소 허용 (프론트 앤드 IP만 허용 react)
configuration.setAllowCredentials(true); // 클라이언트에서 쿠키 요청 허용
// 브라우저가 Authorization을 읽을 수 있게 허용하는 옵션
configuration.addExposedHeader("Authorization");
UrlBasedCorsConfigurationSource source = new UrlBasedCorsConfigurationSource();
source.registerCorsConfiguration("/**", configuration);
return source;
}
// 4. JSESSIONID 응답 x
http.sessionManagement().sessionCreationPolicy(SessionCreationPolicy.STATELESS);
/*
* 또는 yml 설정
* spring:
* security:
* session:
* creation-policy: stateless
*/
// 5. Form 로긴 해제
// OAuth2, SAML 또는 JWT 토큰과 같은 다른 인증 메커니즘을 사용하려는 경우.
// ajax 요청 처리할 경우
http.formLogin().disable();
// 6. http bagic 인증 해제 - 모든 페이지마다 로그인을 해야함.. 안전하지만 너무 불편하다
// BasinAuthenticationFilter 해제
http.httpBasic().disable();
// 7. xss공격 방지 - lucy 필터 ( 적용하면 좋음 )
// 8 .커스텀 필터 적용 ( 시큐리티 필터 교환 )
// http.apply(null); // 보안 설정 하지 않음 -> 기본 시큐리티 설정
// 9. 인증 실패 처리
http.exceptionHandling().authenticationEntryPoint((request, response, authException) -> {
// config는 DS 보다 앞에 있기 때문에 익셉션 핸들러 사용 불가
// 이벤트 발생 -> checkpoint -> 예외핸들러 처리
log.debug("디버그 : 인증 실패 : "+ authException.getMessage());
log.info("인포 : 인증 실패 : "+ authException.getMessage());
log.warn("워닝 : 인증 실패 : "+ authException.getMessage());
log.error("에러 : 인증 실패 : "+ authException.getMessage());
});
// 10. 권한 실패 처리
http.exceptionHandling().accessDeniedHandler((request, response, accessDeniedException) -> {
log.debug("디버그 : 인증 실패 : "+ accessDeniedException.getMessage());
log.info("인포 : 인증 실패 : "+ accessDeniedException.getMessage());
log.warn("워닝 : 인증 실패 : "+ accessDeniedException.getMessage());
log.error("에러 : 인증 실패 : "+ accessDeniedException.getMessage());
});
// 11 .인증, 권한 필터 설정
http.authorizeRequests((authorize) -> {
authorize.antMatchers("/users/**").authenticated()
.antMatchers("/manager/**").access("hasRole('ADMIN') or hasRole('MANAGER')")
.antMatchers("/admin/**").hasRole("ADMIN")
.anyRequest().permitAll(); // /users 는 인증이 필요 나머지는 허용
});
}CORS(Cross-Origin Resource Sharing)
웹 애플리케이션에서는 다른 출처의 자원에 대한 요청이 가능 하지만 이는 보안상의 위협이 될 수 있다. 예를 들어, 악의적인 공격자가 자신이 소유한 웹 페이지에서 다른 사이트의 쿠키를 탈취하거나, 악성 스크립트를 다른 출처의 웹 페이지에 삽입하는 등의 공격이 가능한데, 이러한 공격을 방지하기 위해, 브라우저는 CORS 정책을 사용하여 다른 출처에서의 자원 요청을 차단한다.
따라서, 서로 다른 출처 간의 자원 공유를 안전하게 수행하기 위해서는, 브라우저와 서버 간에도 CORS 정책이 수행되어야 한다. 이를 위해 서버는 다른 출처에서의 요청에 대해 허용할 메서드, 헤더, 도메인 등의 정보를 설정할 수 있다. 클라이언트는 이 정보를 확인하여, 서버의 CORS 정책을 준수하면서 안전하게 자원을 요청하고 사용할 수 있다.
Options 요청
토큰의 옵션 요청은 CORS (Cross-Origin Resource Sharing) 정책을 준수해야 하는 웹 애플리케이션에서 토큰 인증 시스템을 구현할 때 사용된다.
브라우저에서는 다른 출처의 자원에 대한 요청이 기본적으로 차단되지만 CORS 정책을 준수하는 서버에서는 다른 출처에서의 요청에 대한 처리를 허용할 수 있다.
이를 위해, 브라우저는 먼저 서버로부터 OPTIONS 메서드를 사용하여 허용된 메서드 및 헤더를 확인하는 "옵션 요청"을 보내고, 이에 대한 응답을 받은 후에 실제 요청을 보낸다.
// 서버에서 허용할 options 요청
@RequestMapping(value = "/resource", method = RequestMethod.OPTIONS)
public ResponseEntity<Void> options() {
HttpHeaders headers = new HttpHeaders();
headers.setAllow(Arrays.asList(HttpMethod.GET, HttpMethod.POST, HttpMethod.PUT, HttpMethod.DELETE, HttpMethod.OPTIONS));
headers.add("Access-Control-Allow-Origin", "*");
headers.add("Access-Control-Allow-Methods", "GET, POST, PUT, DELETE, OPTIONS");
headers.add("Access-Control-Allow-Headers", "Content-Type, Authorization");
headers.add("Access-Control-Max-Age", "3600");
return new ResponseEntity<Void>(headers, HttpStatus.OK);
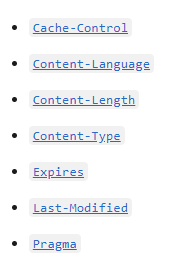
}토큰 인증 시스템에서는, 클라이언트가 서버로부터 토큰을 발급받기 전에 먼저 OPTIONS 메서드를 사용하여 서버가 어떤 메서드 및 헤더를 허용하는지 확인한다. 이를 위해, 클라이언트는 서버에게 OPTIONS 메서드를 사용하여 "토큰의 옵션 요청"을 보내고, 서버는 이에 대한 응답으로 Access-Control-Allow-Methods, Access-Control-Allow-Headers 등의 헤더 정보를 반환한다. 이를 통해 클라이언트는 토큰 인증 요청을 보내기 전에 서버가 허용하는 메서드 및 헤더를 사전에 확인할 수 있다.
https://developer.mozilla.org/en-US/docs/Glossary/CORS-safelisted_response_header
(래퍼런스 참고)
prefligt 요청
Preflight 요청이 함께 보내지는 경우, 서버는 이전에 사용되었던 도메인에서 현재 요청이 발생한 도메인으로의 요청이 안전한지 사전에 검증할 수 있다. 이를 통해, 다른 출처에서의 공격으로부터 서버를 보호할 수 있다.
Preflight 요청은 HTTP OPTIONS 메서드를 사용하여 보내며, 서버는 이 요청에 대해 HTTP 응답을 반환한다. 이 응답에는 Access-Control-Allow-Methods, Access-Control-Allow-Headers 등의 헤더 정보가 포함될 수 있으며, 이를 통해 브라우저에서 요청을 보내기 전에 보안적으로 검증할 수 있다.
현재 정책은 아래 옵션만 공개하는데 서버에서 브라우저가 Authorization 을 읽도록 설정을 바꿀 수 있다.
JwtAuthorizationFilter 생성
JwtAuthorizationFilter는 생성시에 AuthenticationManager 가 필요하다.
@Configuration 어노테이션이 붙은 클래스는 IoC컨테이너에 Bean들이 등록되기 전에 먼저 로딩되므로 IoC컨테이너에서 의존성을 주입할 수 없다.
위 코드에서는 Config 클래스에서 AuthenticationConfiguration로 AuthenticationManager를 생성해 JwtAuthorizationFilter의 생성자에 매개변수로 넣어서 만들었는데 이렇게 만들면 Config 에서만 사용가능하게 된다.
  // 필터 클래스 생성자
  public JwtAuthorizationFilter(AuthenticationManager authenticationManager) {
  super(authenticationManager);
  }

  // @Configuration 에서 등록
  @Bean
  AuthenticationManager authenticationManager(
      AuthenticationConfiguration authenticationConfiguration) throws Exception {
      return authenticationConfiguration.getAuthenticationManager();
  }
어차피 Config클래스에서만 사용되기는 하지만 JwtAuthorizationFilter 자체에서 Bean에 등록된 AuthenticationManager를 호출해 주입할 수도 있다.
public class JwtAuthorizationFilter extends OncePerRequestFilter {
    private final AuthenticationManager authenticationManager;

    public JwtAuthorizationFilter(AuthenticationManager authenticationManager) {
        this.authenticationManager = authenticationManager;
    }
    // 내용
}
토큰 검증 및 인증객체 등록하기
	@Override
    protected void doFilterInternal(HttpServletRequest request, HttpServletResponse response, FilterChain chain)
            throws IOException, ServletException {
        String prefixJwt = request.getHeader(MyJwtProvider.HEADER);

        if (prefixJwt == null) {
            chain.doFilter(request, response);
            return;
        }

        String jwt = prefixJwt.replace(MyJwtProvider.TOKEN_PREFIX, "");
        try {
            // 필터 검증
            DecodedJWT decodedJWT = MyJwtProvider.verify(jwt);
            Long id = decodedJWT.getClaim("id").asLong();
            String role = decodedJWT.getClaim("role").asString();

            User user = User.builder().id(id).role(role).build();
            // 인증 객체 생성 및 SecurityContextHolder 에 등록
            MyUserDetails myUserDetails = new MyUserDetails(user);
            Authentication authentication = new UsernamePasswordAuthenticationToken(
                    myUserDetails,
                    myUserDetails.getPassword(),
                    myUserDetails.getAuthorities());
            SecurityContextHolder.getContext().setAuthentication(authentication);
        } catch (SignatureVerificationException sve) {
            log.error("토큰 검증 실패");
        } catch (TokenExpiredException tee) {
            log.error("토큰 만료됨");
            response.setStatus(HttpServletResponse.SC_UNAUTHORIZED);
            response.getWriter().write("Token expired");
            return;
        }
        chain.doFilter(request, response);
    }
JWT 생성 클래스
public class MyJwtProvider {
    private static final String SUBJECT = "jwtstudy";
    private static final int EXP = 1000 * 60 * 60;
    public static final String TOKEN_PREFIX = "Bearer "; // 스페이스 필요함
    public static final String HEADER = "Authorization";
    private static final String SECRET = System.getenv("HS512_SECRET");

    public static String create(User user) {
        String jwt = JWT.create()
                .withSubject(SUBJECT)
                .withExpiresAt(new Date(System.currentTimeMillis() + EXP))
                .withClaim("id", user.getId())
                .withClaim("role", user.getRole())
                .sign(Algorithm.HMAC512(SECRET));
        return TOKEN_PREFIX + jwt;
    }

    public static DecodedJWT verify(String jwt) throws SignatureVerificationException, TokenExpiredException {
        DecodedJWT decodedJWT = JWT.require(Algorithm.HMAC512(SECRET))
                .build().verify(jwt);
        return decodedJWT;
    }
}