📹 영상에서 실시간으로 얼굴 인식하기
지금까진 정적인 이미지를 처리했다.
이제 영상에 실시간으로 처리하는 것을 시도할 차례이다.
예제 코드 및 분석
전체 코드
import face_recognition
import cv2
import numpy as np

# Get a reference to webcam #0 (the default one)
video_capture = cv2.VideoCapture(0)

# Load a sample picture and learn how to recognize it.
jisungPark_image = face_recognition.load_image_file("C:/Users/Hotaek/Desktop/CCTVWithAI/ExampleSources/FaceRecognition/training/JisungPark.jpg")
jisungPark_face_encoding = face_recognition.face_encodings(jisungPark_image)[0]

# Load a second sample picture and learn how to recognize it.
hotaekHan_image = face_recognition.load_image_file("C:/Users/Hotaek/Desktop/CCTVWithAI/ExampleSources/FaceRecognition/training/HotaekHan.jpg")
hotaekHan_face_encoding = face_recognition.face_encodings(hotaekHan_image)[0]

# Create arrays of known face encodings and their names
known_face_encodings = [
    jisungPark_face_encoding,
    hotaekHan_face_encoding,
]
known_face_names = [
    "Jisung Park",
    "Hotaek Han",
]

# Initialize some variables
face_locations = []
face_encodings = []
face_names = []
process_this_frame = True

while True:
    # Grab a single frame of video
    ret, frame = video_capture.read()

    # Resize frame of video to 1/4 size for faster face recognition processing
    small_frame = cv2.resize(frame, (0, 0), fx=0.25, fy=0.25)

    # Convert the image from BGR color (which OpenCV uses) to RGB color (which face_recognition uses)
    rgb_small_frame = small_frame[:, :, ::-1]

    # Only process every other frame of video to save time
    if process_this_frame:
        # Find all the faces and face encodings in the current frame of video
        face_locations = face_recognition.face_locations(rgb_small_frame)
        face_encodings = face_recognition.face_encodings(rgb_small_frame, face_locations)

        face_names = []
        for face_encoding in face_encodings:
            matches = face_recognition.compare_faces(known_face_encodings, face_encoding)
            name = "Unknown"

            face_distances = face_recognition.face_distance(known_face_encodings, face_encoding)
            best_match_index = np.argmin(face_distances)
            if matches[best_match_index]:
                name = known_face_names[best_match_index]

            face_names.append(name)

    process_this_frame = not process_this_frame


    # Display the results
    for (top, right, bottom, left), name in zip(face_locations, face_names):
        # Scale back up face locations since the frame we detected in was scaled to 1/4 size
        top *= 4
        right *= 4
        bottom *= 4
        left *= 4

        # Draw a box around the face
        cv2.rectangle(frame, (left, top), (right, bottom), (0, 0, 255), 2)

        # Draw a label with a name below the face
        cv2.rectangle(frame, (left, bottom - 35), (right, bottom), (0, 0, 255), cv2.FILLED)
        font = cv2.FONT_HERSHEY_DUPLEX
        cv2.putText(frame, name, (left + 6, bottom - 6), font, 1.0, (255, 255, 255), 1)

    # Display the resulting image
    cv2.imshow('Video', frame)

    # Hit 'q' on the keyboard to quit!
    if cv2.waitKey(1) & 0xFF == ord('q'):
        break

# Release handle to the webcam
video_capture.release()
cv2.destroyAllWindows()
코드 분석
소스 코드가 약간 길어졌으나 이해하는 것은 그리 어렵지 않다. 특징 데이터를 추출할 이미지는 박지성 선수 시절 사진과 내 사진을 가져왔다. openCV의 내용은 따로 언급하지 않겠지만, 예제의 주석을 참고할 수 있도록 남겨두었다.
▦ 웹캠 불러오기
video_capture = cv2.VideoCapture(0)openCV의 VideoCapture()로 연결된 카메라를 불러올 수 있다. 내장된 카메라가 0번부터, 외장 카메라는 그 다음 번호를 갖는다.
▦ 알려진 얼굴의 특징 값들을 저장할 list 선언
known_face_encodings = [
    jisungPark_face_encoding,
    hotaekHan_face_encoding,
]
하나의 list에 모아준다.
▦ 알려진 얼굴의 이름을 저장할 list 선언
known_face_names = [
    "Jisung Park",
    "Hotaek Han",
]
역시 하나의 리스트에 모아준다. 이후에 영상 위에 표시될 태그를 출력할 때 사용된다.
▦ 프레임에서 얼굴의 위치를 찾아서 그 특징들을 저장
 if process_this_frame:
        # Find all the faces and face encodings in the current frame of video
        face_locations = face_recognition.face_locations(rgb_small_frame)
        face_encodings = face_recognition.face_encodings(rgb_small_frame, face_locations)

        face_names = []
위에서 다룬 것처럼, face_locations()로 얼굴의 개수만큼 반환 받은 후, 이것을 다시 face_encodings()의 인자로 전달해 특징점들을 추출한다.
▦ 각각의 특징 점들의 벡터에 대해 알려진 얼굴들과 비교한다.
for face_encoding in face_encodings:
            # See if the face is a match for the known face(s)
            matches = face_recognition.compare_faces(known_face_encodings, face_encoding)
            name = "Unknown"

            face_distances = face_recognition.face_distance(known_face_encodings, face_encoding)
            best_match_index = np.argmin(face_distances)

            if matches[best_match_index]:
                name = known_face_names[best_match_index]

face_names.append(name)-
for문으로 특징 점들의 집합에 대해 하나씩 반복 수행한다. 한 프레임에 얼굴이 5개 검출된다면 5번 실행한다.
-
compare_faces()로 알려진 얼굴의 특징 값들과 검출된 얼굴을 비교한다. matches는 bool로 이루어진 list이다. 요소의 수는 알려진 얼굴의 수와 일치해야 할 것이다.
-
face_distance()는 주어진 얼굴 특징 값들에 대해 비교하고자 하는 특징 값과 각각 비교하여, 유클리디안 거리(Euclidean Distance)를 계산한다. 이 값들은 얼굴이 얼마나 비슷한지에 대한 지표가 된다. 이 값이 작을수록 유사한 얼굴이라고 해석할 수 있다. 반환 자료형은 ndarray이다.
-
numpy의 argmin()은 주어진 list의 최소값의 인덱스를 반환한다. 이 값을 예제에서는 변수 best_match_index에 저장한다. 즉, 유클리디안 거리가 가장 작은 값을 갖게 하는 얼굴이 비교하고자 하는 얼굴과 가장 일치한다고 보는 것이다.
-
이후엔 이렇게 구한 인덱스를 boolean list인 matches와 비교해서 true값을 갖는지 확인한다. (거리가 가장 작다고 그 사람이라는 것은 아니기 때문에, face_compare() 메소드가 true값을 반환했는지도 검사하는 것이다. 만약 if문이 성립한다면, 변수 name에 저장되는 값은 알려진 얼굴의 리스트 중 하나의 값이다.
이후엔 openCV로 사각형 영역을 그려주고, 위에서 구한 name을 출력하는 내용으로, 따로 설명하지 않고 생략한다.
📈 정확도 높이기 #1
어제 포스팅한 아이디어를 실현하기 위해 몇 가지 테스트를 진행하였다.
전체 코드
import numpy as np
import cv2
import face_recognition

hotaek_image1 = face_recognition.load_image_file('HotaekHan.jpg')
hotaek_image2 = face_recognition.load_image_file('HotaekHan2.jpg')
hotaek_image3 = face_recognition.load_image_file('HotaekHan3.jpg')

hotaek_image1_encodings = face_recognition.face_encodings(hotaek_image1)[0]
hotaek_image2_encodings = face_recognition.face_encodings(hotaek_image2)[0]
hotaek_image3_encodings = face_recognition.face_encodings(hotaek_image3)[0]

print('hotaek_image1: ', hotaek_image1_encodings)
print('hotaek_image2: ', hotaek_image2_encodings)
print('hotaek_image3: ', hotaek_image3_encodings)
코드 설명, 의도
우선 내 사진 세 장을 준비했다.
그리고 load_image_file()로 각각 불러온 후, 얼굴의 인코딩 값을 각각의 변수에 저장해줬다.
마지막으로 이 결과를 출력했다.
이렇게 코드를 짠 이유는 같은 얼굴이 비슷한 인코딩 값을 갖는지 확인하기 위해서이다.
만약 이 사실이 확인된다면, 이 128차원의 벡터를 머신 러닝으로 학습시켜 더 나은 인코딩 값을 얻을 수 있고, 결과적으로 인식한 얼굴이 누구 얼굴인지에 대한 정확도를 향상시킬 수 있을 것이라고 생각했다.
실행 결과
hotaek_image1:  [-6.25793561e-02  7.11690411e-02  3.42730321e-02 -5.16402945e-02
 -1.68434441e-01 ... (후략)]

 hotaek_image2:  [ 0.01189508  0.07434316 -0.01192731 -0.06657568 -0.15101379 ... (후략)]

 hotaek_image3:  [-0.0152077 0.10994387  0.09814058 -0.08793111 -0.08750682... (후략)]
음.. 예상과 다르게 같은 얼굴임에도 인코딩한 값이 꽤 차이가 난다.
그 밖의 실험들
# 2
'혹시 같은 얼굴이라고 판단하지 않는 것일까?'라는 생각이 들어서 아래의 테스트를 수행했다.
print('is 2 in 1', face_recognition.compare_faces([hotaek_image1_encodings], hotaek_image2_encodings))
print('is 3 in 2', face_recognition.compare_faces([hotaek_image2_encodings], hotaek_image3_encodings))
print('is 1 in 3', face_recognition.compare_faces([hotaek_image3_encodings], hotaek_image1_encodings))
실행 결과는 모두 true가 나왔다. 모두 distance가 0.6(기본 값)이하이기 때문에 같은 얼굴이긴 하다.
# 3
compare_faces() 함수가 # 2에서 모두 true를 반환한 것은 정답이었지만, 사실 꽤 관대한 결과 아닐까 하는 생각이 들었기 때문에 테스트 해보고 싶었다.
그래서 이번엔 (나와 얼굴이 가장 다를 것으로 예상되는) 김연아의 사진과 내 사진 세 장을 비교했다.
print('is 1 in yuna', face_recognition.compare_faces([yuna_image_encodings], hotaek_image1_encodings))
print('is 2 in yuna', face_recognition.compare_faces([yuna_image_encodings], hotaek_image2_encodings))
print('is 3 in yuna', face_recognition.compare_faces([yuna_image_encodings], hotaek_image3_encodings))
실행 결과는 true, true, false가 나왔다.
어..?
# 4
compare_faces() 함수에는 tolerance라는 매개 변수가 존재한다. 이 값은 두 얼굴 사이의 distance를 몇 부터 true로 판단할 것인지에 대한 기준이 되는 값이다. 이 값이 작을수록 true와 false의 판단이 엄격해진다. 전형적으로 가장 좋은 성능을 보이는 값은 0.6으로 기본 값이다.
그런데 김연아와 내가 같다고 하는 것이 이상하다. 그래서 이 값이 궁금해졌다. 0.59999만 되어도 true라고 반환했을 테니까.
>>> print(face_recognition.face_distance(hotaeks, yuna_image_encodings))

[0.52574756 0.52111293 0.71005561]
음.. 0.6과 엄청나게 가까운 수는 아닌 것 같은데..
# 5
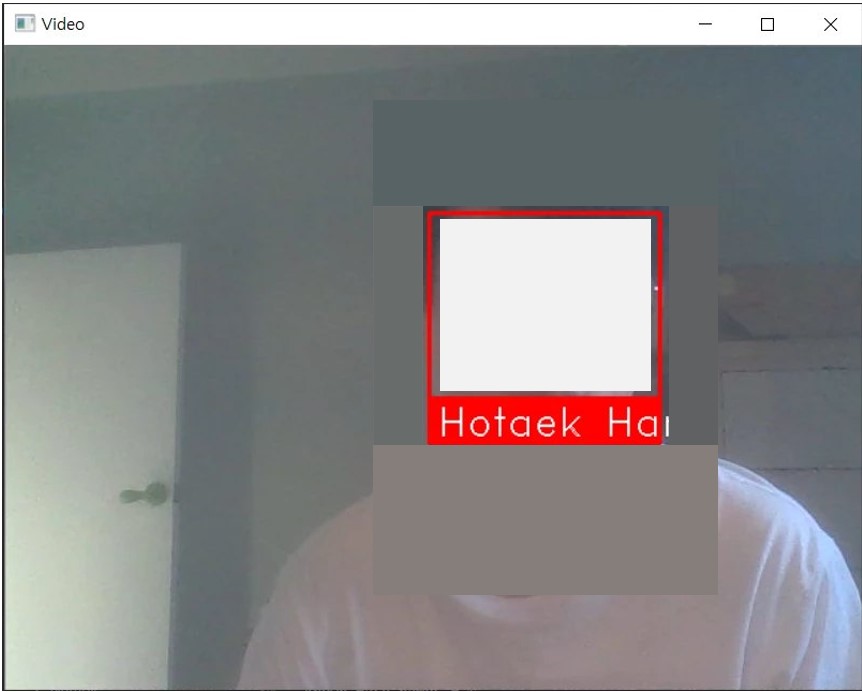
오늘 나는 영상에서 실시간으로 얼굴 인식하는 프로그램을 만들었다. 그리고 나름 잘 작동했다.
하지만 잘 작동하는 것처럼 보였던 이유는 내 얼굴을 등록하고, 내 얼굴만 웹캠에 비춰봤기 때문이다. (ㅋㅋ;)
실제로 김연아의 사진을 웹캠에 비춰봐도 결과는 'Hotaek Han' 또는 'Jisung Park'이 출력되었다. 언른 김연아의 얼굴도 등록시켰다. 그리고 테스트해보니 오작동 없이 'Yuna Kim'을 출력하였다.
그래.
예제로 진행했던 코드는 distance가 최소 값이고 compare_faces()의 결과값이 true이기만 하면 바로 그 얼굴이라고 결론 짓는다. 그렇기 때문에 명단(나, 박지성)에 없는 사람(김연아)을 비추면, 그나마 비슷한 사람을 출력하는 것이다.
# 6
그렇다면 오늘 영상으로 얼굴 인식을 수행할 때의 distance 값은 얼마였길래 잘 작동하는 것처럼 보인 것일까?
위의 코드에 살짝 내용을 추가했다. 수정된 내용은 아래와 같다.
- 기존엔 박지성과 나의 얼굴만 넣었는데, 김연아의 사진을 추가했다.
- boolean으로 구성된 list인 matches를 확인하기 위해 print(matches)를 추가했다.
- 박지성, 나, 김연아와의 distance를 알고 싶어서 이것을 출력하는 코드를 추가했다.
실행 결과는 아래와 같다.
...
[True, True, True]
[0.53042003 0.41538784 0.55700324]
[True, True, True]
[0.54856915 0.42114021 0.56586813]
[True, True, True]
[0.56946151 0.4286843  0.54495211]
[True, True, True]
[0.55452403 0.42343276 0.58663089]
[True, True, False]
[0.59492404 0.5053552  0.61236476]
프레임마다 갱신되기 때문에 이런식의 출력이 끝도 없이 나온다.
우선 박지성, 나, 김연아와 웹캠에 비친 나를 compare_faces()로 비교했는데, 모두 true가 나왔다.
아... 음.... compare_faces()의 결과를 신뢰할 수 없게 되었다..
그리고 이들의 distance는 대략 0.55, 0.4, 0.55이다. (모두 0.6 이하이기 때문에 모두 true 값이 나온 것이다.)
잘 동작했던 이유는 내 샘플 사진과 웹캠의 내 얼굴 사이의 거리가 0.4로 가장 낮았기 때문이다.
음...... 그렇군.
왜지? 왜 이렇게 관대하게 만든 것이지?