🔎 얼굴의 특징 찾기
Face Recognition Tutorial
주어진 사진에서 얼굴의 특징을 찾고, 찾아낸 특징을 토대로 이미지를 편집하는 예제를 수행하였다.
예제 코드 및 분석
전체 코드
import face_recognition

image = face_recognition.load_image_file("JisungPark.jpg")
face_landmarks_list = face_recognition.face_landmarks(image)
1) 변수 image에 파일을 불러온다. 이 때 변수 image의 타입은 numpy.ndarray이다.
image = face_recognition.load_image_file("JisungPark.jpg")2) face_landmarks() 메소드로 얼굴의 특징을 찾아낸다.
face_landmarks_list = face_recognition.face_landmarks(image)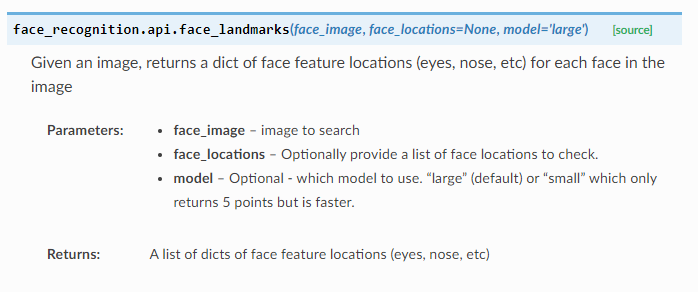 (출처: https://face-recognition.readthedocs.io/en/latest/face_recognition.html)
face_landmarks() 메소드는 주어진 사진에서 얼굴의 특징적인 위치를 찾아내 return한다.
이렇게 찾아낸 return 값의 자료형이 궁금해진다. type을 print해보면,
>>> print(type(face_landmarks_list))
<class 'list'>

>>> print(face_landmarks_list)
{'chin': [(290, 176), (292, 191), ...(중략)], 'left_eyebrow': [(303, 156), (310, 149),... (중략)],
'right_eyebrow': [(358, 150), (366, 145), (375, 143), (383, 144), (390, 149)],
'nose_bridge': [(348, 167), (349, 177), (350, 187), (351, 198)],
'nose_tip': [(341, 208), (346, 208), (351, 209), (356, 208), (361, 206)], 'left_eye': [(315, 171), (320, 168), (327, 169), (333, 173), (327, 174), (320, 174)],
'right_eye': [(363, 170), (368, 165), (374, 164), (380, 166), (375, 169), (369, 170)],
'top_lip': [(333, 230), ... (중략)]}
위와 같이 list 안에 dictionary가 저장된 형태로 반환된다.
좀 더 보기 쉽게,
    >>> for feature, points in face_landmarks.items():
            print(feature, ':\t', end=' ')
            print(points)

chin :   [(290, 176), (292, 191), ...(중략), (404, 168)]
left_eyebrow :   [(303, 156), (310, 149), (319, 146), (328, 147), (337, 152)]
right_eyebrow :  [(358, 150), (366, 145), (375, 143), (383, 144), (390, 149)]
nose_bridge :    [(348, 167), (349, 177), (350, 187), (351, 198)]
nose_tip :       [(341, 208), (346, 208), (351, 209), (356, 208), (361, 206)]
left_eye :       [(315, 171), (320, 168), (327, 169), (333, 173), (327, 174), (320, 174)]
right_eye :      [(363, 170), (368, 165), (374, 164), (380, 166), (375, 169), (369, 170)]
top_lip :        [(333, 230), (340, 224), ...(중략), (337, 229)]
bottom_lip :     [(370, 227), (363, 231), ...(중략), (366, 227)]
이렇게 할 수도 있다.
실습 코드
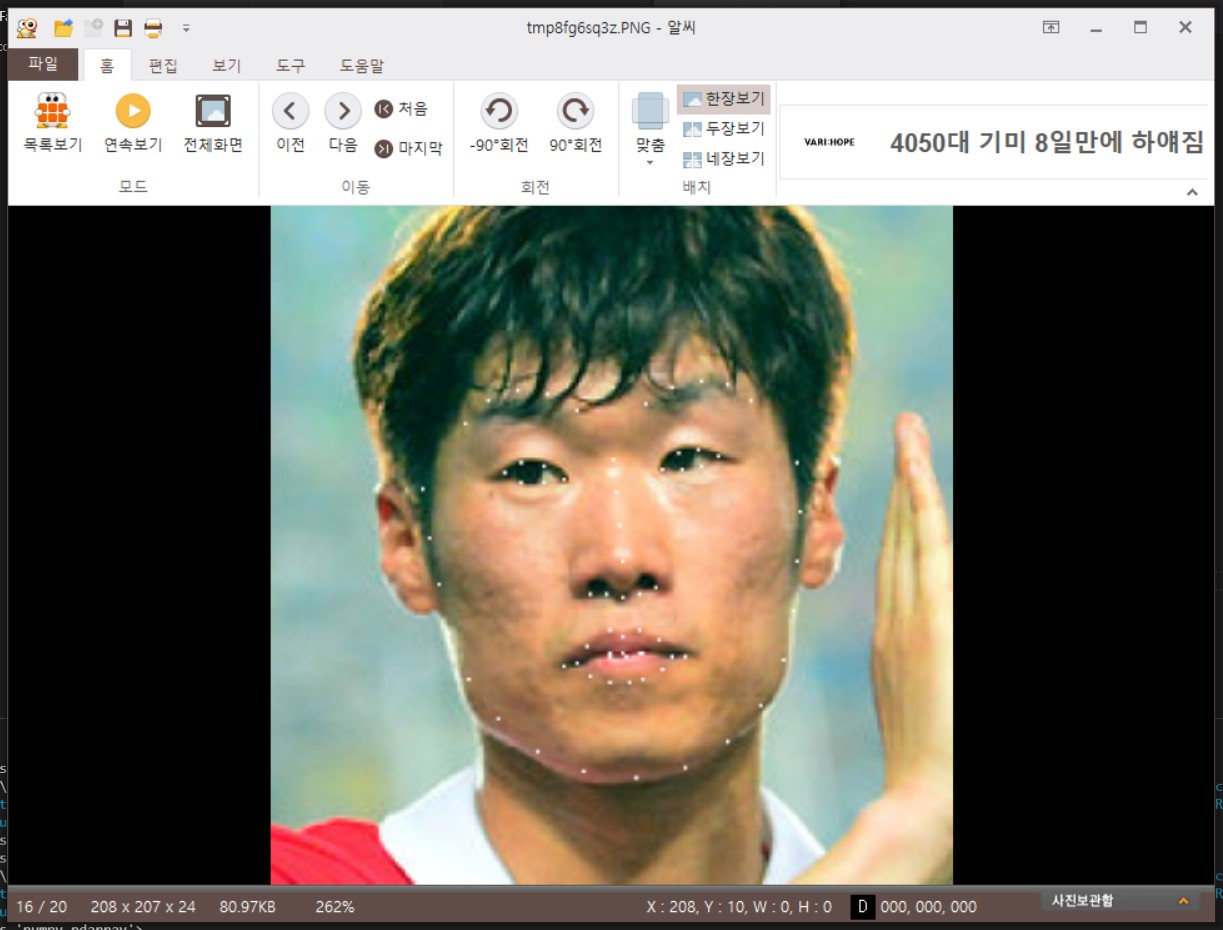
tutorial을 토대로 실습을 진행했다. 주어진 사진에서 얼굴의 특징을 찾아낸 뒤, 흰 점을 찍어 표시하여 출력하는 프로그램이다.
전체 코드
from PIL import Image, ImageDraw
import face_recognition
import numpy as np

# Load the jpg file into a numpy array
image = face_recognition.load_image_file('JisungPark.jpg')

# Find all facial features in all the faces in the image
face_landmarks_list = face_recognition.face_landmarks(image)

pil_image = Image.fromarray(image)

for face_landmarks in face_landmarks_list:
    d = ImageDraw.Draw(pil_image, 'RGBA')       # Creates an object that can be used to draw in the given image.

    for feature, points in face_landmarks.items():
        d.point(points, fill=(255, 255, 255))

image = np.array(pil_image)

face_locations = face_recognition.face_locations(image)
for face_location in face_locations:
    top, right, bottom, left = face_location

    face_image = image[top-50:bottom+50, left-50:right+50]

    pil_image = Image.fromarray(face_image)
    pil_image.show()
간단한 코드 설명
- face_recognition의 load_image_file로 이미지 파일을 불러온다.
- 불러온 파일에서 얼굴의 특징을 face_landmarks_list에 저장한다.
- fromarray() 메소드로 pil_image에 pillow의 규격으로 변환해준다.
- 이미지 편집을 위해 pil_image를 인자로 전달하여 ImageDraw 객체 d를 생성한다.
- d(draw)의 point() 메소드로 얼굴의 특징마다 점을 찍어준다.
여기까지가 특징점을 찍어주는 과정이고 아래는 그 결과를 확인하기 위한 과정이다.
- 이미지 편집이 끝나면 얼굴 검출을 위해 pil_image를 다시 ndarray로 규격을 바꿔준다.
- 얼굴을 검출한 뒤에 출력을 위해 fromarray()로 규격을 변환해준 뒤 출력한다.
실행 결과