Spring Boot
레거시와 차이점
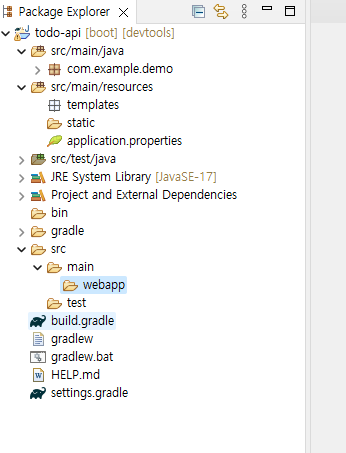
- 안에 server따로 없음
- main 아래에 webapp 폴더 따로 만들어 줘야 함
- gradle을 기본으로 씀
build.gradle 폴더
// 종속성 : 추가적인 라이브러리를추가할때 사용 (maven의 dependency, 입력방식은 다름)
// https://mvnrepository.com/artifact/org.apache.maven.resolver/maven-resolver-api/1.9.14 등에서 추가해서 작성
// 자동으로 되지 않음!! : 우클릭>Gradle>Refresh Gradle 눌러줘야함
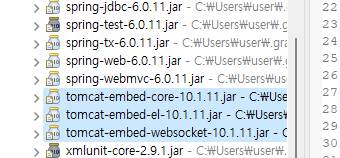
// Project and External Dependency 폴더에 다운받아옴
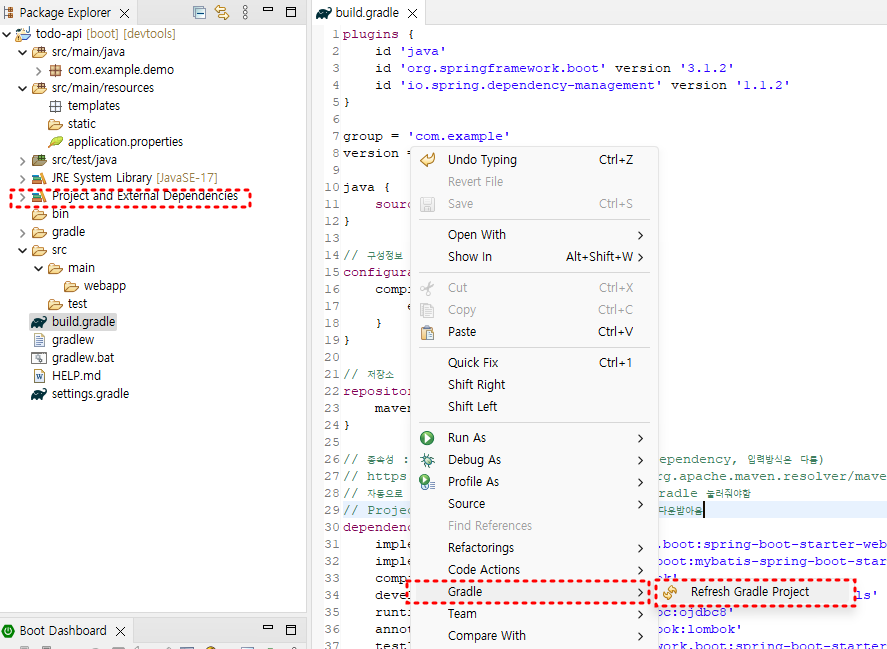
주석>저장>GradleRefresh까지 하면 왼쪽 폴더에서 사라지는것 확인 가능!
Gradle:build.gradle 폴더안에 톰캣 서버
?
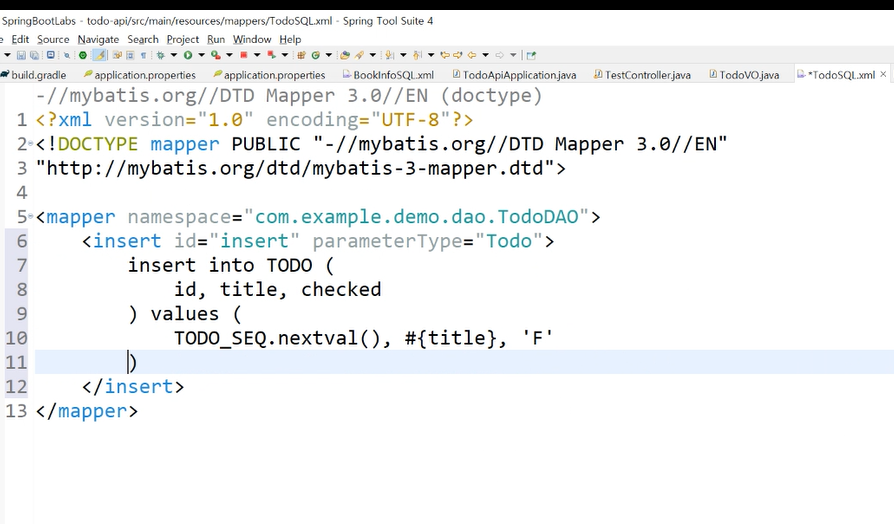
xml 파일 만드는 법.... 뭘까
curl : 커맨드로 url을 입력하겠다
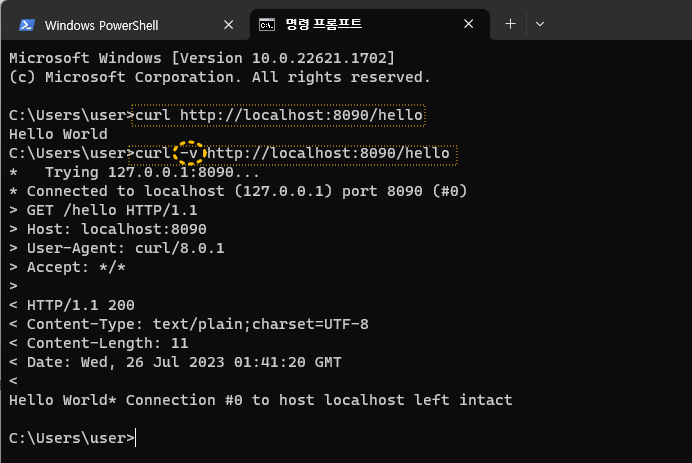
-v를 붙이면 상세하게 나옴
GET data 전송법
curl http://127.0.0.1/?key=value&key2=value2
curl -G http://127.0.0.1/ -d key=value -d key2=value2
POST data 전송법
curl http://127.0.0.1/ -d key=value -d key2=value2
curl http://127.0.0.1/ -d "key=value&key2=value2"
curl -X POST -d "key=value" http://127.0.0.1/
JSON data 전송법
curl -X POST -H "Content-Type: application/json" -d '{"key": number, "key2": "string"}' http://127.0.0.1/
curl -X POST -H "Content-Type: application/json" -d "{\"key\": number, \"key2\": \"string\"}" http://127.0.0.1/
Cookie 값 지정법
curl http://127.0.0.1/ -b "session=domdomi"
파일 업로드
curl http://127.0.0.1/ -d "@/etc/passwd"
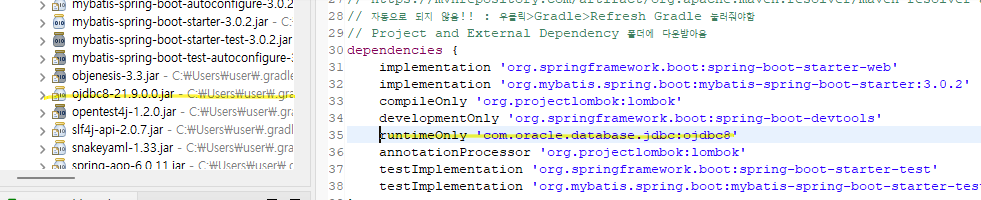
curl http://127.0.0.1/ -F pwdfile=@/etc/passwd -F hello=domdomi
curl 결과 저장
curl http://127.0.0.1/ > test.txt
curl http://127.0.0.1/ -o test.txt
curl -O http://127.0.0.1/test.txt # -O 옵션은 파일 이름 그대로 다운
curl -O http://127.0.0.1/foo[0-9].txt # foo0.txt 부터 foo9.txt 파일 다운 받기
curl -O http://127.0.0.1/foo-[a-z][0-9].txt # foo-a0 ~ foo-z9 다운 받기
curl -O http://127.0.0.1/{foo,bar,baz}.txt # foo.txt, bar.txt, baz.txt 다운 받기
Linux 명령어와 연계
curl http://127.0.0.1/ -d whoami=whoami|base64
cat /etc/passwd | base64 | curl http://127.0.0.1/ -d @- # 명령실행 결과를 base64 인코딩해서 전송
아래는 그냥 help 한 결과!
$ curl --help
Usage: curl [options...] <url>
 -d, --data <data>          HTTP POST data
 -f, --fail                 Fail fast with no output on HTTP errors
 -h, --help <category>      Get help for commands
 -i, --include              Include protocol response headers in the output
 -o, --output <file>        Write to file instead of stdout
 -O, --remote-name          Write output to a file named as the remote file
 -s, --silent               Silent mode
 -T, --upload-file <file>   Transfer local FILE to destination
 -u, --user <user:password> Server user and password
 -A, --user-agent <name>    Send User-Agent <name> to server
 -v, --verbose              Make the operation more talkative
 -V, --version              Show version number and quit
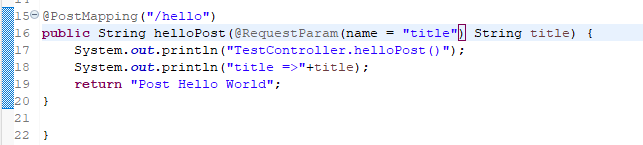
Post 실습
-
코드
-
postman 요청 & 결과

-
서버 콘솔에 찍힌 결과

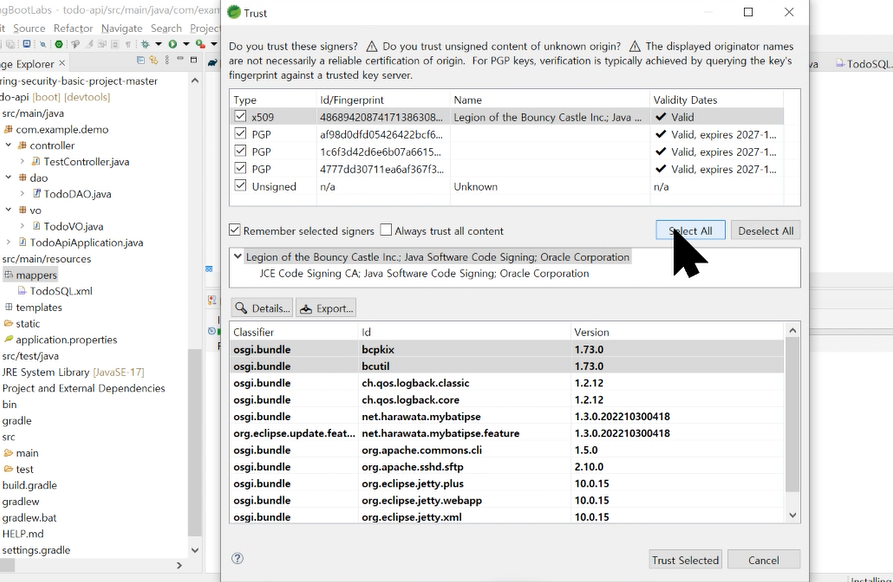
market place에서 mybatis 설치
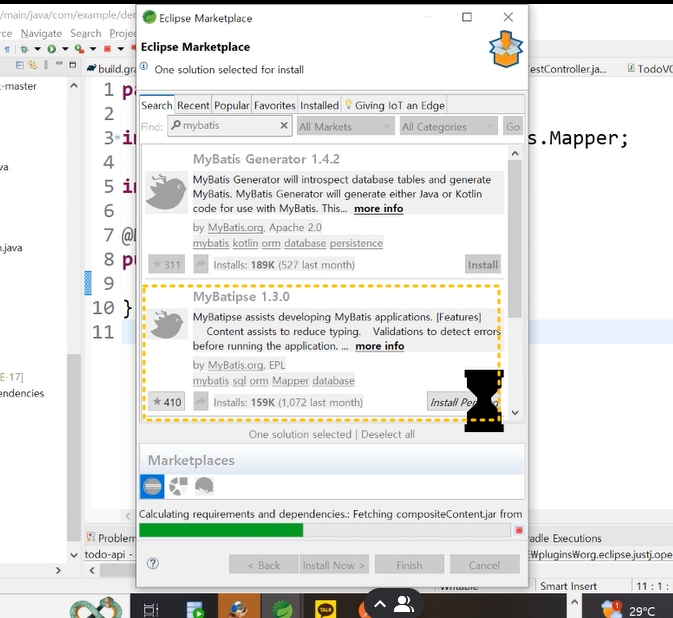
confirm 후 신뢰얻어서 >> accept >> finish
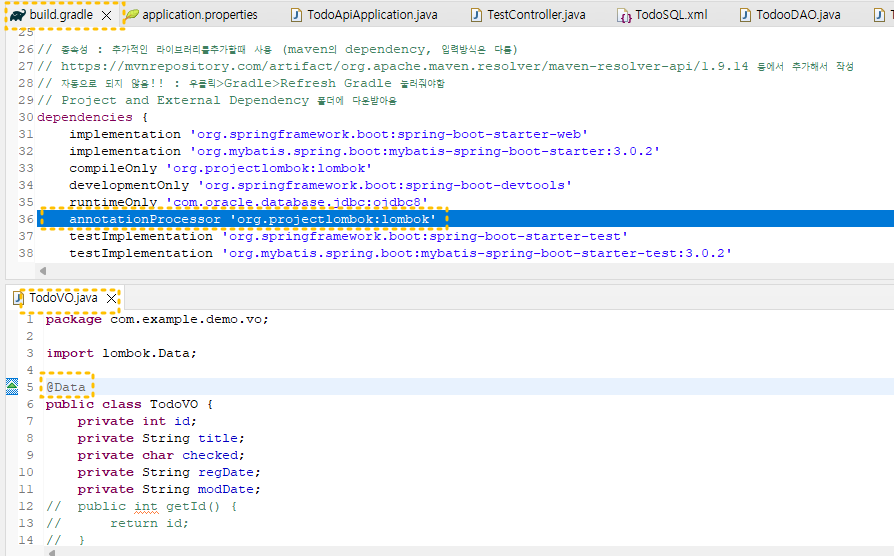
lombok 설정
-
SpringToolSuite4.ini 파일에 "-javaagent:롬복경로" 적어주기

-
build.gradle파일에 롬복 dependency와 todoVo.java에 data어노테이션 ctrl+x >> 저장 후 다시 작성 >> 저장으로 새로고침
참고
실습 테이블 생성

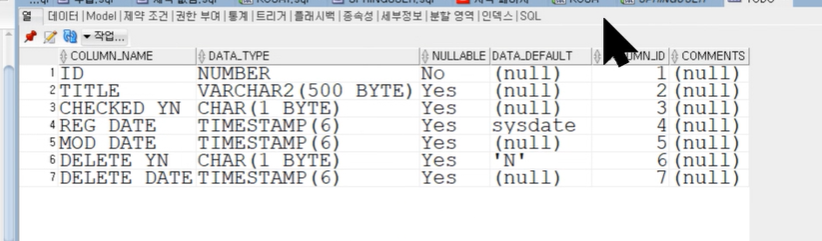
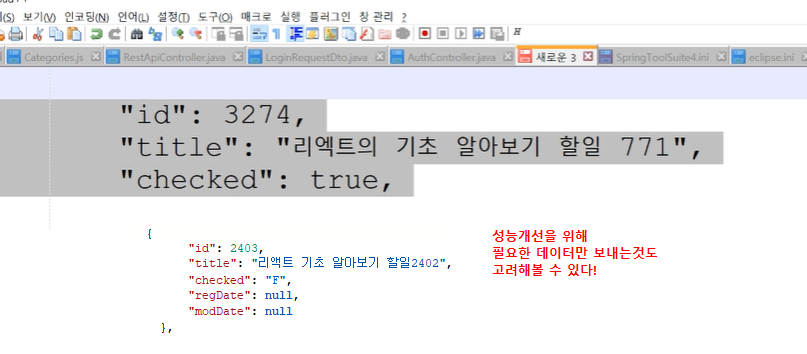
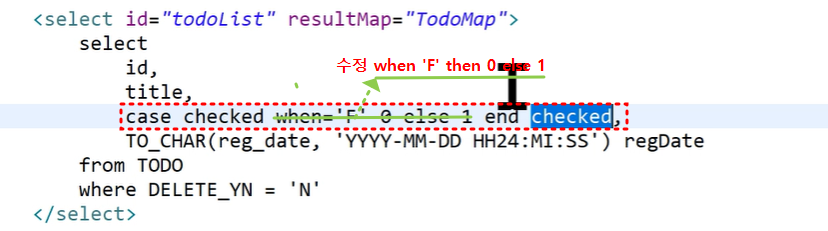
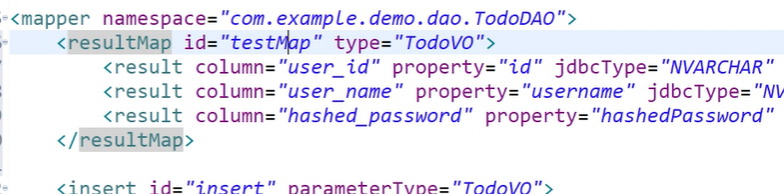
mybatis의 result map
복잡한 결과를 간단하게 맵핑해줌
오라클은 boolean 타입이 없음!
컬럼의 T/F를 true/false로 인식하게끔 해줘야 함.
그때사용하는 것이 mybatis의 result map임
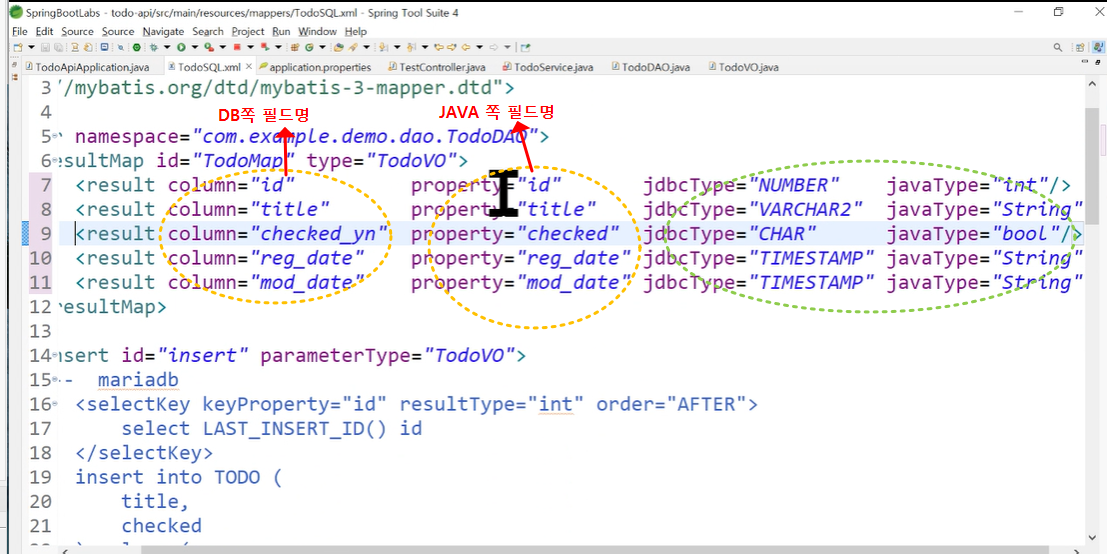
todoMap을 todoVO로 바꾼다는 의미임.
?