
1. 바이너리 파일 다운로드
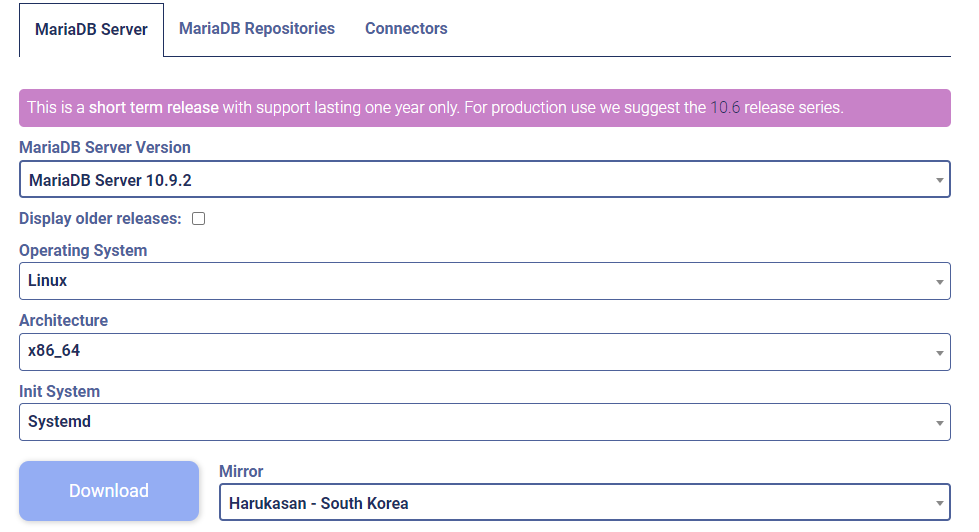
Maridb 사이트에서 바이너리 파일 다운로드
https://downloads.mariadb.org/mariadb/
2. 유저 및 그룹 생성
# groupadd mysql # 그룹 생성

# useradd -g mysql mysql # 유저 생성
3. data 및 log 폴더 생성
엔진 디렉토리

# mkdir -pv /data/mysql/mysql-data
# mkdir -pv /data/mysql/mysql-ibdata
# mkdir -pv /data/mysql/tmpdir
# chown -R mysql:mysql /data/mysql

Log 디렉토리

# mkdir -pv /var/log/mariadb
# mkdir -pv /var/log/mariadb/binary
# mkdir -pv /var/log/mariadb/error
# mkdir -pv /var/log/mariadb/slow
# mkdir -pv /var/log/mariadb/relay
# chown -R mysql. /var/log/mariadb
4. 압축해제
다운로드 받은 tar 파일을 원하는 위치에 이동시킨 후 압축해제
# /usr/local/ 에 압축풀기
# tar -zxvf mariadb-10.6.9-linux-systemd-x86_64.tar.gz -C /usr/local/

# 심볼링크
# ln -s /usr/local/mariadb-10.6.9-linux-systemd-x86_64/ /usr/local/mysql
5. 경로 추가
# vi ~/.bash_profile

#파일 하단에 경로 추가
export MARIADB_HOME=/usr/local/mysql
export PATH=$PATH:$MARIADB_HOME/bin:.
source ~/.bash_profile
6. 설정파일 복사 및 수정
/usr/local/mysql 한곳에서 관리하기위해
설정 파일 위치 변경 및 하드링크
# mv /etc/my.cnf /usr/local/mysql/my.cnf
# ln /usr/local/mysql/my.cnf  /etc/my.cnf
[Master]
my.cnf 파일 수정
#vi my.cnf

[client]
port                            =3306
socket                          =/tmp/mysql.sock

[mysqld]
server-id                       =1 	 # =>master 서버
port                            =3306
socket                          =/tmp/mysql.sock
basedir                         =/usr/local/mysql
datadir                         =/data/mysql/mysql-data
tmpdir                          =/data/mysql/tmpdir
user                            =mysql
log-bin                         =/var/log/mariadb/binary/mysql-bin
log-error                       =/var/log/mariadb/error/mariadb.err
slow_query_log_file             =/var/log/mariadb/slow/mariadb-slow-query.log
relay-log                       = /var/log/mariadb/relay/mariadb-relay
max_binlog_size                 =1G
binlog_format                   =MIXED
binlog_cache_size               =2M
report-host                     =master # =>master 서버
expire_logs_days                =10
relay_log_purge                 =0
long_query_time                 =10
sync_binlog                     =1
log_warnings                    =2

# Character set Config (utf8mb4)
character_set-client-handshake  = FALSE
character-set-server            = utf8mb4
collation_server                = utf8mb4_general_ci
init_connect                    = set collation_connection=utf8mb4_general_ci
init_connect                    = set names utf8mb4
log_slave_update                =ON

[mysqld_safe]
log-error                       =/var/log/mariadb/error/mariadb.err
pid-file                        =/data/mysql/mariadb.pid

!includedir /etc/my.cnf.d
[Slave]
my.cnf 파일 수정
#vi my.cnf

[client]
port                            =3306
socket                          =/tmp/mysql.sock

[mysqld]
server-id                       =2	# =>slave 서버
port                            =3306
socket                          =/tmp/mysql.sock
basedir                         =/usr/local/mysql
datadir                         =/data/mysql/mysql-data
tmpdir                          =/data/mysql/tmpdir
user                            =mysql
log-bin                         =/var/log/mariadb/binary/mysql-bin
log-error                       =/var/log/mariadb/error/mariadb.err
slow_query_log_file             =/var/log/mariadb/slow/mariadb-slow-query.log
relay-log                       = /var/log/mariadb/relay/mariadb-relay
max_binlog_size                 =1G
binlog_format                   =MIXED
binlog_cache_size               =2M
report-host                     =slave	# =>slave 서버
expire_logs_days                =10
relay_log_purge                 =0
long_query_time                 =10
sync_binlog                     =1
log_warnings                    =2

# Character set Config (utf8mb4)
character_set-client-handshake  = FALSE
character-set-server            = utf8mb4
collation_server                = utf8mb4_general_ci
init_connect                    = set collation_connection=utf8mb4_general_ci
init_connect                    = set names utf8mb4
log_slave_update                =ON

[mysqld_safe]
log-error                       =/var/log/mariadb/error/mariadb.err
pid-file                        =/data/mysql/mariadb.pid

!includedir /etc/my.cnf.d
6. mariadb 설치
#cd /usr/local/mysql/scripts

# ./mysql_install_db --socket=/tmp/mysql.sock --port=3306 --basedir=/usr/local/mysql --datadir=/data/mysql/mysql-data --user=mysql --defaults-file=/usr/local/mysql/my.cnf
6-1
shell script 로 설치
# mariadb_install.sh

#!/bin/bash

basedir=/usr/local/mysql
socket=/tmp/mysql.sock
datadir=/data/mysql/mysql-data
port=3306
user=mysql


cd $basedir/scripts

sleep 1

./mysql_install_db --socket=$socket --port=$port --basedir=$basedir --datadir=$datadir --user=$user --defaults-file=$basedir/my.cnf
실행 권한 추가
chmod 744 mariadb_install.sh# ./mariadb_intall.sh
Installing MariaDB/MySQL system tables in '/data/mysql/mysql-data' ...
OK
To start mysqld at boot time you have to copy
support-files/mysql.server to the right place for your system
Two all-privilege accounts were created.
One is root@localhost, it has no password, but you need to
be system 'root' user to connect. Use, for example, sudo mysql
The second is mysql@localhost, it has no password either, but
you need to be the system 'mysql' user to connect.
After connecting you can set the password, if you would need to be
able to connect as any of these users with a password and without sudo
See the MariaDB Knowledgebase at https://mariadb.com/kb
You can start the MariaDB daemon with:
cd '/usr/local/mysql' ; /usr/local/mysql/bin/mysqld_safe --datadir='/data/mysql/mysql-data'
You can test the MariaDB daemon with mysql-test-run.pl
cd '/usr/local/mysql/mysql-test' ; perl mysql-test-run.pl
Please report any problems at https://mariadb.org/jira
The latest information about MariaDB is available at https://mariadb.org/.
Consider joining MariaDB's strong and vibrant community:
https://mariadb.org/get-involved/6-2 mariadb 재설치
생성한 data 및 log 디렉토리 내부의 파일들을 모두 삭제후 다시 설치
7. 서비스 실행
1. systemd 등록
압축 해제한 mariadb에 있는 mariadb.service 파일 복사
# cp /usr/local/mysql/support-files/systemd/mariadb.service /etc/systemd/system

#서비스 실행
# systemctl start mariadb.service

#서비스 정지
# systemctl stop mariadb.service

#서비스 상태 확인
# systemctl status mariadb.service

#시스템 부팅시 자동시작
# systemctl enable mariadb.service
2. service 등록
압축 해제한 mariadb에 있는 mysql.service 파일 복사
#파일 이동
# cp /usr/local/mysql/support-files/mysql.server /etc/init.d/mysql

#서비스 목록에 추가
# chkconfig --add /etc/init.d/mysql

# mysql 서비스를 run level 2345로 부팅시 프로세스시작
# chkconfig --level 2345 mysql on

#서비스 실행
# service mysql start

#서비스 정지
# service mysql stop

** #chkconfig mysql off -- mysql 서비스 off
8. 기본설정
mariadb 서비스 실행후
mariadb-secure-installation tool 실행
# cd /usr/local/mysql/bin
# ./mariadb-secure-installation

In order to log into MariaDB to secure it, we'll need the current
password for the root user. If you've just installed MariaDB, and
haven't set the root password yet, you should just press enter here.

Enter current password for root (enter for none):  [Enter]
OK, successfully used password, moving on...

※ 이 부분은 버전에 따라 안 나올 수 있습니다.
Setting the root password or using the unix_socket ensures that nobody
can log into the MariaDB root user without the proper authorisation.

You already have your root account protected, so you can safely answer 'n'.
Switch to unix_socket authentication [Y/n] Y  [MariaDB 실행 시 통신 소켓 생성 여부? Y 엔터]


Enabled successfully!
Reloading privilege tables..
 ... Success!


You already have your root account protected, so you can safely answer 'n'.

Change the root password? [Y/n] Y  [DB ROOT 패스워드 설정할 것인가? Y 엔터]

New password:  패스워드 입력
Re-enter new password:  재확인 패스워드 입력
Password updated successfully!
Reloading privilege tables..
 ... Success!

By default, a MariaDB installation has an anonymous user, allowing anyone
to log into MariaDB without having to have a user account created for
them.  This is intended only for testing, and to make the installation
go a bit smoother.  You should remove them before moving into a
production environment.

Remove anonymous users? [Y/n] Y  [익명의 접근을 막을 것인지? 보안을 위해 Y 엔터]
 ... Success!


Normally, root should only be allowed to connect from 'localhost'.  This
ensures that someone cannot guess at the root password from the network.

Disallow root login remotely? [Y/n] Y  [DB ROOT 원격을 막을 것인지? 보안을 위해 Y 엔터]

 ... Success!

By default, MariaDB comes with a database named 'test' that anyone can
access.  This is also intended only for testing, and should be removed
before moving into a production environment.

Remove test database and access to it? [Y/n] Y

[Test 용으로 생성된 데이터베이스를 삭제할 것인가? Y 엔터]

 - Dropping test database...
 ... Success!
 - Removing privileges on test database...
 ... Success!

Reloading the privilege tables will ensure that all changes made so far
will take effect immediately.

Reload privilege tables now? [Y/n] Y  [현재 설정한 값을 적용할 것인지? 당연히 Y 엔터]

 ... Success!

Cleaning up...

All done!  If you've completed all of the above steps, your MariaDB
installation should now be secure.

Thanks for using MariaDB!  [설정 완료]
9. 방화벽
외부에서 접속할수 있게 방화벽 설정
# firewall-cmd --permanent --add-port=3306/tcp
success
# firewall-cmd --reload
success
10. 접속
#mysql -u root -p
:비밀번호입력
참고

개발자가 되려는 개발자