BuildContext
플러터는 앱의 모든 스타일을 한 곳에서 정의할 수 있는 기능을 제공한다
일일히 inline style로 넣지 않아도 된다
theme
MeterialApp 의 속성으로 theme 값을 설정해주면
앱에 기본 스타일을 줄 수 있다
import 'package:flutter/material.dart';
void main() {
runApp(const MyApp());
}
class MyApp extends StatefulWidget {
const MyApp({super.key});
State<MyApp> createState() => _MyAppState();
}
class _MyAppState extends State<MyApp> {
// This widget is the root of your application.
Widget build(BuildContext context) {
return MaterialApp(
theme: ThemeData(
textTheme: const TextTheme(
titleLarge: TextStyle(
color: Colors.red,
))),
title: 'Flutter Demo',
home: Scaffold(
backgroundColor: const Color(0x0ff4eddb),
body: Center(
child: Column(
mainAxisAlignment: MainAxisAlignment.center,
children: const [
LargeTitle(),
],
)),
),
);
}
}
class LargeTitle extends StatelessWidget {
const LargeTitle({
Key? key,
}) : super(key: key);
Widget build(BuildContext context) {
return const Text(
'Large Title',
style: TextStyle(color: Colors.white, fontSize: 30),
);
}
}theme 스타일 설정 후
자식인 LargeText 의 색상을 변경하기 위해서는
부모인 App 위젯의 theme 에 직접 접근해야 한다
이럴 때 BuildContext 를 이용해야 한다
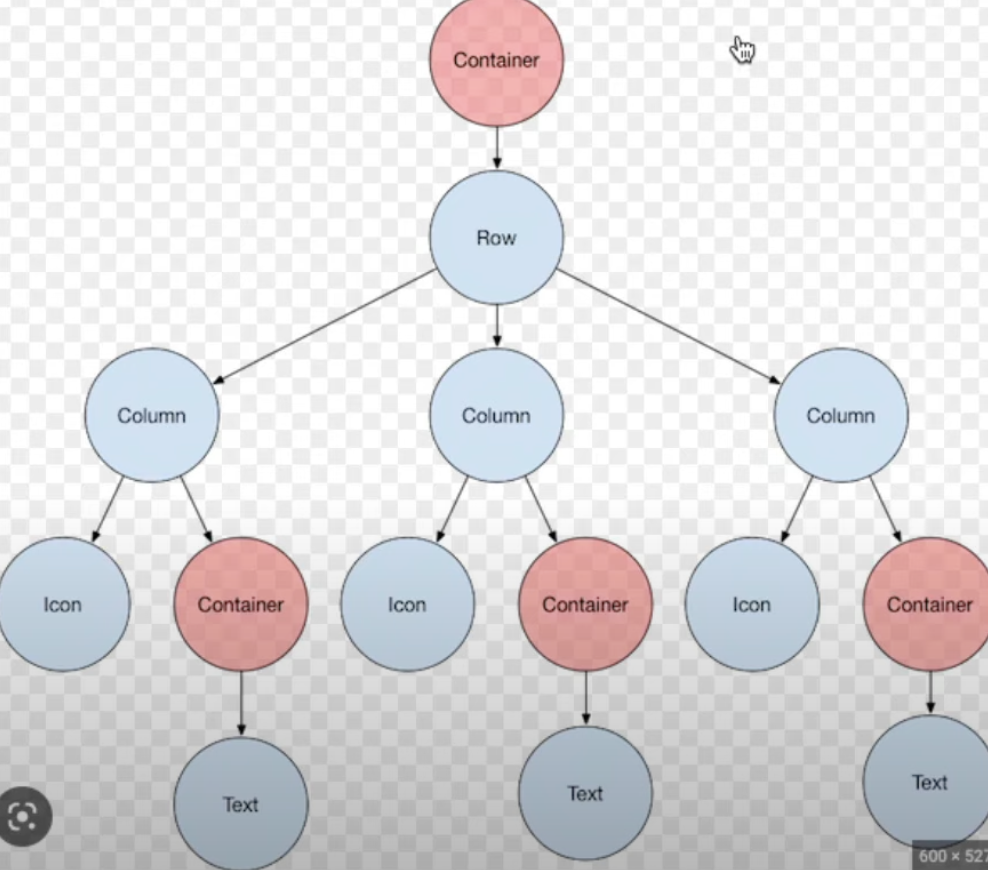
플러터의 위젯 트리
가장 상위는 Root 위젯
현재 내 프로젝트에서는 App 클래스가 된다
context 는 모든 위젯 트리에 대한 정보를 담고 있다
prototype chain 와 비슷한 역할인 것 같다
해당 context에 대한 위치를 다룬다
context 를 통한 참조 값은 항상 null 일 경우를
갖게 되기 때문에 null safe 에러가 기본적으로 발생
!. 문법으로 항상 있음을 알려줘야 한다 (옵셔널 체이닝으로도 가능)
class LargeTitle extends StatelessWidget {
const LargeTitle({
Key? key,
}) : super(key: key);
Widget build(BuildContext context) {
return Text(
'Large Title',
style: TextStyle(
color: Theme.of(context).textTheme.titleLarge!.color, fontSize: 30),
);
}
}

떠돌이 생활을 하는. 실업자, 부랑 생활을 하는