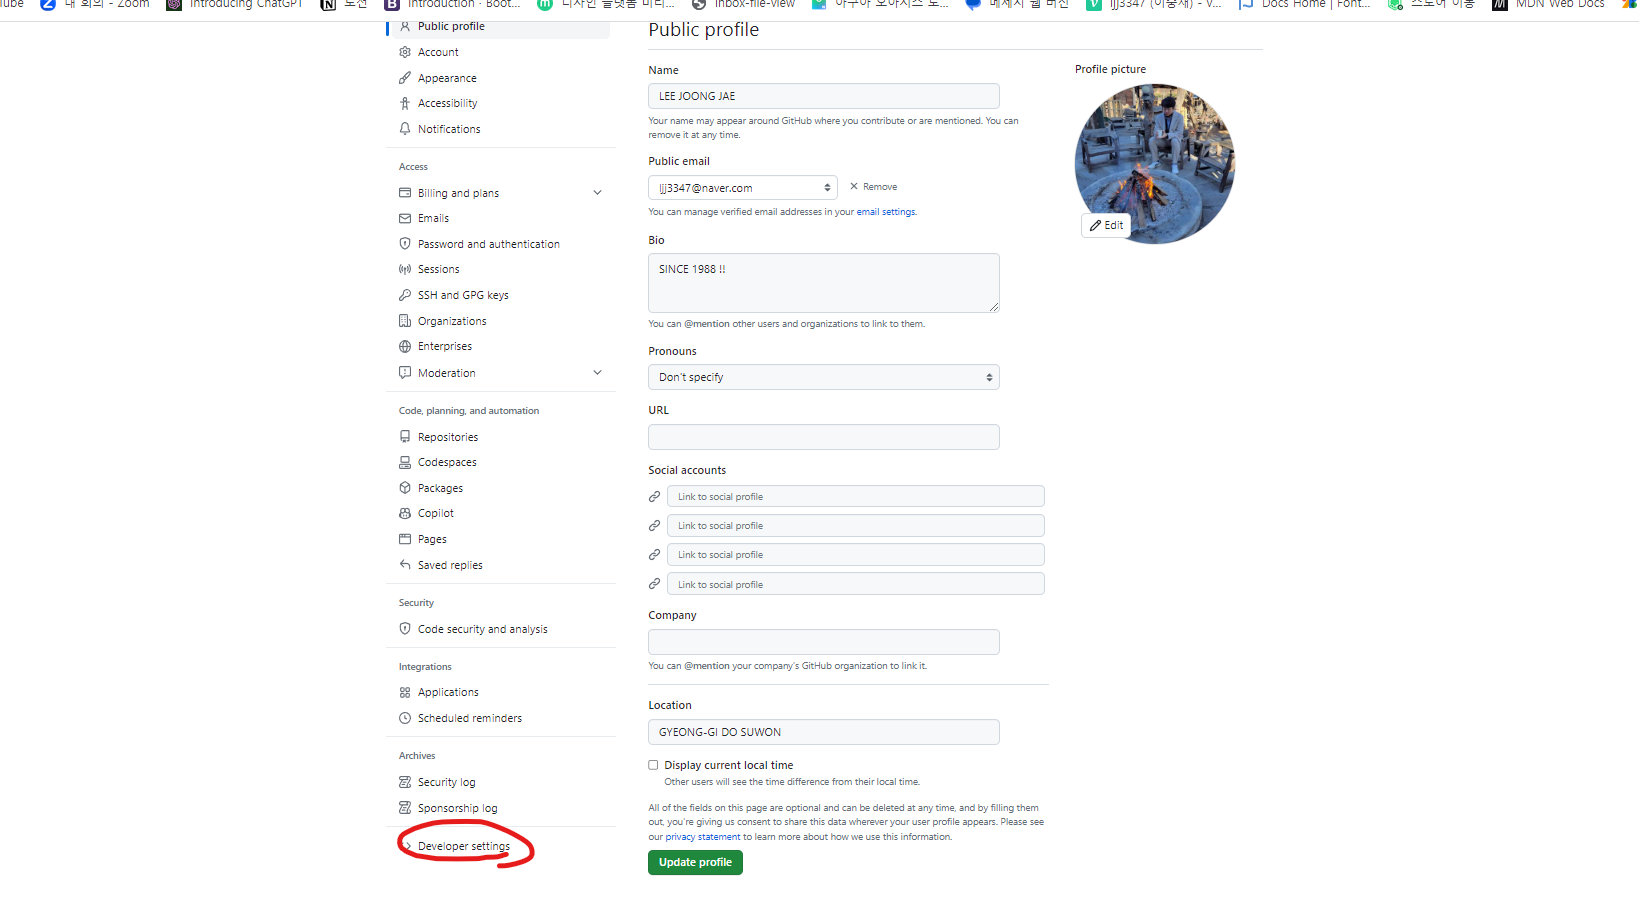
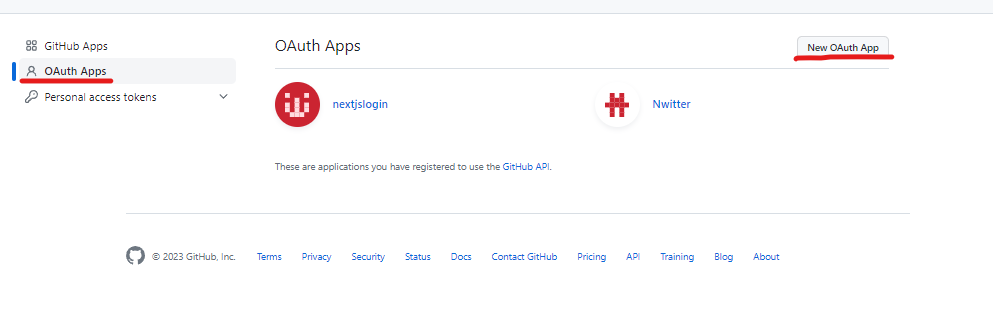
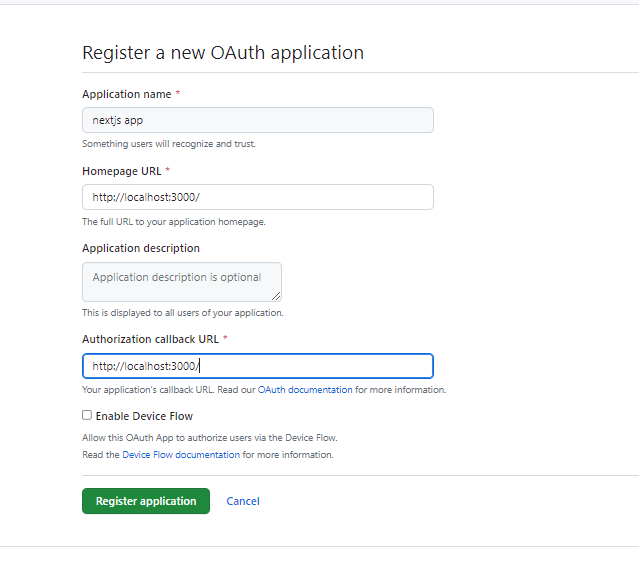
- 깃허브 가서 승인 받기

다른 플랫폼은 하단 링크 참조
https://blog.teamelysium.kr/nextjs-auth
- 주의할 점은 URL이 동일한게 있으면 에러 날 수 있다.
- npm install next-auth로 설치
- 아래의 코드를 pages/api/auth폴더 내에 넣는다
import NextAuth from "next-auth";
import GithubProvider from "next-auth/providers/github";

export const authOptions = {
  providers: [
    GithubProvider({
      clientId: 'Github에서 발급받은ID',
      clientSecret: 'Github에서 발급받은Secret',
    }),
  ],
  secret : 'jwt생성시쓰는암호'
};
export default NextAuth(authOptions);
- 로그인 버튼을 하나 만든다('use client')
'use client'
import React from 'react'
import {signIn,signOut} from 'next-auth/react'

export default function LoginBtn() {
  return (
    <button onClick={()=>{signIn()}}>LoginBtn</button>
  )
}
- 버튼을 불러와서 구성한다
import LoginBtn from '@/components/LoginBtn'

<LoginBtn></LoginBtn>
- 필요한 정보를 빼내와서 쓴다.
import { getServerSession } from 'next-auth'
import { authOptions } from '@/pages/api/auth/[...nextauth]'

let session=await getServerSession(authOptions)
console.log(session)

CODE DIVE!