
DB는 MySQL 사용할 예정, 그 외에 lombok, thymeleaf 등을 이용
1. start.spring.io 에서 프로젝트 생성

위 사진과 같이 Dependency들을 추가해서 프로젝트를 생성해 줍니다.
로그인 기능은 spring-security를 사용해서 구현할 예정입니다.
spring security란?
-> 스프링 기반 애플리케이션의 보안을 담당하는 프레임워크이며, 직접 보안 관련 코드를 작성하는 수고를 덜 수 있다.
-> 제공하는 기능으로는 간단하게 애플리케이션 모든 url에 대해 인증을 요구하며, 로그인 양식을 생성해주고, 아이디 및 암호를 가진 사용자의 양식 기반 인증 기능 등 여러가지 기능을 제공해줍니다. 이외에도 여러 서블릿 API 메소드들과 통합이 가능합니다.
2. MVC 및 설정 파일 작성
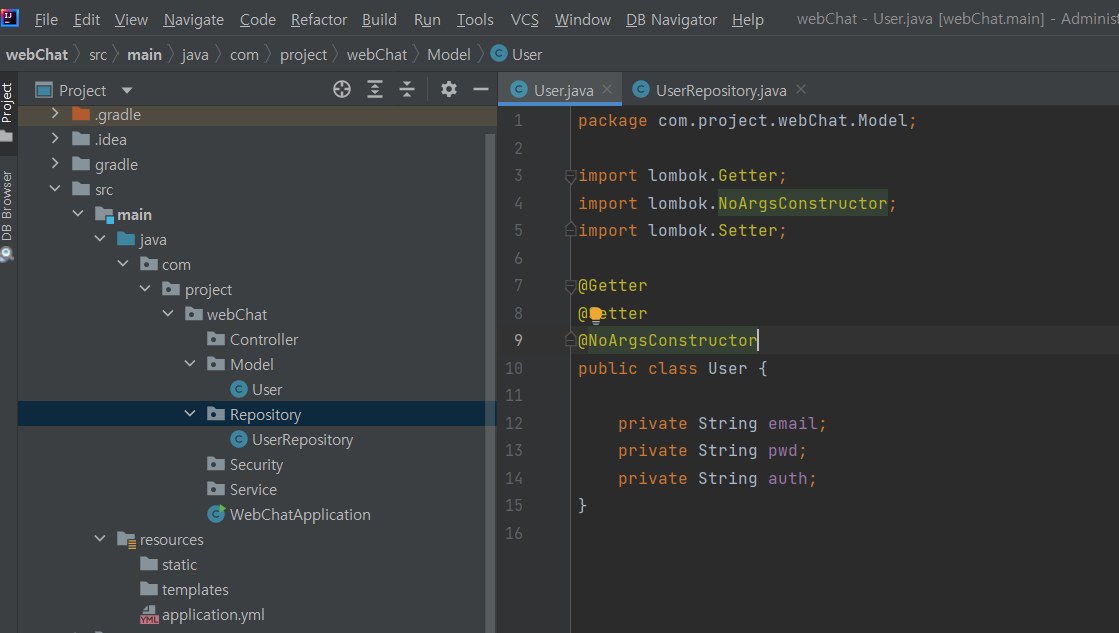
여기서 User에는 이메일, 비밀번호, 권한(유저인지 관리자인지) 필드가 필요하고, 파라미터가 없는 생성자를 자동 생성해주는 NoArgsConstructor 어노테이션을 사용합니다.
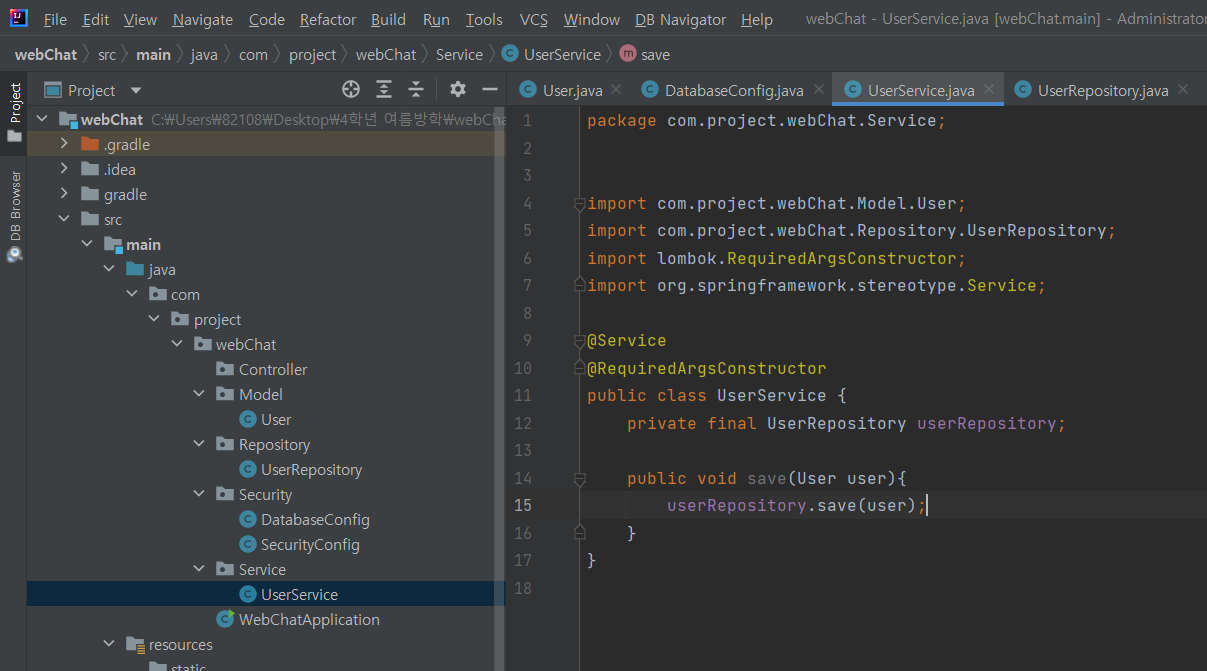
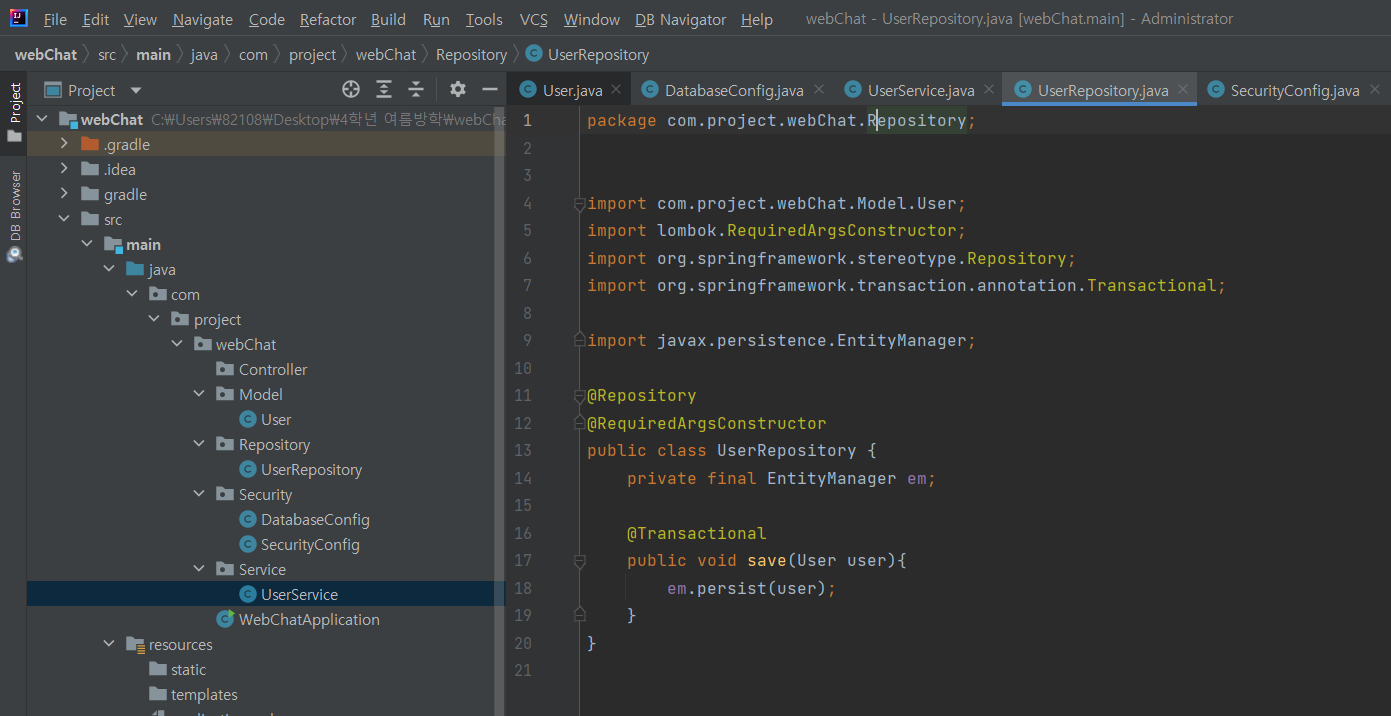
그리고 유저 엔티티들 뿐만 아니라 이 프로젝트에서 생성되는 모든 엔티티들은 Service를 거쳐 Repository로 가서 저장되도록 코드를 작성해줍니다.
UserService.java
UserRepository.java
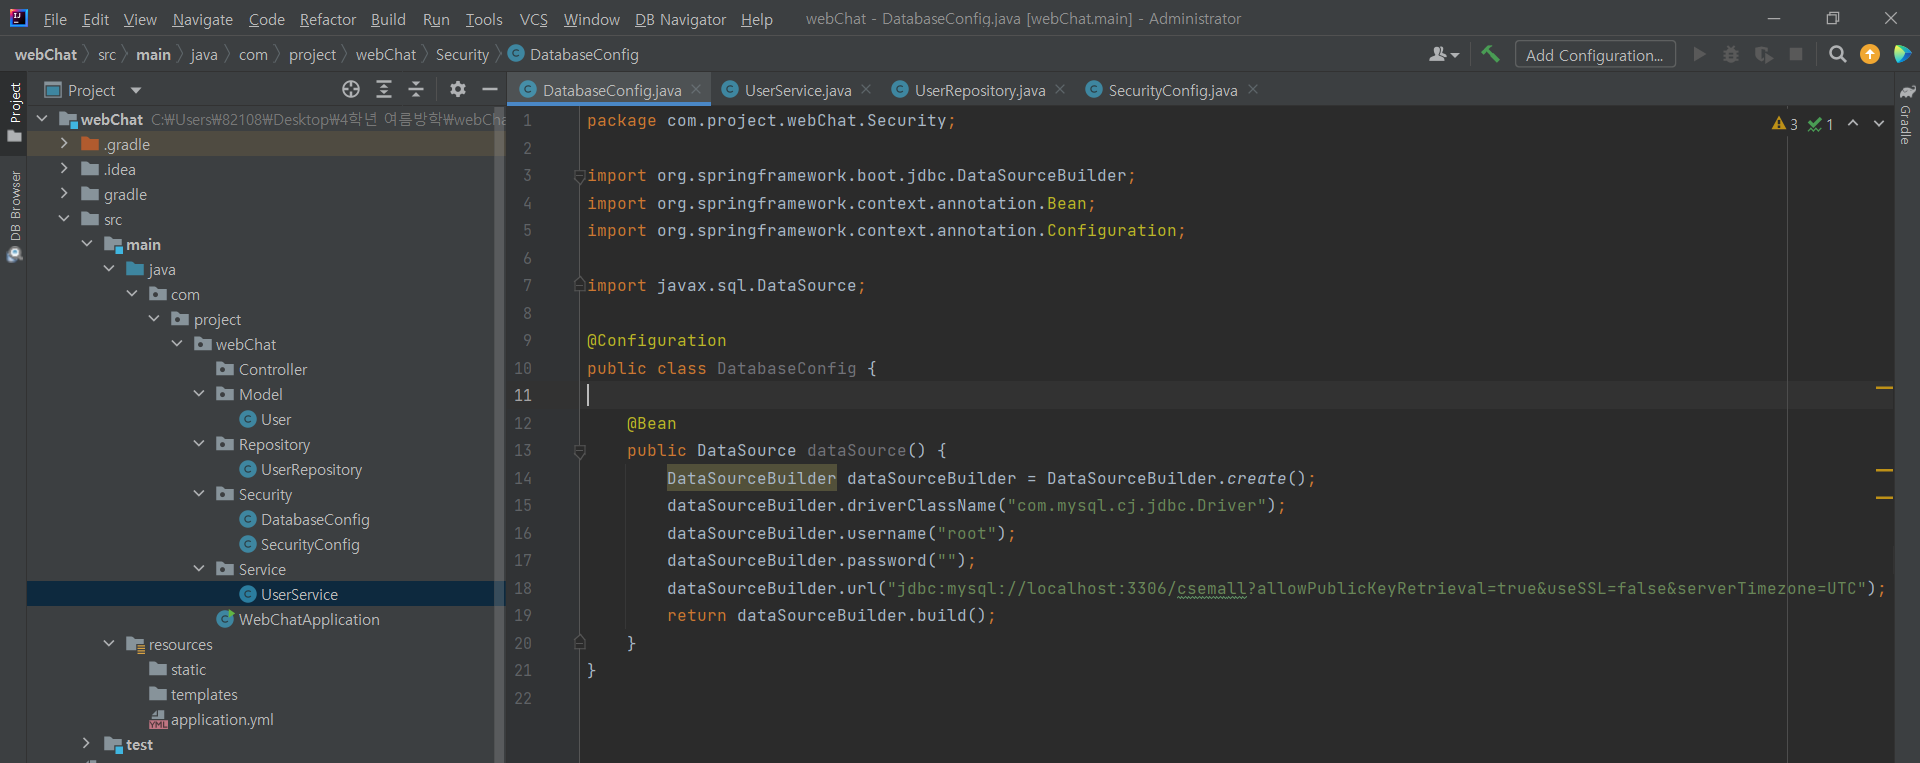
그리고 사용할 데이터베이스에 대한 config 파일도 작성합니다.
데이터베이스 config 파일 설정이 완료되었다면, spring security 파일을 생성해서 작성합니다.
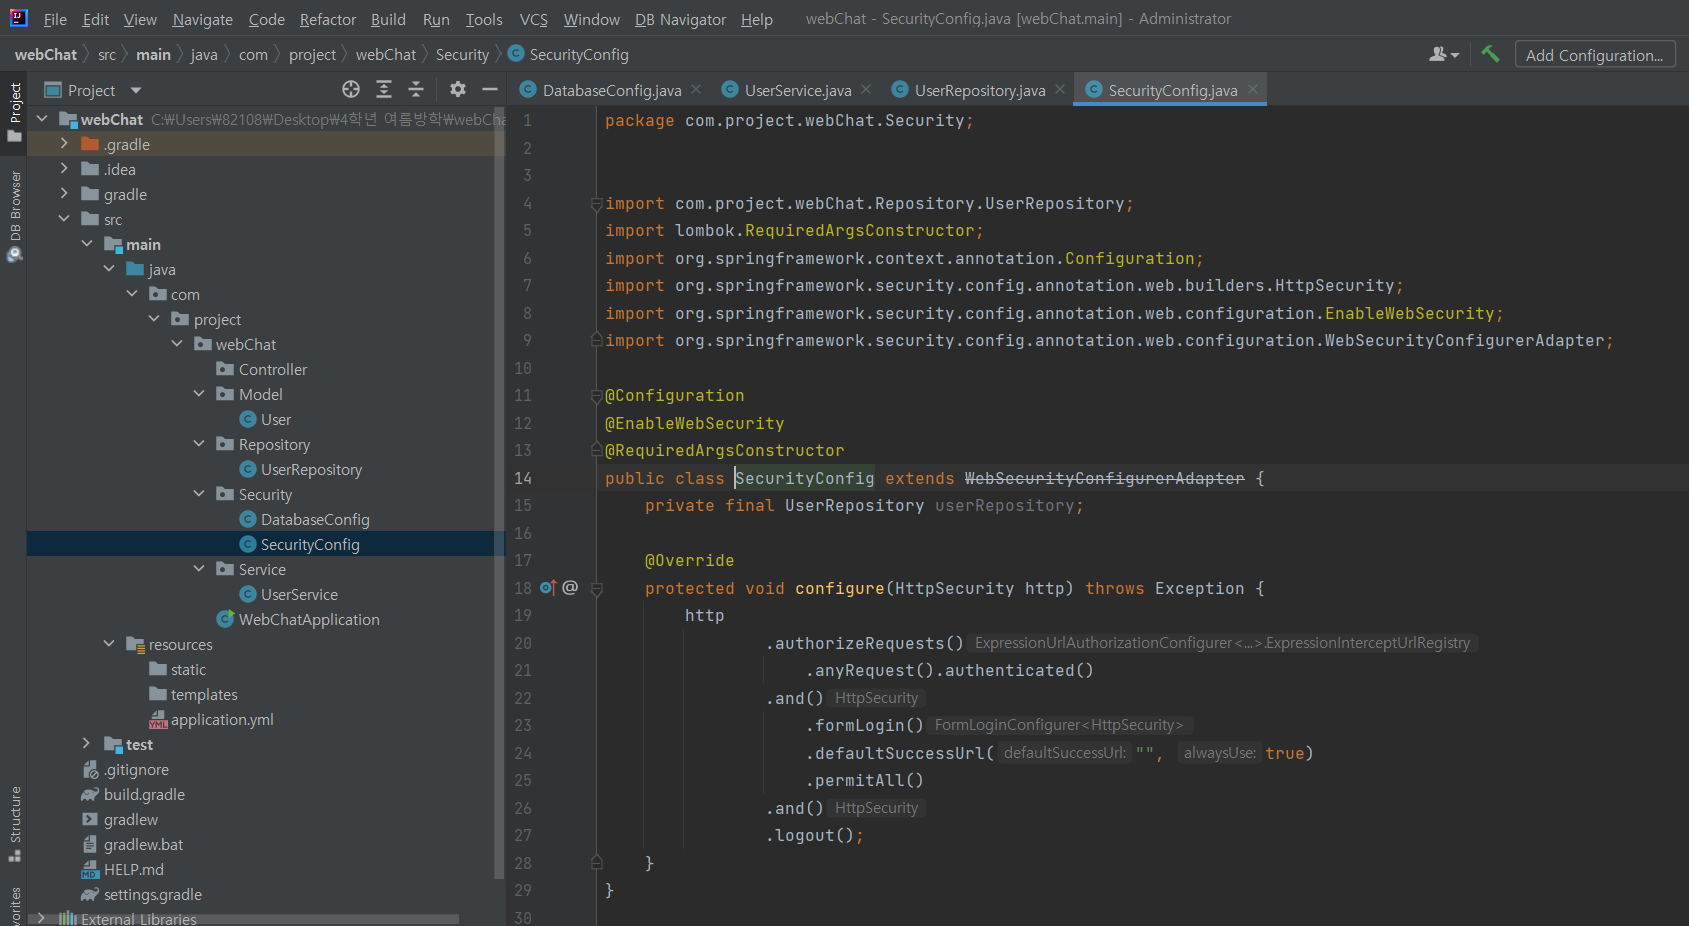
spring security의 웹 보안 기능 초기화 및 설정을 담고있는 WebSecurityConfigureAdapter를 상속해주고, 설정 클래스를 알려주는 Configuration 어노테이션과 웹 보안 활성화를 위한 EnableWebSecurity 어노테이션을 추가로 작성합니다.
anyRequest().authenticated()는 어떠한 URI로 접근하던지 인증이 필요함을 나타내고
formLogin()은 폼 방식 로그인을 사용할 것임을 알리고, defaultSuccessURI로 로그인 성공 시 이동할 uri를 작성합니다.
spring security 참고 사이트(nahwasa)
원래 같았으면 위 사진과 같이 WebSecurityConfigurerAdapter를 extends로 상속받아서 설정을 오버라이딩 하는 방식으로 코드를 작성했겠지만 현재 스프링 부트에서 WebSecurityConfigurerAdapter를 사용할 수 없게 되었다. 그래서 구글링을 해본 결과, 바뀐 방식에서는 상속받아 오버라이딩 하지 않고, 모두 Bean으로 등록하는 방식으로 코드를 작성해야 합니다.
코드
package com.project.webChat.Security;


import com.project.webChat.Service.UserService;
import lombok.RequiredArgsConstructor;
import org.slf4j.Logger;
import org.slf4j.LoggerFactory;
import org.springframework.context.annotation.Bean;
import org.springframework.context.annotation.Configuration;
import org.springframework.security.config.annotation.web.builders.HttpSecurity;
import org.springframework.security.config.annotation.web.configuration.EnableWebSecurity;
import org.springframework.security.crypto.bcrypt.BCryptPasswordEncoder;
import org.springframework.security.crypto.password.PasswordEncoder;
import org.springframework.security.web.SecurityFilterChain;
import org.springframework.security.web.access.AccessDeniedHandler;

import javax.servlet.http.HttpServletResponse;

@Configuration
@EnableWebSecurity
@RequiredArgsConstructor
public class SecurityConfig{

    private final Logger log = LoggerFactory.getLogger(getClass());
    private final UserService userService;

    @Bean
    public PasswordEncoder passwordEncoder() {
        return new BCryptPasswordEncoder();
    }

    @Bean
    public AccessDeniedHandler accessDeniedHandler(){
        log.warn("accessDeniedHandler");
        return (request, response, e) -> {
            response.setStatus(HttpServletResponse.SC_FORBIDDEN);
            response.setContentType("text/plain;charset=UTF-8");
            response.getWriter().write("ACCESS DENIED");
            response.getWriter().flush();
            response.getWriter().close();
        };
    }

    @Bean
    public SecurityFilterChain filterChain(HttpSecurity http) throws Exception {
        http
                .authorizeRequests()
                    .anyRequest().authenticated()
                .and()
                    .formLogin()
                    .defaultSuccessUrl("경로 지정", true)
                    .permitAll()
                .and()
                .logout();

        return http.build();
    }
}
위와 같이, 원래는 configure() 함수 안에 있던 코드들을 @Bean으로 등록한 뒤, SecurityFilterChain으로 리턴 타입을 설정한 뒤 그래도 복사해서 붙여넣고, return http.build()를 합니다.