intellij
intellij 설치를 했는데 확실히 .. sts 툴보다 훨씬 좋은 게 느껴진다.. 지금은 sts 에 익숙해져서 아직 어색하긴 한데, 갈아타야되겠다. 왜 자바 개발자들이 intellij 사용하는지 알 것 같기도 .. 😌 (하지만 너무 비싸...)
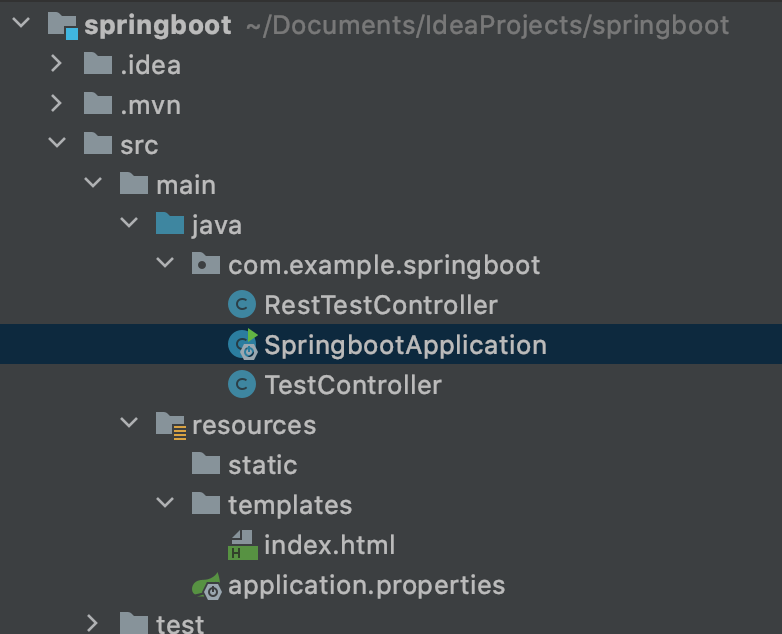
intellij 설치 후 테스트
1. 브라우저에서 index.html 호출하기
TestController 클래스를 하나 만들어 주고 아래 코드를 작성해보자.
package com.example.springboot;


import org.springframework.stereotype.Controller;
import org.springframework.web.bind.annotation.RequestMapping;
import org.springframework.web.bind.annotation.RequestMethod;

@Controller
@RequestMapping("/index")
public class TestController {

    @RequestMapping(method = RequestMethod.GET)
    public String test() {
        return "index";
    }
}
templates 폴더 밑에 index.html 파일을 하나 만들어준다.
<!DOCTYPE html>
<html lang="en">
<head>
    <meta charset="UTF-8">
    <title>Title</title>
</head>
<body>
    스프링 부트 테스트
</body>
</html>
생성이 완료되었다면, 웹브라우저에서 아래 index.html을 호출해보자!

스프링 부트 테스트가 잘 출력되고 있다. 근데 .. 폰트 종류 안습이다..ㅋㅋ 😓
2. 웹페이지가 아닌 문자열 출력
만약 index.html같이 웹페이지 조회가 아닌 RestAPI를 위해 단순 String 값을 출력하고 싶다면, @RestController 어노테이션을 주고 @RequestMapping으로 url을 매핑해주면 된다.
그리고 return값으로는 원하는 값을 던져주면 된다. HashMap으로 return할 경우 자동으로 JSON형태로 파싱처리 된다.
@RestController = @Controller + @ResponseBody 로 생각하면 된다.
package com.example.springboot;

import org.springframework.web.bind.annotation.RequestMapping;
import org.springframework.web.bind.annotation.RequestMethod;
import org.springframework.web.bind.annotation.RestController;

@RestController
public class RestTestController {

    @RequestMapping(value = "/rest", method = RequestMethod.GET)
    public String test() {
        return "Hello World";
    }
}

스프링부트를 활용한 웹 개발 준비가 완료 👏👏👏👏

Step by step goes a long way ✨