Hacker News 클라이언트 앱 제작(1)(수정중)
1. Hacker News 클라이언트 앱
기본세팅
1) typescript 설치(전역 설치)
npm install -g typescript
2) percel 설치(번들링 도구)(전역 설치)
npm install -g parcel-bundler
1) index.html 실행
(index.html)
<!DOCTYPE html>
<html><head>
<meta charset="utf-8">
<meta name="viewport" content="width=device-width, initial-scale=1, shrink-to-fit=no">
<title>HN client</title>
</head>
<body>
<noscript>
You need to enable JavaScript to run this app.
</noscript>
<div id="root">
</div>
<script src="app.js" type="module"></script>
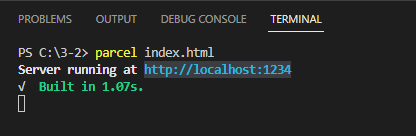
</body></html>percel index.html
index.html이 있는 폴더에서
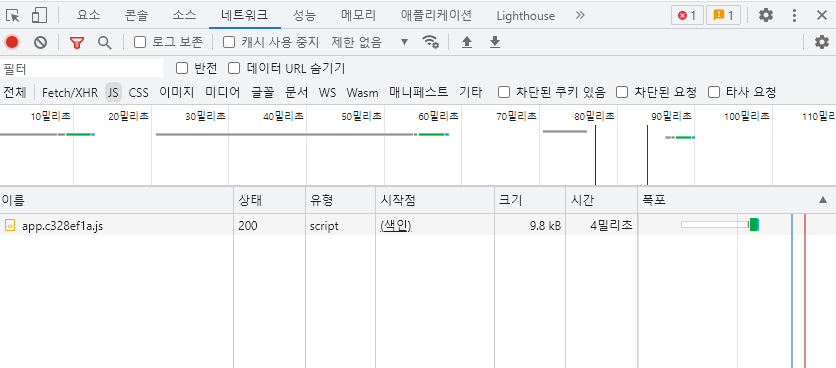
위 명령어를 실행하면 index.html 태그 <script></script>에 import 되어 있는 app.js
파일이 번들링 되어서 빌드가 진행된다.
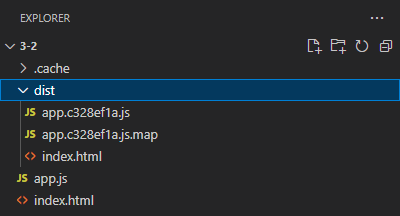
dist 폴더에 번들링된 파일이 생성된다. (app.c328e1a.js: 숫자는 빌드시 임의로 생성)
XMLhttpRequest를 통해서 서버와 통신한다.
https://developer.mozilla.org/ko/docs/Web/API/XMLHttpRequest
(app.js)
const ajax = new XMLHttpRequest();
const NEWS_URL = 'https://api.hnpwa.com/v0/news/1.json';

ajax.open('GET', NEWS_URL, false);
ajax.send();


console.log(ajax.response)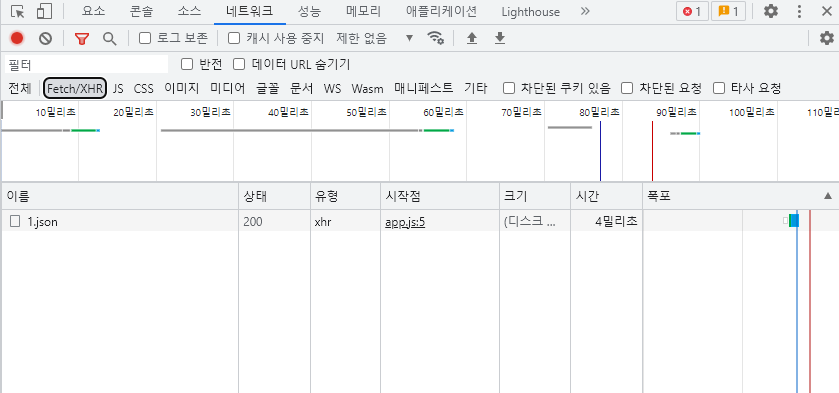

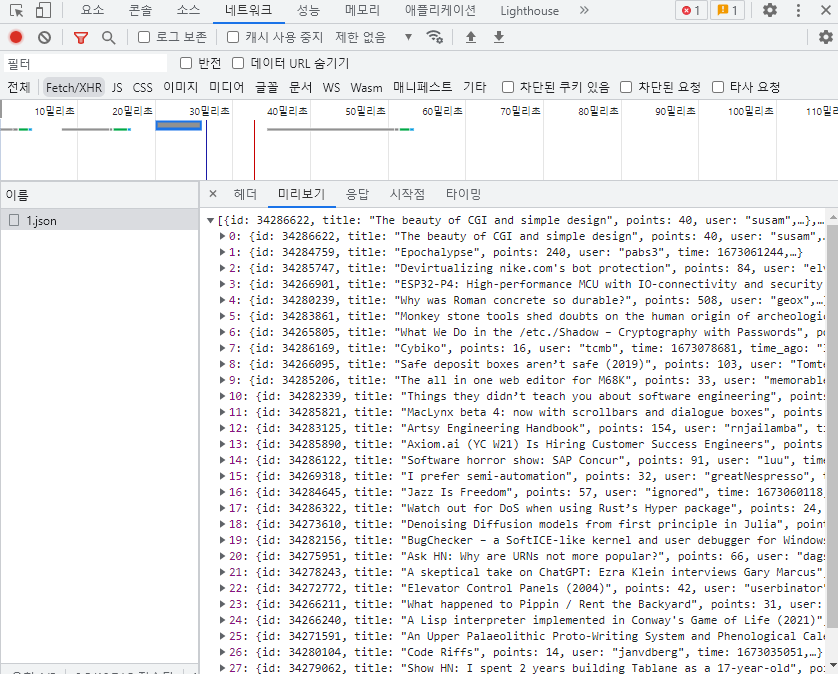
위와 같은 reponse 데이터 문자열을
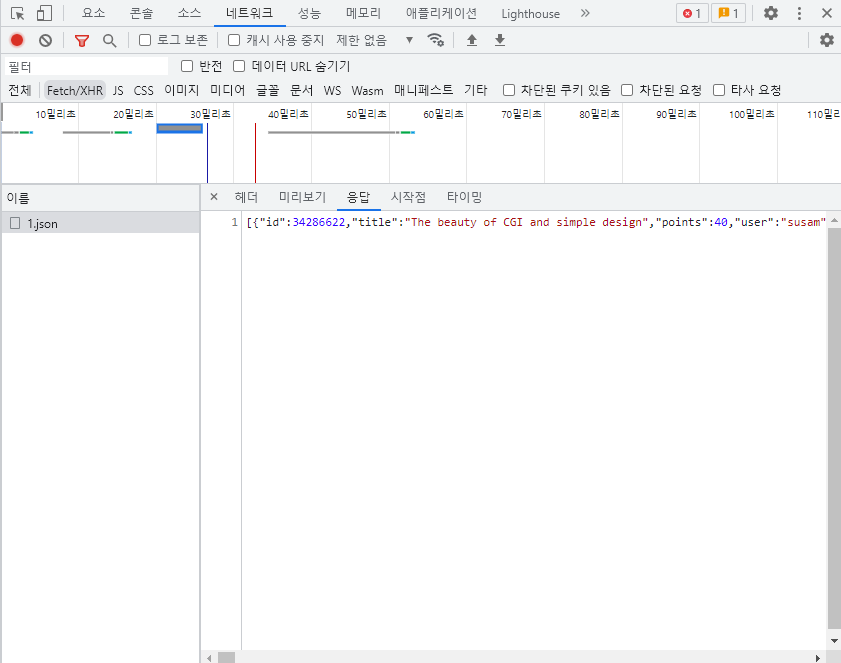
다음과 같이 문자열 객체로 변환하기 위해 JSON.Parse()을 사용한다.
const ajax = new XMLHttpRequest();
const NEWS_URL = 'https://api.hnpwa.com/v0/news/1.json';
//mehod //url //async : false 입력시 동기처리
ajax.open('GET', NEWS_URL, false);
ajax.send();
// 전달받은 데이터가 ajax.response에 저장
const newsFeed = JSON.parse(ajax.response); //저장된 데이터 문자열 객체로 변환
const ul = document.createElement('ul');
for(let i = 0; i < 10; i++) {
const li = document.createElement('li');
li.innerHTML = newsFeed[i].title;
ul.appendChild(li);
}
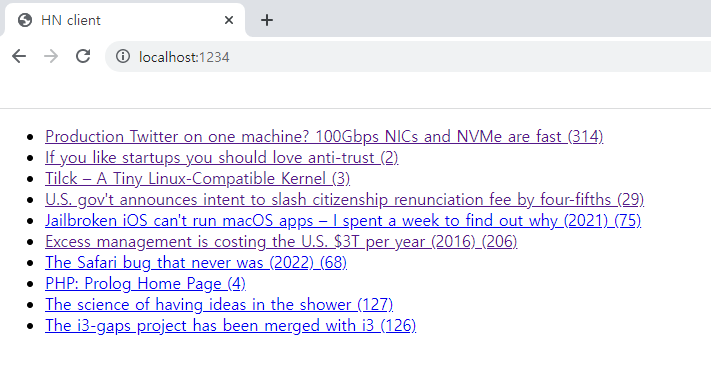
document.getElementById('root').appendChild(ul);웹에서는 글의 제목이 클릭되게 하려면 앵커태그를 이용한다.
글의 목록에서 목록 제목을 클릭하면 화면이 전환되도록 하기 위해 a 태그에 href 속성을 넣어준다.
const ajax = new XMLHttpRequest();
const NEWS_URL = 'https://api.hnpwa.com/v0/news/1.json';
const CONTENT_URL = 'https://api.hnpwa.com/v0/item/@id.json'

ajax.open('GET', NEWS_URL, false);
ajax.send();

const newsFeed = JSON.parse(ajax.response);
const ul = document.createElement('ul');

for(let i = 0; i < 10; i++) {
  const li = document.createElement('li');
  const a = document.createElement('a');

  a.href='#'
  a.innerHTML = `${newsFeed[i].title}(${newsFeed[i].comments_count})`;

  li.appendChild(a);
  ul.appendChild(li);

}

document.getElementById('root').appendChild(ul);
<a> 태그에 addeventLister(이벤트, 실행할 함수)을 이용하여 <a> 태그를 클릭했을때 실행될 코드 입력.
a.addEventListener('click', function(){});여러개 등록해야 되고, 기술적으로 문제가 발생할 수있다.
앵커 태크에 #을 해시라고 하는데, 일종의 북마크이다.
페이지 내에서 어떤 앵커 태그의 이름 name 속성과 같은 해시명이 들어올때 그 위치로 스크롤링이 되도록 한다. 이것을 활용하여 해시가 바뀌었을때, 이벤트가 발생하는 데 hashchange가 발생한다.
어떤 링크와, 타이틀이 클릭됐는지 확인한다.
const ajax = new XMLHttpRequest();
const NEWS_URL = 'https://api.hnpwa.com/v0/news/1.json';
const CONTENT_URL = 'https://api.hnpwa.com/v0/item/@id.json'

ajax.open('GET', NEWS_URL, false);
ajax.send();

const newsFeed = JSON.parse(ajax.response);
const ul = document.createElement('ul');

window.addEventListener('hashchange', function(){
  const = location.hash.substr(1); //#을 제외한 id값만 가져옴
  ajax.open('GET',CONTENT_URL.replace('@id',id), false)


});

for(let i = 0; i < 10; i++) {
  const li = document.createElement('li');
  const a = document.createElement('a');

  a.href='#${newsFeed[i].id}'
  a.innerHTML = `${newsFeed[i].title}(${newsFeed[i].comments_count})`;

  li.appendChild(a);
  ul.appendChild(li);

}

document.getElementById('root').appendChild(ul);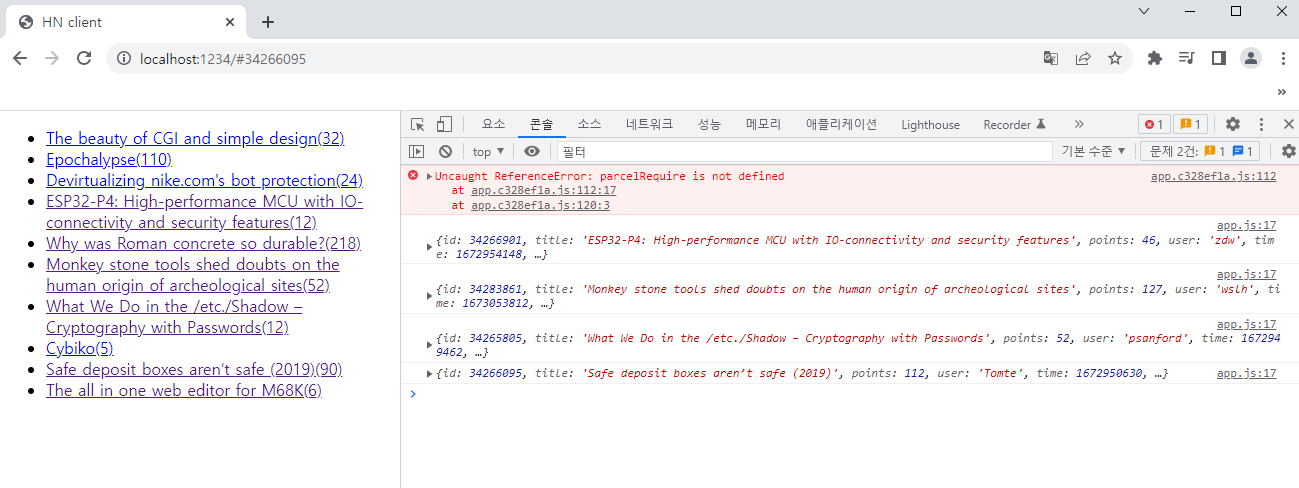
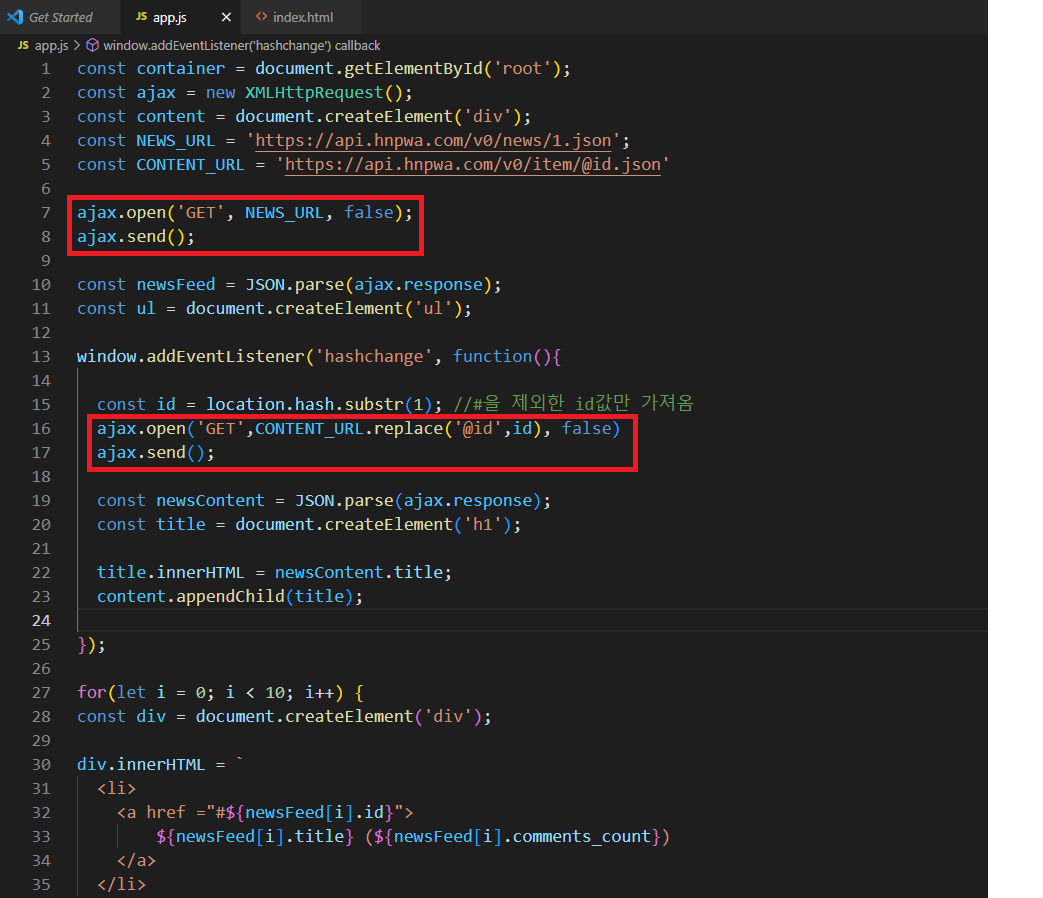
- 타이틀 선택 시 선택된 타이틀이 나오도록 하기
const container = document.getElementById('root');
const ajax = new XMLHttpRequest();
const content = document.createElement('div');
const NEWS_URL = 'https://api.hnpwa.com/v0/news/1.json';
const CONTENT_URL = 'https://api.hnpwa.com/v0/item/@id.json'

ajax.open('GET', NEWS_URL, false);
ajax.send();

const newsFeed = JSON.parse(ajax.response);
const ul = document.createElement('ul');

window.addEventListener('hashchange', function(){

  const id = location.hash.substr(1); //#을 제외한 id값만 가져옴

  ajax.open('GET',CONTENT_URL.replace('@id',id), false)
  ajax.send();

  const newsContent = JSON.parse(ajax.response);
  const title = document.createElement('h1');

  title.innerHTML = newsContent.title;
  content.appendChild(title);

});

for(let i = 0; i < 10; i++) {
  const li = document.createElement('li');
  const a = document.createElement('a');

  a.href=`#${newsFeed[i].id}`
  a.innerHTML = `${newsFeed[i].title}(${newsFeed[i].comments_count})`;

  li.appendChild(a);
  ul.appendChild(li);

}

container.appendChild(ul);
container.appendChild(content);
이 코드를 통해서 만든 UI 결과물은 개발자 도구의 Elements을 확인할 수 있지만, 코드로는 자세히 살펴보지 않는 이상 태그들의 구조를 직관적으로 이해하기 어렵다. 이와 같이 DOM API를 계속 사용할 경우 코드가 점점 복잡해진다.
따라서 문자열을 가지고 UI를 만들고 DOM API를 최소한으로 사용하도록 한다.
const container = document.getElementById('root');
const ajax = new XMLHttpRequest();
const content = document.createElement('div');
const NEWS_URL = 'https://api.hnpwa.com/v0/news/1.json';
const CONTENT_URL = 'https://api.hnpwa.com/v0/item/@id.json'

ajax.open('GET', NEWS_URL, false);
ajax.send();

const newsFeed = JSON.parse(ajax.response);
const ul = document.createElement('ul');

window.addEventListener('hashchange', function(){

  const id = location.hash.substr(1); //#을 제외한 id값만 가져옴
  ajax.open('GET',CONTENT_URL.replace('@id',id), false)
  ajax.send();

  const newsContent = JSON.parse(ajax.response);
  const title = document.createElement('h1');

  title.innerHTML = newsContent.title;
  content.appendChild(title);

});

for(let i = 0; i < 10; i++) {
const div = document.createElement('div');

div.innerHTML = `
  <li>
    <a href ="#${newsFeed[i].id}">
        ${newsFeed[i].title} (${newsFeed[i].comments_count})
    </a>
  </li>
`
    ul.appendChild(div.firstElementChild);
}

container.appendChild(ul);
container.appendChild(content);
코드상의 li구조와 브라우저의 개발자 도구 > element(요소)에서 확인한 li 구조가 유사함을 확인할 수 있다. (가독성 높음)
위 처럼 수정할 경우 양이 들어나도 복잡도 또는 내용을 파악하는데 어려움이 생기지는 않는다.
- 중복 코드 리펙토링
데이터 요청 부분이 중복되므로 함수로 묶는다.
const container = document.getElementById('root');
const ajax = new XMLHttpRequest();
const content = document.createElement('div');
const NEWS_URL = 'https://api.hnpwa.com/v0/news/1.json';
const CONTENT_URL = 'https://api.hnpwa.com/v0/item/@id.json'


function getData(url){

    ajax.open('GET', url, false);
    ajax.send();

    return JSON.parse(ajax.response);
}


const newsFeed = getData(NEWS_URL);
const ul = document.createElement('ul');

window.addEventListener('hashchange', function(){

  const id = location.hash.substr(1); //#을 제외한 id값만 가져옴

  const newsContent = getData(CONTENT_URL.replace('@id',id));
  const title = document.createElement('h1');

  title.innerHTML = newsContent.title;
  content.appendChild(title);

});

for(let i = 0; i < 10; i++) {
const div = document.createElement('div');

div.innerHTML = `
  <li>
    <a href ="#${newsFeed[i].id}">
        ${newsFeed[i].title} (${newsFeed[i].comments_count})
    </a>
  </li>
`
    ul.appendChild(div.firstElementChild);
}

container.appendChild(ul);
container.appendChild(content);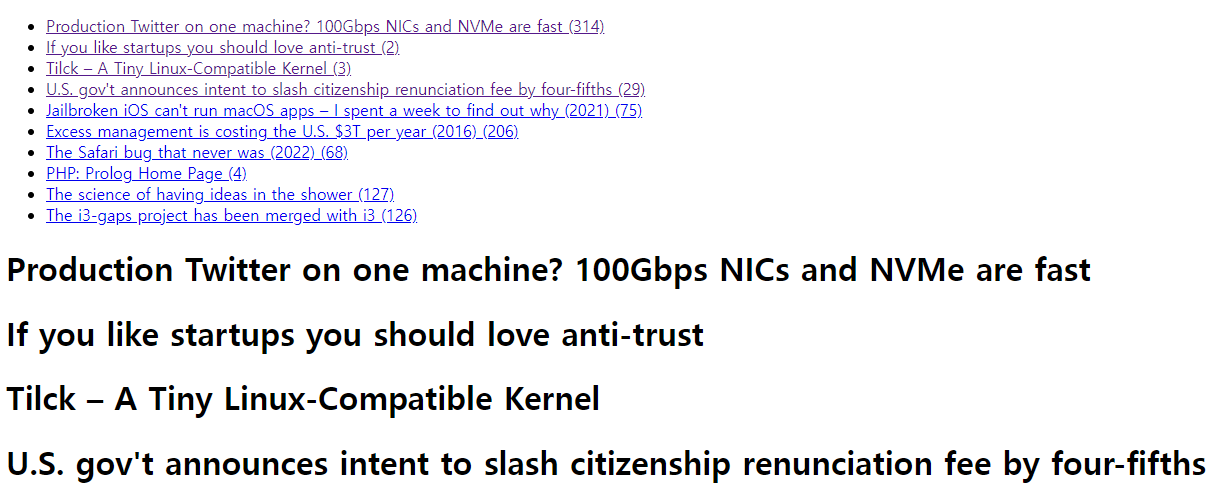
라우터(화면 처리기)
지금까지 구현한 화면은 목록과, 타이틀이 같은 화면에 보인다는 문제점이 있다.
또한 목록을 클릭했을때 내용이 계속 추가되는 문제점(appendChild 메소드 때문)도 가지고 있다.
내용화면으로 진입하면, 목록 화면은 제거하도록 하고 내용이 표시되는 화면 UI를 문자열로 구성하자.
window.addEventListener('hashchange', function(){
const id = location.hash.substr(1); //#을 제외한 id값만 가져옴
const newsContent = getData(CONTENT_URL.replace('@id',id));
const title = document.createElement('h1');
container.innerHTML = `
<h1>${newsContent.title}</h1>
<div>
<a href="#">목록으로</a>
</div>
`
// title.innerHTML = newsContent.title; -> 삭제
// content.appendChild(title);
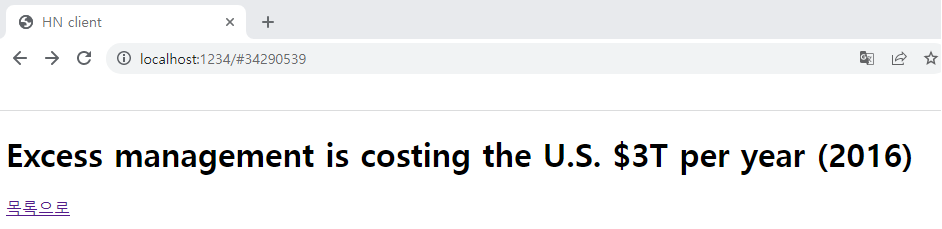
});root(const 변수 container)경로에 html을 대입하면 기존에 있는 html이 제거되고 새로 대입한 html이 표시된다.
목록에서 제목을 클릭하면, 내용만 표시된다.
목록화면의 코드를 문자열을 변경한다. 먼저 newsList 빈배열을 생성하고, <ul> 태그를 삽입후 조회된 데이터를 <li><a href="#></li> 태그로 조합한 후 </ul> 태그를 마지막에 삽입한다. 배열에 저장된 값을 문자열 하나로 연결하고 innerHTML 속성에 사용할 수 있도록 join() 메소드를 사용한다.
const container = document.getElementById('root');
const ajax = new XMLHttpRequest();
const content = document.createElement('div');
const NEWS_URL = 'https://api.hnpwa.com/v0/news/1.json';
const CONTENT_URL = 'https://api.hnpwa.com/v0/item/@id.json'


function getData(url){

    ajax.open('GET', url, false);
    ajax.send();

    return JSON.parse(ajax.response);
}


const newsFeed = getData(NEWS_URL);
const ul = document.createElement('ul');

window.addEventListener('hashchange', function(){

  const id = location.hash.substr(1); //#을 제외한 id값만 가져옴

  const newsContent = getData(CONTENT_URL.replace('@id',id));

  container.innerHTML = `
  <h1>${newsContent.title}</h1>

  <div>
    <a href="#">목록으로</a>
  </div>
  `

});


const newsList = [];
newsList.push('<ul>');

for(let i = 0; i < 10; i++) {

newsList.push(`
  <li>
    <a href ="#${newsFeed[i].id}">
        ${newsFeed[i].title} (${newsFeed[i].comments_count})
    </a>
  </li>
`)
}


newsList.push('</ul>');
container.innerHTML = newList.join('');
라우터를 구성한다. 해시값에 따라 목록과 내용을 보여 줄 수 있도록 라우팅 함수를 만든다.
페이지 초기 로딩시 호출 될 수 있도록 newsFeed함수를 만들고, hashchange 다음에 사용된 익명함수를 외부 함수(newsDetail)로 뽑아낸다.
const container = document.getElementById('root');
const ajax = new XMLHttpRequest();
const content = document.createElement('div');
const NEWS_URL = 'https://api.hnpwa.com/v0/news/1.json';
const CONTENT_URL = 'https://api.hnpwa.com/v0/item/@id.json';

function getData(url) {
  ajax.open('GET', url, false);
  ajax.send();

  return JSON.parse(ajax.response);
}

function newsFeed() {
  const newsFeed = getData(NEWS_URL);
  const newsList = [];

  newsList.push('<ul>');

  for(let i = 0; i < 10; i++) {
    newsList.push(`
      <li>
        <a href="#${newsFeed[i].id}">
          ${newsFeed[i].title} (${newsFeed[i].comments_count})
        </a>
      </li>
    `);
  }

  newsList.push('</ul>');

  container.innerHTML = newsList.join('');
}

function newsDetail() {
  const id = location.hash.substr(1);
  const newsContent = getData(CONTENT_URL.replace('@id', id))

  container.innerHTML = `
    <h1>${newsContent.title}</h1>

    <div>
      <a href="#">목록으로</a>
    </div>
  `;
}

function router() {
  const routePath = location.hash;

  if (routePath === '') {
    newsFeed();
  } else {
    newsDetail();
  }
}

window.addEventListener('hashchange', router);

router();
페이지 구현
페이지 구현 고려 할 사항은 우선, 현재 페이지를 변수로 설정해야 한다.
변수는 글 목록, newsFeed 함수 내부가 아닌 외부에 변수를 만들어야 한다.
newsFeed 함수에 페이지 변수를 초기값 1로 저장 할 경우 2페이지에서 내용을 보고 목록보기를 눌렀을때 1페이지로 돌아온다. 따라서 2페이지가 표시되기 위해서는 여러 함수가 접근 하는 정보를 설정해야 한다. 공유되는 자원을 store 변수로 설정한다.
이전 페이지, 다음페이지, 네비게이션 UI가 필요하다.
push로 네비게이션을 만들어 주고 그런 다음 페이지 정보를 넣어준다.
해시를 설정할 때 글 내용을 보는 해시인지, 글 페이징을 하는 해시인지 구분이 필요하다.
그래서 다음과 같이 구분하여 설정한다.
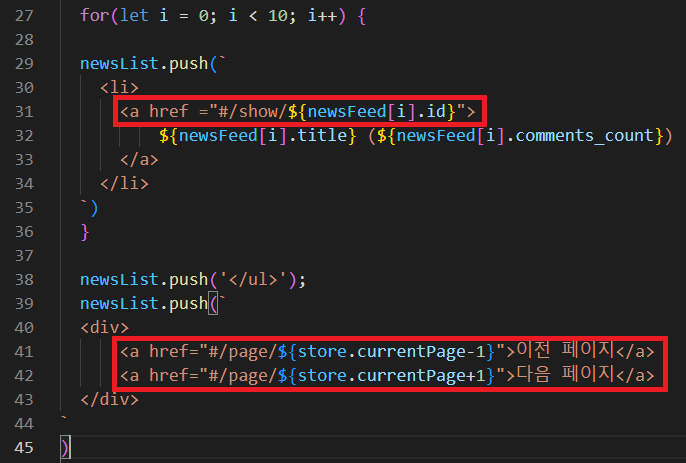
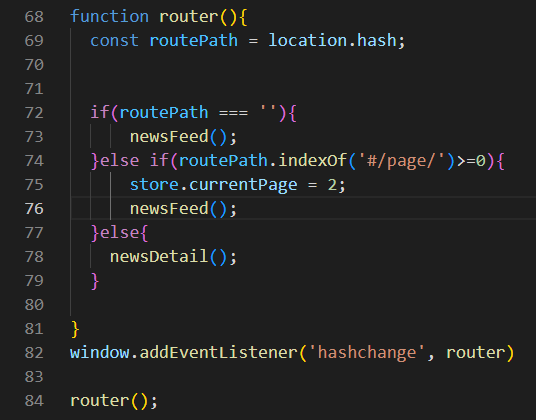
이전 페이지 다음 페이지를 클릭했을 때, 페이지에 해당하는 목록이 표시되도록, 다음과 같이 라우터 함수를 변경한다.
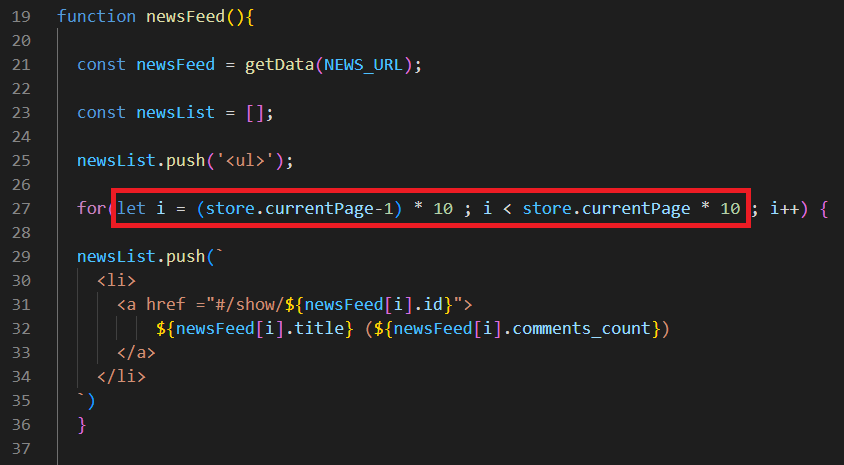
newsFeed의 for문을 변경한다.
페이지(currentPage)가 1일때, 0 ~ 19
페이지가 2일때, 20~39 까지 표시
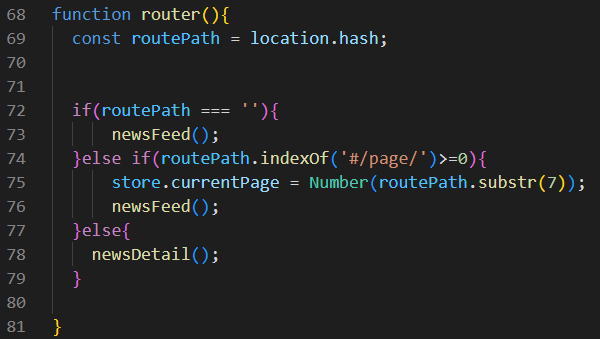
currentPage는 숫자로 되어 있어야 하는데, routePath.substr(7) 이렇게만 사용할 경우, 문자열이 반환되어 기존 currentPage와 합쳐지는 문제가 발생. 따라서 숫자로 바꿔주어야 한다. Number()함수를 이용한다.
페이지를 이동할때 store에 변경된 페이지 정보가 저장되었지만, newsDetail에서 되돌아 가는 페이지를 명시해 준다.
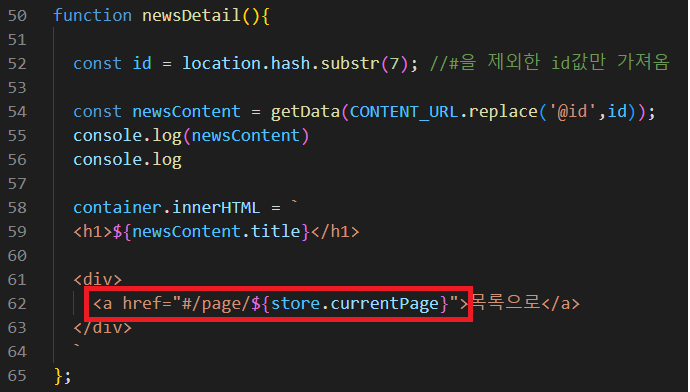
1 페이지에서 이전 페이지 버튼을 누르면 /page/0 이라고 버그가 생기는데 이를 방지하기 위해 다음과 같이 설정한다.

const container = document.getElementById('root');
const ajax = new XMLHttpRequest();
const content = document.createElement('div');
const NEWS_URL = 'https://api.hnpwa.com/v0/news/1.json';
const CONTENT_URL = 'https://api.hnpwa.com/v0/item/@id.json'
const store = {
currentPage : 1,
};
function getData(url){
ajax.open('GET', url, false);
ajax.send();
return JSON.parse(ajax.response);
}
function newsFeed(){
const newsFeed = getData(NEWS_URL);
const newsList = [];
newsList.push('<ul>');
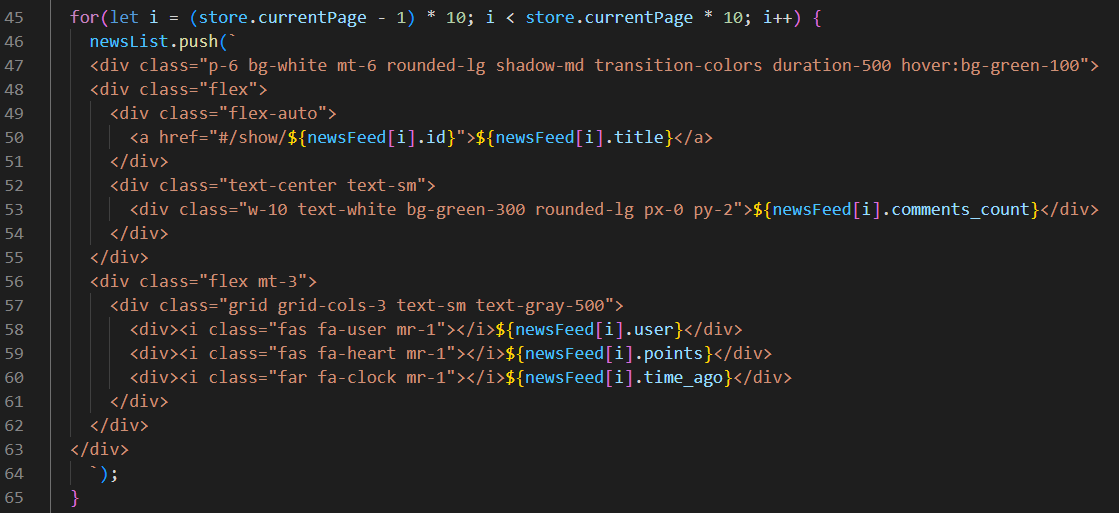
for(let i = (store.currentPage-1) * 10 ; i < store.currentPage * 10 ; i++) {
newsList.push(`
<li>
<a href ="#/show/${newsFeed[i].id}">
${newsFeed[i].title} (${newsFeed[i].comments_count})
</a>
</li>
`)
}
newsList.push('</ul>');
newsList.push(`
<div>
<a href="#/page/${store.currentPage > 1 ? store.currentPage - 1 : 1}">이전 페이지</a>
<a href="#/page/${store.currentPage+1}">다음 페이지</a>
</div>
`
)
container.innerHTML = newsList.join('');
}
function newsDetail(){
const id = location.hash.substr(7); //#을 제외한 id값만 가져옴
const newsContent = getData(CONTENT_URL.replace('@id',id));
console.log(newsContent)
console.log
container.innerHTML = `
<h1>${newsContent.title}</h1>
<div>
<a href="#/page/${store.currentPage}">목록으로</a>
</div>
`
};
function router(){
const routePath = location.hash;
if(routePath === ''){
newsFeed();
}else if(routePath.indexOf('#/page/')>=0){
store.currentPage = Number(routePath.substr(7));
newsFeed();
}else{
newsDetail();
}
}
window.addEventListener('hashchange', router)
router();문자열 코드는 DOM API로 구현한 코드보다 보기 편하지만, 이 또한 내용이 많아지면 구조를 파악하기 어렵다. 따라서 앞서 문자열로 구현한 HTML을 템플릿 코드로 구현하기로 한다. 전체적인 구조를 템플릿으로 구현한 후, 변화하는 부분을 마킹하고 이후에 replace 함수로 치환한다.
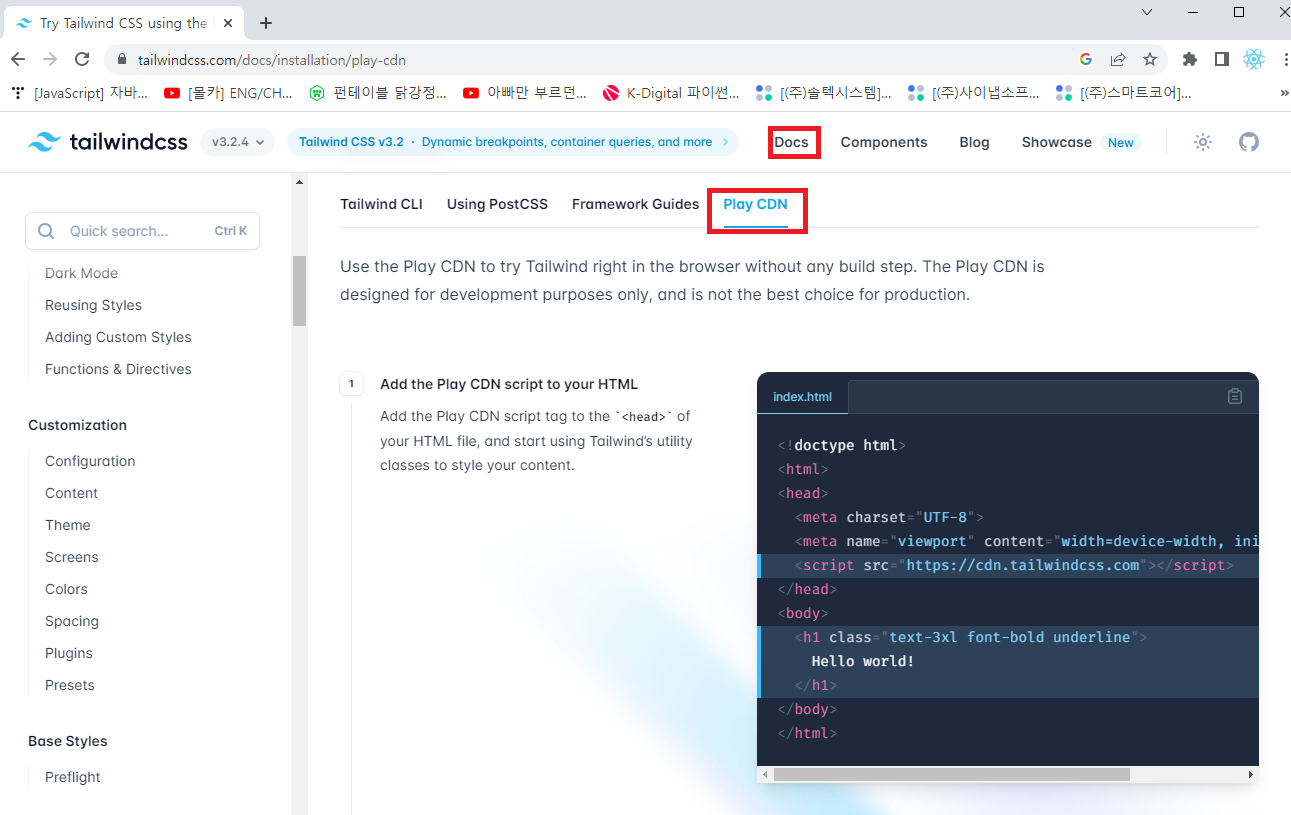
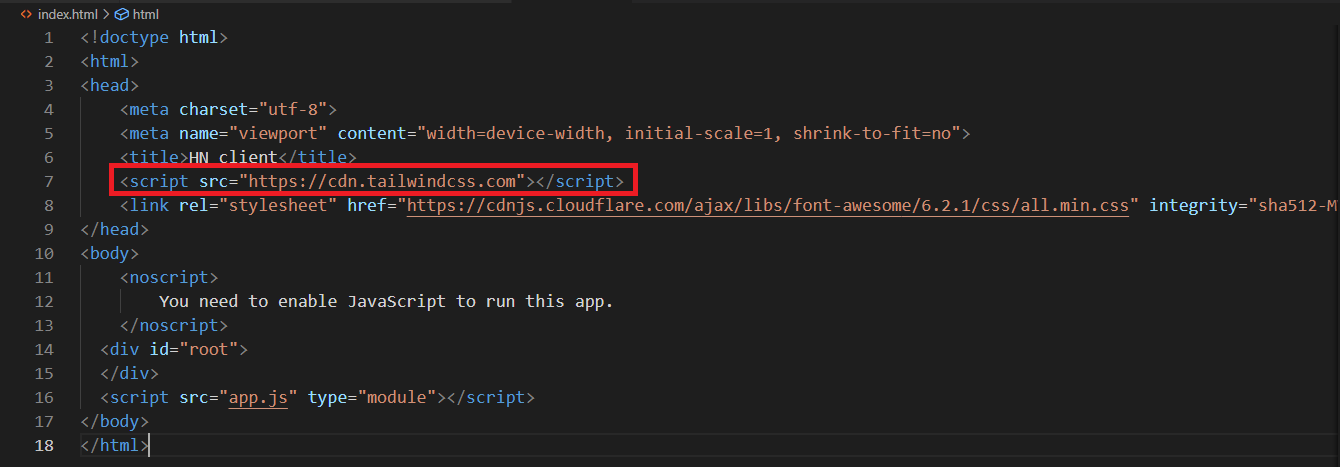
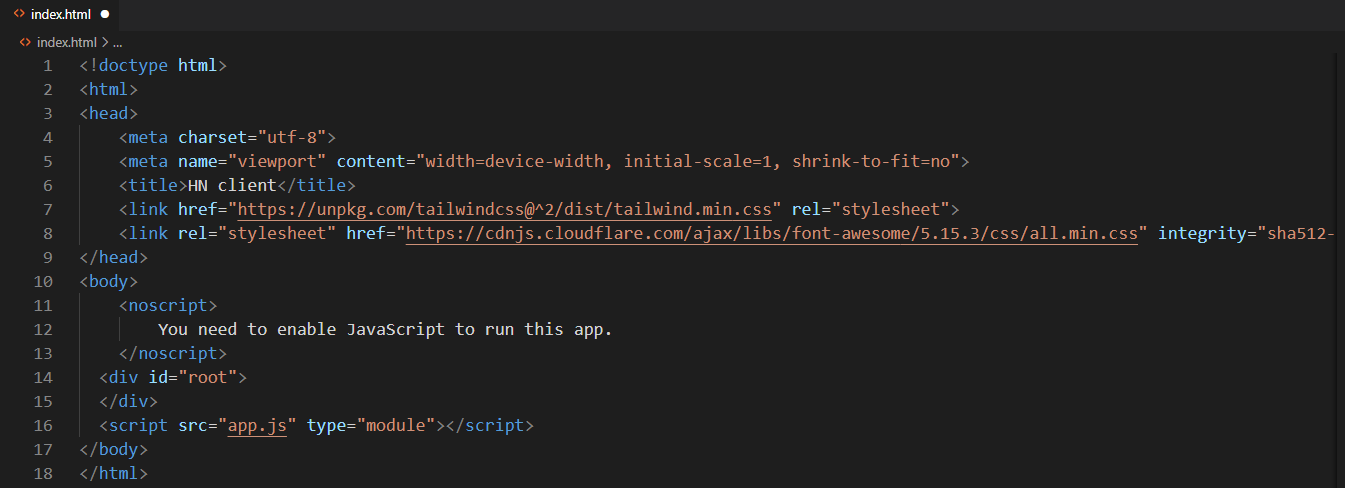
다음으로 디자인을 적용하기 위해 html에 tailwindcss 링크를 붙여 넣는다.
const container = document.getElementById('root');
const ajax = new XMLHttpRequest();
const content = document.createElement('div');
const NEWS_URL = 'https://api.hnpwa.com/v0/news/1.json';
const CONTENT_URL = 'https://api.hnpwa.com/v0/item/@id.json';
const store = {
currentPage: 1,
};
function getData(url) {
ajax.open('GET', url, false);
ajax.send();
return JSON.parse(ajax.response);
}
function newsFeed() {
const newsFeed = getData(NEWS_URL);
const newsList = [];
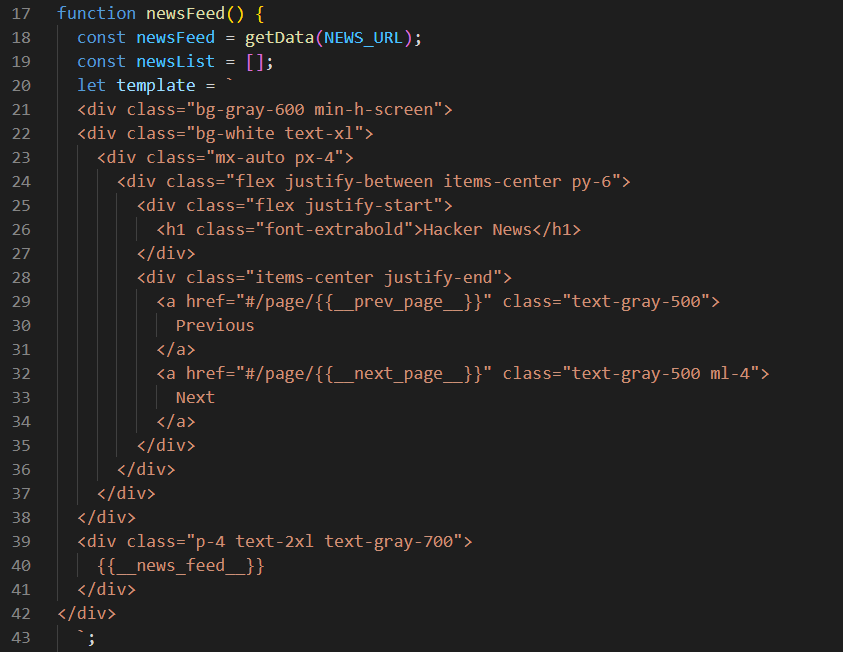
let template = `
<div class="container mx-auto p-4">
<h1>Hacker News</h1>
<ul>
{{__news_feed__}}
</ul>
<div>
<a href="#/page/{{__prev_page__}}">이전 페이지</a>
<a href="#/page/{{__next_page__}}">다음 페이지</a>
</div>
</div>
`;
for(let i = (store.currentPage - 1) * 10; i < store.currentPage * 10; i++) {
newsList.push(`
<li>
<a href="#/show/${newsFeed[i].id}">
${newsFeed[i].title} (${newsFeed[i].comments_count})
</a>
</li>
`);
}
template = template.replace('{{__news_feed__}}', newsList.join(''));
template = template.replace('{{__prev_page__}}', store.currentPage > 1 ? store.currentPage - 1 : 1);
template = template.replace('{{__next_page__}}', store.currentPage + 1);
container.innerHTML = template;
}
function newsDetail() {
const id = location.hash.substr(7);
const newsContent = getData(CONTENT_URL.replace('@id', id))
container.innerHTML = `
<h1>${newsContent.title}</h1>
<div>
<a href="#/page/${store.currentPage}">목록으로</a>
</div>
`;
}
function router() {
const routePath = location.hash;
if (routePath === '') {
newsFeed();
} else if (routePath.indexOf('#/page/') >= 0) {
store.currentPage = Number(routePath.substr(7));
newsFeed();
} else {
newsDetail()
}
}
window.addEventListener('hashchange', router);
router();템플릿으로 구현 방식도 단점이 분명 존재하는데 치환되는 마킹 만큼 replace 함수를 작성해야 한다는 점이다.
그러므로 handlebars와 같은 템플릿 라이브러리를 사용하여 템플릿을 최적화 할 수 있다.
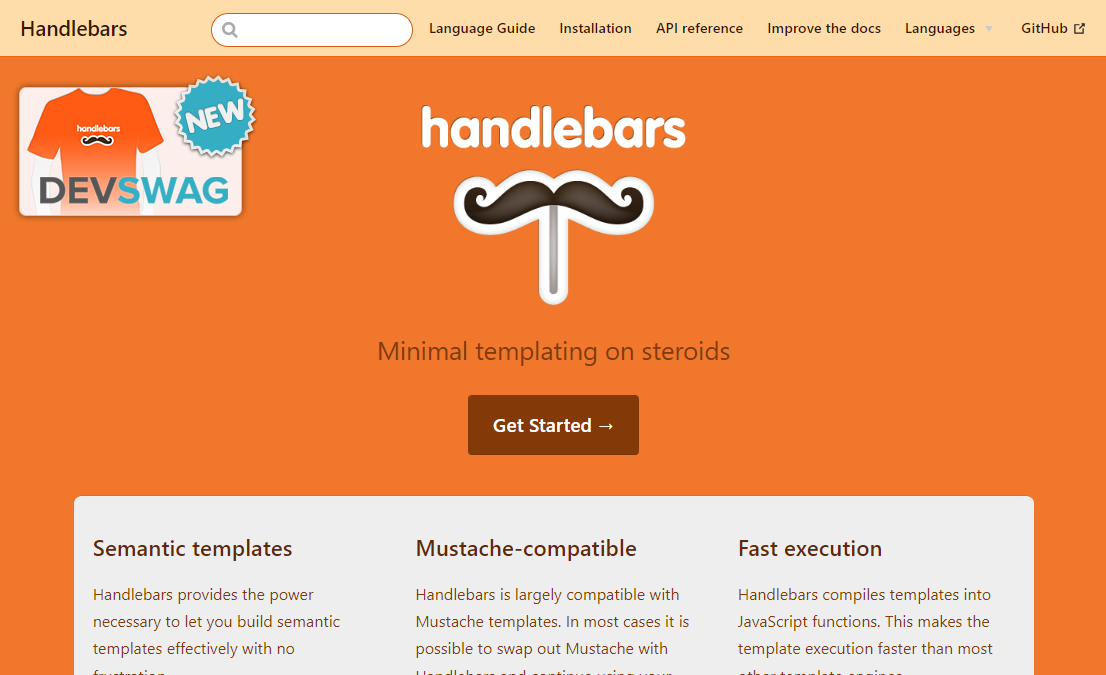
handlebars를 활용한 작업은 구현예정
본격적으로 UI를 입히는 작업을 진행하자. UI 작업은 디자인, 아이콘, 폰트의 요소로 구성되는데,
Fontawesome을 이용하면, 폰트와 아이콘 중에서 아이콘에 해당하는 부분을 폰트 방식으로 제공해서 실제로 이미지로 사용하는 것이 아니라 가볍고 빠르게 사용할 수 있다.
https://cdnjs.com/libraries/font-awesome 에서 font-awesome을 입력 후 검색-> all.min.css(최신 버전) </>아이콘 클릭
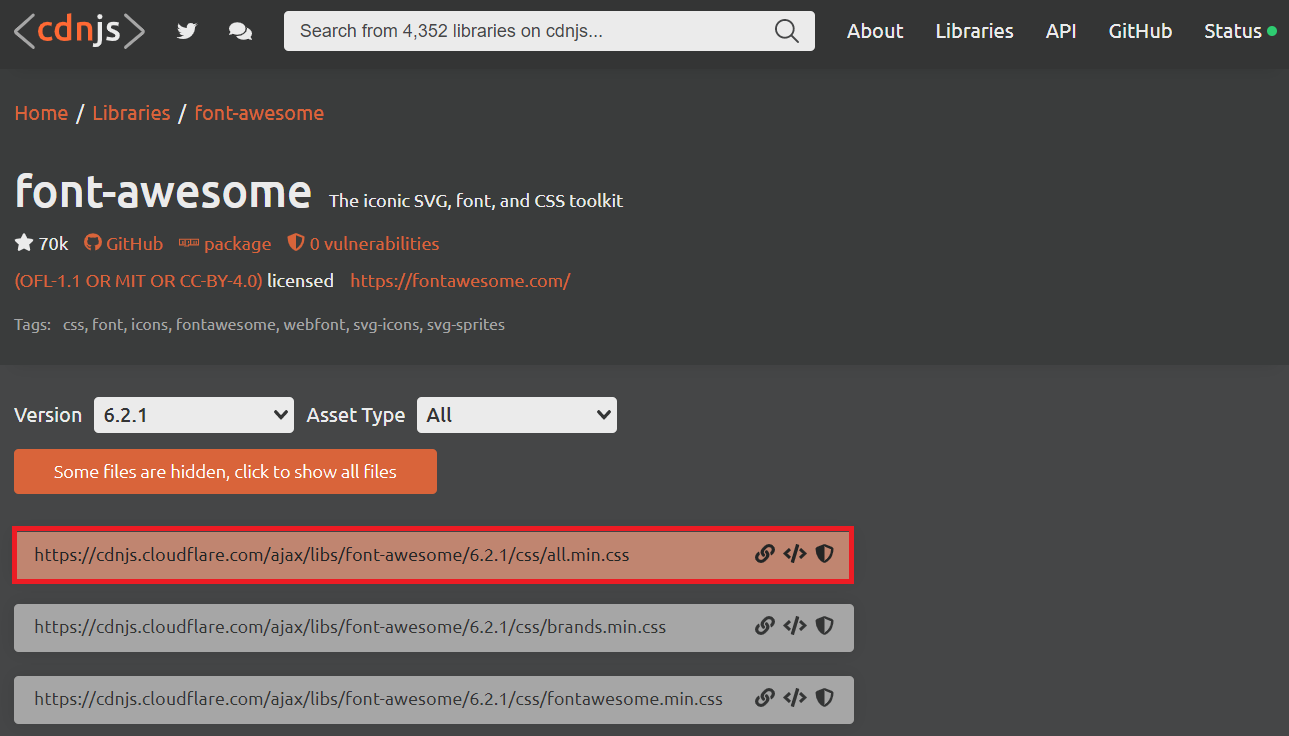
복사된 링크를 html에 링크시킨다.
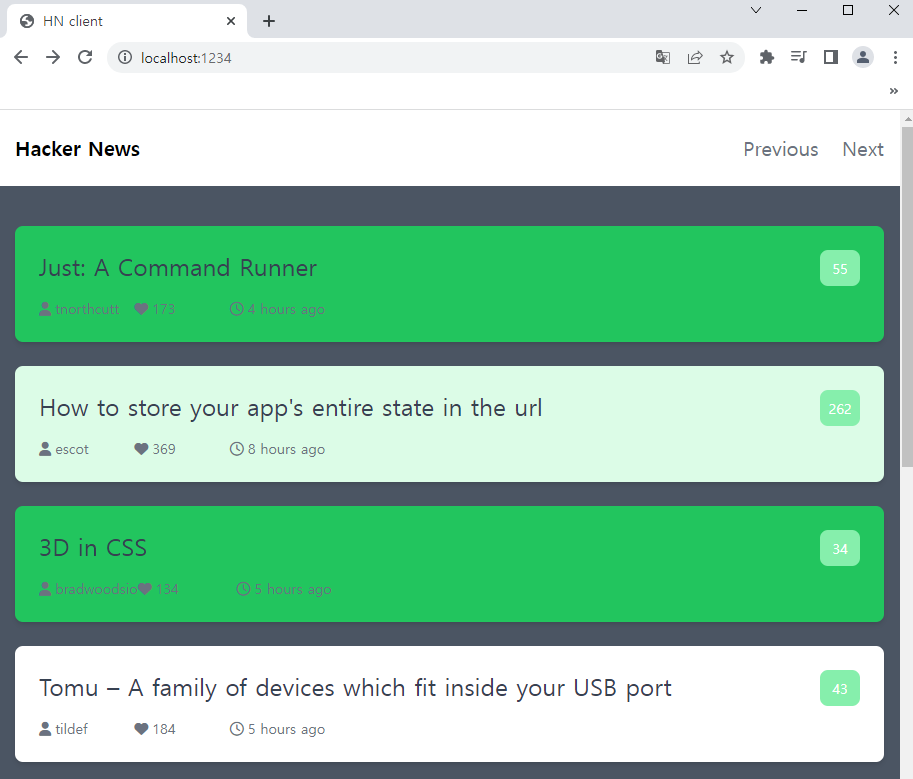
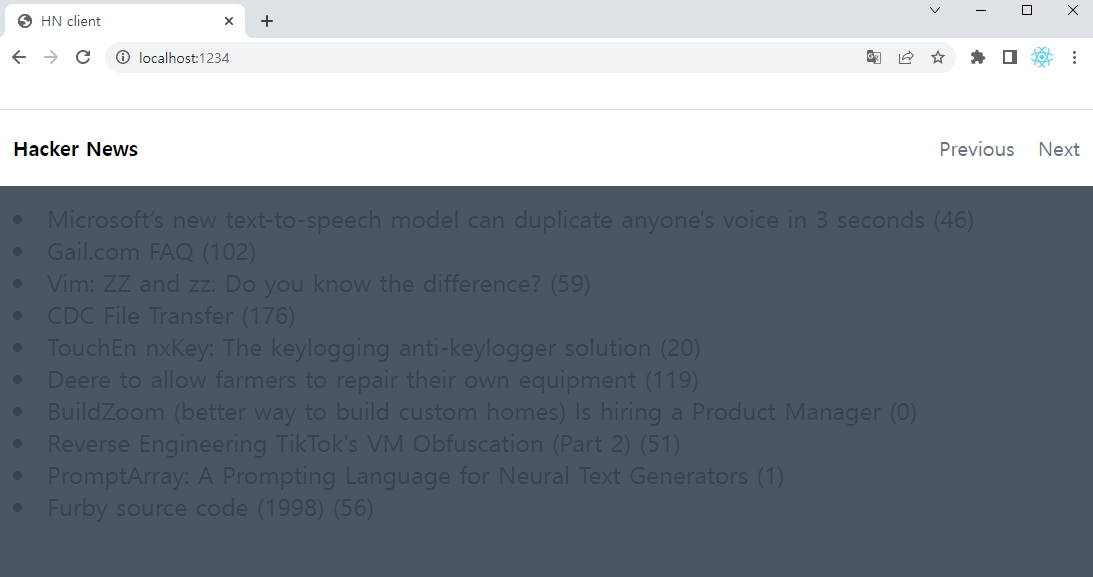
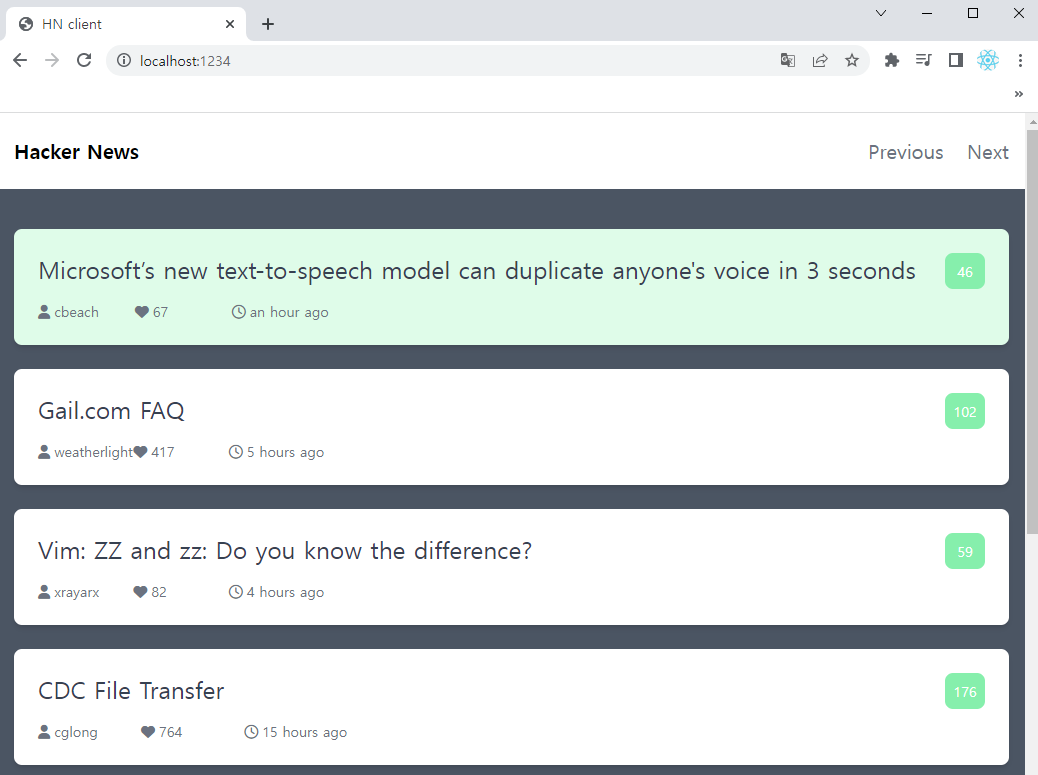
리스트의 디자인을 변경하도록 하자.
타이틀 뷰 네비게이션이 생겼고, 리스트의 디자인이 변경 되었다.
목록화면에 대한 디자인도 변경한다.(li 태그)
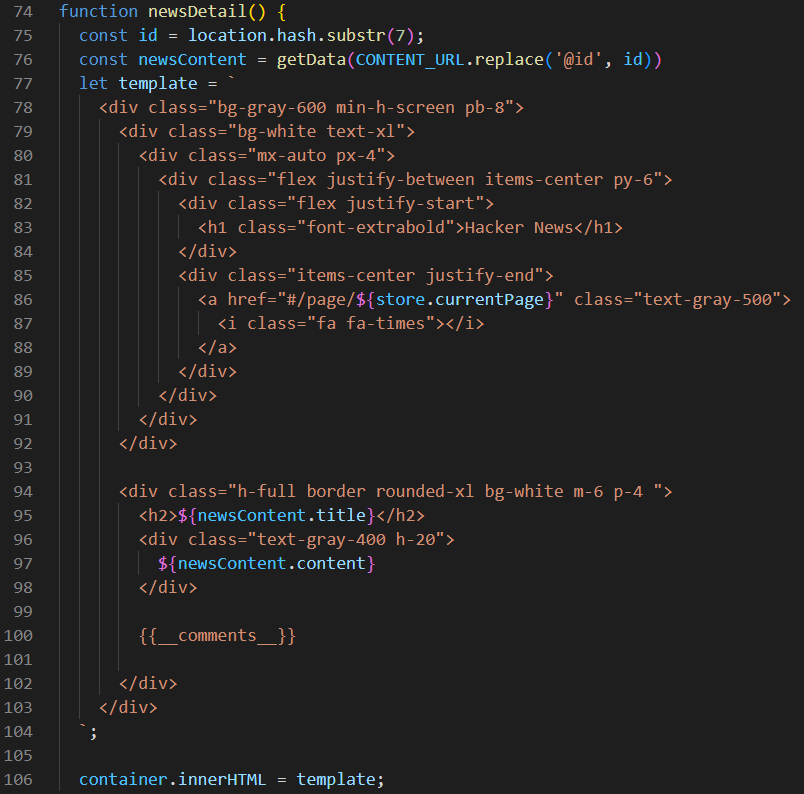
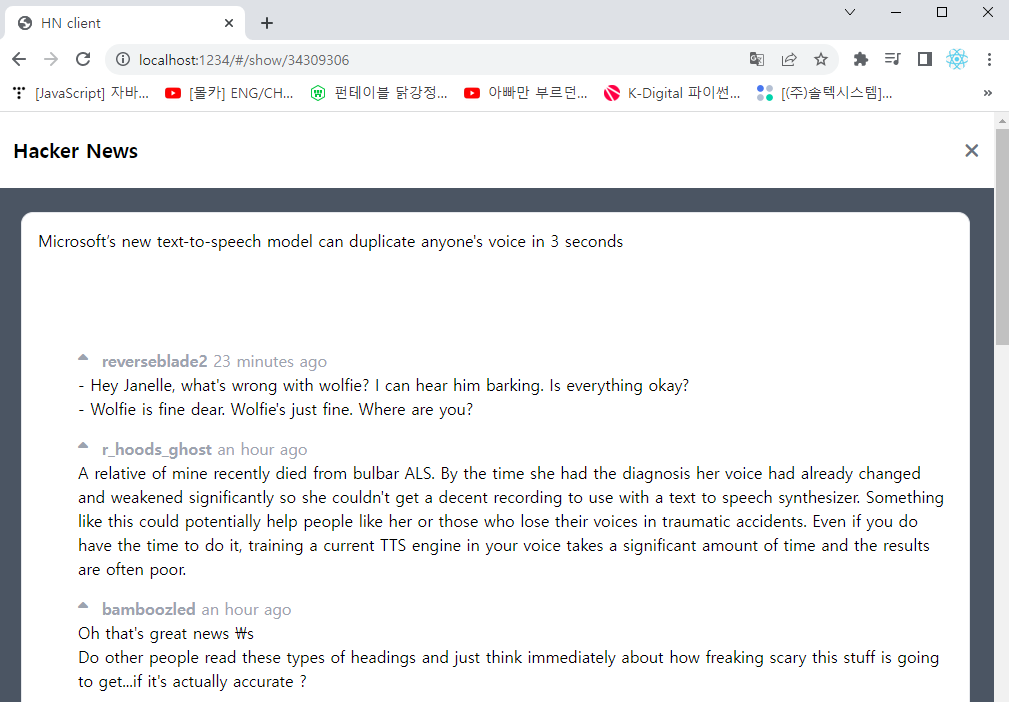
글 내용도 템플릿 방식으로 변경해보자.

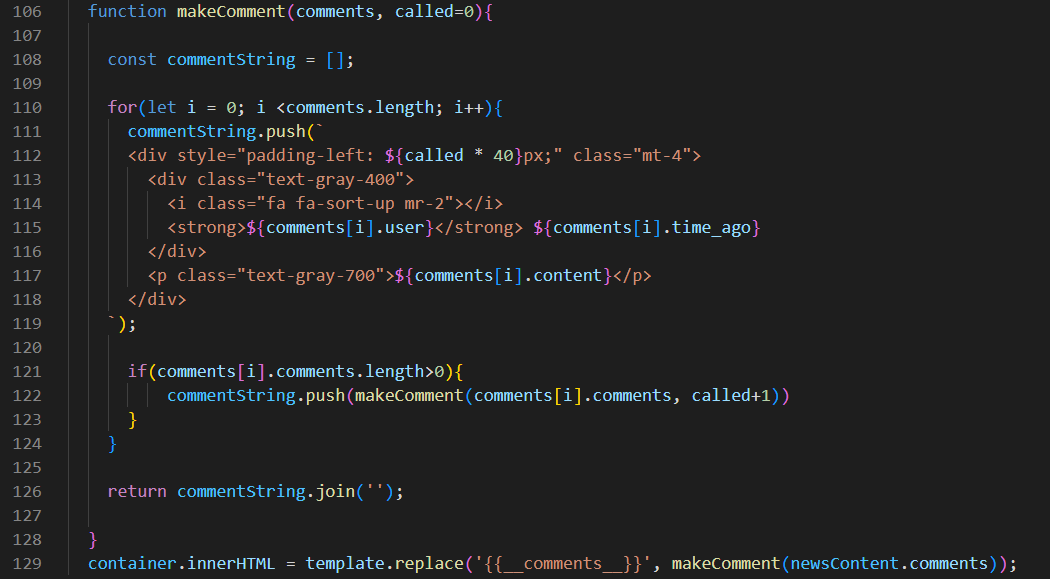
comment의 데이터 구조가 어떻게 되는지 살표보자. comments 하위에 comment 정보(대댓글)가 반복 되는 구조이다. 맨 상위 comments을 열었을때 몇 단계의 comments가 존재하는지 알 수없다. 각각의 comment의 정보는 똑같으므로 처리하는 로직, 코드도 동일하므로 함수로 구현하도록 하자.
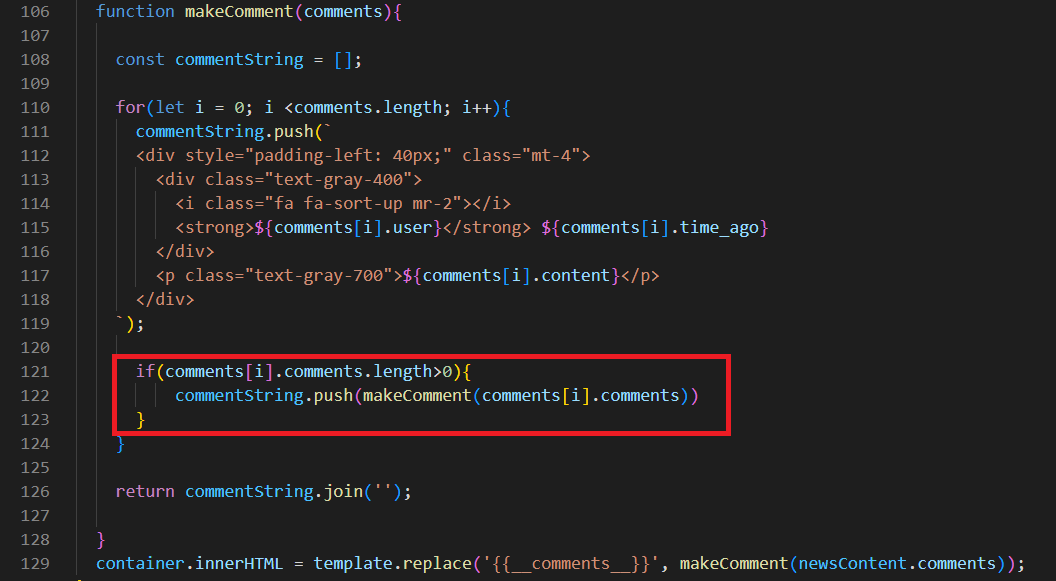
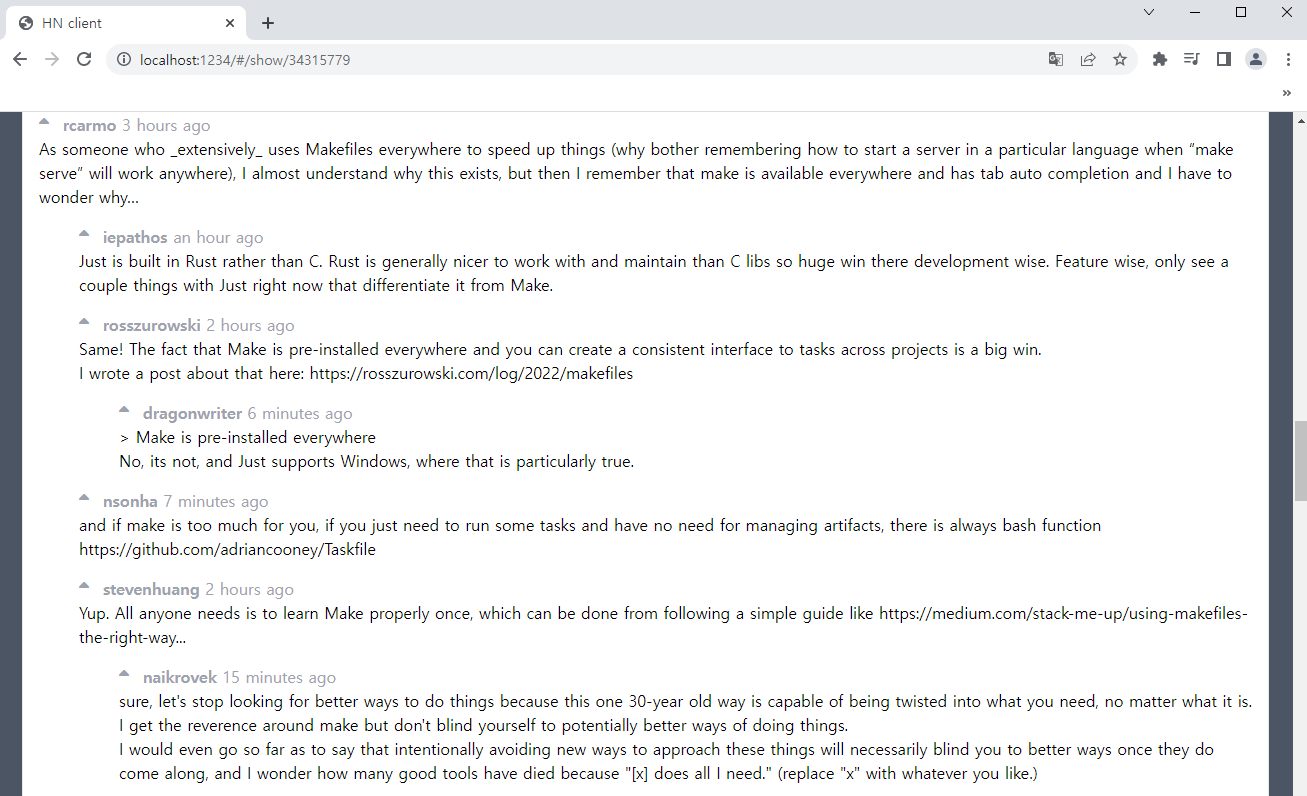
comment가 표시되었다. 하지만 댓글의 depth를 구별하기 위해서 depth에 따른 margin을 다르게 주도록 하자.
margin이 잘 적용되었다.
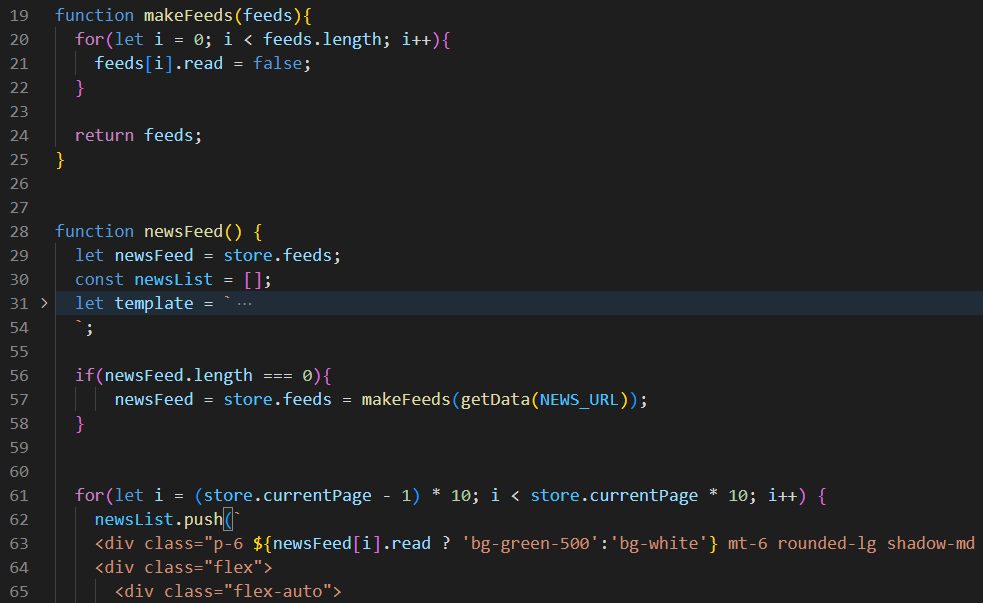
목록에 있는 글을 선택하여 읽었을 경우, 내가 봤던 글인지 아닌지 목록에서 확인할 수가 없다. 봤던 것을 마킹하여 UI적으로 표현하도록 하자.
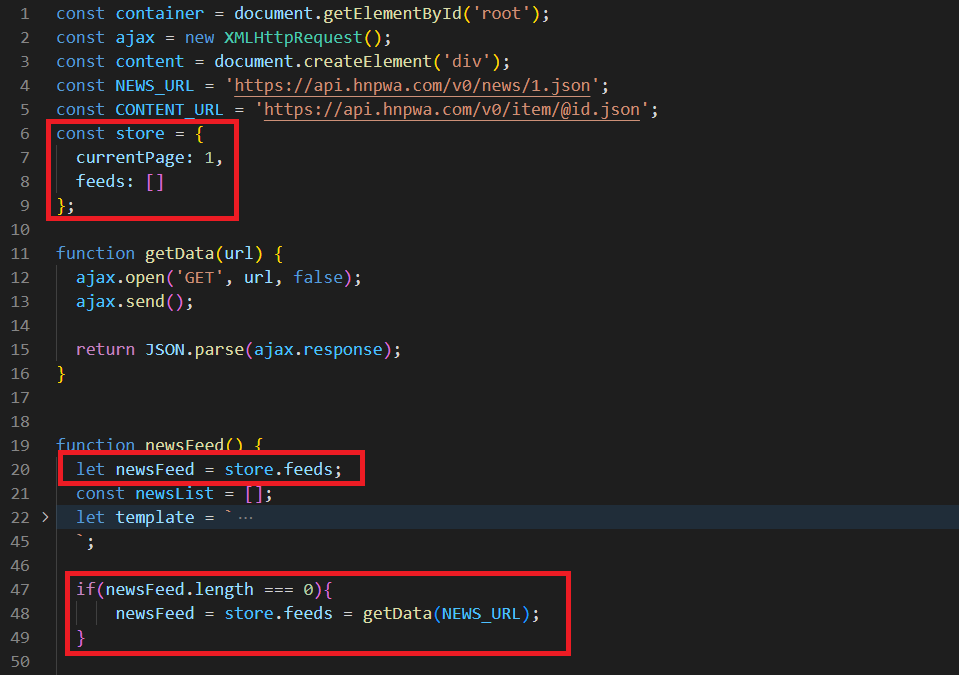
먼저 newsFeed 함수를 살펴보면, 내부에 getData 함수가 존재해 페이지가 변경 될때마다 매번 호출한다. getData 함수를 호출하고 store에 전역 상태로 저장해 글 목록과 내용에서 참조할 수 있도록 한다.
글 목록을 store의 feeds 변수로 사용하되, feeds 값이 없을 경우 목록을 가져오는 함수(getData)를 호출한다.
목록에 읽었는지 여부 속성(read)을 추가한다. 그리고 newsDetail 함수 내부에 읽은 글의 상태를 true로 변경하는 함수를 작성한다.
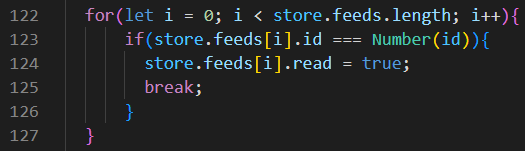
다시 새로고침을 하면 읽은 글의 색상이 변경된것을 확인할 수 있다.