
우리는 백엔드를 긴 기간 동안 사용하려면 데이터베이스를 사용하거나 cloud-based storage를 사용해야 하는 것은 필연적이다. 이를 위해서는 DB와 상호작용을 하는 Akka Actor가 필요하다.
기존 액터들에는 다음과 같은 문제점이 존재한다.
1. 이전 state들을 어떻게 쿼리를 날려 가져오는가
2. 어떠한 작업의 진행 과정을 어떻게 추적할 것인가 (예. 온라인 쇼핑몰에서 주문 상품의 추적, 채팅 메시지)
Persistent Actor는 위의 고민점들을 해결해준다. 더불어, 액터가 재시작되었을 때 이전의 이벤트들이 replay되며 잘 복구되는 특징을 가진다.
이러한 Persistent Actor를 간단히 구현하기 위해서는 다음과 같은 과정을 가진다.
1. application.conf 설정
akka.persistence.journal.plugin = "akka.persistence.journal.leveldb" # simple google lightweight database
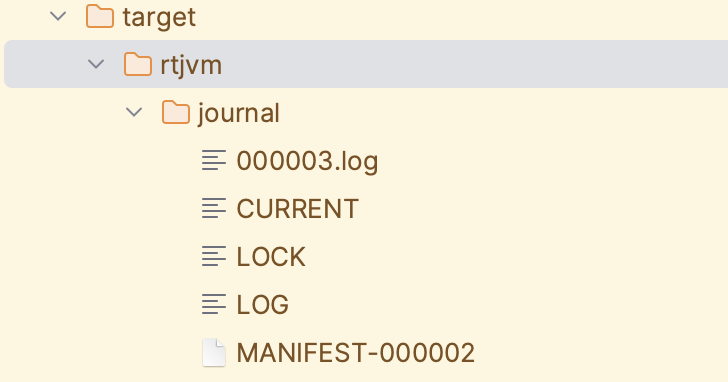
akka.persistence.journal.leveldb.dir = "target/my-app/journal"위와 같은 라인들을 넣는다. 이때, akka.persistence.journal.leveldb는 가벼운 db이고, 디렉터리는 src와 같은 레벨에 있는 target 디렉터리로 지정하였다.
위의 levelDB를 사용하기 위해서는 build.sbt에 있는 다음과 같은 Dependency들이 필요하다.
lazy val leveldbVersion = "0.7"
lazy val leveldbjniVersion = "1.8"

libraryDependencies ++= Seq(
  "org.iq80.leveldb"            % "leveldb"          % leveldbVersion,
  "org.fusesource.leveldbjni"   % "leveldbjni-all"   % leveldbjniVersion
)
위와 같이 levelDB에 관한 config도 설정해준다.
2. PersistentActor 작성
persistent actor를 작성하기 위해서는 PersistentActor를 상속 받아야 한다.
class Accountant extends PersistentActorPersistentActor는 receive라는 메시지 핸들러 하나만 구현하는 것과 달리, 3가지를 구현해야 한다. 액터가 복구되었을 시 실행되는 receiveRecover: Receive, 일반 메시지 핸들러와 같은 기능을 하는 receiveCommand: Receive, 그리고 Persistent store에서 해당 Persistent Actor를 유일하게 구분해주는 식별자인 persistentId:String을 구현해야 한다.
따라서 최초의 형태는 다음과 같을 것이다.
class Accountant extends PersistentActor with ActorLogging {
	override def persistentId: String = ???
    override def receiveRecover: Receive = ???
    override def receiveCommand: Receive = ???
}
이제 위의 3가지 추상 메서드를 구현해야 한다.
3. 추상 메서드 구현
2번에서 언급한 receiveCommand, receiveRecover, persistentId를 구현할 것이다. persistentId는 식별자이며, 간단한 프로그램이므로 직관적으로 설정할 것이다.
필자는 Accountant 액터가 Invoice(recipient:String, date: Date, amount:Int)를 받으면 해당 요청을 처리한 후 총 amount와 해당 Invoice의 ID를 매겨 InvoiceRecorded(id:Int, recipient:String, date:Date, amount:Int) 형태의 이벤트로 Persist시킬 것이다. 또한, 다량으로 Invoice를 등록할 수 있도록 InvoiceBulk(invoices:List[Invoice])를 구현할 것이다.
그렇다면, 일반 메세지 핸들러 역할인 receiveCommand에는 Invoice와 InvoiceBulk 형태를 받는다면 해당 데이터들을 InvoiceRecorded 타입으로 바꾸어 저장하는 로직이 필요하다.
또한, receiveRecover에서는 저장된 InvoiceRecorded 타입의 이벤트를 리플레이하며 실행할 동작들을 정의한다. 필자는 로깅을 하며 리플레이되는 이벤트들을 출력하는 형식으로 코드를 구현할 예정이다.
(1) persistentId 구현
override def persistentId:String = "simplePersistentActor"필자는 예시를 위한 아주 간단한 프로그램을 구현하므로 직관적인 이름을 사용하여 구현을 하였다.
(2) receiveCommand 구현
가장 먼저 위에서 서술한 로직을 구현하기 위한 companion object를 구현할 것이다.
object Accountant {
	case class Invoice(recipient:String, date: Date, amount: Int)
    case class InvoiceBulk(invoices:List[Invoice])
    case class InvocieRecorded(id:Int, recipient:String, date:Date, amount: Int)
}
동반 객체에 필요한 데이터들을 선언한 후, 위의 데이터 타입을 다루도록 recieveCommand 내부에 persist(event)(callback)과 persistAll(event)(callback)을 사용한다.
var latestInvoiceId = 0
var totalAmount = 0

override def receiveCommand:Receive = {
	case Invoice(recipient, date, amount) =>
    	log.info(s"Receive invoice for amount: $amount")

        val event = InvocieRecorded(latestInvoiceId, recipient, date, amount)
        persist(event){
        	e =>
            	latestInvoiceId += 1
                totalAmount += e.amount

                log.info(s"Persisted $e as invoice #${e.id}, for total amount $totalAmount")
        }

   	case InvoiceBulk(invoices) =>
    	val ids = latestInvoiceId to (latestInvoiceId + invoices.size)

        val events = invoices.zip(ids).map(pair =>
        	val invoice = pair._1
            val id = pair._2

            InvoiceRecorded(id, invoice.recipient, invoice.date, invoice.amount)
        )

        persistAll(events){
        	e =>
            	latestInvoiceId += 1
                totalAmount += e.amount

                log.info(s"Persisted SINGLE as invoice #${e.id}, for total amount $totalAmount")
        }
}
이때 유의해야 할 점은, persist와 persistAll은 Future 내부에서 선언되면 안 된다는 점이다. 이는 액터의 캡슐화를 해칠 수 있으므로 반드시 지켜야 한다.
persist와 persistAll은 데이터를 persist하는 것인데, 실제 persist가 호출되는 시점과 persist 내의 callback이 실행되는 시점이 다르다. non-blocking이며 비동기적으로 실행되지만, 호출 시점과 실제 콜백 실행 시점 사이의 갭에 들어온 메시지들은 모두 stash된다는 점 역시 유의해야 한다.
또한, persistAll은 개별 event에 대해 독립적(atomically)으로 실행된다는 점 역시 유의해야 한다.
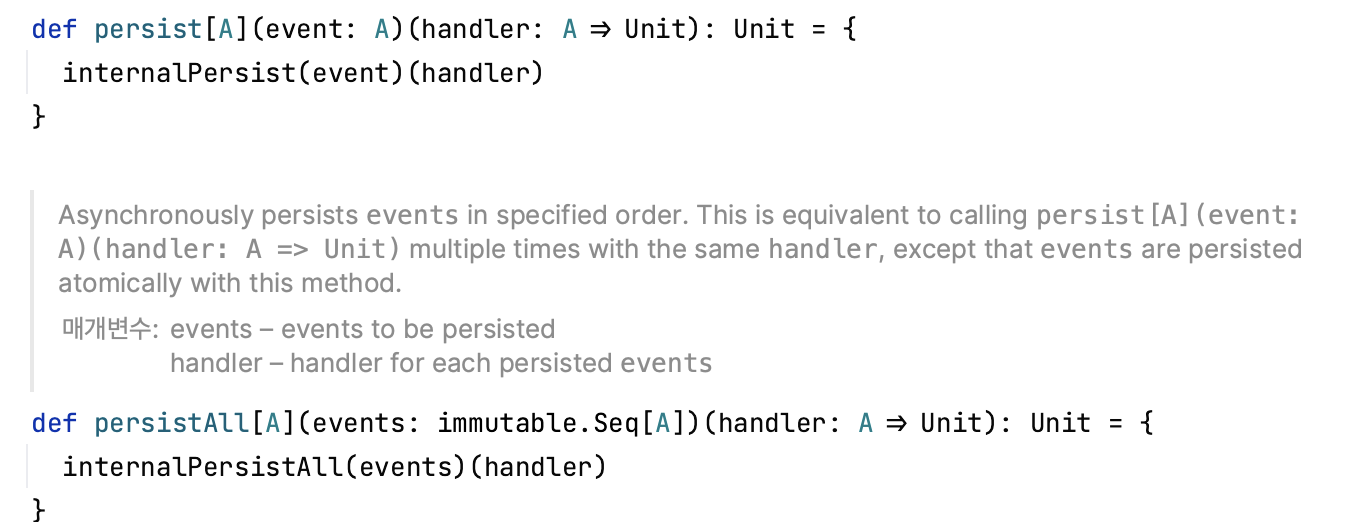
위와 같이 persist와 persisteAll에는 2개의 인자가 들어간다. 첫 번째 인자는 persist를 실행할 event(들)이며, 두 번째는 persist를 진행하며 실행할 동작임을 유의한다.
(3) receiveRecover 구현
우리는 InvoiceRecorded형태로 데이터를 persist했다. 따라서 InvoiceRecorded를 받았을 때를 처리해야 한다.
Actor가 재시작/시작 됐을 때 리플레이 되는 것이므로 로직을 그대로 구현하고 로그를 남길것이다. 즉, receiveCommand의 persist 로직을 따라가도록 구현하는 것이 좋다.
  override def receiveRecover: Receive = {
    case InvoiceRecorded(id, _, _, amount) =>
      log.info(s"Recovered invoice #$id for amount $amount, total amount: $totalAmount")
      latestInvoiceId = id
      totalAmount+=amount
  }
우리는 persist와 persistAll 로직에서 latestInvoiceId를 증가시키고 totalAmount라는 지역 변수에 해당 이벤트의 amount를 더하는 로직을 진행하였다. 그리고 이를 그대로 구현한 것이다.
3. persist Failure 관련 메서드 작성
만약 persist가 fail되면 어떻게 될까? 이를 다루는 메서드 역시 존재한다. onPersistFailure와 onPersistReject가 그 메서드이다. 둘의 차이점이라면, onPersistFailure는 persist하는 과정이 실패하여 액터가 supervisor strategy와 관계 없이 STOP이 된다. 그 이유는 persist 중 실패했기 때문에 inconsistent할 수 있으므로 신뢰되지 못하기 때문이다.
반면, onPersistReject는 Journal에서 실패한 것이므로 일관성에 대한 신뢰 문제가 발생하지 않는다. 따라서 액터는 RESUMED가 된다.
  override def onPersistFailure(cause: Throwable, event: Any, seqNr: Long): Unit = {
    log.error(s"Fail to persist $event because of $cause")
    super.onPersistFailure(cause, event, seqNr)
  }

  override def onPersistRejected(cause: Throwable, event: Any, seqNr: Long): Unit = {
    log.error(s"Fail to Persist $event because of $cause")
    super.onPersistFailure(cause, event, seqNr)
  }
사실 매우 간단한 코드라 실패할 일이 거의 없으므로 위와 같이 작성해주었다.
이제 코드를 실행하도록 작성할 것이다.
object PersistentActors extends App {
  val system = ActorSystem("PersistentActors")
  val accountant = system.actorOf(Props[Accountant], "simpleAccountant")

  (1 to 10).foreach(num => accountant ! Invoice("the sofa company", new Date, num * 1000))

}
위와 같은 코드를 실행하면 밑과 같은 실행 결과를 얻는다.

위와 같이 로그가 잘 찍히며, applicaiton.conf에서 설정한 디렉터리를 보면 관련 로그도 잘 생성된 것을 알 수 있다.
그리고 PersistentActors를 중지시키고 재 시작시키면 다음과 같이 Recover가 되어 이벤트들이 Replay 되며, App에서 실행된 이벤트들이 추가적으로 실행되는 것을 알 수 있다.
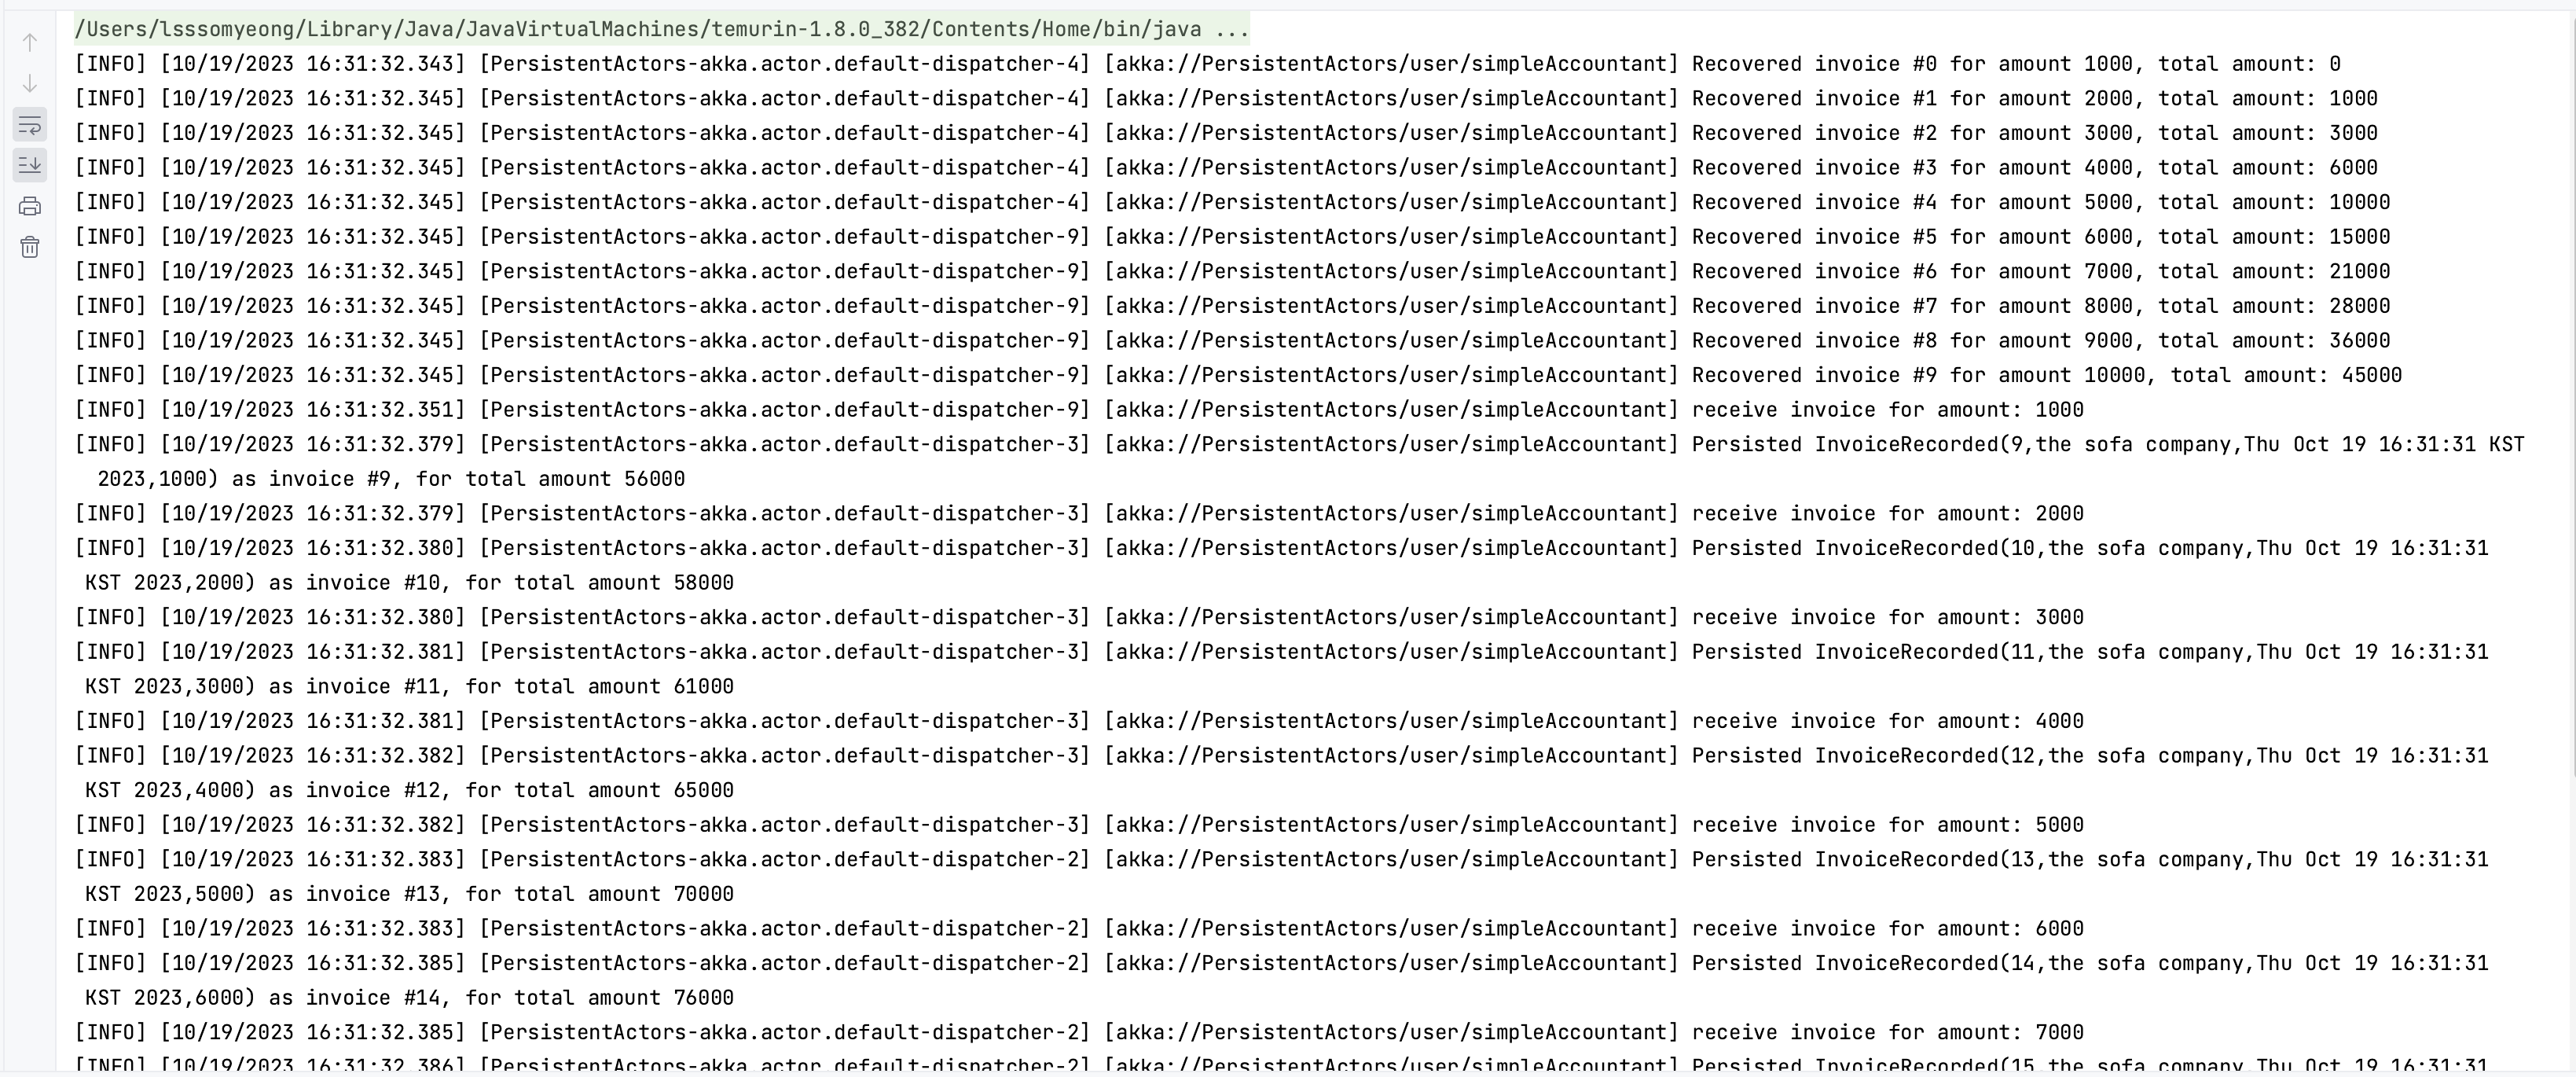
Recovered가 붙은 로그에서 첫번째 실행 결과들이 잘 replay되고 있는 것을 알 수 있다. 또한, 그 밑에는 다시 10번의 Invoice 메시지가 전송되도록 실행되는 것이 보인다.
