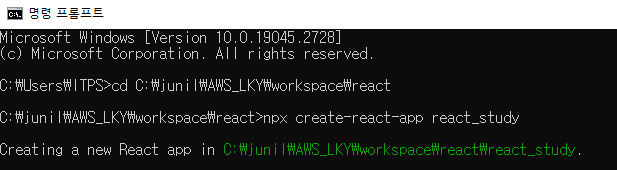
작업 디렉토리에 새파일 생성
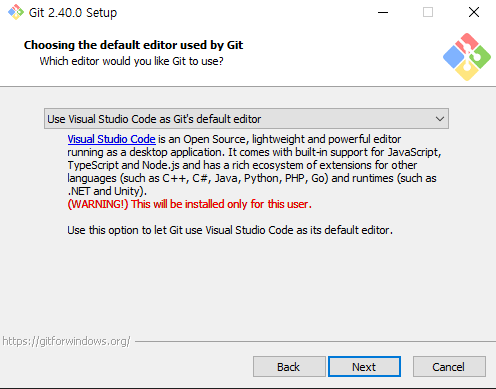
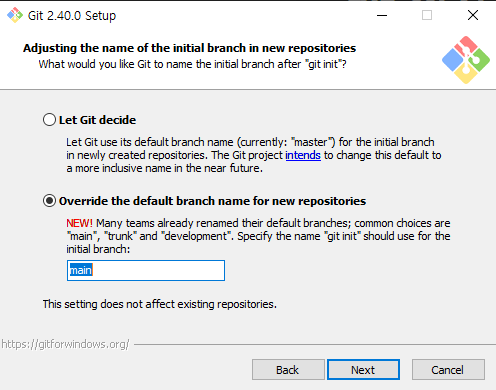
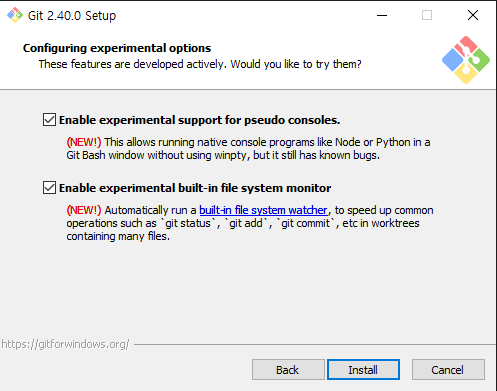
git 설치

git 사용자 등록
git config --global user.name
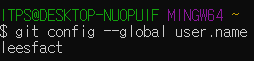
git config --global user.

git bash 사용
git init
git status
git add .
git status
git commit -m ""
git log
git remote add origin https://github.com/leesfact/react.git
git push -u origin main
clone 할 때
git clone -b main https://github.com/leesfact/react.git
Router
- React 기반의
SPA (Single Page Application)에서 사용되는 라우팅 라이브러리 - SPA는 페이지 로딩 없이 동적으로 컨텐츠를 업데이트하는 웹 어플리케이션을 말함
- React Router는 이러한 SPA에서 브라우저의 URL 경로와 연관된
컴포넌트를 렌더링할 수 있도록 지원
npm add react-router-dom
필수 라이브러리 설치
Auto Import
- Visual Studio Coede와 같은 개발 도구에서 자동으로 모듈 및 패키지를 가져오는 기능을 제공

Reactjs code snippets
- React 기반 어플리케이션 개발을 보다 쉽고 빠르게 할 수 있도록 도와주는 코드 스니펫 라이브러리

ESLint
- 자바 스크립트 코드에서 문제점을 찾아내고, 코드 품질을 검사하며, 일관된 코딩 스타일을 유지할 수 있도록 도와주는 오픈소스 린트 도구
Prettier - Code formatter
- 코드 포맷팅 도구로서, 코드 스타일을 일관성있게 유지하며 가독성을 높이고 유지보수성을 개선하는 데 도움을 주는 오프소스 도구
- 코드 저장 시 자동으로 코드 스타일을 정리해주며, 코드 수정과 동시에 변경된 부부만 포맷팅하여 작업 효율성을 높임

vscode-styled-components
- 스타일드 컴포넌트 문법 하이라이팅,
자동완성, 코드 스니펫 등의 편의 기능을 제공
GitLens
- Git 저장소를 더욱 효율적으로 활용할 수 있도록 도와주는 확장 프로그램

Material Icon Theme
- 파일 및 폴더 아이콘을 Google의 Material Desing 아이콘으로 대체하여, 프로젝트의 가시성과 디자인적인 통일성을 높여주는 확장 프로그램

react_study
App.js
import { Route, Routes } from "react-router-dom";
import InputSample from "./pages/InputSample/InputSample";


function Test1() {
  return (<h1>Test1</h1>)
}

function Test2() {
  return (<h1>Test2</h1>)
}

function App() {
  return (
    <>
      <Routes>
        <Route path="/t1" Component={Test1} />
        <Route path="/t2" Component={Test2} />
        <Route path="/sample/input/1" Component={InputSample} />
      </Routes>
    </>
  );
}

export default App;
index.js
import React from 'react';
import ReactDOM from 'react-dom/client';
import './index.css';
import App from './App';
import reportWebVitals from './reportWebVitals';
import { BrowserRouter } from 'react-router-dom';

const root = ReactDOM.createRoot(document.getElementById('root'));
root.render(
  <React.StrictMode>
    <BrowserRouter>
      <App />
    </BrowserRouter>
  </React.StrictMode>
);

// If you want to start measuring performance in your app, pass a function
// to log results (for example: reportWebVitals(console.log))
// or send to an analytics endpoint. Learn more: https://bit.ly/CRA-vitals
reportWebVitals();
pages > InputSample > inputSample.js
import React, { useRef, useState } from 'react';

const InputSample = () => {

    const userInfo = {
        username: '',
        password: '',
    }

    const [userInput, setUserInput] = useState(userInfo);

    //비구조 할당
    const {username, password} = userInput;

    //Ref
    const passwordRef = useRef();


    const handlerChange = (e) => {
        const { name, value } = e.target;
        setUserInput({...userInput, [name]: value});
        // [] <---key
    }

    const nextFocus = (e) => {
        if(e.keyCode === 13){
            passwordRef.current.focus();
        }
    }

    return (
        <div>
            <input
                type="text"
                onChange={handlerChange}
                onKeyUp={nextFocus}
                name="username"
            />
            <input
                type="text"
                onChange={handlerChange}
                onKeyUp={null}
                name="password"
                ref={passwordRef}
            />
            <div>username: {username}</div>
            <div>password: {password}</div>
        </div>
    );
};

export default InputSample;
React 함수형 컴포넌트 사용, 입력 상태 관리, 출력
-
useState훅 사용, 객체 형태로 초기 상태 값을 설정, setUserInput을 통해 상태값 업데이트 -
비구조 할당을 사용, username & password 값을 선언, setUserInput으로 상태값을 업데이트할 때, spread operator를 사용, 객체를 복제한 뒤 해당
name속성 값을 업데이트 -
Ref을 사용하여 password input 요소에 대한 속성을 생성, 키보드 이벤트가 일어날 경우
ref.current.focus()를 호출하여 focus 설정 -
username input 요소에 onKeyUp 이벤트 핸들러를 등록하여 엔터키를 누를 경우 password input 요소로 포커스가 이동하도록 구현
훅 이란?
- Hook은 함수형 컴포넌트에서도 상태 관리 및 React 기능을 사용할 수 있게 해주는 기능
pages > InputSample > inputSample.js (수정)
import React, { useRef, useState } from 'react';
const InputSample = () => {
const userInfo = {
username: '',
password: '',
}
const [userInput, setUserInput] = useState(userInfo);
const [userInfoText, setUserInfoText] = useState(userInfo);
//비구조 할당
const {username, password} = userInfoText;
//Ref
const passwordRef = useRef();
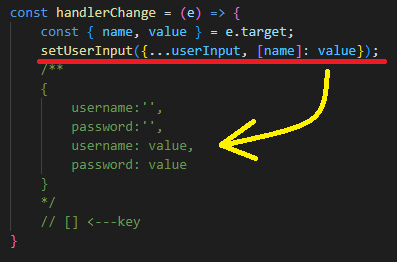
const handlerChange = (e) => {
const { name, value } = e.target;
setUserInput({...userInput, [name]: value});
/**
{
username:'',
password:'',
username: value,
password: value
}
*/
// [] <---key
}
const nextFocus = (e) => {
if(e.keyCode === 13){
passwordRef.current.focus();
}
}
const submitHandler = (e) => {
if(e.keyCode === 13){ // 자료형, 값 모두가 일치 하는 경우 '==='
setUserInfoText({...userInput});
}
}
return (
<div>
<input
type="text"
onChange={handlerChange}
onKeyUp={nextFocus}
name="username"
/>
<input
type="text"
onChange={handlerChange}
onKeyUp={submitHandler}
name="password"
ref={passwordRef}
/>
<div>username: {username}</div>
<div>password: {password}</div>
</div>
);
};
export default InputSample;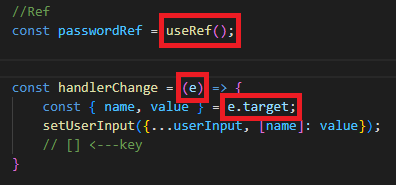
결과

Server Side Rendering (SSR)
- 클라이언트의 요청에 대해 서버에서 HTML, CSS, JavaScript e등의 파일을 조합하여 렌더링하여 클라이언트에게 전송하는 방식
- SSR 방식은 최초 로딩 속도가 느린 CSR 방식의 단점을 보완할 수 있음
- SSR 방식은 초기 로딩 속도가 빠르며, 검색 엔진 최적화
SEO에 유리하고, 자바스크립트를 비활성화한 사용자도 웹 페이지를 볼 수 있음 - 하지만, CSR 방식보다 서버 자원이 많이 필요하며, 구현하기가 복잡하고 유지보수 비용이 높음
Client Side Rendering (CSR)
- 웹 애플리케이션의 렌더링을 클라이언트 측에서 처리하는 방식
- 서버에서는 데이터만 전송하고, 브라우저에서 HTML, CSS, JavaScript등의 파일을 다운로드 받아 클라이언트에서 렌더링
- CSR 방식은 초기 로딩 속도가 느리지만, 페이지가 로딩된 이후에는 빠른 사용자 경험을 제공할 수 있음
- 서버 자원을 적게 사용하기 때문에 서버 부하를 줄일 수 있으며, 구현하기가 비교적 간단하고, 화면 변경이 빈번한 웹 애플리케이션에 적합
- 하지만, CSR 방식은 초기 로딩 속도가 느리기 때문에 사용자 경험이 나쁠 수 있고, 검색엔진 최적화
SEO에도 불리함 - 자바 스크립트를 비활성화한 사용자나 자바스크립트 실행이 불가능한 환경에서는 웹 페이지를 볼 수 없음
검색 엔진 최적화(SEO)란 무엇인가?
- 웹 사이트 또는 웹 페이지의 가시성을 향상시켜 검색 엔진 결과 페이지(SERP)에서 상위 순위에 나타날 수 있도록하는 디지털 마케팅 전략
- SEO 전략은 웹 사이트의 컨텐츠, 구조, HTML 코드, 백링크 등 여러 가지 요소를 개선하는것을 포함
react-minimal-side-navigation
- React 기반의 웹 어플리케이션에서 사이드바 형태의 네이게이션을 구현하기 위한 UI 컴포넌트 라이브러리, 간단하고 직관적인 디자인과 함께 다양한 설정을 통해 원하는 UI를 구성할 수 있음
- 또한, 반응형 디자인을 지원하여 모바일 환경에서도 적합하게 동작
npm install react-minimal-side-navigation
npm install awesome-react-icons
import { Global } from '@emotion/react';
import 'react-minimal-side-navigation/lib/ReactMinimalSideNavigation.css';
import { Route, Routes } from 'react-router-dom';
import MainAside from './components/Aside/MainAside/MainAside';
import InputSample from './pages/InputSample/InputSample';
import UserList from './pages/UserList/UserList';
import { reset } from './styles/Global/reset';

function Test1() {
  return (<h1>Test1</h1>);
}

function Test2() {
  return (<h1>Test2</h1>);
}


function App() {
  return (
    <>
      <Global styles={reset}/>
      <MainAside />
      <Routes>
        <Route path="/t1" Component={Test1}/>
        <Route path="/t2" Component={Test2}/>
        <Route path="/sample/input/1" Component={InputSample}/>
        <Route path="/users" Component={UserList}/>
      </Routes>
    </>
  );
}

export default App;
라우팅이란?
- 라우팅(Routing)은 웹 어플리케이션에서 특정 URL 경로에 대해 해당 컴포넌트를 보여주는 기능을 말함
- 즉, URL 경로에 따라서 웹 페이지의 내용을 동적으로 변경할 수 있는 것
- React에서는
react-router-dom라이브러리를 사용하여 라우팅을 구현할 수 있음 - 라우팅을 구현하면 사용자가 URL을 변경하면 화면을 새로고침하지 않고도 새로운 컴포넌트를 렌더링하여 보열수 있어서 사용자 경험을 개선할 수 있음
.App {
  text-align: center;
}

.App-logo {
  height: 40vmin;
  pointer-events: none;
}

@media (prefers-reduced-motion: no-preference) {
  .App-logo {
    animation: App-logo-spin infinite 20s linear;
  }
}

.App-header {
  background-color: #282c34;
  min-height: 100vh;
  display: flex;
  flex-direction: column;
  align-items: center;
  justify-content: center;
  font-size: calc(10px + 2vmin);
  color: white;
}

.App-link {
  color: #61dafb;
}

@keyframes App-logo-spin {
  from {
    transform: rotate(0deg);
  }
  to {
    transform: rotate(360deg);
  }
}
import React from 'react';
import ReactDOM from 'react-dom/client';
import { BrowserRouter } from "react-router-dom"
import './index.css';
import App from './App';
import reportWebVitals from './reportWebVitals';

const root = ReactDOM.createRoot(document.getElementById('root'));
root.render(
  <React.StrictMode>
    <BrowserRouter>
      <App />
    </BrowserRouter>
  </React.StrictMode>
);

// If you want to start measuring performance in your app, pass a function
// to log results (for example: reportWebVitals(console.log))
// or send to an analytics endpoint. Learn more: https://bit.ly/CRA-vitals
reportWebVitals();- 브라우저 라우팅을 위한
BrowserRouter컴포넌트를React.StrictMode컴포넌트 내부에서App컴포넌트를 렌더링 BrowserRouter는 컴포넌트는react-router-dom라이브러리에서 제공하는 브라우저 라우팅을 위한 컴포넌트이며,App컴포넌트를 감싸면서 해당 앱의 라우팅을 구현React.StrictMode컴포넌트는 React의 Strict 모드를 활성화함, 이 모드에서는 개발 모드에서만 작동하며, 앱에서 잠재적인 문제를 감지하고 경고를 표시하게 됨ReactDOM.createRoot함수를 사용하여rootDOM 노드에App컴포넌트를 렌더링함, 이 함수는 Concurrent Mode에서 사용되며, Concurrent Mode는 리액트 애플리케이션을 더 빠르게 렌더링하기 위한 방식으로,createRoot함수를 사용하면 해당 DOM 노드에서 렌더링을 시작할 수 있음
React의 다양한 Mode
| Mode | 설명 |
|---|---|
| StrictMode | 컴포넌트 안의 문제를 조기에 감지하여 개발자가 버그를 수정하기 쉽게 만듦 |
| ConcurrentMode | 리액트가 DOM 변경 작업을 보다 효율적으로 처리할 수 있도록 하는 모드 |
| SuspenseMode | 코드 스플리팅과 같이 지연되는 작업에 대한 로딩 상태를 처리할 수 있는 모드 |
/** @jsxImportSource @emotion/react */
import React from 'react';
import { Navigation } from 'react-minimal-side-navigation/lib';
import 'react-minimal-side-navigation/lib/ReactMinimalSideNavigation.css';
import { HiHome } from 'react-icons/hi';
import { GrTest } from 'react-icons/gr';
import { BsCardChecklist } from 'react-icons/bs';
import { BiListCheck } from 'react-icons/bi';
import { FaUsers } from 'react-icons/fa';
import * as S from './style';
import { useNavigate } from 'react-router-dom';

const MainAside = () => {
    const navigate = useNavigate();

    return (
        <aside css={S.style}>
            <Navigation
            activeItemId="/"
            onSelect={({ itemId }) => {
                navigate(itemId);
            }}
            items={[
              {
                title: 'Home',
                itemId: '/',
                elemBefore: () => <HiHome />,
              },
              {
                title: 'T1',
                itemId: '/t1',
                elemBefore: () => <GrTest />,
              },
              {
                title: 'T2',
                itemId: '/t2',
                elemBefore: () => <GrTest />,
              },
              {
                title: 'Sample',
                itemId: '/sample/input/1',
                elemBefore: () => <BsCardChecklist />,
                subNav: [
                    {
                        title: 'input1',
                        itemId: '/sample/input/1',
                        elemBefore: () => <BiListCheck />
                    }
                ]
              },
              {
                title: 'List',
                itemId: '/users',
                elemBefore: () => <BsCardChecklist />,
                subNav: [
                    {
                        title: '사용자 전체 조회',
                        itemId: '/users',
                        elemBefore: () => <FaUsers />
                    }
                ]
              },
            ]}
          />
        </aside>

    );
};

export default MainAside;react-minimal-side-navigation패키지를 사용하여 만들어진,MainAside컴포넌트- 이 컴포넌트는 왼쪽 사이드바 역할을 하며,
Navigation컴포넌트를 사용하여 구성됨 Navigation컴포넌트의items속성을 통해 각각의 사이드바 메뉴를 구성하고,onSelect속성을 통해 메뉴를 선택할 때의 동작을 정의- 컴포넌트에서는
useNavigate훅을 사용하여 메뉴를 클릭했을 때 해당 경로로 이동하도록 구현
React의 다양한 훅 함수
| 훅 함수 메서드 | 설명 |
|---|---|
| useState | - 상태를 관리하기 위한 훅함수 - 상태를 변경하고자 할 때, set함수를 사용하여 변경가능 - 예: const [count, setCount] = useState(0) |
| useEffect | - 컴포넌트 렌더링 이후에 실행되는 훅함수 - 컴포넌트가 업데이트될 때마다 실행되는데, 조건을 걸어서 실행되도록 할 수도 있음 - 예: userEffect(() => { console.log("Mounted!");,[]}; |
| useContext | - React 컨텍스트를 사용하여 전역 상태를 관리하기 위한 훅 함수 - createContext를 사용하여 컨텍스트를 생성하고, Provider를 사용하여 전달할 값을 지정 - 예: const MyContext = createContext(defaultValue); |
| useRef | - DOM 요소나 다른 값을 유지하고 싶을 때 사용하는 훅함수 - 일반 변수와는 달리 값이 변경되어도 컴포넌트가 다시 렌더링되지 않음 - 예: const inputRef = userRef(null); |
| useCallback | - 함수를 메모이제이션하여 성능 향상을 위해 사용하는 훅 함수 - 컴포넌트가 렌더링될 때마다 함수가 재선언되는 것을 방지하여, 함수를 재사용할 수 있도록 함 - 예: const onClick = useCallback(() => { console.log("Clicked!"); },[]); |
| useMemo | - 계산된 값을 캐싱하여 성능 향상을 위해 사용하는 훅 함수 - 계산 결과가 동일하다면 이전 결과를 사용하고, 다르면 다시 계산 - 예: const result = useMemo(() => expensiveCalculation(a,b) ,[a,b]); |
| useReducer | - 상태를 관리하기 위한 훅 함수 중 하나로, Redux와 유사한 기능을 제공 - state와 dispatch 함수를 반환하여, state를 변경하기 위한 action을 dispatch 함수로 전달 가능 - 예: const [state, dispatch] - useReducer(reducer, initialState); |
| useNavigate | - 현재 URL을 바꾸기 위한 훅 함수 - 반환된 함수는 클릭 이벤트 또는 다른 이벤트 핸들러에서 호출될 수 있음 - 예: const navigate = useNavigate(); navigate('/home') |
import { css } from "@emotion/react";

export const style = css`
    position: fixed;
    top: 0;
    left: 0;
    z-index: 99;
    width: 300px;
    height: 100%;
`;
import React, { useRef, useState } from 'react';
const InputSample = () => {
const userInfo = {
username: '',
password: ''
}
const [userInput, setUserInput] = useState(userInfo);
const [userInfoText, setUserInfoText] = useState(userInfo);
const { username, password } = userInfoText;
const passwordRef = useRef();
const handlerChange = (e) => {
const { name, value } = e.target;
setUserInput({...userInput, [name]: value});
}
const nextFocus = (e) => {
if(e.keyCode === 13) {
passwordRef.current.focus();
}
}
const submitHandler = (e) => {
if(e.keyCode === 13) {
setUserInfoText({...userInput});
}
}
return (
<div>
<input
className='test'
type="text"
onChange={handlerChange}
onKeyUp={nextFocus}
name="username"
/>
<input
type="text"
onChange={handlerChange}
onKeyUp={submitHandler}
name="password"
ref={passwordRef}
/>
<div>username: {username}</div>
<div>password: {password}</div>
</div>
);
};
export default InputSample;import { css } from "@emotion/react";
export const Container = css`
display: flex;
flex-direction: column;
justify-content: center;
align-items: center;
margin: 50px auto;
width: 900px;
`;
export const Table = css`
border: 1px solid #dbdbdb;
width: 600px;
`;
export const ThAndTd = css`
border: 1px solid #dbdbdb;
width: 100px;
height: 40px;
text-align: center;
`;/** @jsxImportSource @emotion/react */
import React, { useEffect, useRef, useState } from 'react';
import * as S from './style';
const UserList = () => {
useEffect(() => {
console.log("컴포넌트 렌더링");
}, []);
const user = {
id: 0,
username: '',
password: '',
name: '',
email: ''
}
const [inputs, setInputs] = useState(user);
const inputRefs = [useRef(), useRef(), useRef(), useRef()];
const addButtonRef = useRef();
const inputHandler = (e) => {
const { name, value } = e.target;
setInputs({...inputs, [name]: value});
}
const keyupHandler = (e) => {
if(e.keyCode === 13) {
let index = 0;
switch(e.target.name) {
case 'username': index = 1; break;
case 'password': index = 2; break;
case 'name': index = 3; break;
default: addButtonRef.current.click();
}
if(index !== 0){
inputRefs[index].current.focus();
}
}
}
const addHandler = () => {
}
const users = [
{
id: 1,
username: 'aaa',
password: '1234',
name: 'AAA',
email: 'aaa@gmail.com'
},
{
id: 2,
username: 'bbb',
password: '1234',
name: 'BBB',
email: 'bbb@gmail.com'
},
{
id: 3,
username: 'ccc',
password: '1234',
name: 'CCC',
email: 'ccc@gmail.com'
},
]
const userIndex = useRef(4);
return (
<div css={S.Container}>
<div>
<input type="text" onKeyUp={keyupHandler} onChange={inputHandler} placeholder='username' name='username' value={0} ref={inputRefs[0]}/>
<input type="text" onKeyUp={keyupHandler} onChange={inputHandler} placeholder='password' name='password' value={0} ref={inputRefs[1]}/>
<input type="text" onKeyUp={keyupHandler} onChange={inputHandler} placeholder='name' name='name' value={0} ref={inputRefs[2]}/>
<input type="text" onKeyUp={keyupHandler} onChange={inputHandler} placeholder='email' name='email' value={0} ref={inputRefs[3]}/>
<button type='button' onClick={addHandler} ref={addButtonRef}>추가</button>
</div>
<table css={S.Table}>
<thead>
<tr>
<th css={S.ThAndTd}>index</th>
<th css={S.ThAndTd}>username</th>
<th css={S.ThAndTd}>password</th>
<th css={S.ThAndTd}>name</th>
<th css={S.ThAndTd}>email</th>
</tr>
</thead>
<tbody>
{users.map(user => {
return (
<tr>
<td css={S.ThAndTd}>{user.id}</td>
<td css={S.ThAndTd}>{user.username}</td>
<td css={S.ThAndTd}>{user.password}</td>
<td css={S.ThAndTd}>{user.name}</td>
<td css={S.ThAndTd}>{user.email}</td>
</tr>
);
})}
</tbody>
</table>
</div>
);
};
export default UserList;결과