Emotion 리팩토링
const Container = styled.article`
  margin-top: 32px;
  padding: 32px 24px;
  position: relative;
  display: flex;
  flex-direction: column;
  background-color: ${PALLETS_LIGHT.BACKGROUND};

  ol {
    margin-bottom: 60px;
    counter-reset: item 0;
  }
생성한 컴포넌트들 중 몇몇의 컴포넌트들에서 위의 Container 처럼 스타일을 넣어주고 있었다.
const Container = styled.article`
  margin-top: 32px;
  padding: 32px 24px;
  position: relative;
  display: flex;
  flex-direction: column;
  background-color: ${PALLETS_LIGHT.BACKGROUND};
`;

const OlContainer = styled.ol`
  margin-bottom: 60px;
  counter-reset: item 0;
`;
이런 방법도 있지만, 스타일을 컴포넌트 단위로 관리한다는 목적에 맞게 리팩토링 해주었다.
다크모드
theme.tsx
//styles/theme.tsx
export const lightTheme = {
  SUB: '#e8e8fa',
	//...
};

export type Theme = typeof lightTheme;

export const darkTheme: Theme = {
  SUB: '#e8e8fa',
  //...
};
다크모드 색상은 스타일에 연관된 코드이므로 styles 디렉터리에 theme.tsx에 위치되어있다. 라이트 모드(보통 상태)의 경우는 lightTheme이고, 다크모드 일때는 darkTheme이다.
global-styles.ts
//styles/global-styles.ts
import { css } from "@emotion/react";
import { Theme } from "../styles/theme";

interface ThemeInterface {
  theme: Theme;
}

export const GlobalStyle = (props: Theme) =>
  css`
/* reset 에 대한 설정들.. */
  body {
  background: ${props.BACKGROUND};
  color: ${props.MAIN_FONT};
  }
`;
글로벌 스타일 파일이 있다. theme에 따라 웹 페이지의 백그라운드 색을 흰색계열 또는 검은색 계열로 바꾸어야 한다. 먼저 프로젝트에 reset할 css 스타일들을 쭉 넣어주고, 바디의 background와 color에 대해 props로 받은 theme의 BACKGROUND색과 MAIN_FONT색을 적용시킨다.
_app.tsx
//_app.tsx
import { Global } from '@emotion/react';
import { GlobalStyle } from '../styles/global-styles';
import React, { createContext } from 'react';
import { lightTheme, darkTheme, Theme } from '../styles/theme';

interface ContextProps {
  theme: Theme;
  toggleTheme: () => void;
}

export const ThemeContext = createContext<ContextProps>({
  theme: lightTheme,
  toggleTheme: () => {
    return null;
  },
});

function MyApp({ Component, pageProps }: AppProps) {
  const { theme, toggleTheme } = useDarkMode();
  return (
    <ThemeContext.Provider value={{ theme, toggleTheme }}>
      <>
        <Global
          styles={GlobalStyle(theme === lightTheme ? lightTheme : darkTheme)}
        />
        <Component {...pageProps} />
        <DarkModeToggle />
      </>
    </ThemeContext.Provider>
  );
}
ContextAPI
이제 theme에 관한 것을 전역적으로 관리를 해야한다. 부모부터 자식까지 a, b, c, d가 있다고 가정하자. 전역 관리를 하지 않고 props를 넘겨주는 방식을 사용하면, d에서 상태가 변경되었을 경우 a에서도 변경되야 하는데 그러기 위해서는 c와 b를 거쳐가야하기 때문이다. 전역 관리를 하게되면 이 작업은 편리하게 진행될 것이다.
전역 관리를 위해서 ContextAPI를 사용하기로 회의때 결정했었다. ThemeContext 라는 컨텍스트를 생성하고, theme의 초기값은 lightTheme 으로 설정한다. 버튼을 클릭함에 따라 라이트모드 or 다크모드로 동적으로 변해야 하므로 toggleTheme라는 것도 존재한다.(이에 맞게 인터페이스 ContextProps도 생성하자.)
Provider
return 안에 요소들이 ThemeContext.Provider으로 감싸져 있다. value로는 { theme, toggleTheme }을 넘겨주고 있다. 이것은 context를 구독하는 컴포넌트들에게 context의 변화를 알리는 역할을 한다. Provider 하위에서 context를 구독하는 모든 컴포넌트는 Provider의 value prop가 바뀔 때마다 다시 렌더링 되는 것이다. 상세 페이지의 댓글에 Textarea에 다크모드를 적용하고 싶다면, toggleTheme에 따라 theme이 변경되야 하는데 변경되었다는 사실을 TextArea에 알려주기 위한 작업이라고 봐도 무방할 것 같다.
Global
이제 global-styles.ts의 GlobalStyle에 props를 넘겨주는 부분을 설계하면 된다. Global에서는 theme가 lightTheme인지 darkTheme인지에 따라 props를 넘겨주어 테마를 적용시키도록 한다.
이 테마를 변경하기 위해 클릭하는 토글인 DarkModeToggle 컴포넌트도 있다.
이제 우리가 봐야할 곳은 const { theme, toggleTheme } = useDarkMode(); 이다.
useDarkMode.tsx
export const useDarkMode = () => {
const [theme, setTheme] = useState(lightTheme);
const setMode = (mode: Theme) => {
mode === lightTheme
? window.localStorage.setItem('theme', 'light')
: window.localStorage.setItem('theme', 'dark');
setTheme(mode);
};
const toggleTheme = () => {
theme === lightTheme ? setMode(darkTheme) : setMode(lightTheme);
};
useEffect(() => {
const localTheme = window.localStorage.getItem('theme');
if (localTheme !== null) {
if (localTheme === 'dark') {
setTheme(darkTheme);
} else {
setTheme(lightTheme);
}
}
}, []);
return { theme, toggleTheme };
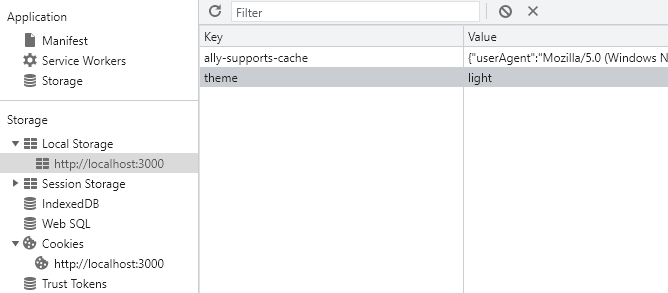
};로컬 스토리지
로컬 스트리지를 이용하고 있어 잠깐 설명하겠다.
로컬 스토리지는 HTML5에서 추가된 저장소이며 window.localStorage에 위치하고 key와 value를 저장할 수 있다. 세션 스토리지와는 다르게 사용자가 지우지 않는 이상 계속 브라우저에 데이터가 남아있다. 로컬 스토리지에 localStorage.setItem(key, value)로 데이터를 저장하고, localStorage.getItem(key)로 조회할 수 있다. localStorage.removeItem(key)로 키를 지울수도 있으며 localStorage.clear()로 로컬 스토리지 전체를 비울 수도 있다.(제로초님의 글 참고)
Custom Hook
일단 로컬 스토리지 부분은 무시하면서 보자.
toggleTheme을 보자. toggleTheme는 클릭 될 때마다 라이트 모드 or 다크모드를 보여줄 것이다. 현재 theme는 라이트 모드고 토글을 클릭했다고 가정하자. setMode(darkMode)가 실행될 것이다. setMode로 가면 setTheme(mode);가 되어 theme는 darkMode가 될 것이다.
사실 이걸로 다크모드 구현은 끝났다. 그렇다면 로컬 스토리지는 왜 사용하고 useEffect는 왜 넣어준 것일까? 바로 모든 페이지에서 theme를 적용하기 위해서다.
다크모드 상태라고 가정하자. 현재 / 경로인 Home에 있을 때, 상세 페이지로 가게되면 사용자는 다크모드가 유지되기를 원하지만 그렇게 동작하지 않는다. 페이지를 이동하면 다크모드를 눌렀었는지 기억하지 못하기 때문이다. 심지어 다크모드를 누르고 새로고침해도 다크모드는 해제된다.
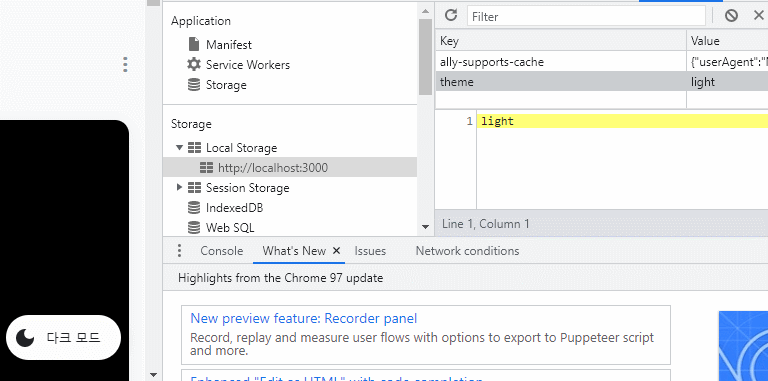
다시 setMode를 보자. darkMode는 lightTheme가 아니므로, 로컬 스토리지에 theme라는 key와 dark라는 value로 데이터가 저장된다. 그리고 setTheme로 인해 theme는 darkTheme가 될 것이다.
이 상태에서 새로고침 하거나 다른 페이지로 가게 되면, useEffect가 실행될 것이다. getItem으로 theme의 value값을 가져와 dark이면 setTheme(darkTheme);을 수행하고 아니라면 setTheme(lightTheme);을 수행하는 것이다. 이제 사용자가 다크모드를 사용하기 더욱 편리할 것이다.
특정 부분에 다크모드 적용
이제 백그라운드는 다크모드가 정상적으로 적용되고 있다. 하지만 각종 페이지에서 사용되는 게시글 카드, 버튼들, 입력 폼 등은 적용되지 않고 있다. 이 부분에 다크모드를 적용해보자.
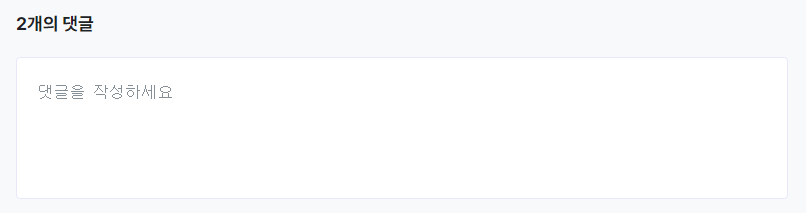
댓글을 입력하는 Textarea에 다크모드를 적용해보겠다.
import { useContext } from "react";
import { Theme } from "../../styles/theme";
import { ThemeContext } from "../../pages/_app";

interface ThemeProps {
  theme: Theme;
}

export const Comment = () => {
  const { theme } = useContext(ThemeContext);
  return  <TextArea theme={theme} />
}

const TextArea = styled.textarea<ThemeProps>`
  background-color: ${({ theme }) => theme.CARD_BACKGROUND};
`;
먼저 theme의 타입인 Theme과 _app에서 ThemeContext을 가져온다. css에서 theme을 사용하기위해 인터페이스도 정의해준다.
useContext를 사용하여 ThemeContext를 가져오고 theme를 받아온다. 그리고 Textarea에 theme이라는 이름으로 객체 theme을 넘겨준다.
보통 Emotion으로 스타일 하듯이 설계를 해주고 태그 뒤에 타입을 넣어준다. 그리고 ${({ theme }) => theme.CARD_BACKGROUND};와 같이 사용하면 끝이다.
theme이 다크모드이면 다크모드의 CARD_BACKGROUND를 보여줄 것이고, theme이 라이트 모드이면 라이트 모드의 CARD_BACKGROUND를 보여주는 것이다.
