Blob
Blob은 이미지 내에서 주변보다 더 밝거나 어두운 영역을 의미한다.
Blob을 찾아내기 위해 DFS 알고리즘을 사용했다.
즉, 이미지 픽셀들을 방문하면서 블롭이 발견되면 1씩 추가하는 간단한 방식이다.
블롭 검출의 가중치는 다음 2차원 배열을 사용했다.
	vector<vector<pair<int, int>>> blobs;
	int dx[] = { -1, 0, 1, 0, -1, -1, 1, 1 };
	int dy[] = { 0, 1, 0, -1, -1, 1, -1, 1 };
이렇게 하면 x, y의 기준은 0,0이므로 x가 -1, y가 0이면 좌로 1칸 이라는 뜻이다.
즉, 8칸으로 상하좌우 대각선을 모두 체크할 수 있다.
void CImageDlg::OnBnClickedButtonBlobdetect()
{

	// TODO: 여기에 컨트롤 알림 처리기 코드를 추가합니다.
	if (m_result == nullptr) {
		AfxMessageBox(_T("이미지를 먼저 로드해주세요."));
		return;
	}

	int height = IMAGE_HEIGHT;
	int width = IMAGE_WIDTH;

	bool **visited = new bool*[height];
	for (int i = 0; i < height; i++) {
		visited[i] = new bool[width];
		fill_n(visited[i], width, false);
	}

	vector<vector<pair<int, int>>> blobs;
	int dx[] = { -1, 0, 1, 0, -1, -1, 1, 1 };
	int dy[] = { 0, 1, 0, -1, -1, 1, -1, 1 };

	for (int y = 0; y < height; y++) {
		for (int x = 0; x < width; x++) {
			if (m_result[y * width + x] && !visited[y][x]) {
				vector<pair<int, int>> blob;
				stack<pair<int, int>> s;
				s.push({ y, x });
				visited[y][x] = true;

				while (!s.empty()) {
					pair<int, int> p = s.top();
					s.pop();
					blob.push_back(p);

					for (int k = 0; k < 8; k++) {
						int newY = p.first + dy[k];
						int newX = p.second + dx[k];

						if (newY >= 0 && newY < height && newX >= 0 && newX < width && m_result[newY * width + newX] && !visited[newY][newX]) {
							s.push({ newY, newX });
							visited[newY][newX] = true;
						}
					}
				}

				blobs.push_back(blob);
			}
		}
	}

	for (int i = 0; i < height; i++)
		delete[] visited[i];
	delete[] visited;

	CString message;
	message.Format(_T("Blob count: %d"), blobs.size());
	AfxMessageBox(message);
}
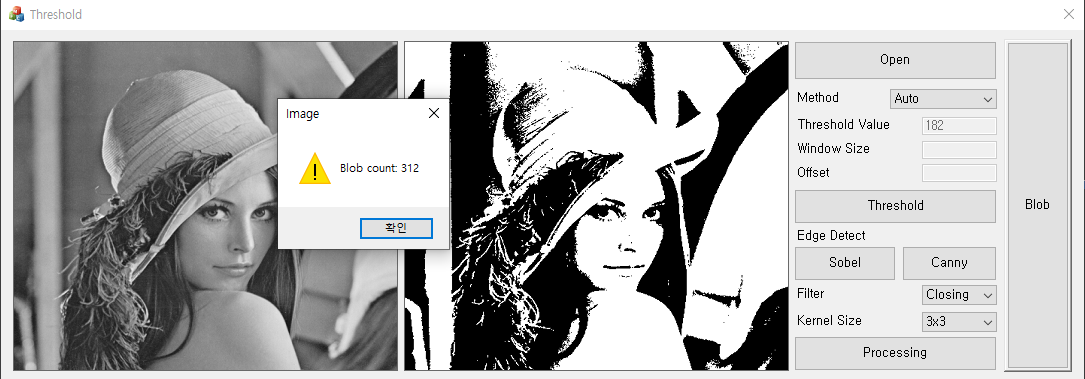
그럼 최종적으로 완성된 MFC 화면을 보자.
1. Auto Threshold
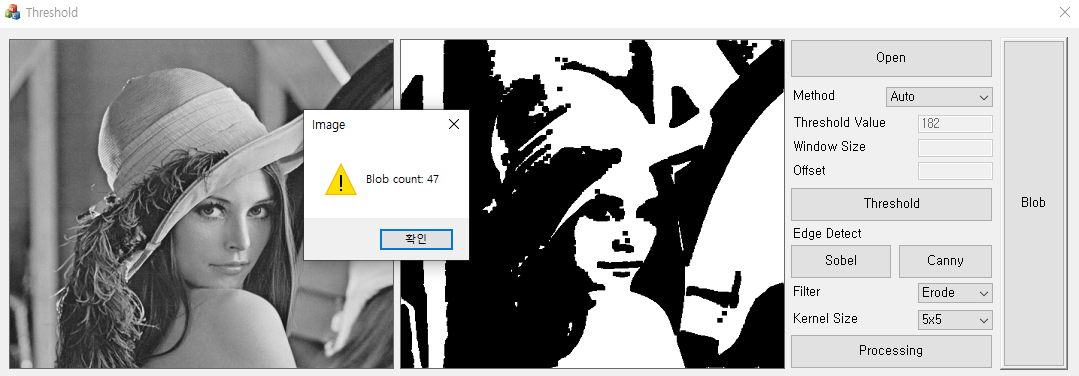
2. Auto Threshold + Erode 5x5
3. Canny Edge Detection
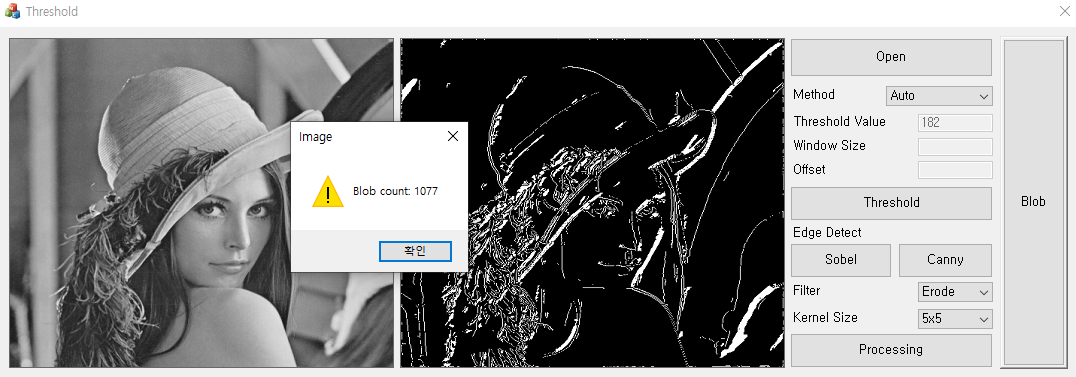
4. Canny Edge Detection + Dilate 3x3


개인 저장용. 오류 매우 많음.