
✍🏻양방향 바인딩
v-model
- 프론트엔드에서 입력 양식을 처리할 때 입력 요소의 상태와 자바스크립트의 상태를 동기화해야 하는 경우가 많다.
value를 바인딩하고@input이벤트로text를 변경하는 것은 번거로울 수 있다. 그래서 Vue에서는 이러한 작업을 단순화 하도록 양방향 바인딩할 수 있는v-model디렉티브를 제공한다.
<template>
	<div>
		<h2>input Value</h2>
		<input type="text" :value="inputValue" />
		<div>{{ inputValue }}</div>
	</div>
</template>
import { ref } from "vue";
export default {
setup() {
const inputValue = ref(null);
return { inputValue };
},
};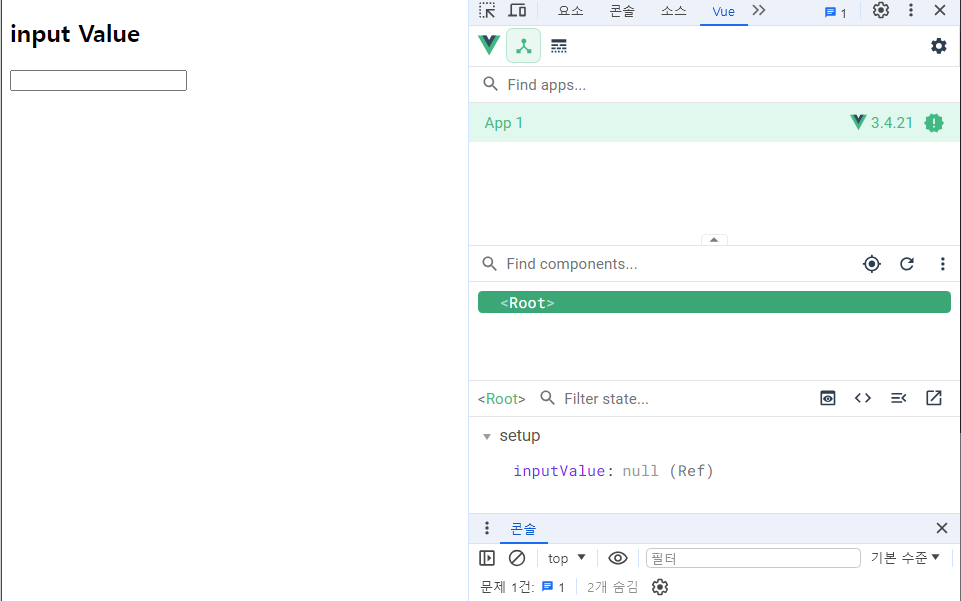
현재 inputValue의 값이 null인 상태이다. 값을 넣어보자
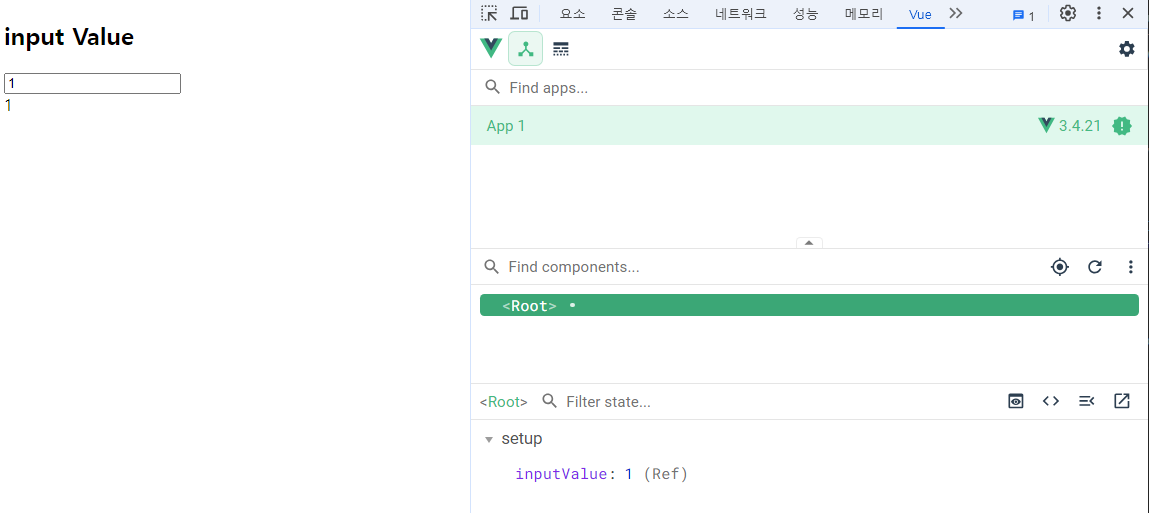
이렇게 자바스크립트 상태가 변경되면 input의 value의 상태 또한 변경된다. 왜내면 v-bind로 binding이 되어 있기 때문이다. 하지만 input 상태가 변경되면 자바스크립트 상태는 그대로다. 이유는 동기화가 되어 있지 않기 때문이다.
<template>
	<div>
		<h2>input Value</h2>
		<input
			type="text"
			:value="inputValue"
			@input="event => (inputValue = event.target.value)"
		/>
		<div>{{ inputValue }}</div>
	</div>
</template>
이렇게 만들면 동기화가 가능하며 이러한 것을 구현한게 v-model이다.
<template>
	<div>
		<h2>input Value</h2>
      	<!-- input -->
		<input type="text" v-model="inputValue" />
		<div>{{ inputValue }}</div>
      	<!-- textarea -->
      	<textarea v-model="textareaValue"></textarea>
      	<div>{{ textareaValue }}</div>
	</div>
</template>v-model은 내부적으로 HTML요소가 어떤 요소냐에 따라 서로 다른 속성(:value)과 이벤트(@input)를 사용한다.
input, textarea-> value와 input 이벤트를 사용
checkbox, radio-> checked와 change 이벤트를 사용
select-> value와 change 이벤트를 사용
✔ Checkbox
<!-- 단방향 -->
<template>
	<div>
		<h2>checkbox value</h2>
		<label for="checkbox"> {{ checkboxValue }}</label>
		<input type="checkbox" id="checkbox" :checked="checkboxValue" />
	</div>
</template>

<!-- 양방향 바인딩 -->
<template>
	<div>
		<h2>checkbox value</h2>
		<label for="checkbox"> {{ checkboxValue }}</label>
		<input
			type="checkbox"
			id="checkbox"
			:checked="checkboxValue"
			@change="event => (checkboxValue = event.target.checked)"
		/>
	</div>
</template>

<!-- v-model 양방향 바인딩 -->
<template>
	<div>
		<h2>checkbox value</h2>
		<label for="checkbox"> {{ checkboxValue }}</label>
		<input type="checkbox" id="checkbox" v-model="checkboxValue"/>
	</div>
</template>
import { ref } from "vue";

export default {
	setup() {
		const checkboxValue = ref(true);
		return { checkboxValue };
	},
};
현재 checkbox는
true또는false로 구분되어 있는데 이것을Yes또는No로 구분하고 싶다면true-value="Yes",false-value="No"로 설정하면된다.
<template>
	<div>
		<h2>checkbox value</h2>
		<label for="checkbox"> {{ checkboxValue }}</label>
		<input type="checkbox" id="checkbox" v-model="checkboxValue" true-value="Yes" false-value="No"/>
	</div>
</template>
import { ref } from "vue";
export default {
setup() {
const checkboxValue = ref("Yes");
return { checkboxValue };
},
};그리고 checkbox는 한개의 값이 아닌 여러개의 값이 될 수 있다. 배열을 이용하여 만들 수 있다.
<template>
	<h2>checkbox value</h2>
		<label>
			<input type="checkbox" value="html" v-model="checkboxValues" />
			html
		</label>
		<label>
			<input type="checkbox" value="css" v-model="checkboxValues" />
			css
		</label>
		<label>
			<input type="checkbox" value="javascript" v-model="checkboxValues"/>
			javascript
		</label>
		<div>{{ checkboxValues }}</div>
</template>
import { ref } from "vue";
export default {
setup() {
const checkboxValues = ref([]);
return {
checkboxValues,
};
},
};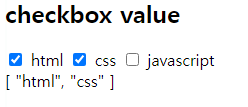
이렇게 배열로 양방향을 만들 수 있다.
✔ radio
<!-- 단방향 -->
<template>
	<div>
		<h2>radio value</h2>
		<label>
			<input type="radio" name="type" value="A" :checked="radioValue === 'A'"/> A형
		</label>
		<label>
			<input type="radio" name="type" value="AB" :checked="radioValue === 'AB'"/>
			AB형
		</label>
		<div>{{ radioValue }}</div>
	</div>
</template>

<!-- 양방향 바인딩 -->
<template>
	<div>
		<h2>radio value</h2>
		<label>
			<input
				type="radio"
				name="type"
				value="A"
				:checked="radioValue === 'A'"
				@change="event => (radioValue = event.target.value)"/>
			A형
		</label>
		<label>
			<input
				type="radio"
				name="type"
				value="AB"
				:checked="radioValue === 'AB'"
				@change="event => (radioValue = event.target.value)"/>
			AB형
		</label>
		<div>{{ radioValue }}</div>
	</div>
</template>

<!-- v-model 양방향 바인딩 -->
<template>
	<div>
		<h2>radio value</h2>
		<label>
			<input type="radio" name="type" value="A" v-model="radioValue"/>
			A형
		</label>
		<label>
			<input type="radio" name="type" value="AB" v-model="radioValue"/>
			AB형
		</label>
		<div>{{ radioValue }}</div>
	</div>
</template>
import { ref } from "vue";

export default {
	setup() {
		const radioValue = ref("A");
		return { radioValue };
	},
};
✔ select
<!-- 단방향 -->
<template>
	<div>
		<h2>select value</h2>
		<select :value="selectValue">
			<option value="html">html 수업</option>
			<option value="css">css 수업</option>
			<option value="javascript">JavaScript 수업</option>
		</select>
		<div>{{ selectValue }}</div>
	</div>
</template>

<!-- 양방향 -->
<template>
	<div>
		<h2>select value</h2>
		<select :value="selectValue" @change=" event => (selectValue = event.target.value)">
			<option value="html">html 수업</option>
			<option value="css">css 수업</option>
			<option value="javascript">JavaScript 수업</option>
		</select>
		<div>{{ selectValue }}</div>
	</div>
</template>

<!-- v-model 양방향 바인딩 -->
<template>
	<div>
		<h2>select value</h2>
		<select v-model="selectValue">
			<option value="html">html 수업</option>
			<option value="css">css 수업</option>
			<option value="javascript">JavaScript 수업</option>
		</select>
		<div>{{ selectValue }}</div>
	</div>
</template>
import { ref } from "vue";
export default {
setup() {
const selectValue = ref("html");
return {
selectValue,
};
},
};v-model 수식어(modifiers)
✔ .lazy
- 기본적으로
v-model은 각input이벤트 후 입력과 데이터를 동기화 한다. (단, 앞에서 설명한 IME 구성은 제외)lazy수식어를 추가하여change이벤트 이후에 동기화 할 수 있다.
<input type="text" v-model="inputValue" />이럴 때 input에 텍스트를 입력할 때마다 변경되는 값이 계속해서 보여지는데
<input type="text" v-model.lazy="inputValue" />.lazy를 사용할 경우 input에 텍스트를 입력 후 포커스가 나갔을 때 변경된 텍스트 값이 보인다.
✔ .number
- 우리가 기본적으로 입력받는 값은 문자열이다. 사용자 입력이 자동으로 number 타입으로 형변환 되기를 원한다면
.number수식어를 추가하면된다.
<input type="text" v-model="inputValue" />
<div>{{ typeof inputValue }}</div>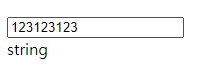
숫자를 입력했을 때 문자열(string)로 확인이 된다
<input type="text" v-model.number="inputValue" />
<div>{{ typeof inputValue }}</div>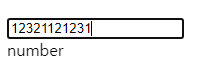
✔ .trim
- 사용자가 입력한 내용에서 자동으로 앞 뒤 공백을 제거하는 트림처리가 되길 바란다면,
v-model이 관리하는 inputtrim수식어를 추가하면 된다.
<input type="text" v-model="inputValue" />
<div>{{ typeof inputValue }}</div>

이렇게 공백을 사용자가 입력하면 데이터에 공백 또한 추가된 걸 볼 수있다. 여기서 .trim을 사용하면 데이터가 동기화 될 때는 앞 뒤 공백이 제거된 걸 확인할 수 있다.
<input type="text" v-model.trim="inputValue" />
<div>{{ typeof inputValue }}</div>