🎉프로젝트 시작
채팅, 답장, 삭제 기능이 포함된 메신저 페이지를 구현하는 과제가 주어졌다. 와이어 프레임을 제작하여 팀원들과 디자인을 회의하였고, 이후 역할을 분배했다. 내가 1차로 맡은 부분은 공통 스타일 구현이다.
✨공통 스타일 구현
1. GlobalStyles.ts
// src/styles/GlobalStyles.ts
import { createGlobalStyle } from 'styled-components';
import reset from 'styled-reset';

const GlobalStyles = createGlobalStyle`
    ${reset}
    ...
`
styled-components, styled-reset을 설치하고 GlobalStyles.ts파일을 다음과 같이 생성한다. ...에는 폰트나 각종 기본적인 스타일을 지정해준다.
// src/App.tsx
import GlobalStyles from "styles/GlobalStyles";

function App() {
  return (
  	<div>
      <GlobalStyles />
   	<div>
  )
}
이후 App.tsx에 GlobalStyles를 import하면 모든페이지에 공통 스타일이 적용된다.
2. theme
주로 사용되는 컬러나, 폰트 크기 등을 theme으로 상수화해서 각 페이지에서 사용할 수 있도록 해보자.
// src/styles.theme.ts
const colors = {
  main: '#ff505f',
  white: '#ffffff',
  black: '#000000',
  gray: '#737376',
  myChatBackground: '#ff505f',
  othersChatBackground: '#f5f5f5',
  button: '#ffe5e8',
  buttonHover: '#ff505f',
  border: '#E6E6E6',
};

const fontSize = {
  title: '20px',
  subTitle: '16px',
  text: '14px',
  smallText: '13px',
};

const theme = {
  colors,
  fontSize,
};

export default theme;
각종 color와 font를 상수화하고, theme으로 묶어서 export 했다. 이것을 App.tsx에서 ThemeProvider로 뿌려주면 모든 컴포넌트에서 theme을 사용할 수 있게된다.
// src/App.tsx
import GlobalStyles from "styles/GlobalStyles";
import { ThemeProvider } from "styled-components";
import theme from "styles/theme";

function App() {
  return (
    <ThemeProvider theme={theme}>
      <GlobalStyles />
      <MainPage />
    </ThemeProvider>
  );
}
컴포넌트에서 import할 필요가 없으며 다음과 같이 사용한다.
const Container = styled.div`
background-color: ${({theme}) => theme.colors.main}
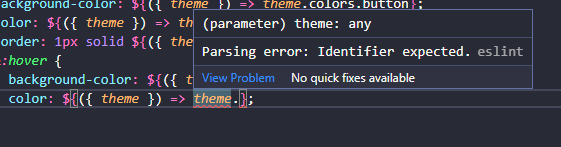
`끝난 것 같지만 문제가 하나 있다. theme의 타입이 any라서 추론이 되지 않는다는 것. theme에 colors와 fontSize가 있고 그 안에는 더 많은 값이 있는데, 사용할 때 theme 뒤에 .을 찍어도 어떤 값을 사용할 수 있는지 알려주지 않는다. 이를 해결하기 위해서는 theme의 타입을 선언해주어야 한다.
3. theme 타입 선언
먼저 theme.ts에서 theme의 타입을 export 해보자.
// src/styles.theme.ts
import { DefaultTheme } from 'styled-components';

const colors = {};
const fontSize = {};

export type ColorsTypes = typeof colors;
export type FontSizeTypes = typeof fontSize;

const theme : DefaultTheme = {
  colors,
  fontSize,
};

export default theme;DefaultTheme을 import하고, theme의 타입으로 지정해준다. 이후 typeof를 사용하여 colors와 fontSize의 타입을 export 한다. 이제 타입 선언 파일을 만들어보자.
// src/styles/styled.d.ts
import 'styled-components';
import { ColorsTypes, FontSizeTypes } from './theme';

declare module 'styled-components' {
  export interface DefaultTheme {
    colors: ColorsTypes;

    fontSize: FontSizeTypes;
  }
}
.d.ts 파일은 타입추론을 돕는 타입선언파일이다. styled-components 모듈을 import한 후 DefaultTheme을 export 한다. DefaultTheme은 props.theme의 interface로 사용된다. 기본적으로 DefaultTheme 은 비어 있으므로 만들어둔 theme을 가져와서 확장해준다.
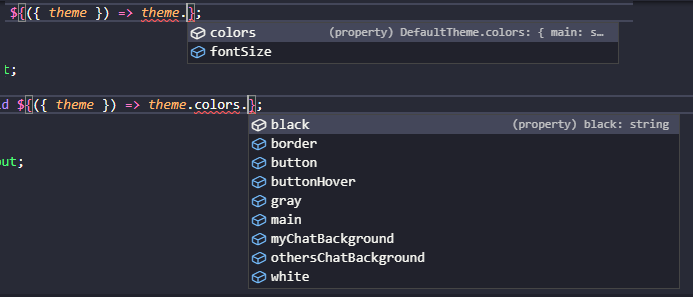
이렇게 하면 theme의 타입추론이 가능해지고, theme 뒤에 .을 찍으면 설정된 값이 나타난다. 같은 방식으로 color나 font-size 외에도 다른 theme을 추가할 수 있다. 이로써 공통 스타일 구현 끝.
✨채팅방 구현
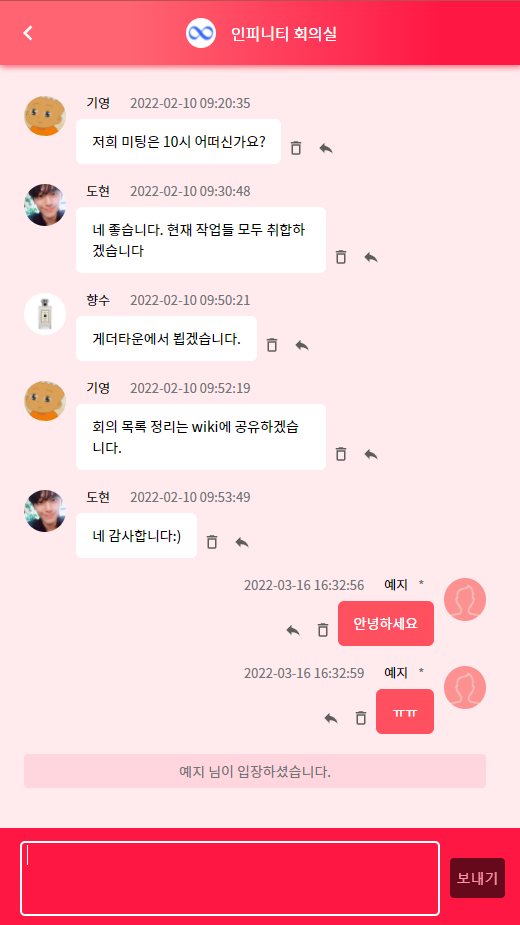
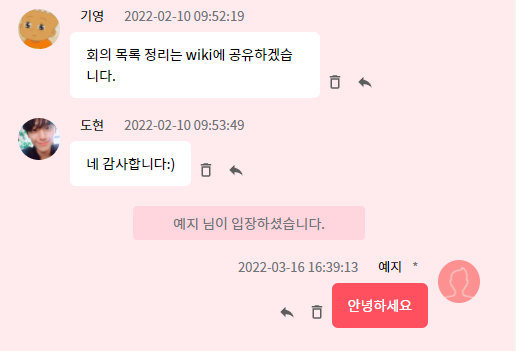
구현할 기능은 채팅방 입장 시 이전에 주고받은 5개의 메세지 출력 및 입장 메세지 출력, 메세지 전송 시 대화목록 최하단으로 자동 스크롤으로 총 3가지 이다.
1. 채팅방 입장 시 이전 메세지 내용 출력
// utils/data.json
"messages": [
    {
      "userId": 1,
      "userName": "기영",
      "profileImage": "https://i.ibb.co/LNw3QCV/image.png",
      "date": "2022-02-10 09:20:35",
      "content": "저희 미팅은 10시 어떠신가요?",
    },
    ...
이전에 주고받은 메세지는 json 형식으로 하드코딩 되어있다. 이것을 컴포넌트에서 가져와서 뿌려주기만 하면 되는데, 문제는 로그인 한 유저가 입력하는 채팅을 어떻게 구분할 것인가이다.
이를 해결하기 위해 Redux-toolkit을 도입하여, 로그인할 때 유저의 id를 무작위 숫자로 저장해 주었다. 컴포넌트에서 redux에 저장된 정보를 가져와서 메세지의 userid와 로그인 userid를 비교해서 뿌려주는 방식으로 해결했다. 그럼 Redux-toolkit 세팅부터 해결방법까지 살펴보자.
Redux-toolkit 세팅
// stroes/store.ts
import { configureStore } from "@reduxjs/toolkit";
import { combineReducers } from "redux";

const rootReducer = combineReducers({});

const store = configureStore({
  reducer: rootReducer,
});

export type rootState = ReturnType<typeof rootReducer>;
export default store;configureStore를 통해 reducer들을 모아둔 store를 생성했다. reducer는 현재 비어있으며, user.ts에서 만들고 다시 돌아와서 넣어주자.
// stores/user.ts
import { createSlice, PayloadAction } from "@reduxjs/toolkit";
import { rootState } from "stores";

export interface IUserState {
  userId: number;
  userName: string;
  profileImage: string;
}

const initialState: IUserState = {
  userId: 0,
  userName: "",
  profileImage: "https://i.ibb.co/vmy2PYq/83fc4c6dca8298dc8e03ba63d35a9cae.jpg",
};

const user = createSlice({
  name: "userReducer",
  initialState,
  reducers: {
    setUser: (_, action: PayloadAction<IUserState>) => action.payload,
  },
});

export const { setUser } = user.actions;
export const userSelocter = (state: rootState) => state.user;
export default user;
initialState에 초기 정보를 저장하고, createSlice를 사용해서 action과 reducer를 한 번에 만들었다. 이후 action과 저장된 정보를 가져오는 userSelector, slice를 export 해주었다. 여기서 사용된 setUser: (_, action: PayloadAction<IUserState>) => action.payload, 은 아래의 코드를 축약한 것이다.
    setUser: (state, action) => {
      state.userId = action.payload.userId;
      state.userName = action.payload.userName;
      state.profileImage = action.payload.profileImage;
    },
다시 store.ts로 돌아와서, 만든 reducer를 넣어주면 기본 세팅 끝.
import user from "./user";

const rootReducer = combineReducers({
 user: user.reducer,
});
채팅방 컴포넌트
// components/messenger/ChatRoom.tsx
export const ChatRoom = () => {
  const [messages, setMessages] = useState<IMessage[]>(MockMessages.messages);
  const { userId, profileImage, userName } = useSelector(userSelector);
  const onSendMessage = async () => {
    if (content.trim().length === 0) return;
    setMessages([
      ...messages,
      {
        id: Date.now(),
        userId,
        userName,
        profileImage,
        date: getCurrentDate(),
        content: content.replace(/(\n|\r\n)/g, "<br />"),
      },
    ]);
  };
  const isMyMessage = (userId: number) => userId === user.userId;
  ...
  return (...)
}
json으로 저장된 5개의 메세지를 포함하는 messages state를 선언하고, 메세지를 보낼 때, 기존에 저장된 메세지 배열에 새로 입력한 메세지를 추가해주었다. userId, userName, profileImage는 useSelector로 Redux에 저장된 정보를 가져왔다. 이 정보는 로그인 페이지에서 로그인할 때 저장된다. 메세지의 isMyMessage의 값에 따라서, 내가 보낸 메세지인지, 다른 사람의 메세지인지 구분해서 렌더링 하였다.
2. 채팅방 입장 시 입장 메세지 출력
시도 및 오류
// components/messenger/ChatRoom.tsx
export const ChatRoom = () => {
  ...
  return (
    ...
   		{messages.map((message) => {
   	 		return ...
  		})}
 	 	<JoinMessage>{userName} 님이 입장하셨습니다.</JoinMessage>
  	...
  )
}
messages 배열을 map으로 렌더링하고 이후에 입장메세지를 추가해주었다. 이렇게 하니 로그인 한 첫 화면에서는 잘 나오지만, 유저가 메세지를 입력하면 입장메세지 아래에 추가되지 않고, 위에 쌓이는 오류가 발생했다.
해결 방법
// components/messenger/ChatRoom.tsx
export const ChatRoom = () => {
  ...
  useEffect(() => {
    userId &&
      setMessages((prev) => [
        ...prev,
        {
          id: 9999,
          userId: 9999,
          userName: "",
          profileImage: "",
          date: getCurrentDate(),
          content: `${userName} 님이 입장하셨습니다.`,
        },
      ]);
  }, [userId, userName]);
  return (
    ...
   		{messages.map((message) => {
   	 		return (
              {id !== 9999 ? <ChatMessage isMyMessage={isMyMessage(userId)}/>
            	: <JoinMessage />
            )
  		})}
  	...
  )
}
useEffect로 로그인 후 컴포넌트가 처음 렌더될 때, messages 배열에 입장메세지를 추가하고 일반 메세지와 구분하기 위해 id를 9999로 주었다. 이렇게 하니 정상적으로 동작하는 것을 확인할 수 있었다.
3. 메세지 입력 시 자동 스크롤
시도 및 오류
export const ChatRoom = () => {
  const messagesEndRef = useRef<HTMLDivElement>(null);
  const scrollToBottom = () => {
    messagesEndRef.current?.scrollIntoView({ behavior: 'smooth' });
  };

  useEffect(() => {
    scrollToBottom();
  }, [messages]);

  return (
    <ChatRoomBox>
      ...
      <div ref={messagesEndRef} />
	</ChatRoomBox>
  )
}
컴포넌트의 최하단에 div를 만들고 useRef로 선택했다. 이후 메세지 배열이 바뀔 때 마다 부드럽게 아래로 스크롤 시키는 로직으로 구현했다.
그런데 스크롤이 아래로 이동하는 도중에 새 메세지를 입력하면 스크롤이 완료되기도 전에 새로운 메세지로 이동해야 되었다. 많은 메세지를 빠르게 입력할 경우 뭔가 잘못되었음을 확실히 알 수 있었다.
해결방법
export const ChatRoom = () => {
  const scrollToBottom = () => {
    messagesEndRef.current.scrollTop = messagesEndRef.current?.scrollHeight;
  };

  return (
    <ChatRoomBox ref={messagesEndRef}>
      ...
	</ChatRoomBox>
  )
}
기존에 추가했던 div를 삭제하고, useRef로 컴포넌트 전체를 선택했다. 이후 scrollTop의 위치를, 컴포넌트의 스크롤 전체 높이로 설정하여 스크롤 하지 않고 아래로 이동하는 방식으로 해결했다.
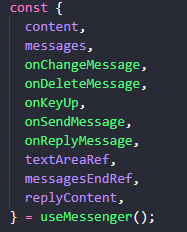
4. 리팩토링
작업을 완료하고 보니, ChatRoom 컴포넌트가 너무 커진 것을 확인할 수 있었다. 메세지 관련 로직들을 useMessenger라는 커스텀 hooks로 빼서 분리해주었다. 이로써 채팅방 구현 끝. 과제도 끝.
📝회고 및 배운점
Redux-toolkit을 처음 사용해봤는데, 세팅하는 방법이 다른 상태관리 tool보다 좀 복잡했던 것 같다. 한 번 경험해보고 싶어서 일부러 도입했는데, 잘 마무리 된 것 같다. 더 복잡한 상태관리를 해야하는 상황을 마주하게 된다면 아마..... 많이 헤메지 않을까. 더 공부하도록하자.
이번 과제를 하면서 마주친 문제들은 어떤 새로운 기술을 도입하거나, 검색을 한다고 해서 해결할 수 있는 것들이 아니었고, 오로지 이미 구현된 로직을 수정해야하는 것들이었다. 짧게 적었지만 모두 오랜 시간 고민해서 해결한 것이었고, 해결했을 때 희열감이 들었다. 다음 과제도 화이팅.