개발환경
IDE : InteliJ
Spring Boot : 2.6.2
JDK : 17
1. Controller 생성
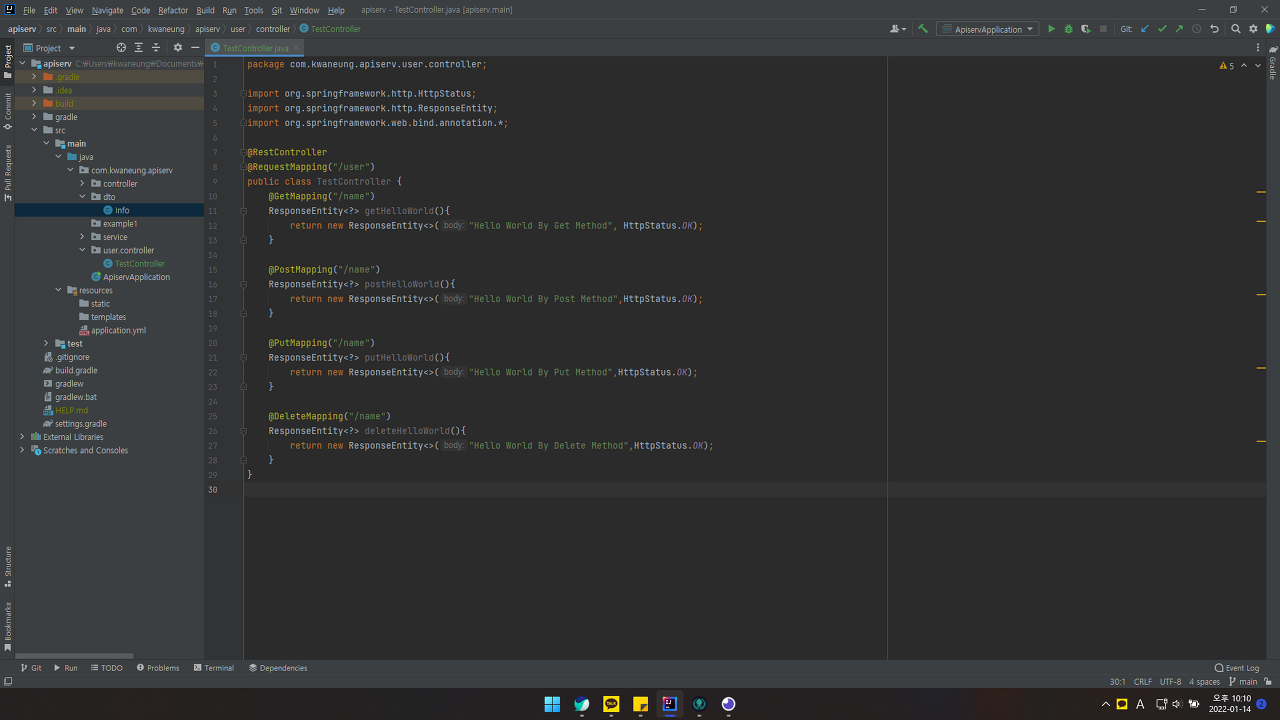
controller 패키지를 생성해주고 안에 TestController.java 자바클래스를 한개 생성한다.
package com.kwaneung.apiserv.user.controller;

import org.springframework.http.HttpStatus;
import org.springframework.http.ResponseEntity;
import org.springframework.web.bind.annotation.*;

@RestController
@RequestMapping("/user")
public class TestController {
    @GetMapping("/name")
    ResponseEntity<?> getHelloWorld(){
        return new ResponseEntity<>("Hello World By Get Method", HttpStatus.OK);
    }

    @PostMapping("/name")
    ResponseEntity<?> postHelloWorld(){
        return new ResponseEntity<>("Hello World By Post Method",HttpStatus.OK);
    }

    @PutMapping("/name")
    ResponseEntity<?> putHelloWorld(){
        return new ResponseEntity<>("Hello World By Put Method",HttpStatus.OK);
    }

    @DeleteMapping("/name")
    ResponseEntity<?> deleteHelloWorld(){
        return new ResponseEntity<>("Hello World By Delete Method",HttpStatus.OK);
    }
}
- @RestController : @ResponseBody를 지원하는 컨트롤러 어노테이션이다.
- @RequestMapping : path를 맵핑시킨다. 예를들어 ("/user")는 localhost:8888/user로 시작하는 요청에 대해 맵핑을 시키게 된다
- GetMapping : GET방식으로 호출이 되는 요청을 맵핑한다.
- PostMapping : POST방식으로 호출이 되는 요청을 맵핑한다.
- PutMapping : PUT방식으로 호출이 되는 요청을 맵핑한다.
- DeleteMapping : Delete 방식으로 호출이 되는 요청을 맵핑한다.
프로그램을 실행한다.
2. 테스트용 API 클라이언트 프로그램 설치
Rest API 테스트를 위해 Insomnia 프로그램을 설치한다.
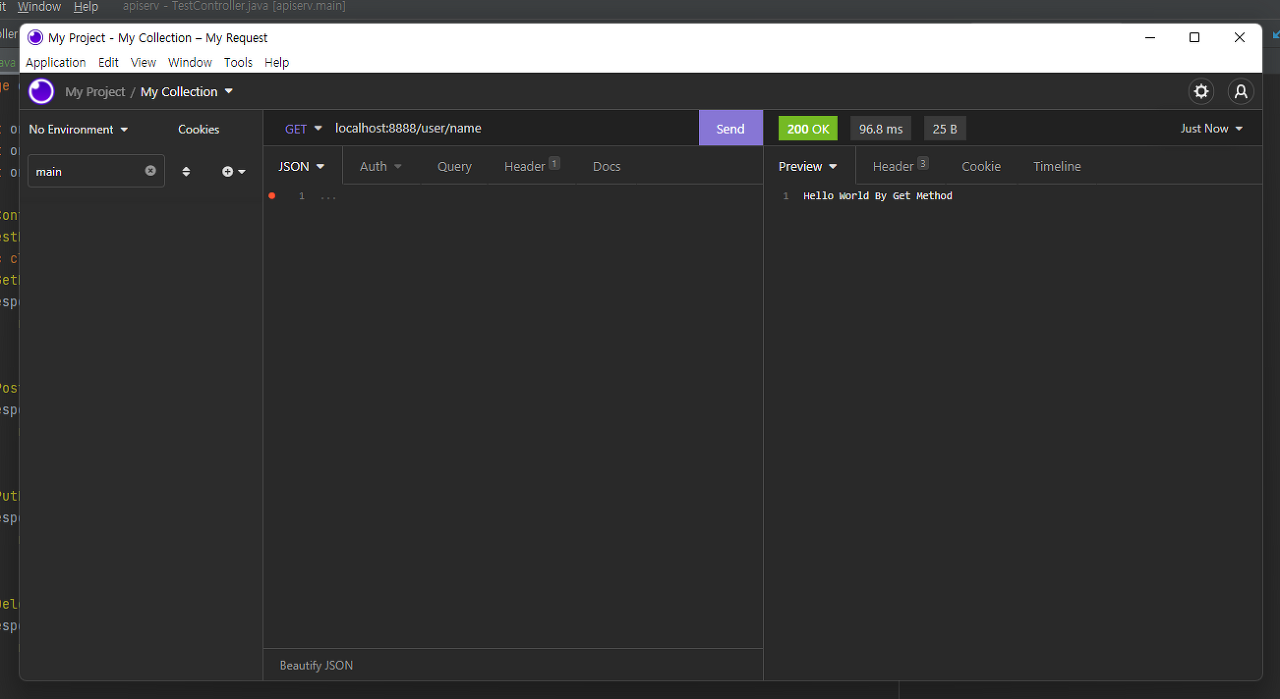
Rest API를 테스트하기 좋은 프로그램이다. 앞으로 정상 동작하는지에 대한 테스트는 해당 프로그램으로 하면 좋다.
localhost:8888/user/name url을 GET 메소드로 호출을 하면 만들어 놓은대로 return이 오는것을 알 수 있다.
3. Service 생성

service 패키지를 생성해주고 안에 TestService.java 자파클래스를 한개 생성한다.
package com.kwaneung.apiserv.user.service;

import org.springframework.stereotype.Service;

@Service
public class TestService {

    public String myName(String name) {
        if (name != null) {
            return "my name is " + name;
        } else {
            return "name param is null";
        }
    }

    public String myAge(Integer age) {
        if (age != null) {
            return "my age is " + age;
        } else {
            return "age param is null";
        }
    }

    public String myRole(String role) {
        if (role != null) {
            return "my role is " + role;
        } else {
            return "role param is null";
        }
    }
}
- @Service : 컨트롤러에서 호출되는 서비스 비즈니스 로직 어노테이션
4. Controller 수정
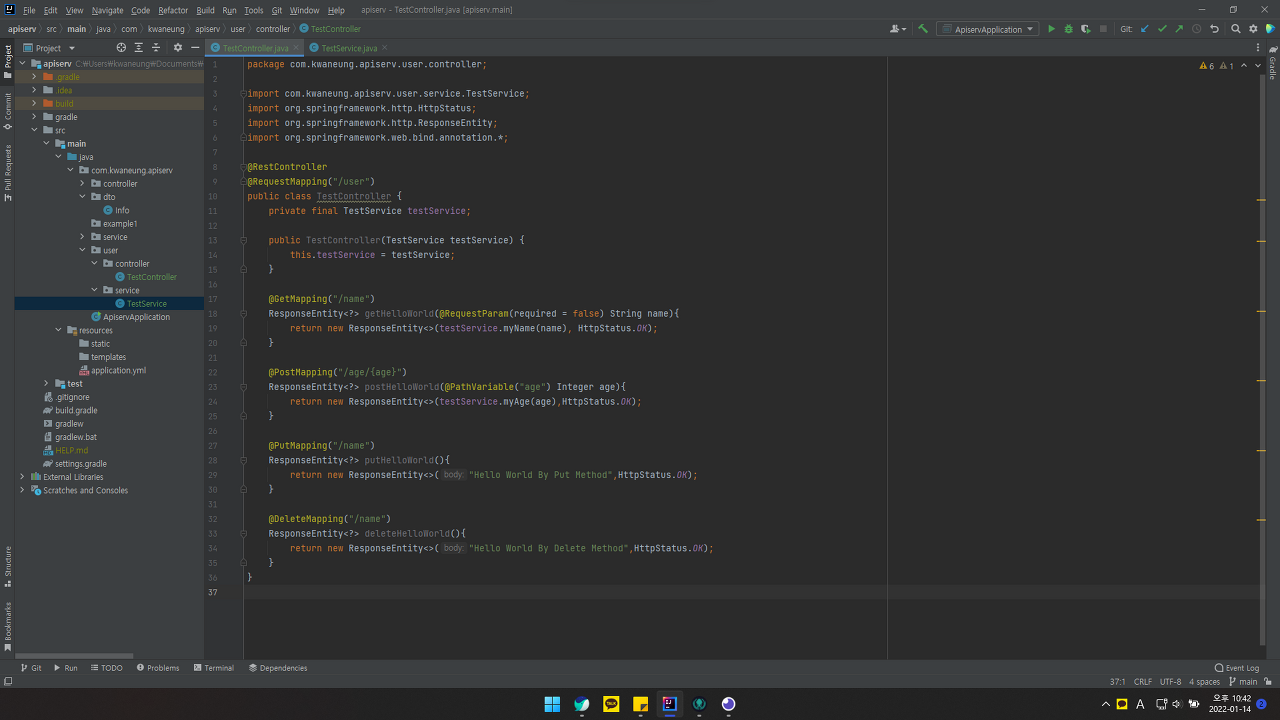
Controller에 Service instance를 생성해준다.
package com.kwaneung.apiserv.user.controller;

import com.kwaneung.apiserv.user.service.TestService;
import org.springframework.http.HttpStatus;
import org.springframework.http.ResponseEntity;
import org.springframework.web.bind.annotation.*;

@RestController
@RequestMapping("/user")
public class TestController {
    private final TestService testService;

    public TestController(TestService testService) {
        this.testService = testService;
    }

    @GetMapping("/name")
    ResponseEntity<?> getHelloWorld(@RequestParam(required = false) String name){
        return new ResponseEntity<>(testService.myName(name), HttpStatus.OK);
    }

    @PostMapping("/age/{age}")
    ResponseEntity<?> postHelloWorld(@PathVariable("age") Integer age){
        return new ResponseEntity<>(testService.myAge(age),HttpStatus.OK);
    }

    @PutMapping("/name")
    ResponseEntity<?> putHelloWorld(){
        return new ResponseEntity<>("Hello World By Put Method",HttpStatus.OK);
    }

    @DeleteMapping("/name")
    ResponseEntity<?> deleteHelloWorld(){
        return new ResponseEntity<>("Hello World By Delete Method",HttpStatus.OK);
    }
}
- @RequestParam : 요청 문자열을 맵핑한다. require 옵션으로 필수값 체크를 할 수 있다.
예제 코드에는 require 옵션을 false로 하고 서비스에서 null을 체크하지만, require 옵션으로 서비스로 넘어가는 값이 있는지 없는지를 먼저 체크할 수 있다. (default가 true다.)
ex) localhost:8888/user/name?name=kwaneung- @PostMapping : 해당 path의 값을 맵핑한다.
ex) localhost:8888/user/age/29

엔지니어였던 개발자