설치
npm i @nestjs/swagger@7.3.0기본 설정
main.ts 에서 설정을 해줄수있땅
file: main.ts

import { DocumentBuilder, SwaggerModule } from '@nestjs/swagger';

async function bootstrap() {

  const config = new DocumentBuilder()
    .setTitle('Swagger Nest.js')
    .setDescription('description')
    .addServer('http://localhost:3000/') // 스웨거 서버 리스트에 추가됨
    .setVersion('1.0')
    .build();
  const document = SwaggerModule.createDocument(app, config);
  SwaggerModule.setup('swagger', app, document);

  await app.listen(3000);
}
bootstrap();
이렇게 설정하면
http://localhost:3000/swagger에 접속시 swagger 확인 가능
Api 설명 추가
file: posts.controller.ts

import { ApiTags } from '@nestjs/swagger';

@Controller('posts')
@ApiTags('Posts API')
export class PostsController {
  constructor(
    // Injecting Posts Service
    private readonly postsService: PostsService,
  ) {}

  @ApiOperation({
    summary: 'Creates a new blog post',
  })
  @ApiResponse({
    status: 201,
    description: 'success!',
  })
  @Post()
  public createPost(@Body() createPostDto: CreatePostDto) {
    console.log(createPostDto);
  }

}
@ApiTags
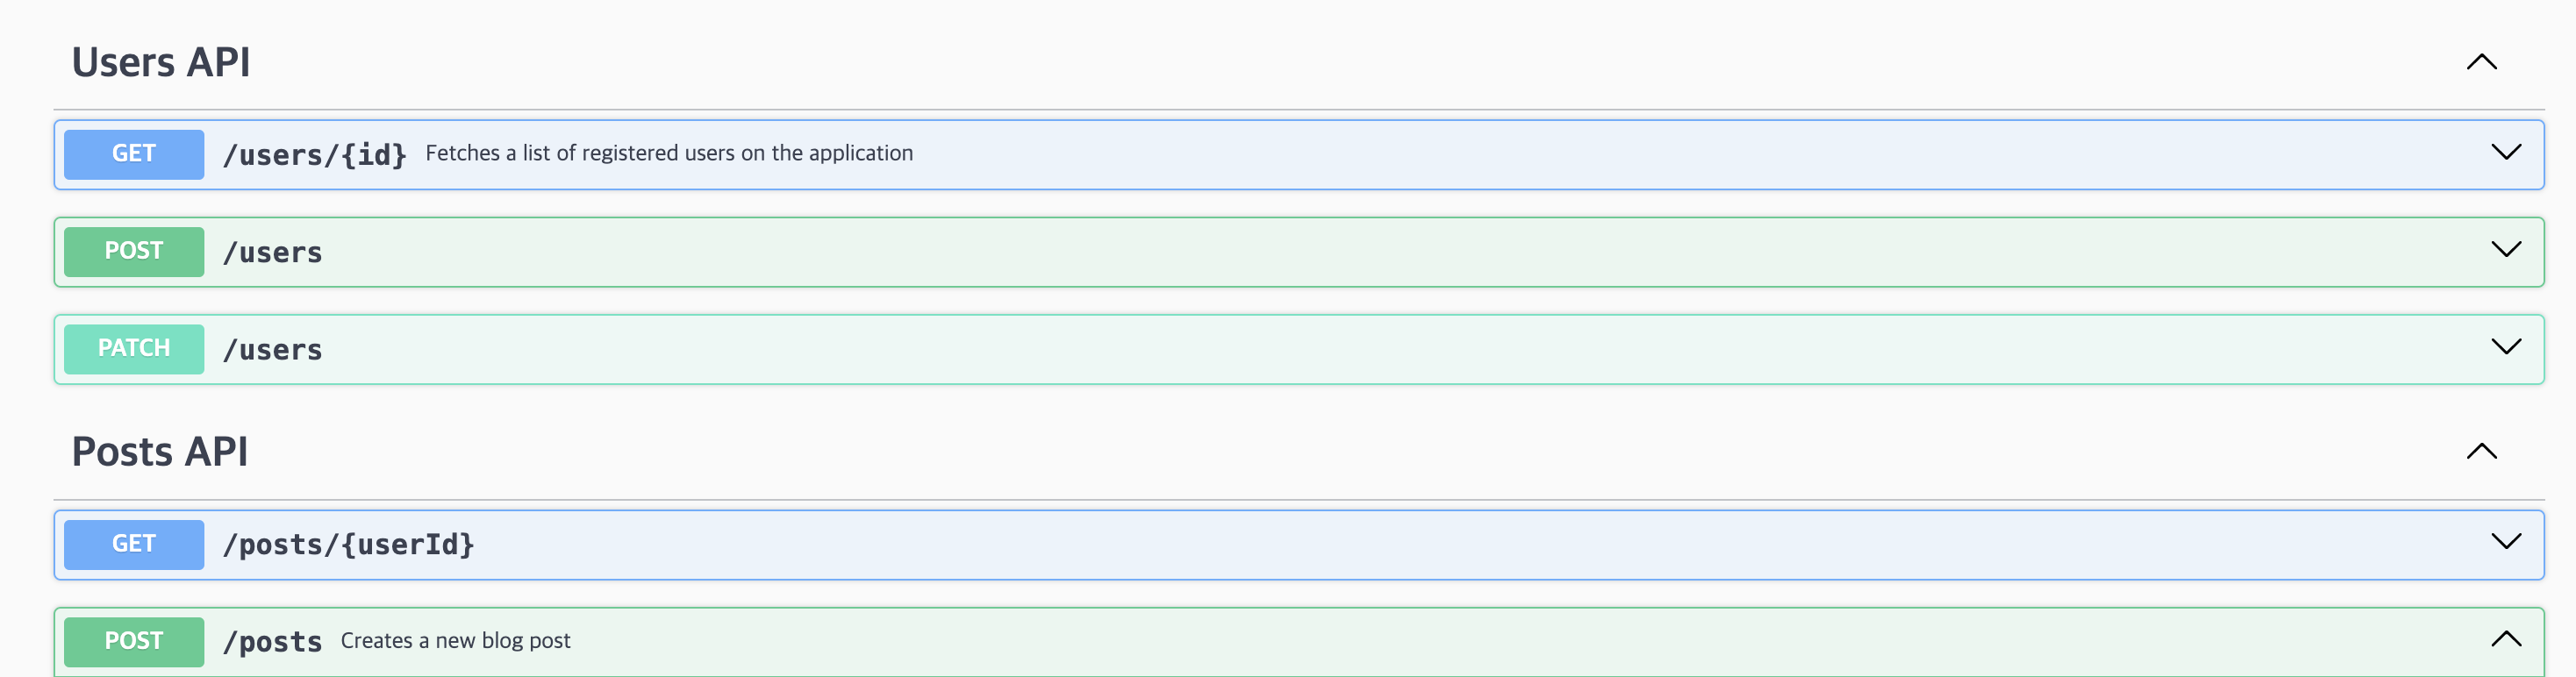
처음에는 모든 api endpoints 들이 default 그룹에 한꺼번에 그룹화되어있지만, 위 사진처럼 모듈에 따라 나누고싶다면 @ApiTags를 controller 파일에서 사용하자.
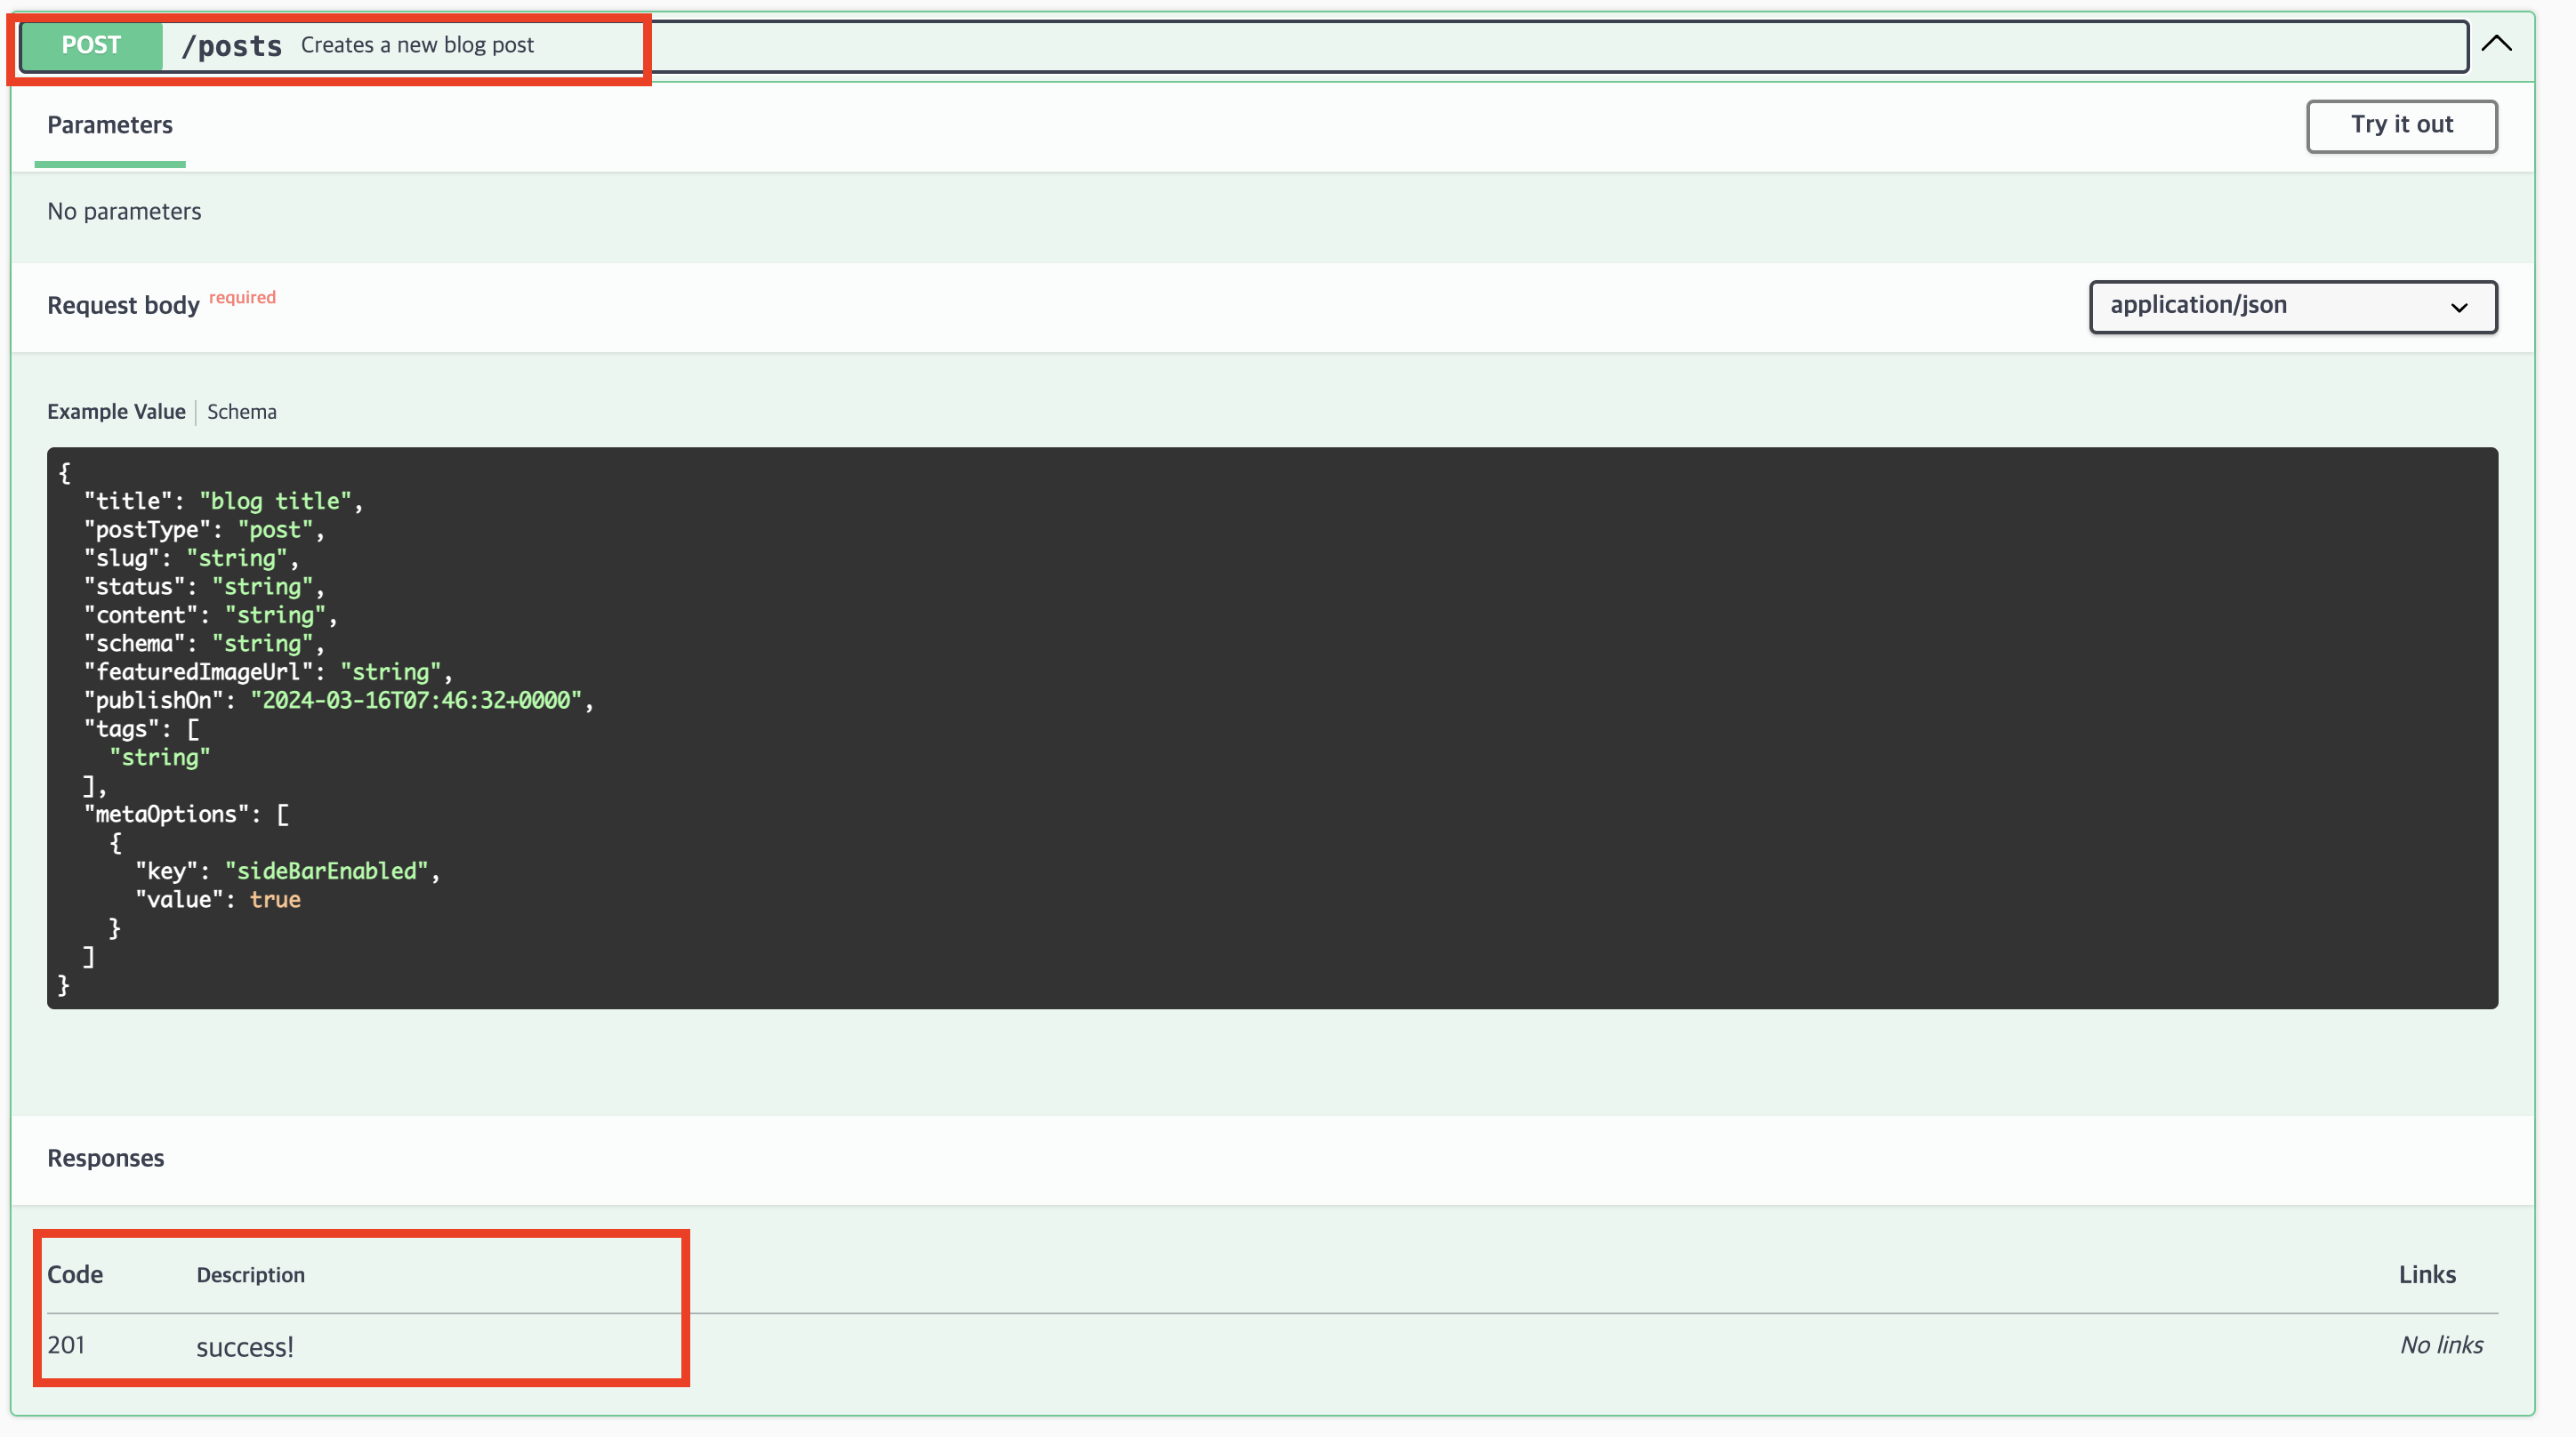
@ApiOperation, @ApiResponse
swagger에서 위 데코레이터들을 통해 어떤 api인지 설명하고, 어떤 응답값을 갖는지 알려줄수있다
@ApiQuery
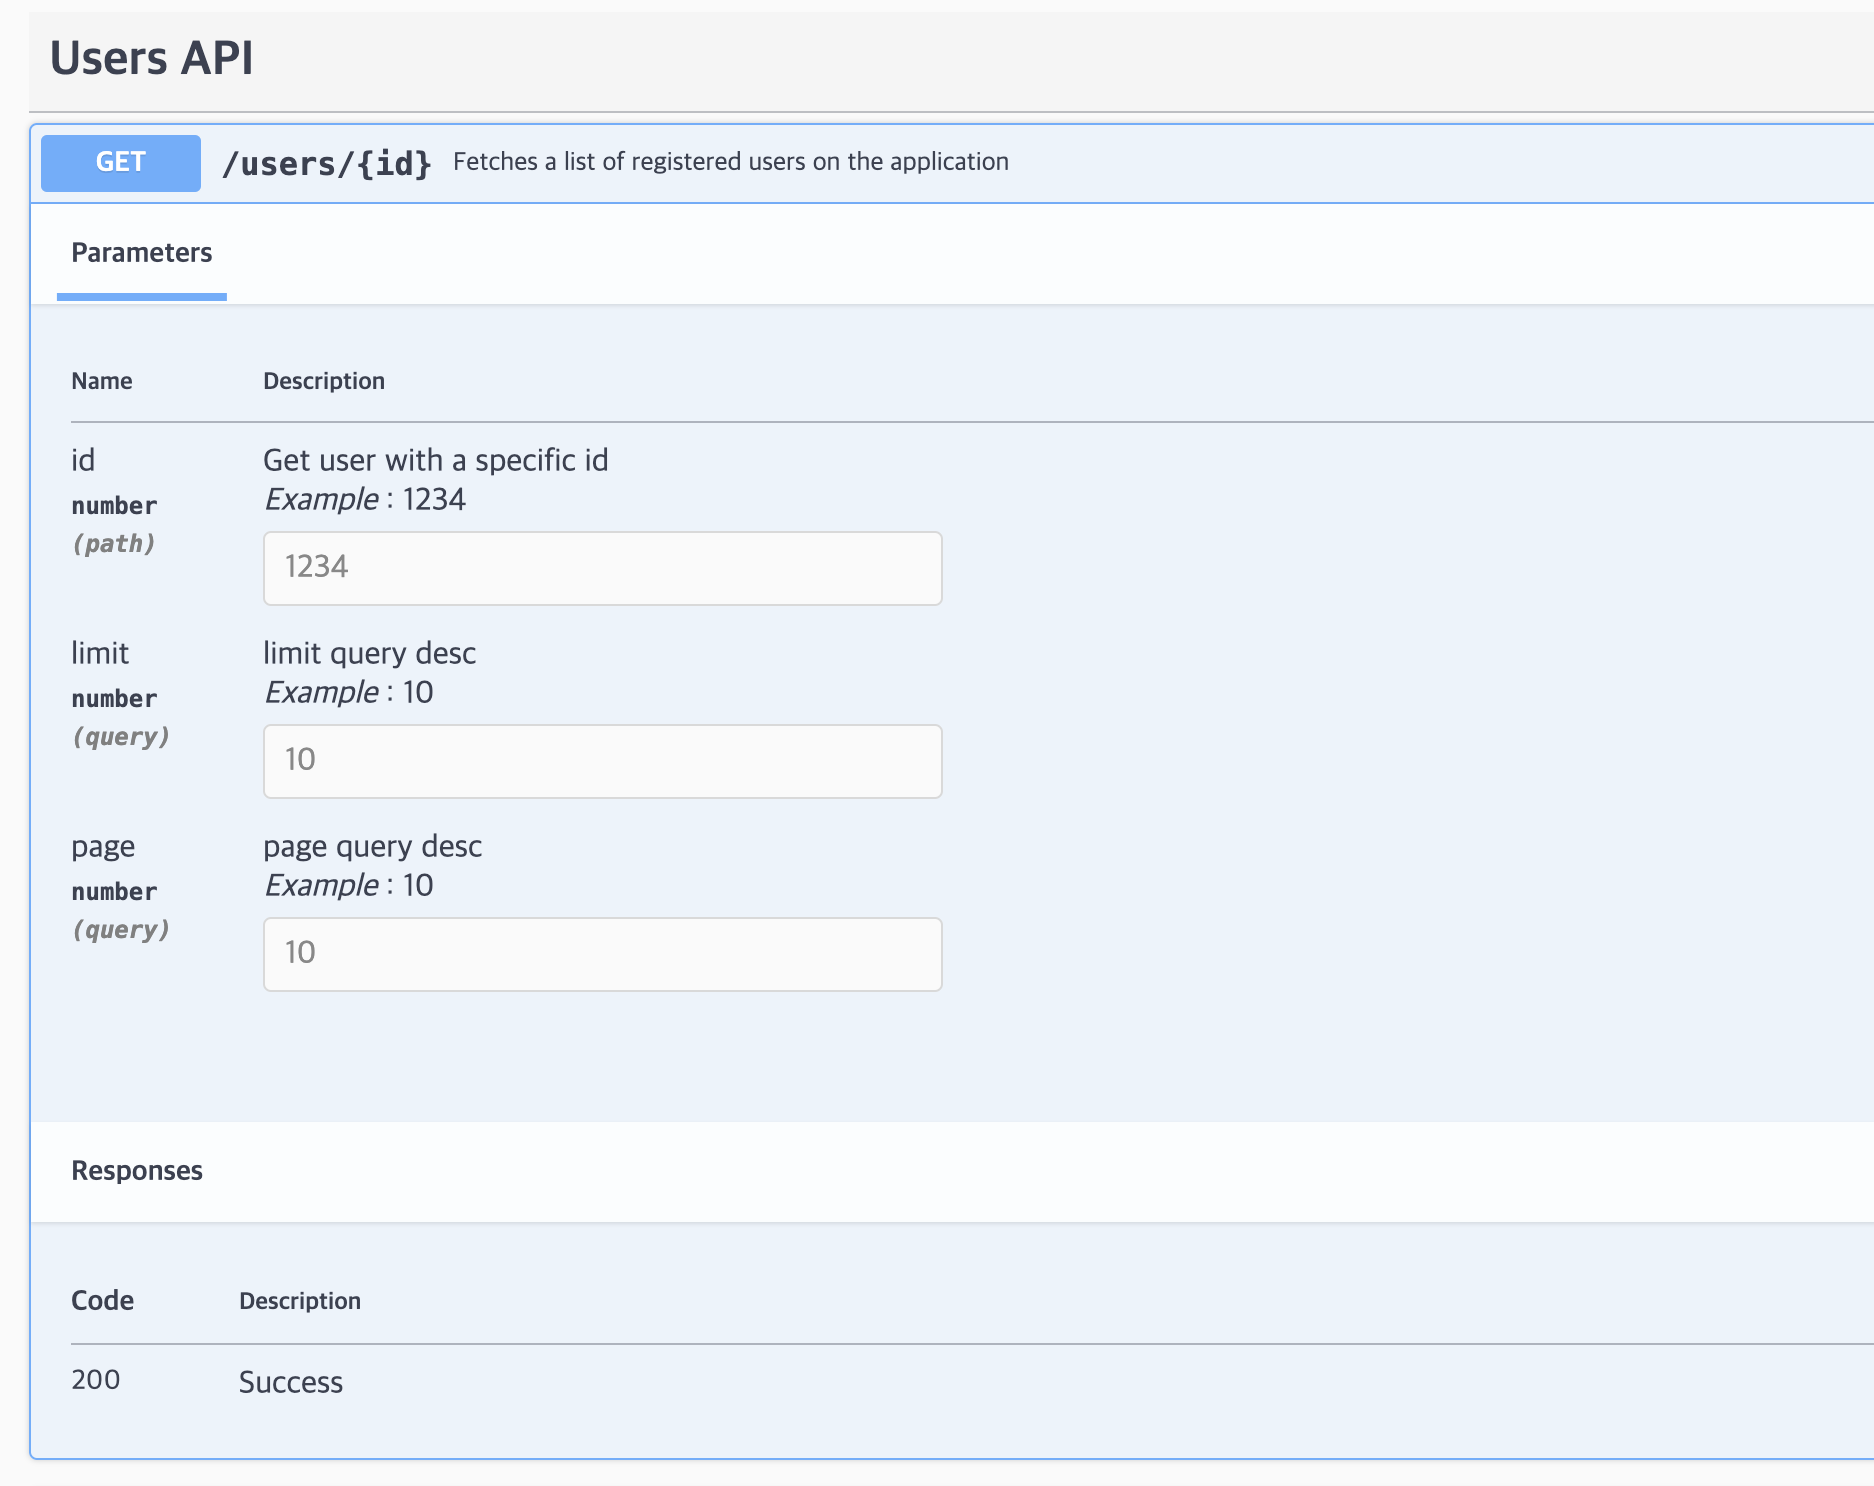
위 사진처럼 query에 대한 정보도 @ApiQuery로 추가 가능
import { ApiQuery } from '@nestjs/swagger';

@Get('/:id?')
@ApiQuery({
    name: 'limit',
    type: 'number',
    required: false,
    description: 'limit query desc',
    example: 10,
  })
  @ApiQuery({
    name: 'page',
    type: 'number',
    required: false,
    description: 'page query desc',
    example: 10,
  })
public getUsers(
    @Param() getUsersParamDto: GetUsersParamDto,
    @Query('limit', new DefaultValuePipe(10), ParseIntPipe) limit: number,
    @Query('page', new DefaultValuePipe(1), ParseIntPipe) page: number,
  ) {
    return this.usersService.findAll(getUsersParamDto, limit, page);
  }
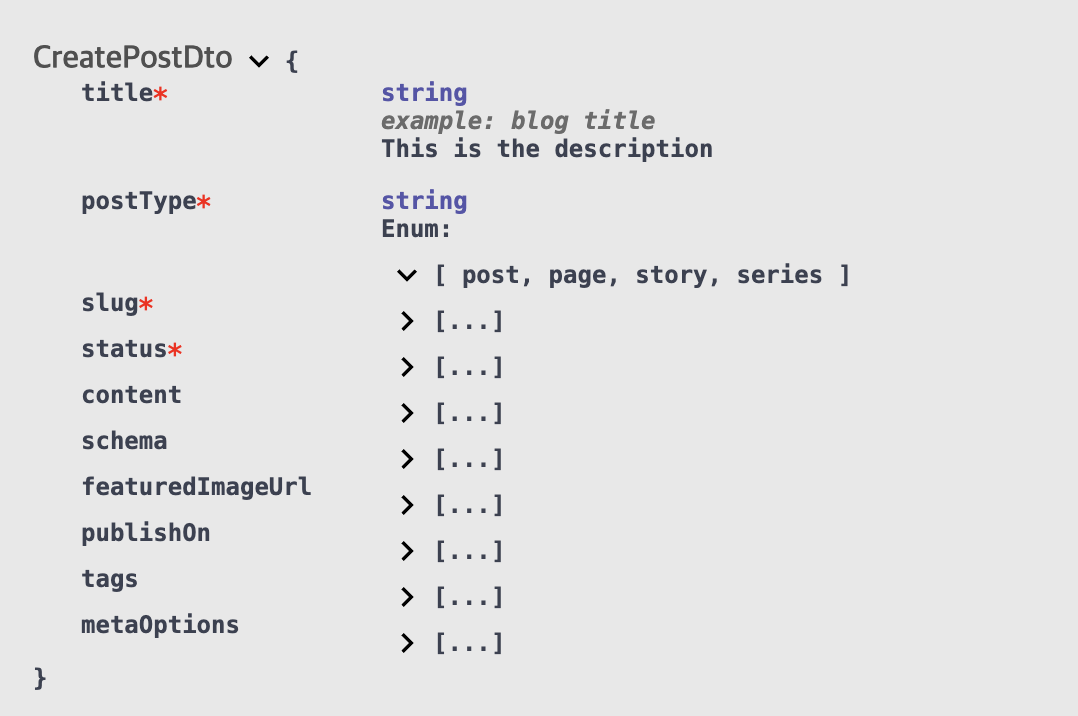
Dto 설명 추가
Dto 에도 정확한 정보를 swagger에 전달하고싶다면
@ApiProperty
optional 프로퍼티인 경우에는 ApiPropertyOptional를 이용하자
import { ApiProperty, ApiPropertyOptional } from '@nestjs/swagger';

export class CreatePostDto {
  @ApiProperty({
    description: 'This is the description',
    example: 'blog title',
  })
  @IsString()
  @MinLength(4)
  @IsNotEmpty()
  title: string;

  @ApiProperty({
    enum: postType,
  })
  @IsEnum(postType)
  @IsNotEmpty()
  postType: postType;

.....
  @ApiPropertyOptional()
  @IsString()
  @IsOptional()
  @ApiPropertyOptional()
  content?: string;
참고로, extends시 필요한 PartialType도
import { PartialType } from '@nestjs/swagger';
하면 됨

👩💻안녕하세요🌞