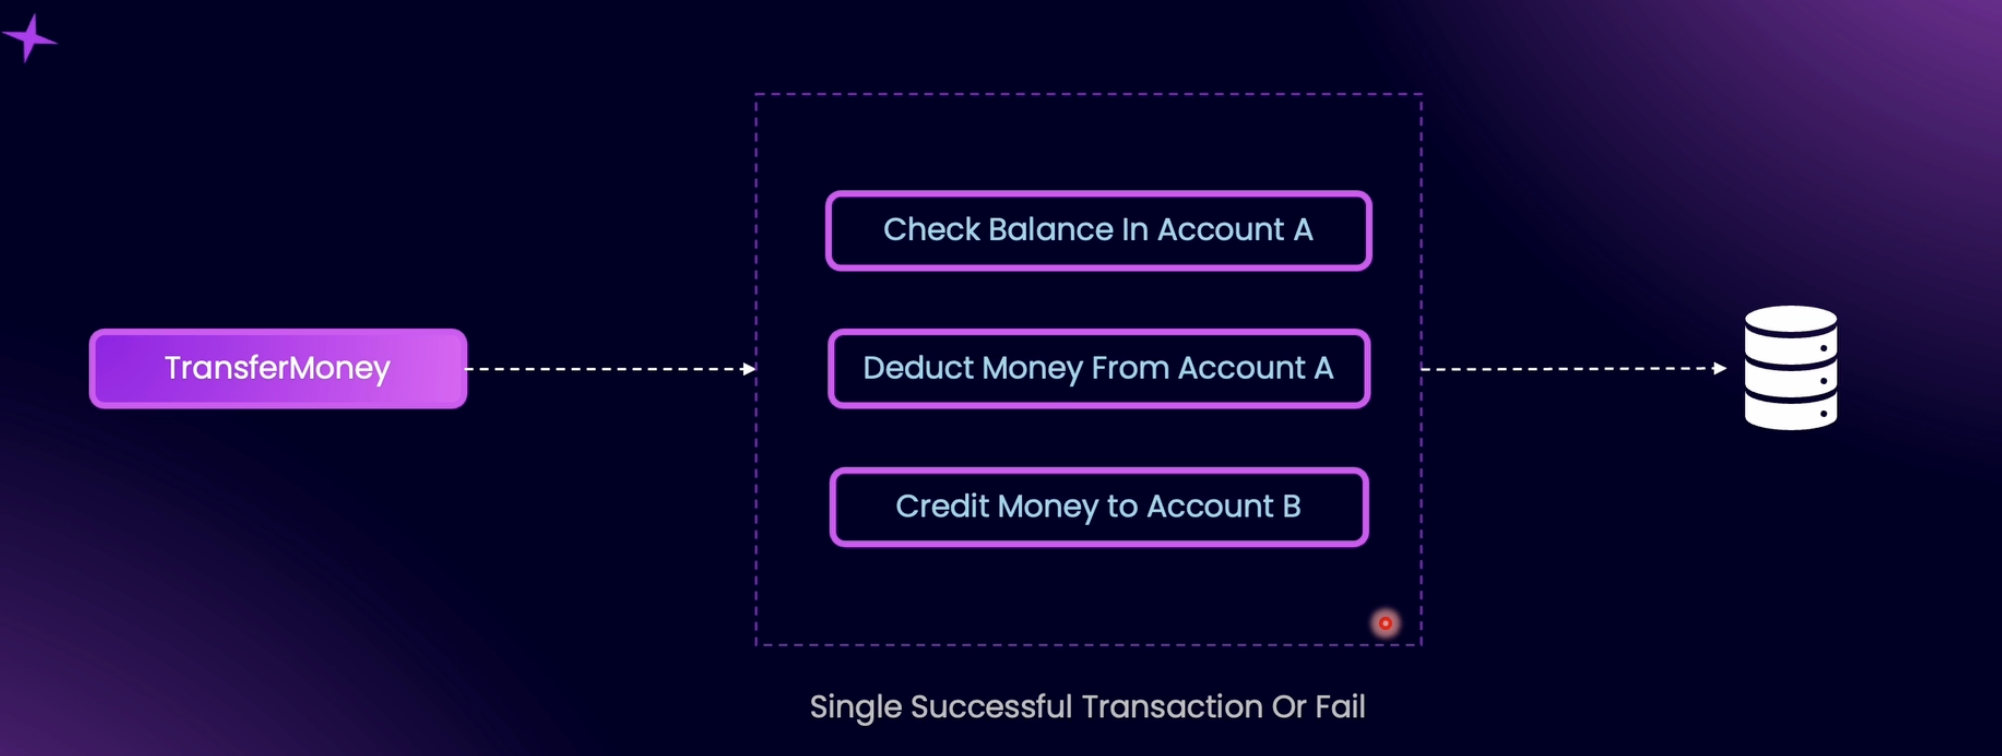
typeORM 에선 위 3개의 단계를 하나의 transaction 이라고 본다
예를들어 유저 A가 B에게 돈을 입금한다고 가정했을때
- A의 계좌 잔액 확인
- A의 돈을 출금
- B 계좌로 입금
이러한 state로 이루어지는데, 이 셋 중 하나라도 오류가 난다면 모든 state가 roll back되며 취소되어야한다. 이런 경우 transaction을 사용한다. transaction을 사용하여 실패했을때는 상태가 자동으로 롤백된다고한다.
예를들어 멀티플 CRUD 를 할때도 db transactions을 사용하는게 좋다.
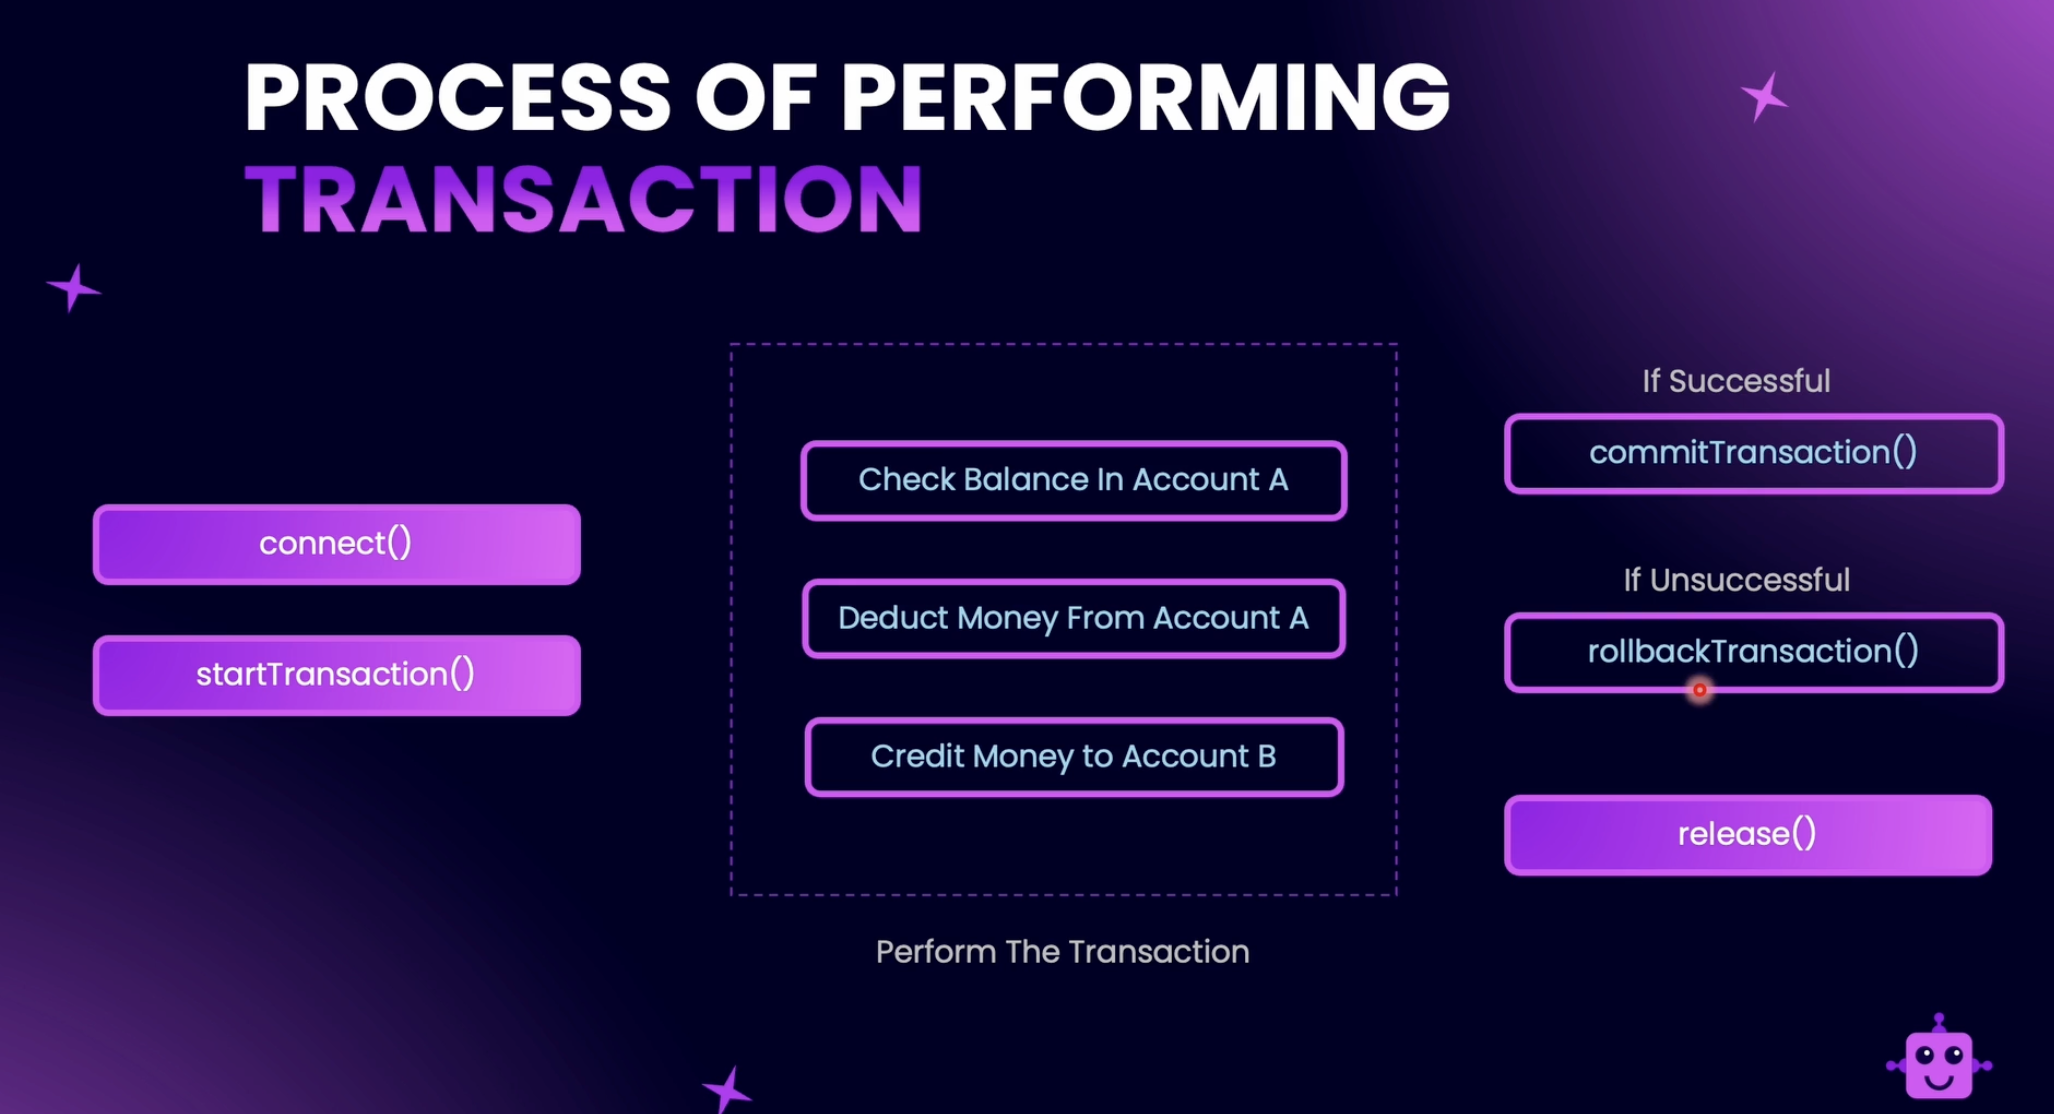
QueryRunner
typeORM 에서는 database transactions를 위해 QueryRunner라는 class를 인스턴스화해서 사용한다
-
QueryRunner라는 class를 인스턴스화 -
.connect()메소드 👉 data source 연결 -
.startTransction()메소드 👉 add transactions to the connection.... transactions 스타뜨
-
try catch 문을 사용해서
3개의 perform이 모두 성공 :commitTransaction()
3개의 perform중 하나라도 실패 :rollbackTransaction()
The rollback method rolls back whatever changes were performed to the database, and puts the database back into the initial stage before you started the transaction.
실습 코드
유저 여러명을 생성하는 transaction을 만들어보자
한명이라도 저장이 실패하면 (ex. 이메일이 없거나) 모든 perform이 취소되게끔!

users.service.ts코드가 길어지는걸 방지하기위해 새로운 파일을 만들자
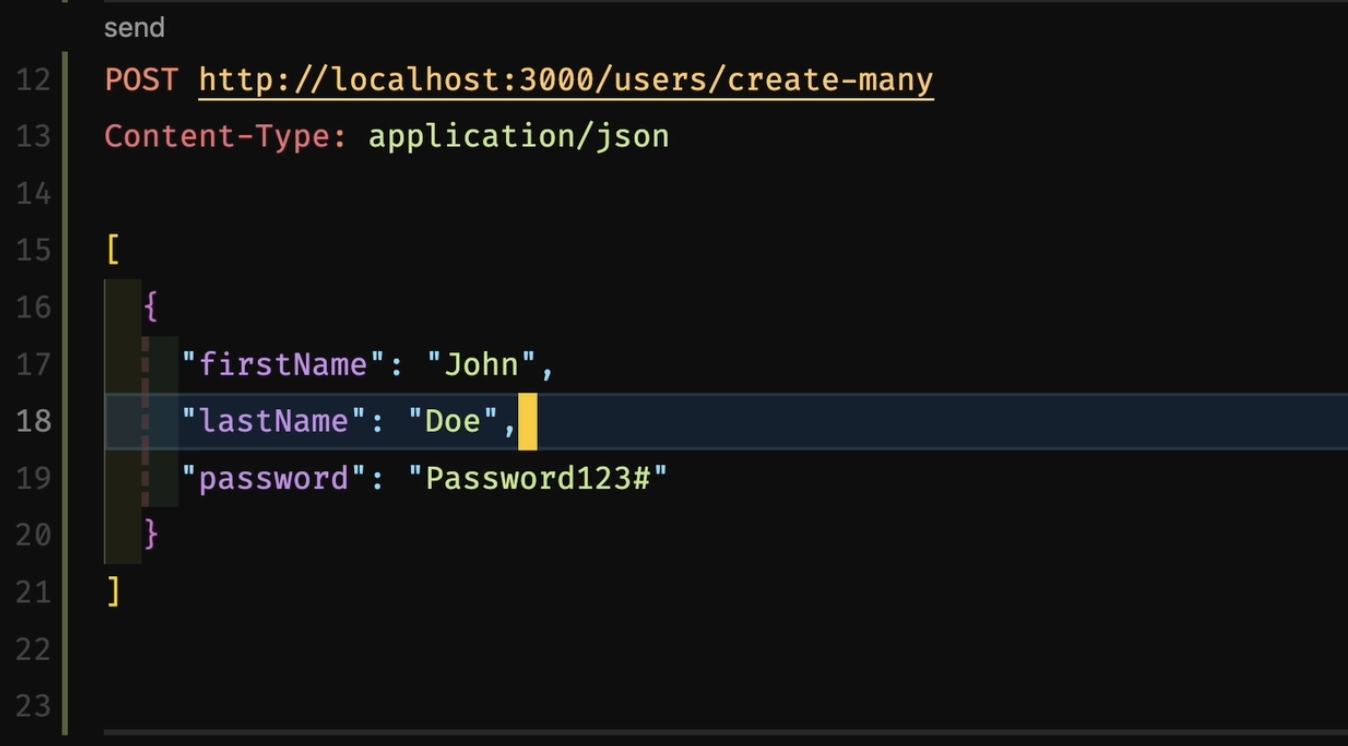
API 명세서
POST http://localhost:3000/users/create-many
Content-Type: application/json

{
"users": [
    {
      "firstName": "Mark",
      "lastName": "Doe",
      "email": "mark@doe.com",
      "password": "Password123#"
    },
    {
      "firstName": "Tom",
      "lastName": "Doe",
      "email": "tom@doe.com",
      "password": "Password123#"
    }
  ]
}
이런식으로 보내진다.
사용자들의 정보는 우선 기존 CreateUserDto를 사용하여 CreateUserDto[]
밑에서 ValidateNested 사용하여 고칠거임
파일 : users-create-many.provider.ts

import {
  ConflictException,
  Injectable,
  RequestTimeoutException,
} from '@nestjs/common';
import { CreateUserDto } from '../dtos/createUser.dto';
import { User } from '../user.entity';
import { DataSource } from 'typeorm';


@Injectable()
export class UsersCreateManyProvider {
  constructor(
    // Injecting Datasource
    private readonly dataSource: DataSource,
  ) {}

  public async createMany(createUsersDto: CreateUserDto[]) {
    let newUsers: User[] = [];
    // Create Query Runner Instance
    const queryRunner = this.dataSource.createQueryRunner();
	// Connect Query Runner to datasource
    await queryRunner.connect();
	// Start Transactions
    await queryRunner.startTransaction();


    try {
      for (let user of createUsersDto) {
        let newUser = queryRunner.manager.create(User, user);
        let result = await queryRunner.manager.save(newUser); //한 user db 저장
        newUsers.push(result);
      }

      // 성공적으로 commit
      // with this line of code, we have successfully catered to the success condition.
      await queryRunner.commitTransaction();

    } catch (err) {
      // 하나라도 실패면 rollback
        await queryRunner.rollbackTransaction();
        throw new ConflictException('Transations didnt complete', {
          description: String(err),
        });

    } finally {
        // 성공이든 실패든 이제 DB연결해제
        await queryRunner.release();
      }
    }

    return newUsers;
  }
}
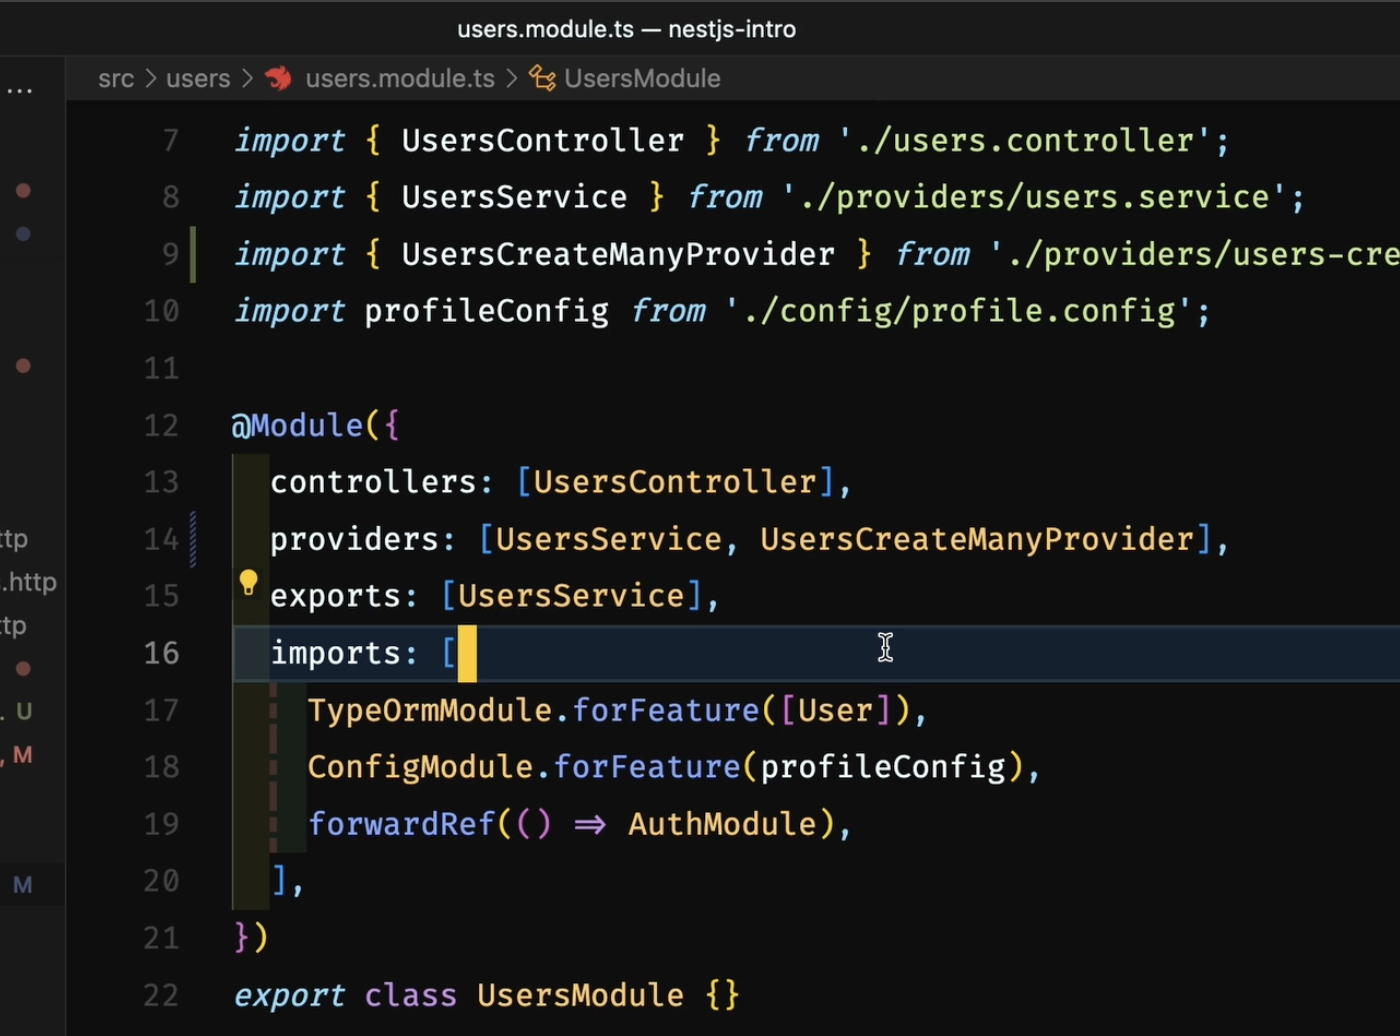
새로운 provider 파일을 생성햇으므로 users.module.ts - providers 에 추가도 해준다 👇👇
DTO 수정하기 (feat. ValidateNested)
POST http://localhost:3000/users/create-many
Content-Type: application/json

{
"users": [
    {
      "firstName": "Mark",
      "lastName": "Doe",
      "email": "mark@doe.com",
      "password": "Password123#"
    },
    {
      "firstName": "Tom",
      "lastName": "Doe",
      "email": "tom@doe.com",
      "password": "Password123#"
    }
  ]
}
명세를 보면 이런식으로 보내진다.
import {
  IsEmail,
  IsNotEmpty,
  IsOptional,
  IsString,
  MaxLength,
  MinLength,
  Matches,
} from 'class-validator';

export class CreateUserDto {
  @IsNotEmpty()
  @IsString()
  @MinLength(3)
  @MaxLength(96)
  firstName: string;

  @IsString()
  @IsOptional()
  @MinLength(3)
  @MaxLength(96)
  lastName?: string;

  @IsNotEmpty()
  @IsString()
  @IsEmail()
  email: string;

  @IsNotEmpty()
  @IsString()
  @MinLength(8)
  @Matches(
    /^(?=.*[a-zA-Z])(?=.*\d)(?=.*[!@#$%^&*()_+={}\[\]:;"'<>,.?~`-]).+$/,
    {
      message:
        'Minimum 8 characters at least one number, one letter and one special character',
    },
  )
  password: string;
}
그럼 걍 위 실습코드처럼 CreateUserDto[] 이렇게 하면되는거아니야?!
👉 안됩니다 배열 안 user의 프로퍼티 검증못함
이렇게 email 없이 요청해도 에러안뜸
👉 dto 새로 생성하자!
ValidateNestedType
태그 두개 이용하면 됩니다
nested DTO를 사용할때는 @ValidateNested, @Type 항상둘다사용
import { IsArray, IsNotEmpty, ValidateNested } from 'class-validator';
import { CreateUserDto } from './createUser.dto';
import { Type } from 'class-transformer';


export class CreateManyUsersDto {
  @IsNotEmpty()
  @IsArray()
  @ValidateNested({ each: true }) //each element of the array would comply to the CreateUserDto.
  @Type(() => CreateUserDto) //the type of value that each element of this particular array would contain.
  users: CreateUserDto[];
}
each 는 배열 안 CreateUserDto 각각을 다 검증하겟다는겨