get 요청시 10000개의 데이터가있다면 한꺼번에 불러오는게 어려우므로 pagination을 구현해보도록하자
Pagination in Posts
이렇게 요청을 보낸다면
(limit은 받을 data의 개수)

이렇게 page에 대한 정보가 다 담기도록할거다
이렇게 해야 프론트엔드도 편하니꽈~😋
Pagination Dto
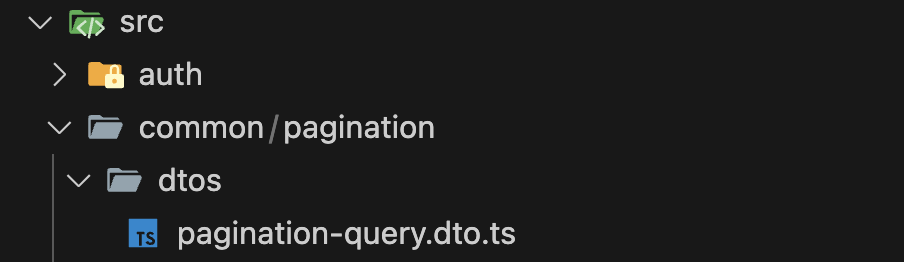
Paginaiton은 결국 거의 모든 쿼리에서쓰이니까 common folder를 만들고 여기에 pagination 폴더를 만들어서 새로운 module도 생성했다.
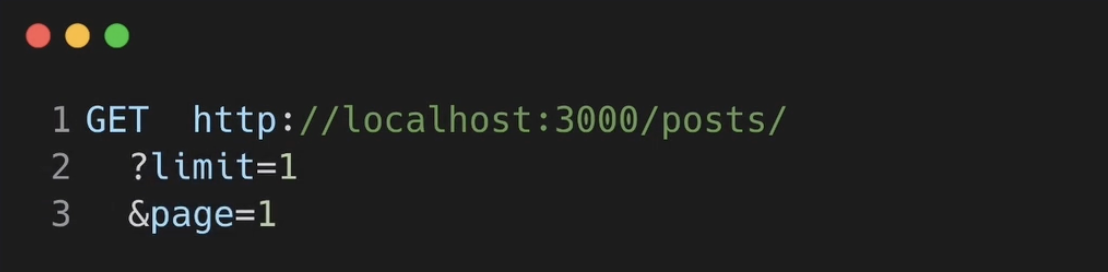
GET http://localhost:3000/posts/
    ?limit=5
    &page=3
우리가 get 요청을 이런식으로보내므로, query에는 항상 limit(받을 data의 개수) 과 page 가 들어간다.
pagination 폴더에 dto 파일을 생성하자
import { Type } from 'class-transformer';
import { IsOptional, IsPositive } from 'class-validator';

export class PaginationQueryDto {
  @IsOptional()
  @IsPositive() //숫자 +인지
  @Type(() => Number)
  limit?: number = 10; //default


  @IsOptional()
  @IsPositive() //숫자 +인지
  @Type(() => Number)
  page?: number = 1;
}
query는 문자열로 들어오므로 number 타입으로 자동변환을 위해 @Type(() => Number)를 사용했다.
implicit conversions
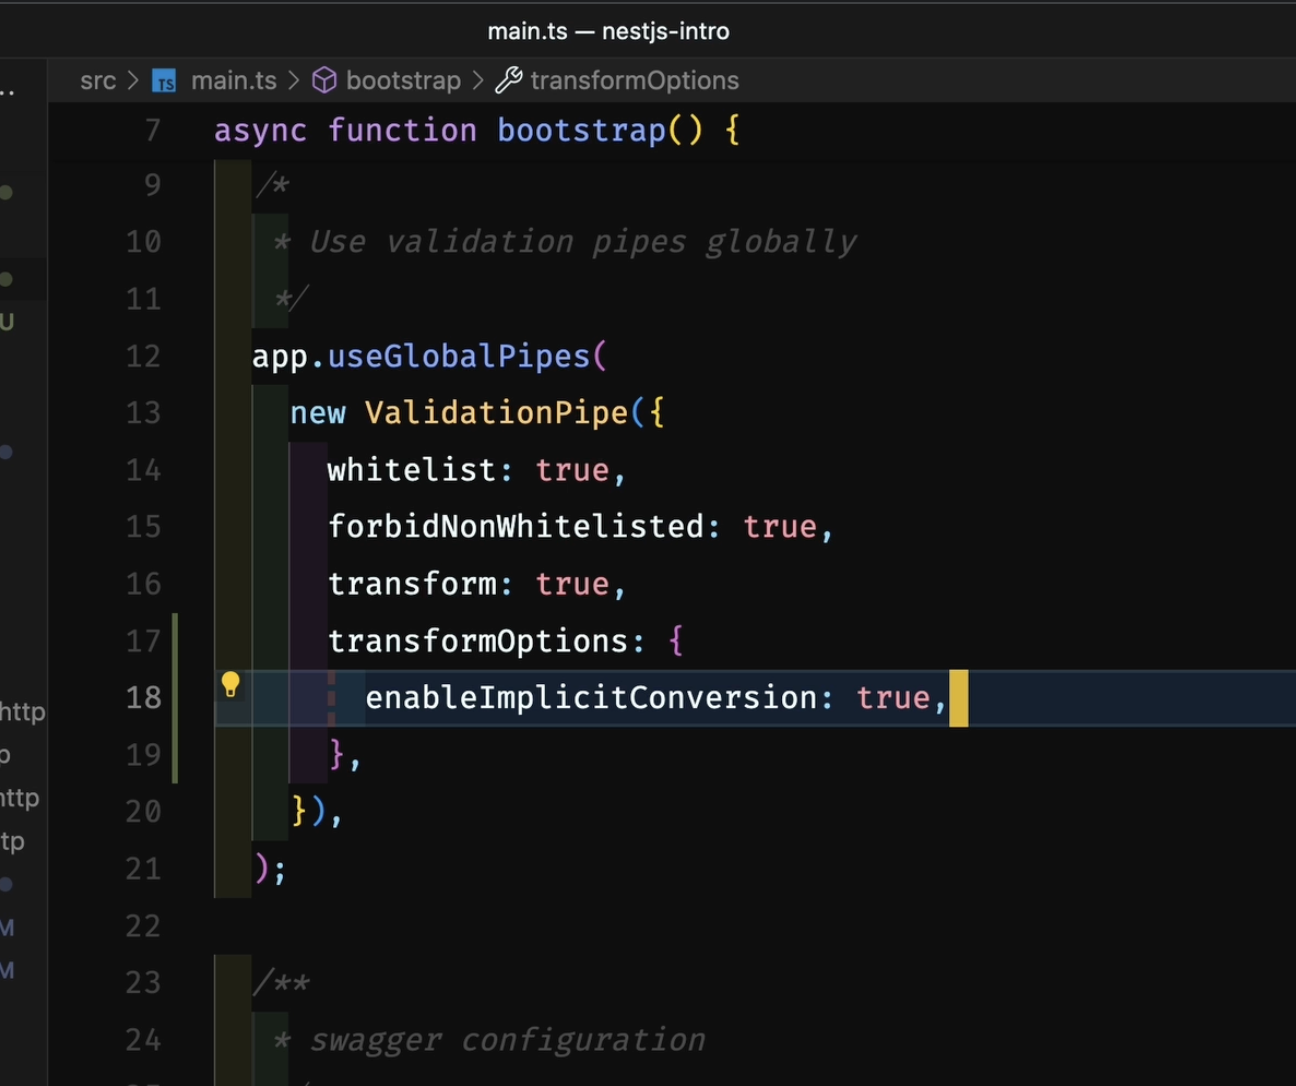
하지만 항상 자동 변환이 이루어지게하고싶다면? 👉👉 implicit conversions(암시적 변환)
즉 모든 키값에 @Type(()=>Number)대신 validationPipe 에enableImplicitConversion : true 를 하면 된다
IntersectionType with Pagination Dto
GET http://localhost:3000/posts/
    ?limit=5
    &page=3
나는 post를 다 가져오는 함수에서 pagination을 먼저 구현하려고한다
getPosts.dto.ts 를 만들고, limit과 page가 있는 Pagination Dto와 합쳐보자. IntersectionType를 사용하면된다
파일: getPosts.dto.ts

import { IntersectionType } from '@nestjs/swagger';
import { Type } from 'class-transformer';
import { IsDate, IsOptional } from 'class-validator';
import { PaginationQueryDto } from 'src/common/pagination/dtos/pagination-query.dto';

class GetPostsBaseDto {
  @IsDate()
  @IsOptional()
  @Type(() => Date)
  startDate?: Date;

  @IsDate()
  @IsOptional()
  @Type(() => Date)
  endDate?: Date;
}

export class GetPostsDto extends IntersectionType(
  GetPostsBaseDto,
  PaginationQueryDto,
) {}
Return Type
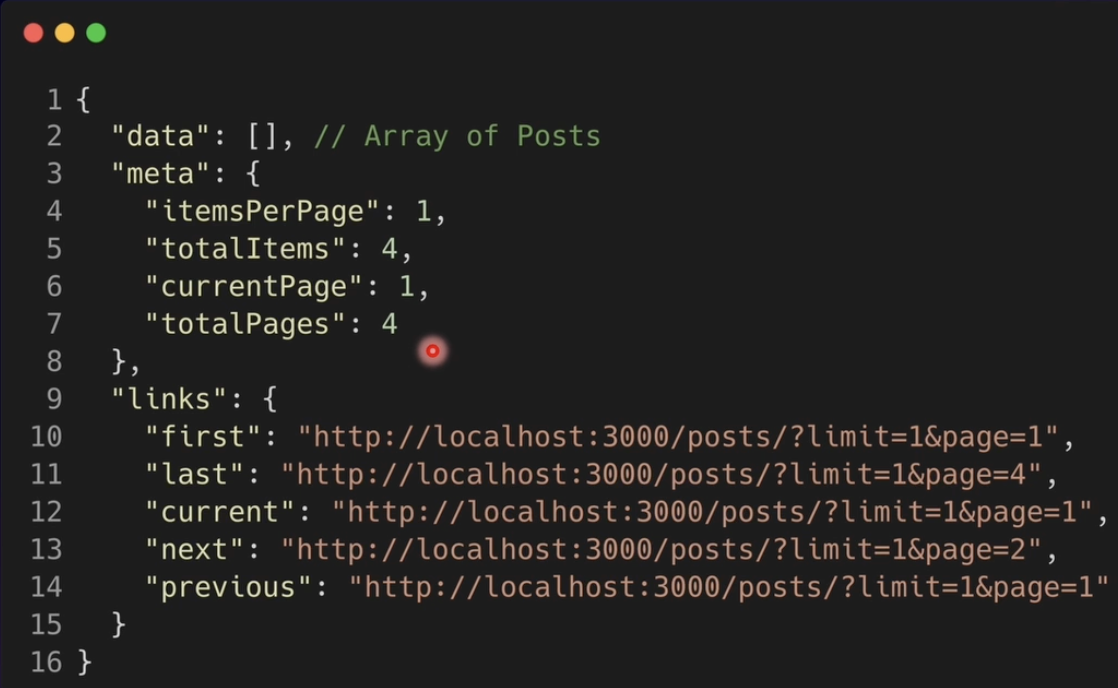
이렇게 response를 받고싶으므로 type 파일을 만들자
파일: paginated.interface.ts

export interface Paginated<T> {
  data: T[];
  //data is going to be an array of the entity.
  // for example if you want to paginate the posts entity, the data over here would be an array of posts.
  // If you want to paginate the user's entity, then the data over here is going to be an array of users.
  meta: {
    itemsPerPage: number;
    totalItems: number;
    currentPage: number;
    totalPages: number;
  };
  links: {
    first: string;
    last: string;
    current: string;
    next: string;
    previous: string;
  };
}
generic 타입인 이유는, 모든곳에서 사용하기위함.
만약 내가 post 서비스에서 사용하게된다면 data 는 post엔티티의 형태를 가진 배열일테고, user 서비스에서 사용하게된다면 data 는 user 엔티티의 형태를 가진 배열이니까!
PaginationProvider
본격적으로 pagination을 다른 모듈에서 사용하기위해 provider 파일을 만들자.
Provider will hold the logic in order to paginate any entity that we want to Paginate.
파일: paginated.interface.ts

export interface Paginated<T> {
  data: T[];
  //data is going to be an array of the entity.
  // for example if you want to paginate the posts entity, the data over here would be an array of posts.
  // If you want to paginate the user's entity, then the data over here is going to be an array of users.
  meta: {
    itemsPerPage: number;
    totalItems: number;
    currentPage: number;
    totalPages: number;
  };
  links: {
    first: string;
    last: string;
    current: string;
    next: string;
    previous: string;
  };
}
우리가 return 해야할 값은 이와 같은 Paginated<T> 오브젝트이다
차례대로 data, meta, links의 값을 구하는 법을 알아보자.
data
Now data is going to be an array of the entity.
So for example if you want to paginate the posts entity, the data over here would be an array of posts. If you want to paginate the user's entity, then the data over here is going to be an array of users.
import { Injectable, Inject } from '@nestjs/common';
import { ObjectLiteral, Repository } from 'typeorm';
import { PaginationQueryDto } from '../dtos/pagination-query.dto';
import { REQUEST } from '@nestjs/core';
import { Request } from 'express';
import { Paginated } from '../interfaces/paginated.interface';

@Injectable()
export class PaginationProvider {
  constructor(
    //Injecting request
    @Inject(REQUEST)
    private readonly request: Request,
  ) {}
  public async paginateQuery<T extends ObjectLiteral>(
    paginationQuery: PaginationQueryDto,
    repository: Repository<T>,
    relations?: object | null,
  ): Promise<Paginated<T>> {
    // async니까 return type Promise

    let result = await repository.find({
     🌟 skip: (paginationQuery.page - 1) * paginationQuery.limit,
     🌟 take: paginationQuery.limit,

      relations: relations,
    });

      ...////


  }
}
우선 return type은 promise이며 Paginated<T> 타입을 가진 obj이다.
<T extends ObjectLiteral>인 이유는, T는 repository의 타입에따라 users의 오브젝트일수도있고 posts의 오브젝트일 수도 있기 때문이다. ObjectLiteral는 key값이 string이고 value는 any타입인 오브젝트타입이다.
그리고 repository에서 pagination에 해당하는 data만 가져오기 위해 skip 과 take를 사용하자
skip은 첫번째 페이지서부터 생략하는 data의 갯수이고, take는 가져올 data의 갯수이다.
만약 limit(가져올 개수)가 10이고 , page 가 2라면, 1부터 10까지의 데이터는 스킵하고 11-20 까지의 데이터만 가져와야하므로 🌟 와 같은 값이 된다.
결국 pagination에 해당하는 data값은 result가 된다.
meta
meta: {
    itemsPerPage: number;
    totalItems: number;
    currentPage: number;
    totalPages: number;
  };

👇👇👇

   const totalItems = await repository.count(); // 모든 data 개수
   const totalPages = Math.ceil(totalItems / paginationQuery.limit);

👇👇👇
meta: {
        itemsPerPage: paginationQuery.limit,
        totalItems: totalItems,
        currentPage: paginationQuery.page,
        totalPages: totalPages,
      }
상대적으로 구하기 쉽다.
links
links를 구하기 위해선
import { REQUEST } from '@nestjs/core'
import { Request } from 'express'
가 필요하다
import { Injectable, Inject } from '@nestjs/common';
import { ObjectLiteral, Repository } from 'typeorm';
import { PaginationQueryDto } from '../dtos/pagination-query.dto';
import { REQUEST } from '@nestjs/core';
import { Request } from 'express';
import { Paginated } from '../interfaces/paginated.interface';
@Injectable()
export class PaginationProvider {
constructor(
//Injecting request
@Inject(REQUEST)
private readonly request: Request,
) {}
public async paginateQuery<T extends ObjectLiteral>(
paginationQuery: PaginationQueryDto,
repository: Repository<T>,
relations?: object | null,
): Promise<Paginated<T>> {
// Create the baseURL
const baseURL =
this.request.protocol + '://' + this.request.headers.host + '/';
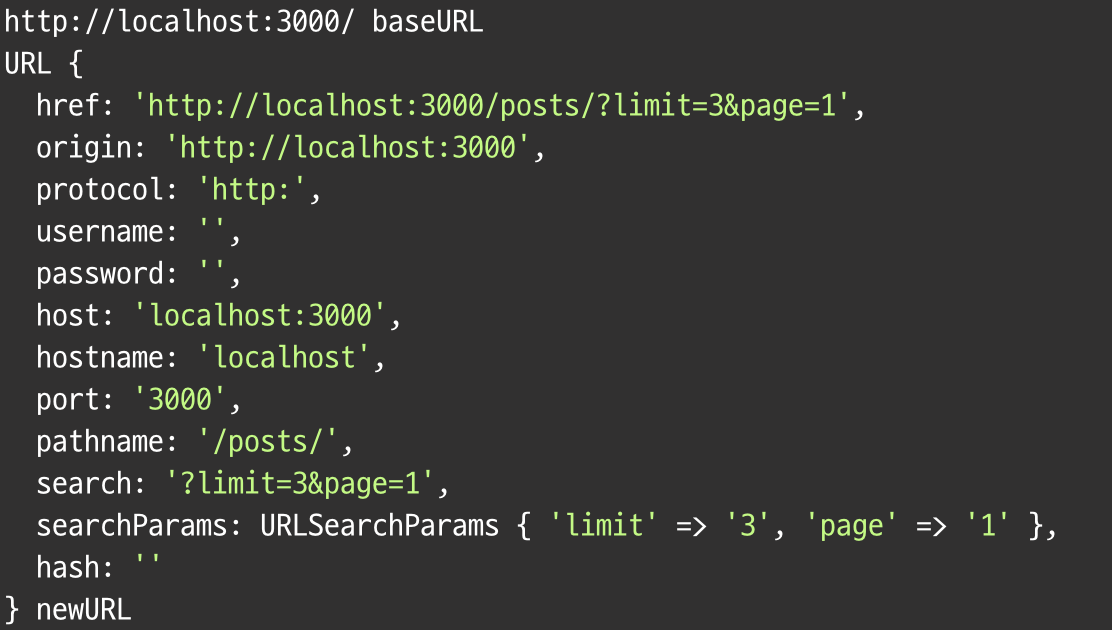
const newURL = new URL(this.request.url, baseURL);
//console.log(baseURL, 'baseURL'); // http://localhost:3000/
//console.log(newURL, 'newURL');
const totalItems = await repository.count();
const totalPages = Math.ceil(totalItems / paginationQuery.limit);
const nextPage =
paginationQuery.page === totalPages
? paginationQuery.page
: paginationQuery.page + 1;
const prevPage =
paginationQuery.page === 1
? paginationQuery.page
: paginationQuery.page - 1;
const finalResponse: Paginated<T> = {
data: result,
meta: {
itemsPerPage: paginationQuery.limit,
totalItems: totalItems,
currentPage: paginationQuery.page,
totalPages: totalPages,
},
links: {
first: `${newURL.origin}${newURL.pathname}?limit=${paginationQuery.limit}&page=1`,
last: `${newURL.origin}${newURL.pathname}?limit=${paginationQuery.limit}&page=${totalPages}`,
current: `${newURL.origin}${newURL.pathname}?limit=${paginationQuery.limit}&page=${paginationQuery.page}`,
next: `${newURL.origin}${newURL.pathname}?limit=${paginationQuery.limit}&page=${nextPage}`,
previous: `${newURL.origin}${newURL.pathname}?limit=${paginationQuery.limit}&page=${prevPage}`,
},
};
return finalResponse;
}
}
localhost일 경우
newURL과 baseURL 의 출력결과는 다음과 같다.