
이번 포스팅에서는 Ansible의 fact caching과 Secret Manager와의 연동에 대해 알아보겠다.
실습환경 구성
스터디에서 제공해준 CF가 있으니, 참조하여 설치하도록 하자. ubuntu(암호: qwe123)
# YAML 파일 다운로드
curl -O https://s3.ap-northeast-2.amazonaws.com/cloudformation.cloudneta.net/Ansible/a101-2w.yaml

# CloudFormation 스택 배포
# aws cloudformation deploy --template-file a101-1w.yaml --stack-name mylab --parameter-overrides KeyName=<My SSH Keyname> SgIngressSshCidr=<My Home Public IP Address>/32 --region ap-northeast-2
예시) aws cloudformation deploy --template-file a101-2w.yaml --stack-name mylab --parameter-overrides KeyName=kp-gasida SgIngressSshCidr=$(curl -s ipinfo.io/ip)/32 --region ap-northeast-2 --capabilities CAPABILITY_NAMED_IAM

## Tip. 인스턴스 타입 변경 : MyInstanceType=t3.xlarge
예시) aws cloudformation deploy --template-file a101-2w.yaml --stack-name mylab --parameter-overrides KeyName=kp-gasida SgIngressSshCidr=$(curl -s ipinfo.io/ip)/32 --region ap-northeast-2 --capabilities CAPABILITY_NAMED_IAM MyInstanceType=t3.xlarge

# CloudFormation 스택 배포 완료 후 작업용 EC2 IP 출력
aws cloudformation describe-stacks --stack-name mylab --query 'Stacks[*].Outputs[0].OutputValue' --output text --region ap-northeast-2

# Ansible Server EC2 SSH 접속
ssh -i ~/.ssh/kp-gasida.pem ubuntu@$(aws cloudformation describe-stacks --stack-name mylab --query 'Stacks[*].Outputs[0].OutputValue' --output text --region ap-northeast-2)
Managed node에 ssh 공개키 배포
# 공개 키를 관리 노드에 복사
for i in {1..3}; do ssh-copy-id ubuntu@tnode$i; done
# 복사 확인
for i in {1..3}; do echo ">> tnode$i <<"; ssh tnode$i cat ~/.ssh/authorized_keys; echo; done
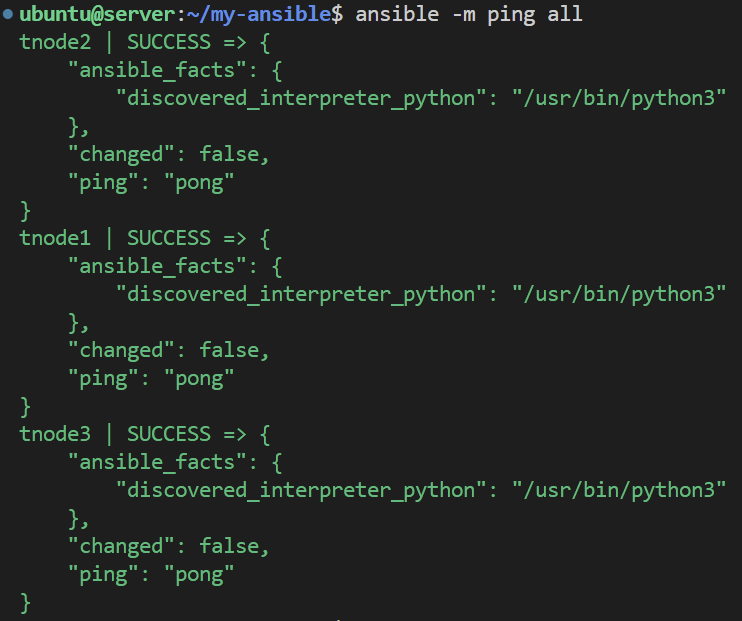
# ping 모듈 확인
ansible -m ping allCF로 환경세팅을 하게되면 4개의 노드가 세팅되는데, Server node 에 Managed node의 alias가 지정되어 있어서 위 명령어로 SSH 공개키 배포가 가능하다.
fact caching
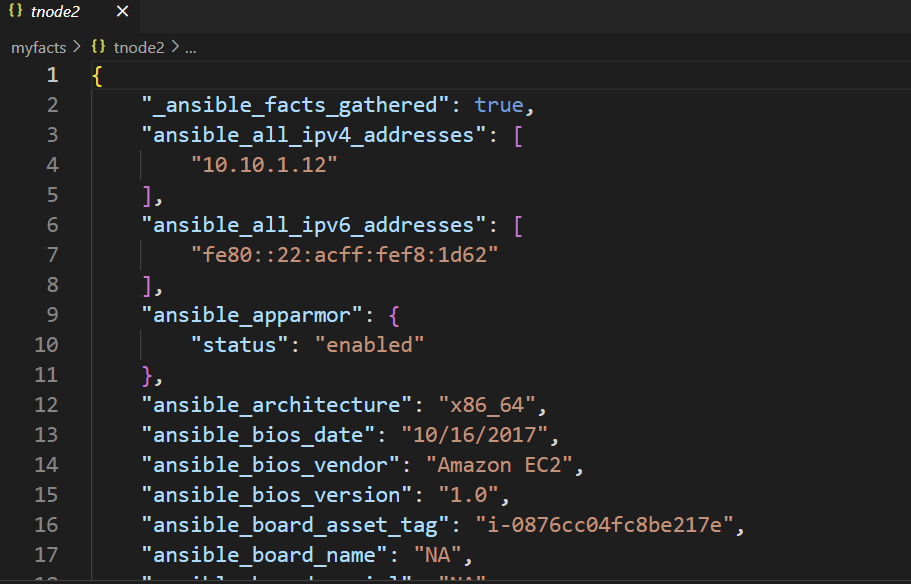
ansible.cfg 파일을 보면, fact_caching 이라는 파라미터가 있는데, Server node에서 Managed node 접근 시 해당 노드의 정보를 읽어오는데, 이 값들을 캐싱하는 것이라고 보면 된다. 캐싱되므로 이후는 fact 값을 지정된 Server node의 디렉토리에서 가져오게 된다.
[defaults]
inventory = ./inventory
remote_user = ubuntu
ask_pass = false
inject_facts_as_vars = false
gathering = smart
fact_caching = jsonfile
fact_caching_connection = myfacts
캐싱된 fact 정보들..
--flush-cache
fact 캐시를 삭제하는 명령어로, 뭔가 새로 불러오거나 이슈가 생겼을 때 사용 가능하다.
AWS Secret Manager 연동
이전 포스팅에서 ansible vault를 이용해 playbook을 암호화 하는 것을 배웠다. 복호화 시 Server node 어딘가이 있는 password를 사용하는데, 보안상 AWS Secret Manager나 Vault 등을 사용하는게 안전하다.
이미 Server node에는 Secret Manager 관련 롤이 할당되어 있다.
$ aws sts get-caller-identity
{
    "UserId": "AROAQPRC2GSOFCMSWQAPA:i-02aafe4a7f5c033f2",
    "Account": "033359017116",
    "Arn": "arn:aws:sts::033359017116:assumed-role/AnsibleInstanceRole/i-02aafe4a7f5c033f2"
}

# 암호 파일 생성
echo "Password1!" > mysecret.txt
chmod go-rx mysecret.txt
ls -l mysecret.txt

# AWS SecretManager로 암호 생성 및 확인
aws secretsmanager create-secret --name MySecret1 --secret-string file://mysecret.txt --region ap-northeast-2
aws secretsmanager get-secret-value --secret-id MySecret1 --region ap-northeast-2 | jq

# 암호 파일은 제거
shred -u mysecret.txt  # The file is destroyed so it can no longer be accessed
(shred란 민감정보 파일 삭제 시 더 안전하게 지워주는 command 이니 참고하자: https://www.freecodecamp.org/news/securely-erasing-a-disk-and-file-using-linux-command-shred/)

실습
$ vi get-vault-password.sh
aws secretsmanager get-secret-value --secret-id MySecret1 --region ap-northeast-2 | jq -r .SecretString

ansible-vault create --vault-pass-file ./get-vault-password.sh mysecret1.yml

- hosts: all
  tasks:
    - name: Print message
      debug:
        msg: Secret Test

$ ansible-playbook mysecret1.yml --vault-password-file ./get-vault-password.sh
mysecret1.yml
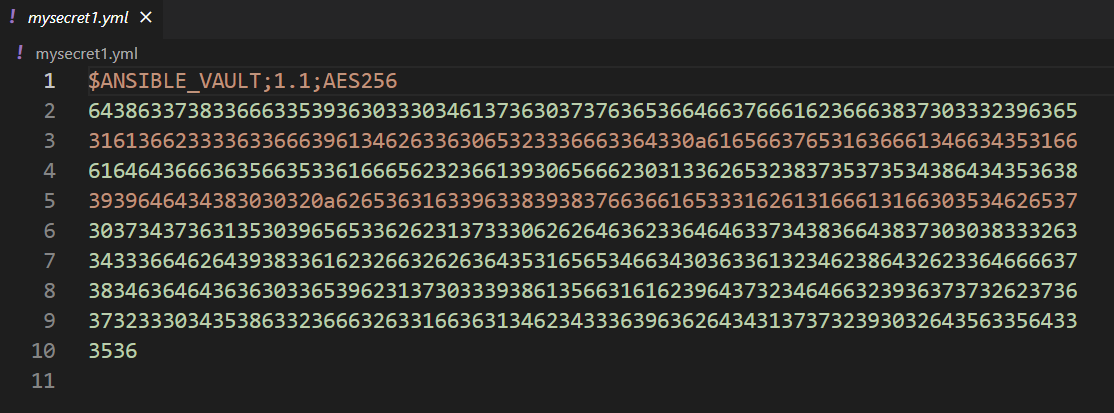
mysecret1.yml은 암호화 되었고, AWS Secret Manager에 저장된 Password로 복호화가 되었다!
실제 업무에서는 보안은 가장 신경써야할 요소 중 하나다. 민감정보는 꼭꼭 숨겨두고 안전하게 관리하는 습관을 들이자.