1. Open JDK 설치
https://www.azul.com/downloads/?package=jdk
압축 파일을 해제한 후에 제어판에 있는 시스템 환경 변수 편집에서 환경 변수를 바꿔줍니다.
JAVA_HOME이라는 환경변수가 있다면 변경을 해주고 없다면 새로 만든 후 변수 값에 압축 해제한 파일의 위치를 넣습니다.
JDK가 제대로 설치됐는지 확인하기 위해 CMD창에 아래 코드를 입력해줍니다.
java -version2. Maven 설치
https://chocolatey.org/
위에 사이트에 들어가서 Get started에 들어가면 나오는 코드를 파워셸에 붙여 넣어줍니다.
Set-ExecutionPolicy Bypass -Scope Process -Force; [System.Net.ServicePointManager]::SecurityProtocol = [System.Net.ServicePointManager]::SecurityProtocol -bor 3072; iex ((New-Object System.Net.WebClient).DownloadString('https://community.chocolatey.org/install.ps1'))설치가 끝났다면 cmd창에서
choco install maven위의 코드를 붙여넣고 all을 선택해주면 설치가 끝납니다.
3. IntelliJ 설치
spring.io 사이트에 들어간 후 Learn에서 Guides를 클릭 후 Thymeleaf가 있는
링크를 클릭해줍니다.
여기를 참고하면서 설정
https://spring.io/guides/gs/serving-web-content/
(Thymeleaf의 장점: 서버상에서 동작하지 않아도 HTML 파일의 내용을 바로 확인이 가능하다.)
Thymeleaf 문법
https://www.thymeleaf.org/doc/tutorials/3.1/usingthymeleaf.html#standard-expression-syntax
새 프로젝트를 생성한 후 프로젝트 설정을 위해 아래 링크에서 다음과 같이 설정해줍니다.
https://start.spring.io/
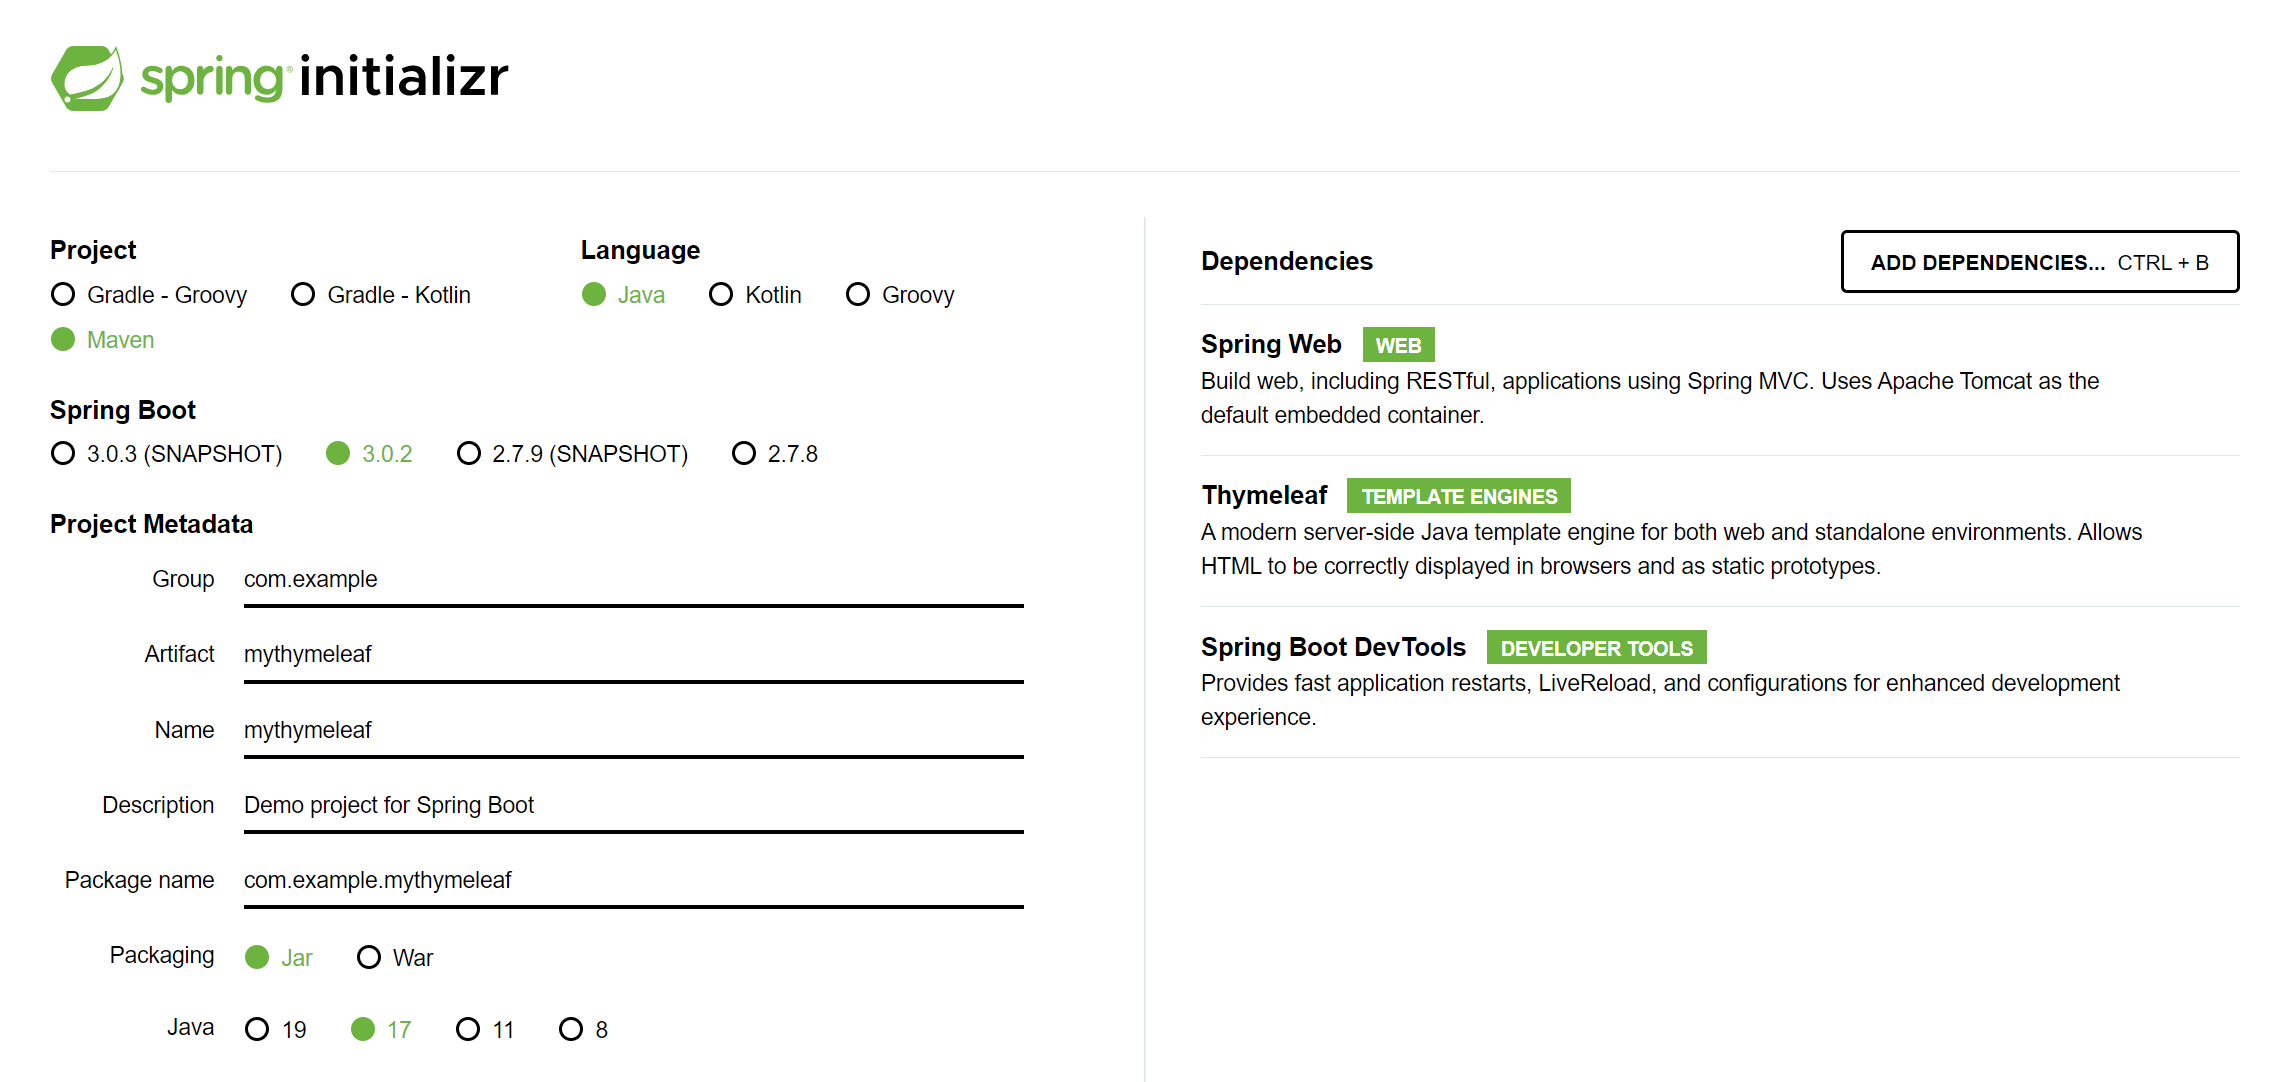
(Maven 기준으로 설명된 오픈소스가 많기 때문에 Maven을 선택)
파일을 다운받은 후에 압축을 풀고 IntelliJ에서 열어줍니다.
Controller 생성
java -> com.example.mythymeleaf에 controller 패키지를 만든 후
GreetingController 생성
package com.example.servingwebcontent;

import org.springframework.stereotype.Controller;
import org.springframework.ui.Model;
import org.springframework.web.bind.annotation.GetMapping;
import org.springframework.web.bind.annotation.RequestParam;

@Controller
public class GreetingController {

	@GetMapping("/greeting")
	public String greeting(@RequestParam(name="name", required=false, defaultValue="World") String name, Model model) {
		model.addAttribute("name", name);
		return "greeting";
	}

}
name의 값이 없을 경우에는 World로 자동 세팅이 된다.
Application을 구동시키고 localhost:8080/greeting 링크에 들어가면 잘 작동하는 것을 알 수 있습니다.