Introduction
이전 글에서 Chrome Extension은 대표적으로 Background & Content Script, Option Page & UI Element로 구분할 수 있다고 했습니다.
이번에는 Content Script를 적용해보도록 하겠습니다.
Content Script란?
Chrome Extension에 추가한 앱은 브라우저 정보, 탭 및 사용자가 방문하는 사이트에 대한 이해 없이 팝업 내에서 격리되어 실행되어 Chrome Extension의 React 앱은 브라우저와 상호작용할 수 없는 것과 같이 보이지만, chrome 이라는 전역 객체를 통해 우리는 브라우저 API에 엑세스할 수 있습니다.
이때, 브라우저의 API에 엑세스하는 코드의 집합을 Content Script라고 명명합니다. 즉, Content Script는 웹 페이지의 컨텍스트에서 실행되고 DOM 요소, 개체 및 메서드에 대한 전체 액세스 권한이 있는 특수 JavaScript 파일입니다.
앱과 브라우저 상호 작용 방법
앱과 브라우저의 상호작용 방법에는 메세지 패싱이 있으며, 메세지 패싱은 서로 다른 컨텍스트에서 실행되는 서로 다른 스크립트가 서로 통신할 수 있도록 하는 기술입니다.
Pre-requisition
메세지 패싱 API를 사용하기 위해서는 아래의 네 가지 요소가 준비되어야합니다.
- const { chrome } = window;
// manifest.json
{
	"permissions": [
   		"activeTab",
        ...etc
	],
}- 콘텐트 스크립트
- npm run eject
메세지 패싱을 사용하기 위해서는 ContentScript.js를 작성하여 index.html이 호출할 수 있게 만들어야합니다. CRA에서는 이 과정이 불가능하여 프로젝트 Eject가 필요합니다.
Settings
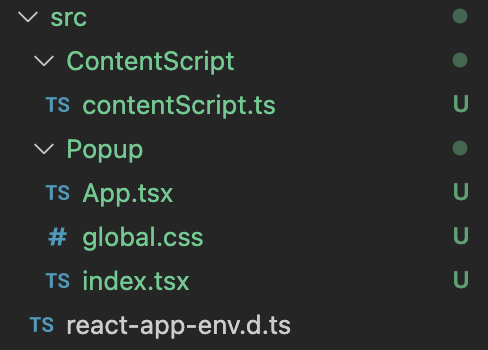
Webpack을 사용하여 Popup & ContentScript를 따로 번들링하기 위해 개별 디렉토리로 구분합니다.
이어서 Webpack.config.js를 수정하겠습니다. (Webpack 버전은 V5입니다.)
// webpack.config.js

module.exports = {

    ..etc,
    entry: {
      index: paths.appIndexJs,
      contentScripts: paths.appContentScriptJs,
    },
}

> paths.js에서 appContentScriptJs 경로를 src/ContentScript/contentScript로 지정합니다.
public/manifest.json 파일에도 Content Script관련 내용을 추가하겠습니다.
// manifest.json

{
	...etc,
    "content_scripts": [
    {
      "matches": ["http://*/*", "https://*/*"],
      "js": ["./static/js/contentScripts.bundle.js"]
    }
  ]
}
수정 후, npm run build 커맨드를 실행하면
Cannot read property 'filter' of undefined에러가 발생합니다.
webpack.config.js의 WebpackManifestPlugin 객체를 확인하면,
WebpackManifestPlugin
new WebpackManifestPlugin({
        fileName: "asset-manifest.json",
        publicPath: paths.publicUrlOrPath,
        generate: (seed, files, entrypoints) => {
          const manifestFiles = files.reduce((manifest, file) => {
            manifest[file.name] = file.path;
            return manifest;
          }, seed);

          const entrypointFiles = entrypoints.main.filter(
            (fileName) => !fileName.endsWith(".map")
          );
          // Object.keys(entrypoints).filter(...)로 수정합니다.

          return {
            files: manifestFiles,
            entrypoints: entrypointFiles,
          };
        },
      }),
Single Entry는 entrypoints가 main이지만, Multiple Entry에서는 entry에서 정의한 entryName으로 변경됩니다. 여기서는 index와 contentScript가 됩니다.
이후 Build를 하게되면 정상적으로 Build되지만 contentScript를 읽어올 수 없습니다.


webpack.config.js의 output을 확인하면, 번들링 결과물에 [contenthash:8]이 들어가서 manifest.json에 정의한 contentScript Import경로와 차이가 있습니다. 때문에, [contenthash:8]을 제거하고 static/js/[name].bundle.js로 변경하겠습니다.
Message Passing
마지막으로, Chrome Extension App에 Content Script를 추가했으니, Interface를 구축하여 메세지 패싱을 해보겠습니다.
우선, 메세지 패싱 문서를 확인합니다.
Simple one-time requests
Content-Script에서 메세지를 보내는 샘플 코드는 아래와 같습니다.
chrome.runtime.sendMessage({greeting: "hello"}, function(response) {
  console.log(response.farewell);
});
Chrome Extension에서 Content Script로 요청을 보내는 샘플 코드입니다.
chrome.tabs.query({active: true, currentWindow: true}, function(tabs) {
  chrome.tabs.sendMessage(tabs[0].id, {greeting: "hello"}, function(response) {
    console.log(response.farewell);
  });
});
수신 측의 이벤트 리스너입니다.
chrome.runtime.onMessage.addListener(
  function(request, sender, sendResponse) {
    console.log(sender.tab ?
                "from a content script:" + sender.tab.url :
                "from the extension");
    if (request.greeting === "hello")
      sendResponse({farewell: "goodbye"});
  }
);
sendMessage를 하려면 수신 측이 있어야 합니다. 없는 경우 다음과 같은 에러가 발생합니다.
Unchecked runtime.lastError: Could not establish connection. Receiving end does not exist.
Content-Script는 브라우저에서 실행되는 코드입니다.


Message 전송에 성공하면 위와 같은 응답을 받을 수 있습니다.
End
다음에는 Web3 Wallet의 Keystore 생성과 관리에 대해 알아보겠습니다.
Reference :
Creating a Chrome Extension React Typescript
About Content Script