Github OAuth
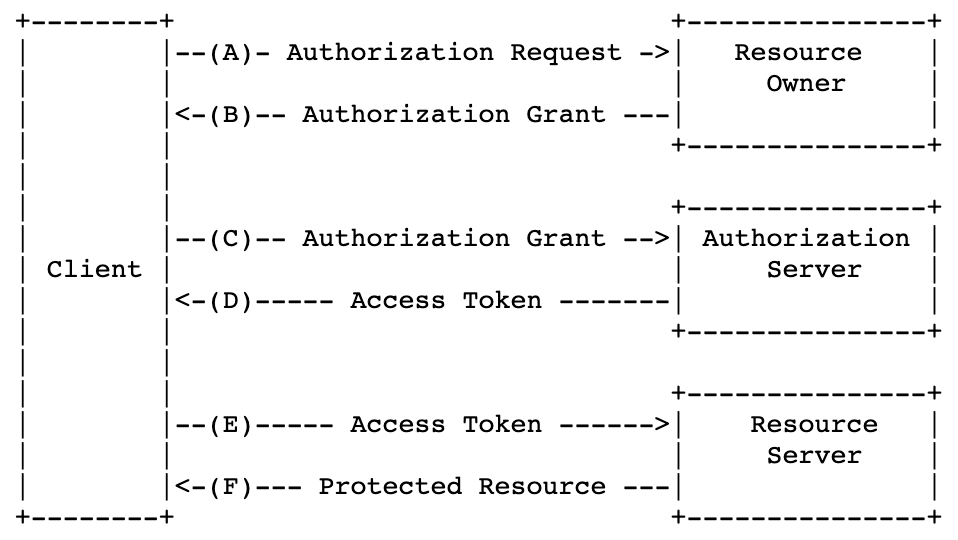
Client가 개발중인 서버, Resource Owner가 사용자, Authorization Server/Resource Server가 OAuth를 제공하는 서비스이다.
다음과 같은 흐름으로 OAuth가 동작하게 되는데, 이를 바탕으로 Github OAuth를 구현해보았다.
1) Github에 application 등록
Github Developers 설정에서 New OAuth App을 등록해주어야한다.

로컬에서만 테스트해보려고 일단 URL을 다음과 같이 설정해주었다. callback의 경우 사용자의 Authorization을 얻은 후 redirect될 url이다. 홈이 아니라 다른 경로에서 token처리를 해주려고 /auth 경로로 설정해두었다.
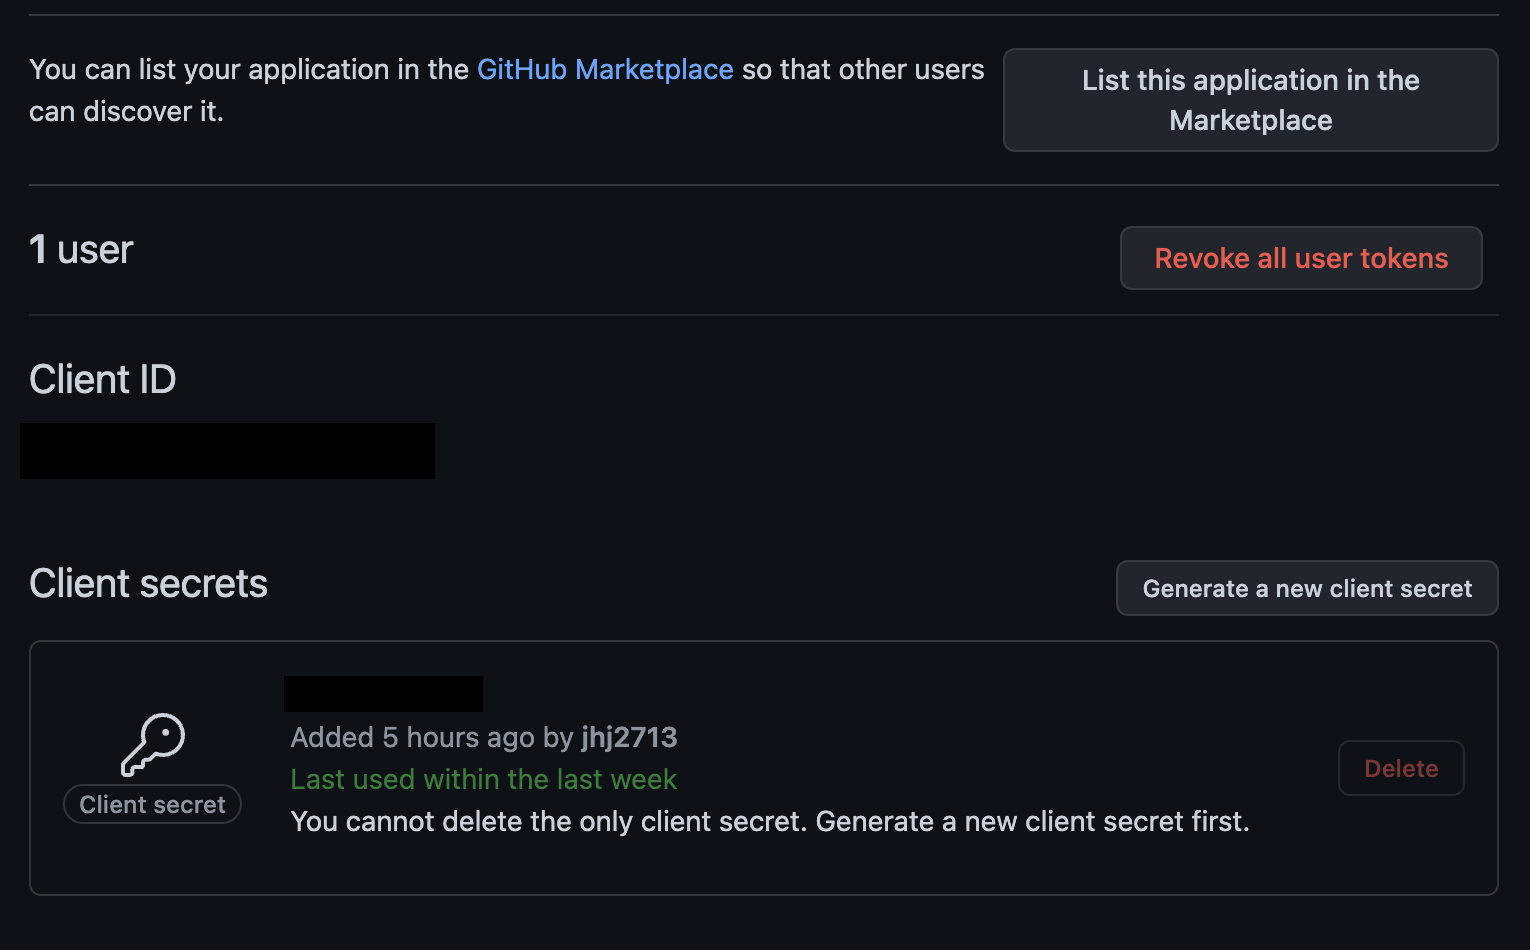
Application을 등록하면 다음과 같이 Client ID와 Client secret을 얻을 수 있다.
2) Github Identity 요청
GET https://github.com/login/oauth/authorize?client_id=CLIENT_ID앞서 발급받은 Client ID로 생성할 수 있는 해당 링크는 사용자들에게 Github 로그인을 요청하게된다.
loginButton.addEventListener("click", async () => {
  location.assign(`https://github.com/login/oauth/authorize?client_id=${CLIENT_ID}`);
}
로그인 버튼을 누르면 해당 경로로 이동하도록 설정한다.
3) Access Token 요청
Identity 요청에서 로그인이 성공적으로 완료되면 Application 등록 시 설정했던 callback url로 연결된다.
나는 callback url을 /auth로 설정해주었으므로
http://localhost:3000/auth?code=authorization_code로 이동하게 된다.
여기서 code 쿼리는 Authorization Code이다. 해당 code를 사용해 Github에 Access Token 요청을 보낼 수 있다.
const response = await fetch("https://github.com/login/oauth/access_token", {
    method: "POST",
    headers: {
      "Content-Type": "application/json",
      accept: "application/json",
    },
    body: JSON.stringify({
      client_id: process.env.CLIENT_ID,
      client_secret: process.env.CLIENT_SECRET,
      code: req.query.code,
    }),
  }).then((res) => res.json());
다음과 같이 https://github.com/login/oauth/access_token으로 body에 client_id, cliend_secret, code를 담아 전송하면 access token을 받을 수 있다
4) Access Token 활용
GET https://api.github.com/userauthorization 헤더에 access token을 담고 해당 url로 요청을 보내면 사용자 정보를 받을 수 있다.
const user = await fetch("https://api.github.com/user", {
  headers: {
    "Content-Type": "application/json",
    accept: "application/json",
    authorization: `token ${response.access_token}`,
  },
}).then((res) => res.json());
참고자료
https://docs.github.com/en/developers/apps/building-oauth-apps/authorizing-oauth-apps
https://tools.ietf.org/html/rfc6749