#32 리덕스 재입문!
리덕스(Redux) 코딩
그동안 벨로퍼트님의 자료를 통해 공부했었는데, 리덕스는 새롭게 업데이트가 필요한 시점이라 유튜브 영상들을 통해서 요약해보겠다.
간단한 팩트 정리
-
리덕스는 useState 처럼 컴포넌트 내부에서만 사용되는게 아니라 외부에서도 사용이 가능하다.
-
주로 규모가 큰 프로젝트에 쓰이며 비동기 작업을 자주 이용하는 프로젝트에 사용할 것을 추천한다!
-
보통 props 문법이 귀찮을 때 쓴다. (일일이 자식 컴포넌트한테 전달하기 귀찮을 때)
알야아 할 3가지 키워드
-
Redux
리덕스는 상태 관리자이다. 프로그램이 동작하는데 필요한 데이터를 체계적으로 관리를 해준다.(createStore, subscribe, getState, dispatch)
-
React Redux
리액트와 리덕스를 통합해서 사용이 가능하게 만든다.(connect, useDispatch, useSelector)
-
Redux toolkit
간단하게 리덕스 문제를 해결해주는 좋은 녀석!(configureStore, createSlice, createAsyncThunk)
우리는 Redux toolkit 에 대해 알아볼 것 이다.
🎹 Redux toolkit
장점
- 설정 용이하게 해줌
- 너무 많은 미들웨어 설치 해결해줌
- 반복되는 코드 해결해줌
- 불변성 유지의 어려움을 해결해줌
쉬운 예제 )
App.js
function Counter() {
  return (
    <div>
      <button>+</button> 0
    </div>
  );
}

export default function App() {
  return (
    <div>
      <Counter></Counter>
    </div>
  );
}
버튼이 있는 Counter 컴포넌트를 App 에 넣어서 렌더링해준다.
버튼을 클릭할 때마다, 숫자가 증가하는 카운터를 만들것이다.
먼저 redux 와 react redux 를 추가해준다.
그럼 밑에 코드를 참고해서 만들어보자!
App.js
import { createStore } from "redux";

function reducer(state, action) {
	return state;
}
const initialState = { value: 0 };
const store = createStore(reducer, initialState);
function Counter() {
  return (
    <div>
      <button>+</button> 0
    </div>
  );
}

export default function App() {
  return (
    <div>
      <Counter></Counter>
    </div>
  );
}
createStore 함수를 불러와서 store 라는 변수에 정의해주고...
reducer 를 만들어서 state 와 action 을 파라미터로 지정해준다.
현재값은 {value : 0} 이라고 만들어준다.
그리고 store 에 인자로서 만든 reducer 와 initalState 를 넣어준다.
다음에는 Provider 를 불러와서 App 에서 리턴하는 div 태그를 묶어준다.
App.js
import { createStore } from "redux";
import { Provider } from "react-redux";

function reducer(state, action) {
	return state;
}
const initialState = { value: 0 };
const store = createStore(reducer, initialState);
function Counter() {
  return (
    <div>
      <button>+</button> 0
    </div>
  );
}

export default function App() {
  return (
    <Provider store={store}>
      <div>
        <Counter></Counter>
      </div>
    </Provider>
  );
}
Counter 컴포넌트가 initialState 에 있는 value 값을 가져와야 한다.
이 때, useSelector 를 불러와서 count 라는 변수에 추가하고, state 의 value 를 불러온다.
그리고 Counter 컴포넌트에 button 태그 옆에 있는 숫자 0 대신 count 를 적어준다.
App.js
import { createStore } from "redux";
import { Provider, useSelector } from "react-redux";

function reducer(state, action) {
  return state;
}
const initialState = { value: 0 };
const store = createStore(reducer, initialState);
function Counter() {
  const count = useSelector((state) => state.value);
  return (
    <div>
      <button>+</button> {count}
    </div>
  );
}

export default function App() {
  return (
    <Provider store={store}>
      <div>
        <Counter></Counter>
      </div>
    </Provider>
  );
}
다음은 버튼을 클릭했을때, state 그러니까 숫자 0 을 바꾸는 dispatch 작업을 해보겠다.
App.js
import { createStore } from "redux";
import { Provider, useSelector, useDispatch } from "react-redux";

function reducer(state, action) {
  return state;
}
const initialState = { value: 0 };
const store = createStore(reducer, initialState);
function Counter() {
  const dispatch = useDispatch();
  const count = useSelector((state) => state.value);
  return (
    <div>
      <button
        onClick={() => {
          dispatch({ type: "up", step: 2 });
        }}
      >
        +
      </button>{" "}
      {count}
    </div>
  );
}

export default function App() {
  return (
    <Provider store={store}>
      <div>
        <Counter></Counter>
      </div>
    </Provider>
  );
}
dispatch 가 전달될 때 마다, 숫자 2씩 증가하는 step 값을 2로 주었다.
그럼 이것을 받는 reducer 작업을 해보겠다.
App.js
import { createStore } from "redux";
import { Provider, useSelector, useDispatch } from "react-redux";

function reducer(state, action) {
  if (action.type === "up") {
    return { ...state, value: state.value + action.step };
  }
  return state;
}
const initialState = { value: 0 };
const store = createStore(reducer, initialState);
function Counter() {
  const dispatch = useDispatch();
  const count = useSelector((state) => state.value);
  return (
    <div>
      <button
        onClick={() => {
          dispatch({ type: "up", step: 2 });
        }}
      >
        +
      </button>{" "}
      {count}
    </div>
  );
}

export default function App() {
  return (
    <Provider store={store}>
      <div>
        <Counter></Counter>
      </div>
    </Provider>
  );
}
불변성을 유지하게 위해서 기존의 코드를 복제해준다.
그럼 이제 버튼을 클릭해보면...
한 번 클릭했을 때...

여러번 클릭했을 때...

지금까지 진행해본 코드는 하나의 store 안에 모든 정보를 담아보았다.
근데 만약 프로젝트가 커지면, 기능별로 작은 store 를 만들고 싶어할 것 이다.
그런 작은 store 를 slice 라고 부르겠다.
그럼 그 작은 store 들을 합쳐서, 리덕스가 요구하는 큰 store 로 redux toolkit 이 알아서 만들어준다.
이번엔 counter 라고 하는 기능을 위한 작은 store 라고 할 수 있는 slice 를 만들것 이다.
만약 뭐 counter timer 같은 것들이 있으면, 각각의 기능별로 slice 를 만들어서 걔들을 하나의 store 로 합치면 되겠다.
아 그리고 slice 를 사용할려면 @reduxjs/toolkit 이것을 설치해서 불러와준다.
createSlice 라는 함수를 불러오는데...
import {createSlice} from "@reduxjs/toolkit"
createSlice 는 필요한 객체가 있다.
그럼 그 객체를 만들어보겠다.
App.js
import { createStore } from "redux";
import { Provider, useSelector, useDispatch } from "react-redux";
import { createSlice } from "@reduxjs/toolkit";
createSlice({
  name: "counter",
  initialState: { value: 0 },
  reducers: {
    up: (state, action) => {
      state.value = state.value + action.step;
    }
  }
});
function reducer(state, action) {
  if (action.type === "up") {
    return { ...state, value: state.value + action.step };
  }
  return state;
}
const initialState = { value: 0 };
const store = createStore(reducer, initialState);
function Counter() {
  const dispatch = useDispatch();
  const count = useSelector((state) => state.value);
  return (
    <div>
      <button
        onClick={() => {
          dispatch({ type: "up", step: 2 });
        }}
      >
        +
      </button>{" "}
      {count}
    </div>
  );
}

export default function App() {
  return (
    <Provider store={store}>
      <div>
        <Counter></Counter>
      </div>
    </Provider>
  );
}
createSlice 에 있는 인자들을 설명하자면, 처음으로 이름을 counter 로 지정해두었다.
store 는 초기값이 필요하니 initialState 에 밑에처럼 똑같이 지정해준다.
그리고 store 는 reducer 가 필요한데, 중요한 것은 reducer 가 아닌 reducers 라고 적어주는 이것은 복수형이다.
그리고 그 안에 타입별로 함수를 정해준다.
그러니까 action.type 이 up 일 때면 해당 함수가 실행된 것 이다.
그리고 이전의 코드를 보면, 리턴할 때 복제를 해주었다. (불변성때문에)
그런데 toolkit 을 사용하면 복잡하게 안해도 된다.
그리고 counterSlice 라는 이름을 주었다.
const counterSlice = createSlice({
  name: "counter",
  initialState: { value: 0 },
  reducers: {
    up: (state, action) => {
      state.value = state.value + action.step;
    }
  }
});
위의 counterSlice 이 작은 store 인데, 여러개 만들면 된다.
그럼 이러한 작은 store 그러니까 slice 들을 모아서 store 로 만들 때는, configureStore 를 써준다.
(스토어를 설정해준다는 뜻이다.)
그리고 counterSlice 밑에 있는 코드들 그러니까 Counter 라는 컴포넌트 전까지 주석처리 해준다.
// function reducer(state, action) {
//   if (action.type === "up") {
//     return { ...state, value: state.value + action.step };
//   }
//   return state;
// }
// const initialState = { value: 0 };
// const store = createStore(reducer, initialState);

주석처리 된 코드들
밑의 configureStore 에는 객체를 전달해준다.
configureStore()
그리고 필수적으로 들어가는게 reducer 이다. (s 가 붙지 않는다.)
reducer 에는 각각의 slice 에 있는 reducer 들이 들어가면 된다.
그리고 밑의 코드를 추가적으로 추가해준다.
configureStore({
  reducer: {
    counter:counterSlice.reducer
  }
})
counterSlice 안에 있는 reducer 들이 있을 것 이다.
이것을 하나로 합쳐서 하나로 만든 reducer 를 자동으로 만들어주는데, 그렇게 만든 하나의 reducer 가 바로...
counterSlice.reducer이것이다!
이렇게 만든 결과는 store 이다.
const store = configureStore({
  reducer: {
    counter:counterSlice.reducer
  }
})
그럼 그러한 store 를 Provider 로 전달해주고 그리고 그 store 에서 사용하는 여러가지 정보들을 state 들을 사용할려면 useSelector 를 쓰면 되는데...
Counter 에 있는 count 에 추가적으로 코드를 정리해주면...
  const count = useSelector((state) => {
    console.log(state);
    state.value;
  });
useSelector 안에 state 를 콘솔로 찍어보면...

state 의 최상위 객체로 counter 가 생겼다.
해당 counter 는...
const store = configureStore({
  reducer: {
    counter: counterSlice.reducer
  }
});
위의 counter 와 같은 것이다.
그럼 counter 말고 다르게 이름을 정해보고 새로고침을 해보면...
const store = configureStore({
  reducer: {
    prac: counterSlice.reducer
  }
});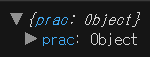
바로 지정해둔 이름으로 바뀐것을 알 수 있다.
다시 counter 로 되돌리고...
그럼 만약 counter 에 기본값을 가지고 오고 싶다면 어떻게 할까?
바로...
const count = useSelector((state) => {
   	return state.counter.value;
  });
configureStore 안에 있는 reducer 안에 있는 counter 를 써준다.
그러니까 count 는 counterSlice 에 전달한 초기값인 value 가 된다.
그럼 화면을 확인해보면...

초기값인 0 이 잘 뜬걸 볼 수 있다.
그럼 이제 화면의 버튼을 클릭하면, counerSlice 에 있는 reducers 의 up 이 호출되면서 step 값 만큼 증가하길 바란다.
그럼 2씩 증가하게 만들고싶다면...
const counterSlice = createSlice({
  name: "counter",
  initialState: { value: 0 },
  reducers: {
    up: (state, action) => {
      state.value = state.value + action.step;
    }
  }
});
위의 counterSlice 의 이름인 counter 를...
 <div>
    <button
      onClick={() => {
        dispatch({ type: "counter/up", step: 2 });
      }}
    >
      +
    </button>{" "}
    {count}
 </div>
버튼의 onClick 안에 있는 type: "up" 에서 "counter/up" 이라고 적어준다.
이제 버튼을 눌러보면...

즉 type 을 action 을 counter 라고 하면 counterSlice 에 있는 reducers 의 up 함수가 실행된다.
근데 위의 방법이 귀찮을수 있는데 redux toolkit 에서는 up 같은 reducer 함수들을 참고해서 자동으로 action 을 만들어내는 action creator 를 생성해준다.
쓰는 방법은...
버튼안에...
onClick={() => {
	// dispatch({ type: "counter/up", step: 2 });
       dispatch(counterSlice.actions.up(2));
dispatch 안에 counterSlice 를 적어주고 actions(복수형) 에 up 함수를 적고 2를 적어본다.
그리고 첫 번째 dispatch 는 주석처리해준다.
counterSlice 에 가서 up 함수의 action 을 콘솔을 찍어보고 버튼을 눌러보면...
const counterSlice = createSlice({
  name: "counter",
  initialState: { value: 0 },
  reducers: {
    up: (state, action) => {
      console.log(action);
      state.value = state.value + action.step;
    }
  }
});
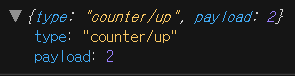
콘솔을 보면 우리가 전달한 2인 값이 payload 라고 하는 약속된 이름에 값으로 들어온다.
그럼 우리는 action.step 이 아니라 action.payload 라고 적어본다.
변경 전 )
  reducers: {
    up: (state, action) => {
      console.log(action);
      state.value = state.value + action.step;
    }
  }
변경 후 )
  reducers: {
    up: (state, action) => {
      console.log(action);
      state.value = state.value + action.payload;
    }
  }
그럼 payload 가 숫자 2가 된다.
만약 우리가 직접 action 을 전달한다면, 해당 step 프로퍼티가 그대로 갔는데 자동으로 생성된 action creator 를 이용하면 payload 를 써야한다. (필수)
저장하고 화면을 확인해보면...

숫자가 잘 증가하는걸 볼 수 있다.
이것도 toolkit 을 사용했을 때 얻을 수 있는 굉장히 편리한 효과다.
그런데 보통 이렇게 한 파일에 다 담지않고 분리해준다.
그럼 한 번 분리해보자!
그럼 우리의 store 와 counterSlice 를 별도의 파일로 붙여넣어준다.
store.js 라는 파일을 만들어주고 밑에처럼 붙여넣어준다.
store.js
import { createSlice, configureStore } from "@reduxjs/toolkit";
const counterSlice = createSlice({
  name: "counter",
  initialState: { value: 0 },
  reducers: {
    up: (state, action) => {
      state.value = state.value + action.payload;
    }
  }
});
const store = configureStore({
  reducer: {
    counter: counterSlice.reducer
  }
});

export default store;
아 그리고 App.js 에서 import 해준다.
App.js
import store from "./store";
근데 문제는 counterSlice 같은 경우에는 configureStore 에서도 쓰지만 App 안에서도 쓰인다.
그럼 counterSlice 를 분산시켜준다.
counterSlice.js 파일을 만들고 counterSlice 코드를 잘라서 붙여넣어주고 export 시켜준다.
다음과 같이 하면 된다.
counterSlice.js
import { createSlice } from "@reduxjs/toolkit";

const counterSlice = createSlice({
  name: "counter",
  initialState: { value: 0 },
  reducers: {
    up: (state, action) => {
      state.value = state.value + action.payload;
    }
  }
});

export default counterSlice;
store.js
import { configureStore } from "@reduxjs/toolkit";
import counterSlice from "./counterSlice";

const store = configureStore({
  reducer: {
    counter: counterSlice.reducer
  }
});

export default store;
App.js
import { createStore } from "redux";
import { Provider, useSelector, useDispatch } from "react-redux";
import store from "./store";
import counterSlice from "./counterSlice";

function Counter() {
  const dispatch = useDispatch();
  const count = useSelector((state) => {
    return state.counter.value;
  });
  return (
    <div>
      <button
        onClick={() => {
          dispatch(counterSlice.actions.up(2));
        }}
      >
        +
      </button>{" "}
      {count}
    </div>
  );
}

export default function App() {
  return (
    <Provider store={store}>
      <div>
        <Counter></Counter>
      </div>
    </Provider>
  );
}
아 더 간결하게 만들고 싶으면...
counterSlice.js
import { createSlice } from "@reduxjs/toolkit";

const counterSlice = createSlice({
  name: "counter",
  initialState: { value: 0 },
  reducers: {
    up: (state, action) => {
      state.value = state.value + action.payload;
    }
  }
});

export default counterSlice;
export const { up } = counterSlice.actions;
up 이라는 counterSlice.actions 를 export 해주고...
App.js 에 import 해준다.
App.js
import { createStore } from "redux";
import { Provider, useSelector, useDispatch } from "react-redux";
import store from "./store";
import {up} from "./counterSlice";

function Counter() {
  const dispatch = useDispatch();
  const count = useSelector((state) => {
    return state.counter.value;
  });
  return (
    <div>
      <button
        onClick={() => {
          dispatch(up(2));
        }}
      >
        +
      </button>{" "}
      {count}
    </div>
  );
}

export default function App() {
  return (
    <Provider store={store}>
      <div>
        <Counter></Counter>
      </div>
    </Provider>
  );
}
필요없는 counterSlice.actions 부분을 지워주면 끝!
이제 화면으로 가서 버튼을 동작시키면...

아무런 문제없이 잘 동작한다.
참고 : 유튜브 생활코딩님의 Redux toolkit
