Nest.js에서 권한을 인가하기 위해선 Guards 클래스가 필요하다. Guards는 기존 Express에선 미들웨어를 통해 관련된 로직을 실행했으나, Nest.js는 Guards를 통해 인가를 시켜준다. Guard는 Express의 미들웨어와는 본질적으로 다르다. 오늘은 인증 인가 작업을 위한 jwt, Guards 그리고 에러 핸들링을 위한 Exception filters를 알아보고자 한다.
Guard
Guard는
@Injectable()데코레이터가 달려있어야 하며CanActivate인터페이스의 조건을 만족하는 클래스이다.
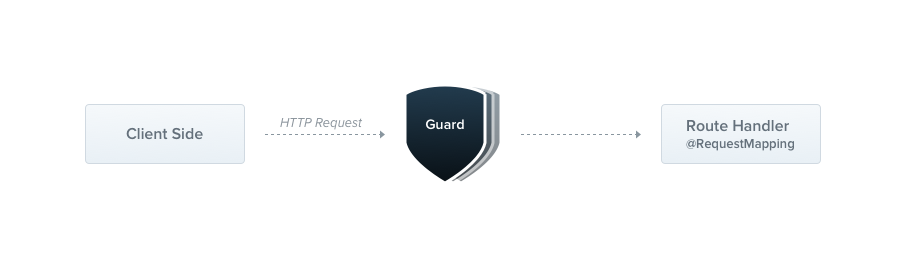
Guard는 Express의 미들웨어와 비슷한 모습을 띠고 있다. 기존 Express에선 Route 레이어에서 인가 미들웨어를 거쳐 Controller 레이어에 도달했다.
미들웨어는 next() 함수를 호출한 뒤 어떤 핸들러가 실행될지 알 수 없지만, Guard는 다음에 무엇이 실행될지 정확히 알 수 있다는 차이가 있다.
// auth.guard
export class AuthGuard implements CanActivate {
	canActivate(context: ExecutionContext): boolean | Promise<boolean> | Observable<boolean> {
		const request = context.switchToHttp().getRequest();
		return validateRequest(request);
	}
}
기본적인 guard의 모습이다. guard 클래스는 유효성을 검사하고 요청을 진행할 수 있는지 결정한다.
리턴값이 true일 경우 요청이 처리되고, false일 경우 Nest.js에서 요청을 거부한다.
passport
passport는 인증, 인가를 도와주는 Node.js 라이브러리이다. npm 주간 다운로드 170만 건에 달하는 인기 있는 라이브러리이며, 소셜 로그인(카카오톡, 페이스북, 트위터)와 jwt를 이용한 인증, 인가 또한 지원한다. 오늘은 jwt와 passport를 이용해 guard 클래스를 만들어 볼 것이다.
$ npm i --save @nestjs/jwt passport-jwtpassport는 Guard의 strategy(전략)에 따른 요청을 인증하기 위한 용도로 사용한다.
// src/auth/secutiry/passport.jwt.strategy.ts
import { Injectable, UnauthorizedException } from '@nestjs/common';
import { ExtractJwt, Strategy } from 'passport-jwt';
import { PassportStrategy } from '@nestjs/passport';
import { JwtPayload } from '../jwt-payload.interface';
import { AuthService } from '../auth.service';

@Injectable()
export class JwtStrategy extends PassportStrategy(Strategy) {
	constructor(private readonly authService: AuthService) {
		super({
			jwtFromRequest: ExtractJwt.fromAuthHeaderAsBearerToken(),
			ignoreExpiration: false,
			secretOrKey: process.env.JWT_SECRET_KEY,
		});
	}

	async validate(req, payload: JwtPayload) {
	const user = await this.authService.tokenValidateUser(payload);

	if (!user) {
		throw new UnauthorizedException({ message: 'This token has user not found', });
	}
	return user;
	}
}
// src/auth/auth.service.ts
import { Injectable } from '@nestjs/common';
import { User } from 'src/user/entity/user.entity';
import { UserRepository } from 'src/user/entity/user.repository';
import { JwtPayload } from './jwt-payload.interface';
@Injectable()
export class AuthService {
constructor(private readonly userRepository: UserRepository) {}
async tokenValidateUser(payload: JwtPayload): Promise<User | undefined> {
return await this.userRepository.findOneBy({ id: payload.id });
}
}// src/auth/security/auth.guard.ts
import { Injectable } from '@nestjs/common';
import { AuthGuard } from '@nestjs/passport';
@Injectable()
export class JwtAuthGuard extends AuthGuard('jwt') {}jwtFromRequest : Request에서 JWT를 추출하는 방법을 지정.
ignoreExpiration : JWT의 만료여부를 Passport에 위임
secretOrKey : JWT를 생성할 때 사용했던 시크릿 키
JwtStrategy 클래스를 만들어 PassportStrategy를 상속받는다. JWT토큰이 들어오면 해당 전략이 토큰의 유효성을 검증한 뒤, DB의 유저 정보여부를 확인하고 최종적으로 유저의 정보를 반환한다.
위와 같이 만들어 준 뒤 auth모듈도 생성한 뒤 수정해 준다.
// src/auth/auth.module.ts
mport { Module } from '@nestjs/common';
import { AuthService } from './auth.service';
import { JwtStrategy } from './security/passport.jwt.strategy.ts';
import { UsersModule } from '../users/users.module';
import { PassportModule } from '@nestjs/passport';
import { JwtModule } from '@nestjs/jwt';

@Module({
	imports: [ UsersModule,  PassportModule,
		JwtModule.register({
			secret: process.env.JWT_SECRET_KEY
			signOptions: { expiresIn: '60s' },
		}),
	],
	providers: [AuthService, JwtStrategy],
	exports: [AuthService],
})
export class AuthModule {}
// src/community/community.controller.ts
@Controller('community')
export class CommunityController {
constructor(private readonly communityService: CommunityService) {}
@Post()
@UseGuards(JwtAuthGuard)
createPost(
@Body() createPostDto: CreatePostDto ): Promise<{ status: string }> {
return this.communityService.createPost(createPostDto, user.id);
}Guard를 생성한 뒤, 해당 작업이 필요한 Controller에 @UseGuards() 데코레이터를 사용해 방금 만들어둔 Guard를 호출해 JWT를 이용한 유저 인가작업을 마치게 된다. 해당 작업을 통해 JWT토큰이 유효하지 않거나 DB에 유저 정보가 매칭되지 않는 경우 Guard 클래스에서 요청을 거부하게 된다.
Exception filters
Nest.js에는 서버가 구동되는 중 처리되지 않은 예외 사항을 처리하는 예외 레이어가 기본적으로 제공된다. 우리가 예외를 처리하지 않았을 경우 예외를 포착해 적절한 응답을 클라이언트에게 전송한다.
서버가 가동하는 중 예외 사항은 많이 일어난다. Service 레이어에서 정상적으로 로직이 작동하지 않거나, DB에 관련된 에러 등 예외사항은 많으며, 개발자는 예외 사항을 미리 잡아 핸들링해야한다.
Nest.js에 기본적으로 내장된 전역 예외 필터를 통해 우리가 지정하지 않은 에러의 경우 아래 값을 클라이언트에 보낸다.
{
	"statusCode": 500,
	"message": "Internal server error"
}
의도적으로 에러 핸들링을 한 경우에는 지정해둔 에러 코드와, 에러메시지를 표출 한다.
@Get()
async findAll() {
	throw new HttpException('잘못된 요청', HttpStatus.FORBIDDEN);
}
{
"statusCode": 403,
"message": "잘못된 요청"
}클라이언트가 위와 같은 에러 내용을 받았을 경우 내용도 부실하고, 무엇보다 서버의 콘솔에는 기록이 남지 않는다.
Nest.js는 기본적으로 제공하는 예외 필터를 제어할 수 있다. 이를 통해 클라이언트에게 전달하는 데이터를 수정하거나, 서버에 에러와 관련된 로그를 출력할 수 있다.
import {
ArgumentsHost,
BadRequestException,
Catch,
ExceptionFilter,
HttpException,
HttpStatus,
Logger,
} from '@nestjs/common';
import { Request, Response } from 'express';
import { QueryFailedError } from 'typeorm';
@Catch()
export class GlobalExceptionFilter implements ExceptionFilter {
catch(exception: unknown, host: ArgumentsHost) {
const ctx = host.switchToHttp();
const response = ctx.getResponse<Response>();
const request = ctx.getRequest<Request>();
let status = HttpStatus.INTERNAL_SERVER_ERROR;
let message = (exception as any).message.message;
let code = 'HttpException';
switch (exception.constructor) {
case HttpException:
status = (exception as HttpException).getStatus();
message = (exception as HttpException).getResponse();
break;
case QueryFailedError:
message = (exception as QueryFailedError).message;
code = (exception as any).code;
break;
case BadRequestException:
message = (exception as any).response.message;
status = (exception as any).status;
break;
default:
status = HttpStatus.INTERNAL_SERVER_ERROR;
}
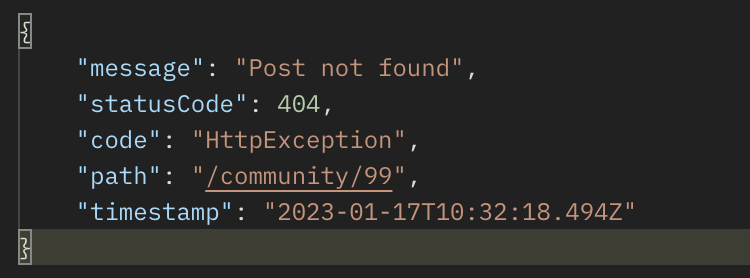
const error = {
message,
statusCode: status,
code,
path: request.url,
timestamp: new Date(),
};
Logger.error(JSON.stringify(error));
response.status(status).json(error);
}
}Exception filter는 @Catch() 데코레이터가 필요하며 ExceptionFilter 인터페이스를 구현해야 한다.
@Catch() 데코레이터에 인자로 HttpException 를 넣어주면 Http에 관련된 예외만 처리하는 클래스를 만들게 되고, 공백으로 비워둘 경우에는 모든 예외 처리를 해당 클래스가 실행하게 된다.
내가 실행 중인 서버의 경우 크게 3가지의 예외 발생지점이 있어서 case 문을 통해 분기를 나눠두었다.
예외 필터를 위처럼 수정한 뒤, 예외 핸들링을 실행시켜보면, 클라이언트가 받는 메시지가 달라져 있고, Logger 라이브러리를 통해 서버의 콘솔에도 관련 로그가 남게 되어 서버의 유지보수에 도움이 된다.
마치며
오늘은 Guard와 Exception filter를 알아보았다. 서버에서 가장 중요하다고 생각되는 게 보안이다.
개인정보 유출은 아주 민감한 문제이며, 해당 문제가 일어나기 전에 예방해야 한다.
내가 나중에 서비스를 운영하게 된다면, 운영 중인 서비스를 이용하는 사용자들을 위해서라도 꼼꼼히 신경 써야겠다.