NVIDIA의 Fundamentals of Deep Learning 리뷰
00 GPU reset방법
실험이 잘못되거나 새로운 실험을 하고자 할 경우, GPU memory를 지워야 한다.
- restart button 누르기
- 다음의 코드 실행
import IPython
app = IPython.Application.instance()
app.kernel.do_shutdown(True)
01 MNIST image classification
Deep learning
- Deep learning으로 image를 classification해보자
MNIST dataset
- 우리가 분류하고자 하는 dataset이다.
- 0~9까지의 손글씨 숫자가 70,000개의 grayscale image로 구성되어 있다.
Training and Validation Data and Labels
- classification문제를 풀기위해서 총 4개의 data segment가 필요하다.
- 크게 training과 validation(test)을 위해 두 파트로 나뉘고
- x와 그에 대응하는 y(label)이 주어진다.
- x_train: training과정에서 사용되는 이미지
- y_train: x_train에 대응디는 y label
- x_valid: validation(test)에 사용되는 이미지
- y_valid: x_valid에 대응되는 y label
Loading the Data Into Memory (with Keras)
- Tensorflow2와 Keras API를 사용한다.
from tensorflow.keras.datasets import mnist

(x_train, y_train), (x_valid, y_valid) = mnist.load_data()
Exploring the MNIST Data
- 28*28의 grayscale 이미지이다.
- train data는 60,000개, validation data는 10,000개
- unsigned 8-bit integer, 0~255
Preparing the Data for Training
-
Flattening
-
Normalizing
-
Categorization (categorize the labels)
flattening
- (60,000, 28, 28)이었던 이미지를 (60,000, 784)로 바꾼다.
- 28*28이었던 2D를 784의 1D로 바꾸는 것과 같다.
Normalization
- integer값을 0~1 사이의 floating point value로 바꾸는 것
- 우리 문제에서는 모든 값을 255로 나누면 된다.(0~255인 integer이므로)
Categorical encoding
values = ['red, green, blue, green']을 사용하는 것 보다
values = [[1,0,0], [0,0,1], [0,1,0], [0,0,1]]
로 categorize하는 것keras library for categorical encoding
    import tensorflow.keras as keras
    num_categories = 10

    y_train = keras.utils.to_categorical(y_train, num_categories)
    y_valid = keras.utils.to_categorical(y_valid, num_categories)
Creating the Model
- Input layer
- Hidden layer
- Output labyer
tensorflow의 sequential 모델을 사용해보자
Instantiating the model
from tensorflow.keras.models import Sequential
model = Sequential()
Creating the Input Layer
- keras의 Dense layer class를 사용한다.
from tensorflow.keras.layers import Denseunits 는 layer에서의 neuron의 개수를 의미한다.
activation 으로 우리는 'relu'를 사용함.
input_shape은 입력데이터의 shape을 의미한다. 우리는 mnist data를 flattening한 1D array 784 values이므로 (784,)
model.add(Dense(units=512, activation='relu', input_shape=(784,)))Creating the Hidden Layer
model.add(Dense(units = 512, activation='relu'))Creating the Output Layer
- output layer의 activation function으로는 softmax사용
- softmax는 각 layer의 value를 0과 1사이의 probability로 만든다.
- 그리고 모든 layer의 output을 더한 값이 1이 되도록 한다.
model.add(Dense(units=10, activation='softmax'))- 우리는 10개의 category중 1를 선택하고 싶으므로 최종 output layer의 unit의 개수는 10이 된다.
- 각각의 10개의 output은 image가 특정 class에 속할 확률을 제시한다.
Summarizing the Model
model에 관한 summary를 제공하는 method
model.summary()Compiling the Model
- training 전에 하는 마지막 스텝
- 여기서 loss function을 specify함.
- loss function은 training과정에서 얼마나 잘하고 있는지를 확인하기 위한 척도이다.
- 또한 compiling 단계에서 training 도중 accuracy를 tracking할지도 specify가능
model.compile(loss='categorical_crossentropy', metrics=['accuracy'])Training the Model
history = model.fit(x_train, y_train, epochs=5, verbose=1, validation_data=(x_valid, y_valid))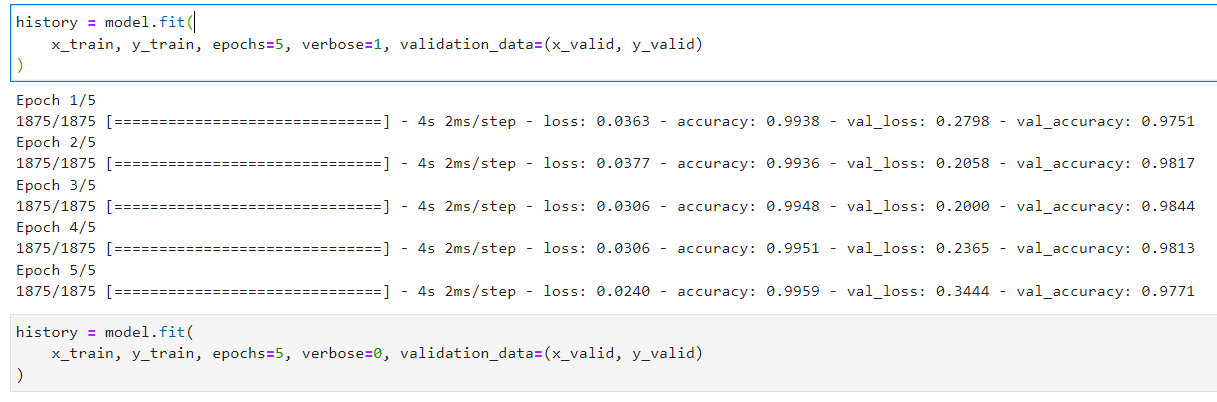
- accuracy는 training data에 대한 정확도를 의미한다
- val_accuracy는 validation data(test data)에 대한 정확도를 의미한다
Clear the Memory
다음 실험을 위해 GPU memory clear
Next
- 또 다른 image classification problem풀기
- data preparation, building own neural network