iOS & Swift 공부 - Observer & Notification Design Pattern
-
Observer & Notification
→ Observer 가 코드 어딘가에서 서식하며 Notification 을 기다리는 개념
→ 특정 이벤트가 발생하면 Notification 을 발동하게끔 할 수 있음. 그때 기다리고 있던 Observer 역시 발동하여, 그에 맞는 코드를 실행시킨다.
-
Delegate Design Pattern 은 1:1 관계에서 사용하는 반면, Observer & Notification Pattern 은 1:다 관계 성립 가능
→ ex. 5개의 다른 Observer 가 1개의 Notification 을 기다릴 수 있다는 뜻
Notification
- 등록된 Notification 에 Notification Center 를 통해 정보를 전달하기 위한 구조체.
주요 프로퍼티
-
name : 알림을 식별하는 태그
var name: Notification.Name -
object : 발송자가 옵저버에게 보내려고 하는 객체. 주로 발송자 객체를 전달하는 데 쓰임
var object: Any? -
userInfo : 노티피케이션과 관련된 값 또는 객체의 저장소
var userInfo: [AnyHashable : Any]?
일반 노티피케이션
-
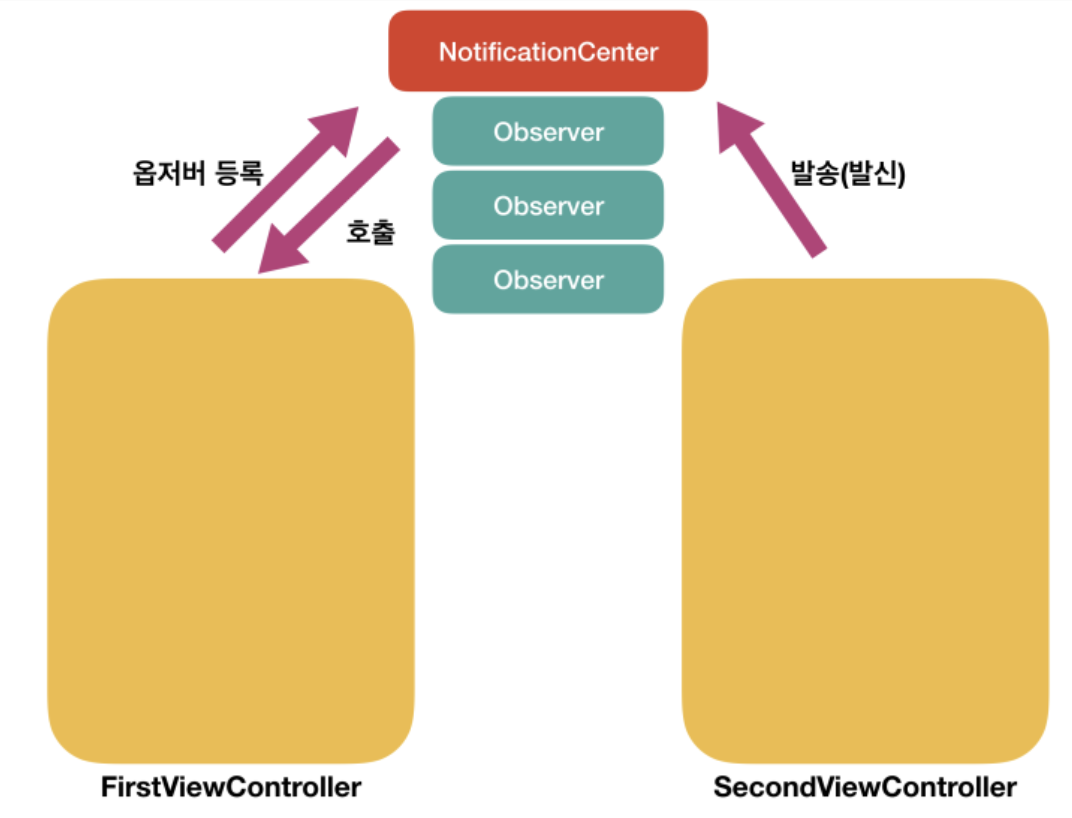
옵저버 등록
NotificationCenter.default.addObserver(self, selector: #selector(didRecieveTestNotification(_:)), name: NSNotification.Name("TestNotification"), object: nil) @objc func didRecieveTestNotification(_ notification: Notification) { print("Test Notification") } -
발송자
NotificationCenter.default.post(name: NSNotification.Name("TestNotification"), object: nil, userInfo: nil)
Example

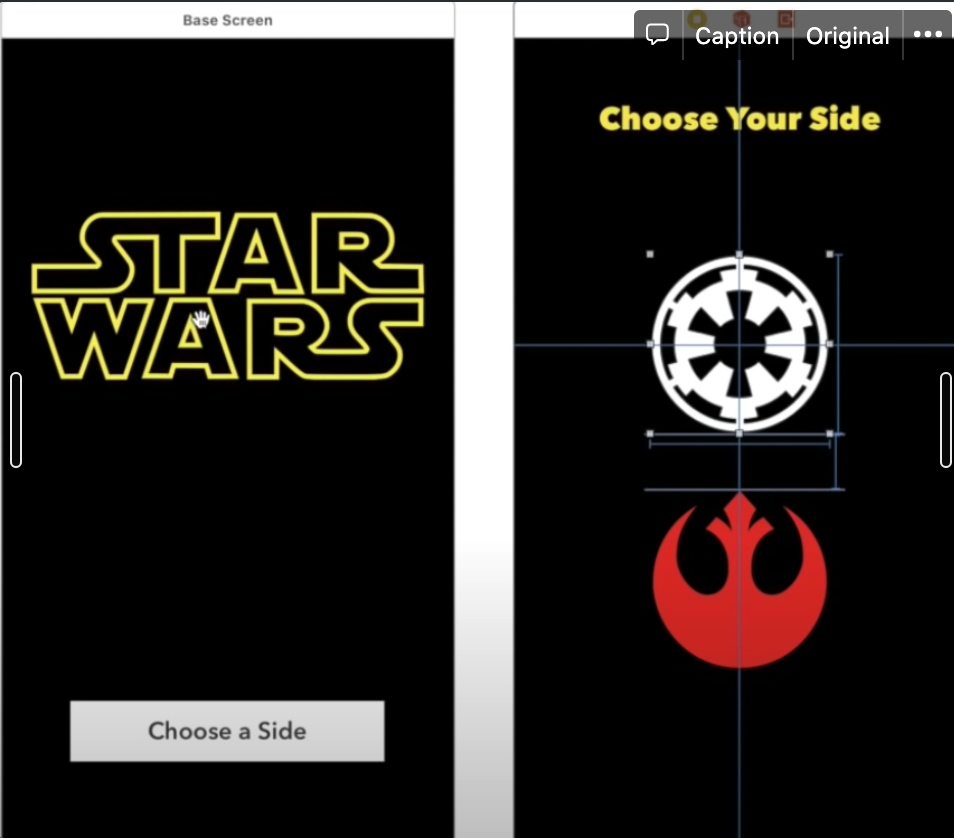
위와 같이 2개의 View Controller 로 된 간단한 앱이 있다고 치자. 우측 VC 에서 어떤 아이콘을 누르느냐에 따라, 첫 번째 VC 의 이미지가 아래와 같이 바뀐다.
물론 1:1 관계에서는 Delegate Design Pattern 을 쓰는 것이 더 현명하겠지만, Observer Pattern 을 통해서도 VC 간의 통신이 가능하다는 것을 보여주기 위함이니, 넘어가자.
우선 유니크한 Notification 을 식별할 수 있는 Key 값이 있어야 한다.
let lightNotificationKey = "co.kevinkim.lightSide"
let darkNotificationKey = "co.kevinkim.darkSide"
→ 위와 같은 String 타입의 Key 같은 경우에는 고유해야 하므로 앱의 Bundle ID와 같은 형식으로 쓰는 것을 권장한다고 한다. 가능하다면 별도의 Constants 파일을 만들어 보관하는 것이 좋다.
위 키를 쉽게 이용하고, Notification.Name 형태로 쓰기 위해서는 아래와 같이 작성하면 된다.
let light = Notification.Name(rawValue: lightNotificationKey)
let dark = Notification.Name(rawValue: darkNotificationKey)
→ 위와 같이 미리 써두면, 옵저버를 추가하거나 Notification을 보낼 때 키 값으로 간단하게 light 또는 dark 를 쓰면 된다.
그럼 우선 두 번째 (우측) View Controller 부터 보자.
class SelectionScreen: UIViewController {

	override func viewDidLoad() {
		super.viewDidLooad()
	}

	@IBAction func darkButtonTapped(_ sender: UIButton) {
		let name = Notification.Name(rawValue: darkNotificationKey)
		NotificationCenter.default.post(name: name, object: nil)
		dismiss(animated: true, completion: nil)
	}

	@IBAction func lightButtonTapped(_ sender: UIButton) {
		let name = Notification.Name(rawValue: lightNotificationKey)
		NotificationCenter.default.post(name: name, object: nil)
		dismiss(animated: true, completion: nil)
	}
핵심은 NotificationCenter.default.post(..) 이다.
앞서 정의했듯이, darkNotificationKey 랑 lightNotificationKey 는 "co.kevinkim.lightSide" 또는 "co.kevinkim.darkSide"의 값을 가지는 Key 값이다.
→ Notification 을 " post " 함으로써 이 Key 들을 공중에 뿌린다고 생각하면 될 것 같다. 이 Key 를 뿌리고, 해당 Key 가 공중에 뿌려지기를 기다리는 Observer 가 포착하고, 특정 코드를 실행하는 거다.
그렇다면 이 Key 값들, 즉 Notification 을 기다리는 Observer 는 당연히 첫 번째 (좌측) View Controller 에 정의해야 할 것이다.
아래 코드를 보자.
class BaseScreen: UIViewController {
@IBOutlet weak var mainImageView: UIImageView!
@IBOutlet weak var chooseButton: UIButton!
@IBOutlet weak var nameLabel: UILabel!
let light = Notification.Name(rawValue: lightNotificationKey)
let dark = Notification.Name(rawValue: darkNotificationKey)
// 해당 View Controller 가 메모리에서 해제되면 옵저버 역시 remove 해주는 것이 좋음
deinit {
NotificationCenter.default.removeObserver(self)
}
override func viewDidLoad() {
super.viewDidLoad()
createObservers()
}
func createObservers() {
// Light
NotificationCenter.default.addObserver(self, selector: #selector(BaseScreen.updateUI(notification:)),
name: light, object: nil)
// Dark
NotificationCenter.default.addObserver(self, selector: #selector(BaseScreen.updateUI(notification:)),
name: dark, object: nil)
}
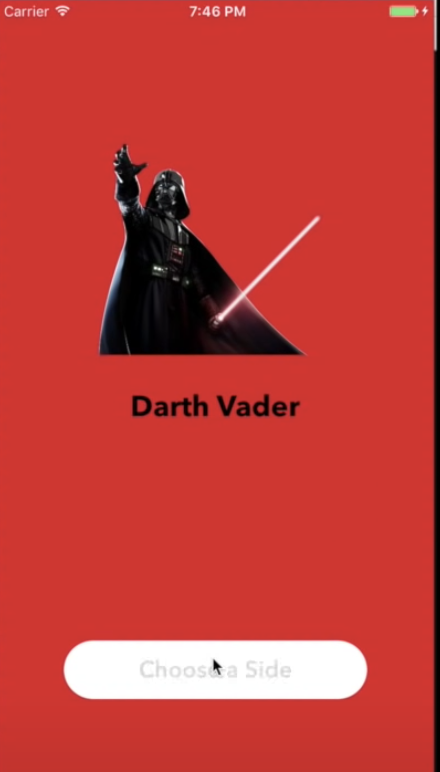
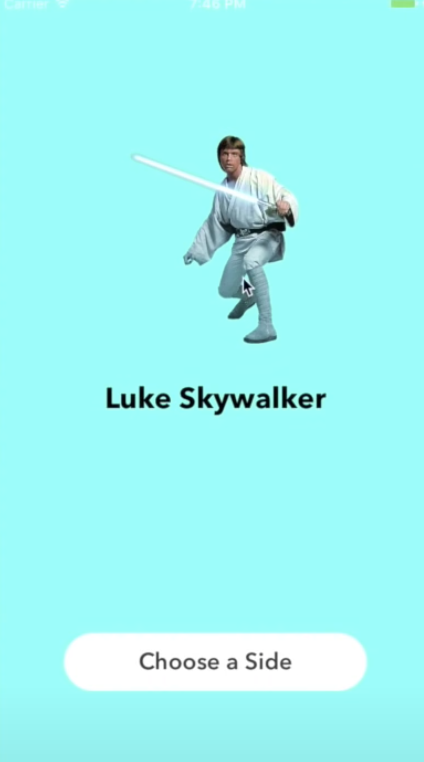
func updateUI(notification: NSNotification( {
let isLight = notification.name == light
let image = isLight ? UIImage(named: "luke")! : UIImage(named: "vadar")!
let color = isLight ? UIColor.cyan : UIColor.red
let name = isLight ? "Luke Skywalker" : "Darth Vader"
mainImageView.image = image
view.backgroundColor = color
nameLabel.text = name
}
@IBAction func chooseButtonTapped(_ sender: UIButton) {
let selectVC = storyboard?.instantiateViewController(withIdentifier: "selectVC") as! SelectionScreen
present(selectVC, animated: true, completion: nil)createObservers ( ) 함수 안에서 addObserver 메서드를 이용해 Observer 들을 만들어줬다.
NotificationCenter.default.addObserver(self, selector: #selector(BaseScreen.updateUI(notification:)),
		name: light, object: nil)
→ light 라는 Notification 을 기다리는 Observer 이며, 발동 시 updateUI ( ) 함수를 실행하도록 설정하였다. updateUI( ) 함수 실행 시 해당 Notification 의 name, 즉 light 아니면 dark 인지 까지 넘어가게 된다. 그리고 최종적으로 updateUI( ) 함수에서 notification.name 이 light 인지 dark 인지 판별하여 그에 따라 맞는 UI 를 설정해주게 된다.