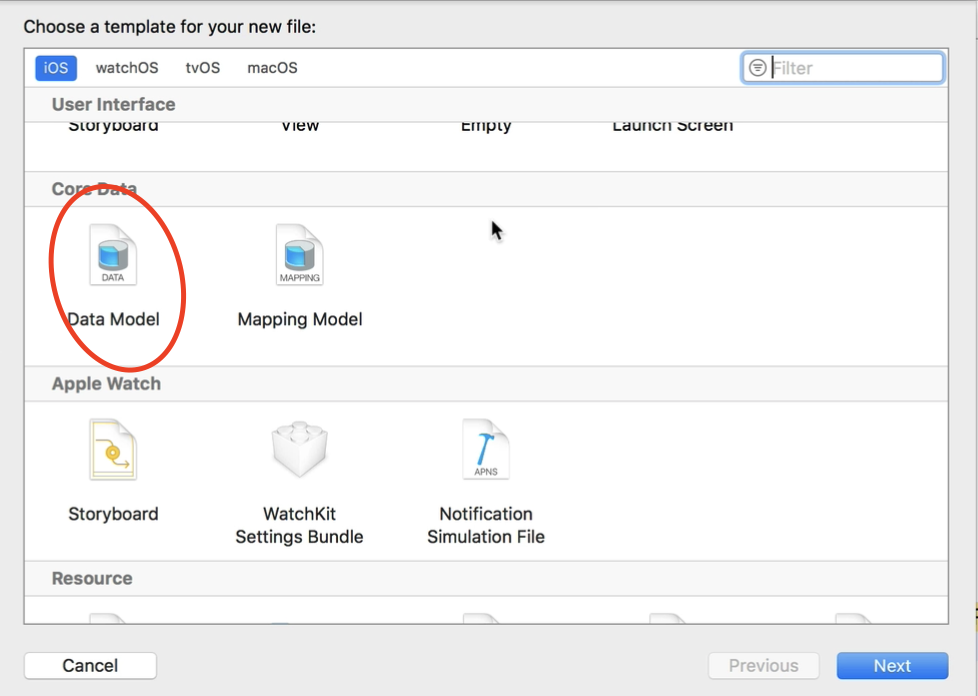
Configure & Setup Core Data
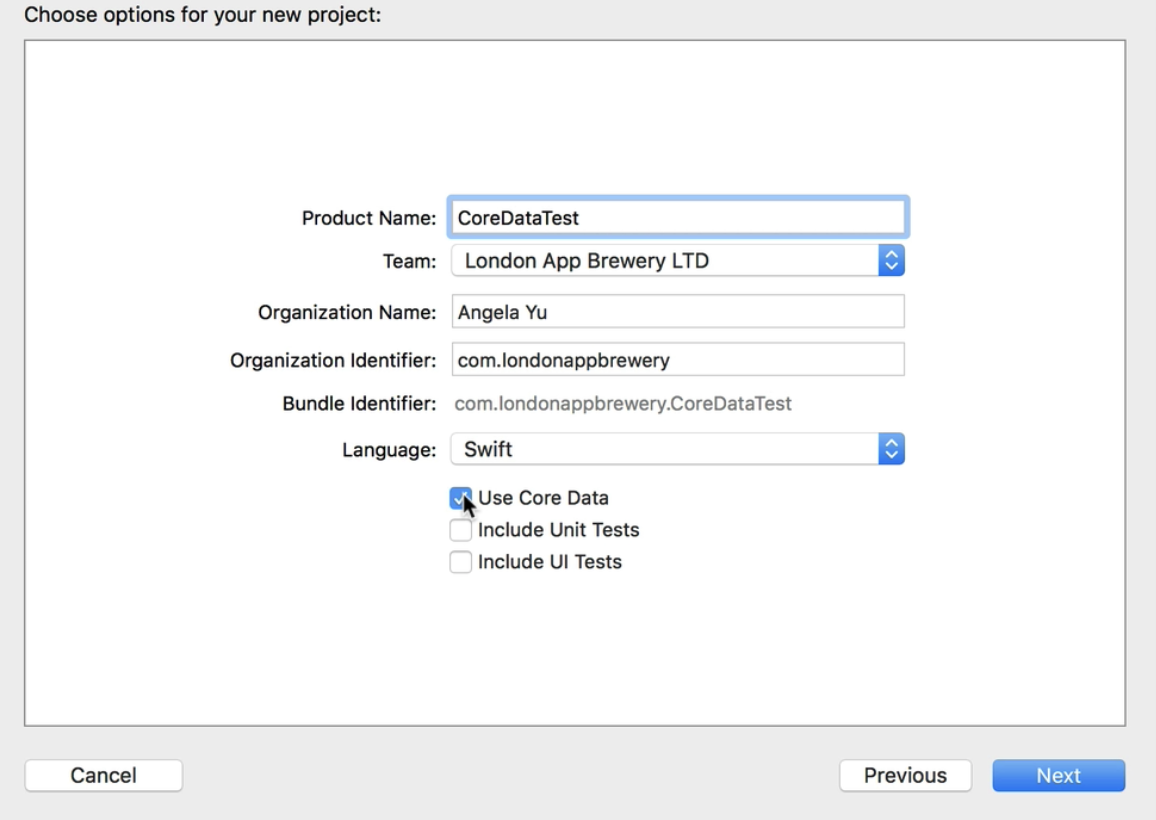
- First and foremost, the "Use Core Data" checkbox must be checked.
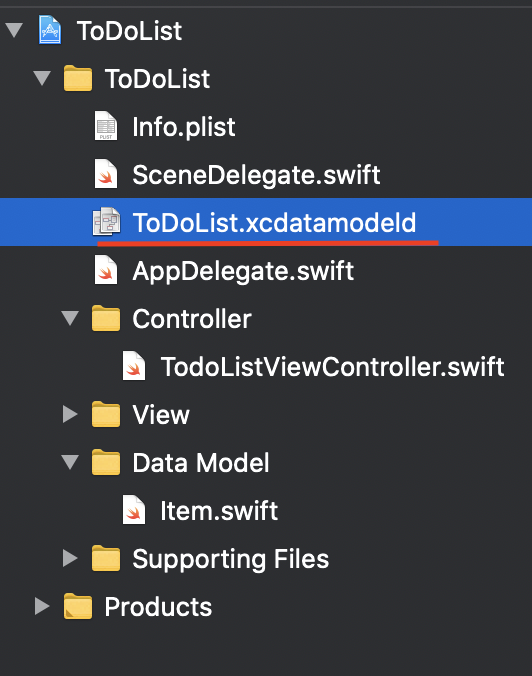
- After creating the project, you notice one different file. Inside here is where we set up all of our data and structure it for use.
- Additionally, in the AppDelegate.swift file, you see some more methods added to help you save data into Core Data.
-
If you want to add Core Data functionalities later on in your project, you can always create a new Data Model file.
→ Note that you would have to paste the AppDelegate.swift file methods needed to use Core Data from somewhere else. (also import CoreData)
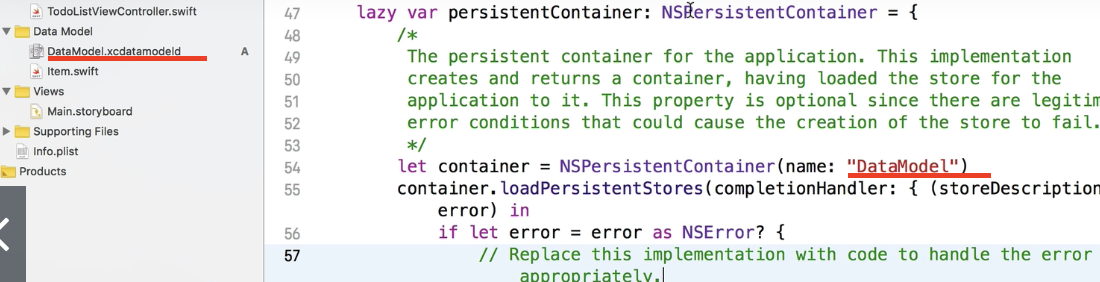
( The name of these two also have to match )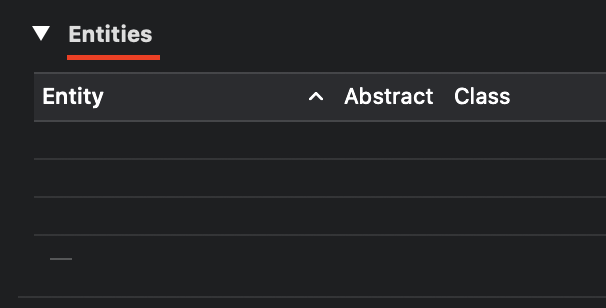
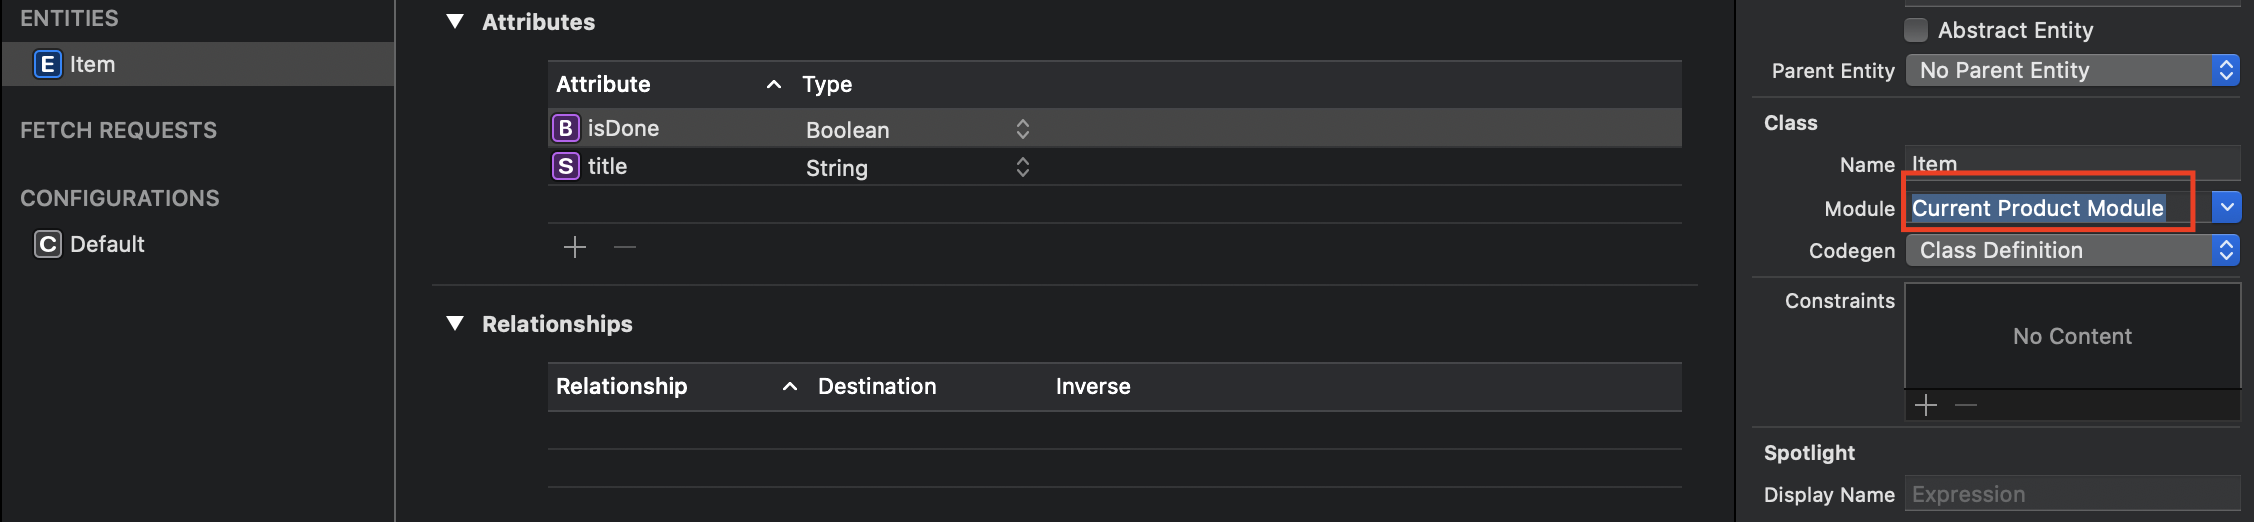
- " Entity " are pretty much equivalent to classes, and each entity has a whole bunch of attributes (properties).
- Each entity is basically like a table of data.
- ex. For every single Excel sheet that you have, you might have a single entity inside you Core Data data model.

- Click the above icon to add a new entity.

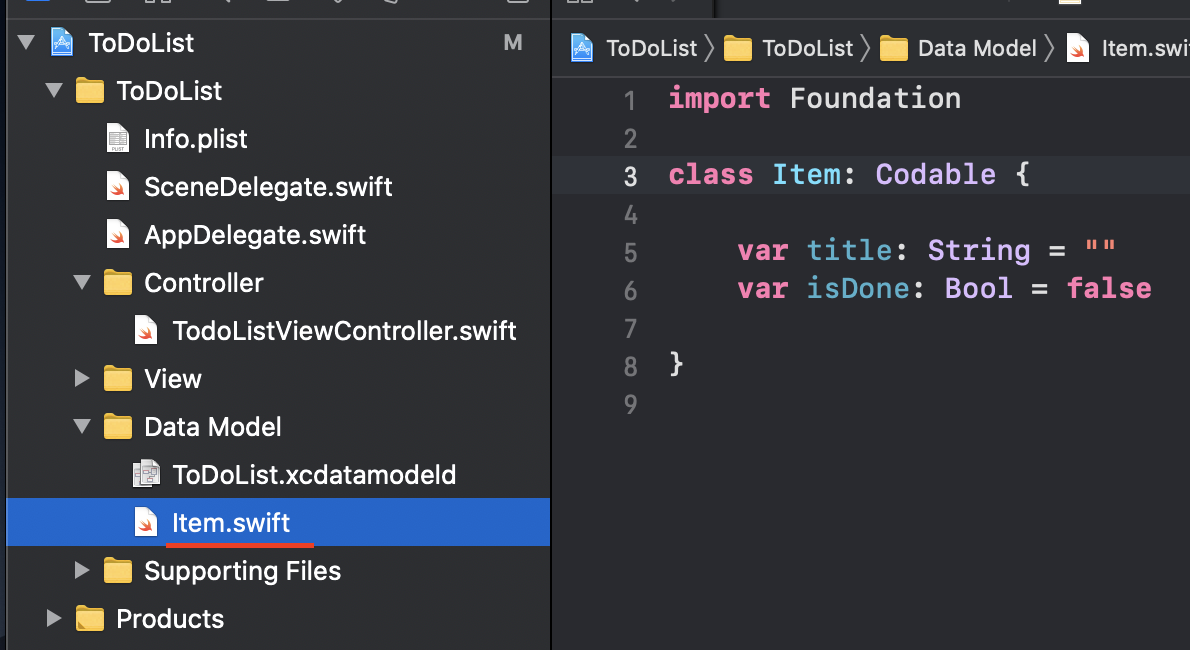
- Now, by clicking the "+" icon, you can add attributes to your newly created entity. Give the attribute a name and a type. In this example, we are making a Core Data DB for a To Do app, hence I added two attributes : "title" and a "isDone" attribute.
- Note that you can also mark your attributes as an Optional. It is checked by default.
-
Since we now essentially made the same thing as the above swift code, we can safely delete the file.
-
Also, remember to change the Module of the entity to "Current Product Module", instead of the default "global namespace".
→ It might not be a big problem right now, but once you need to store much more data and have to support multi-threading in your app, this might become an issue.
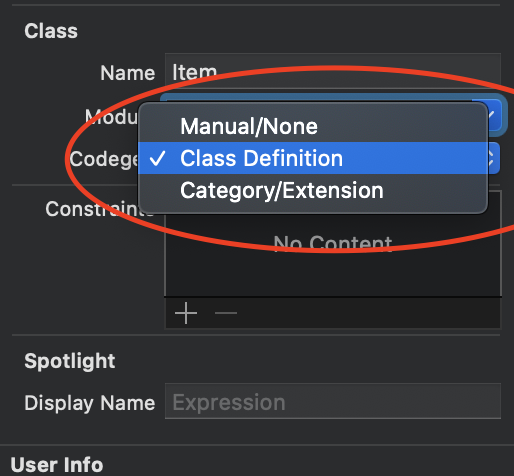
- Note that there is this thing called "Codegen" as well. You get 3 options.
-
Class Definition (default)
→ Converts your data, your entities, and your attributes into "classes" and "properties", so you can use them and manipulate them just as you would if you had created a class with these properties.
→ Xcode creates a separate Swift file for you in your project directory. However, you can't open the swift file and add your own code. Xcode will over write it.
→ Least effort needed, quickest to set up and easiest to understand.
-
Category / Extension
→ You would have to create your classes that are identically named to your entities, and Xcode will automatically link them up to allow you to use Core Data.
→ This may be the option that most developers prefer, because they might want to add some custom code inside.
-
Manual
→ No linkages, no code generation by Xcode. You have to do all the work yourself.
→ Lease used in practice
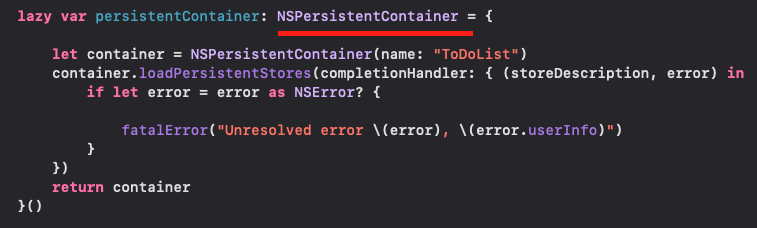
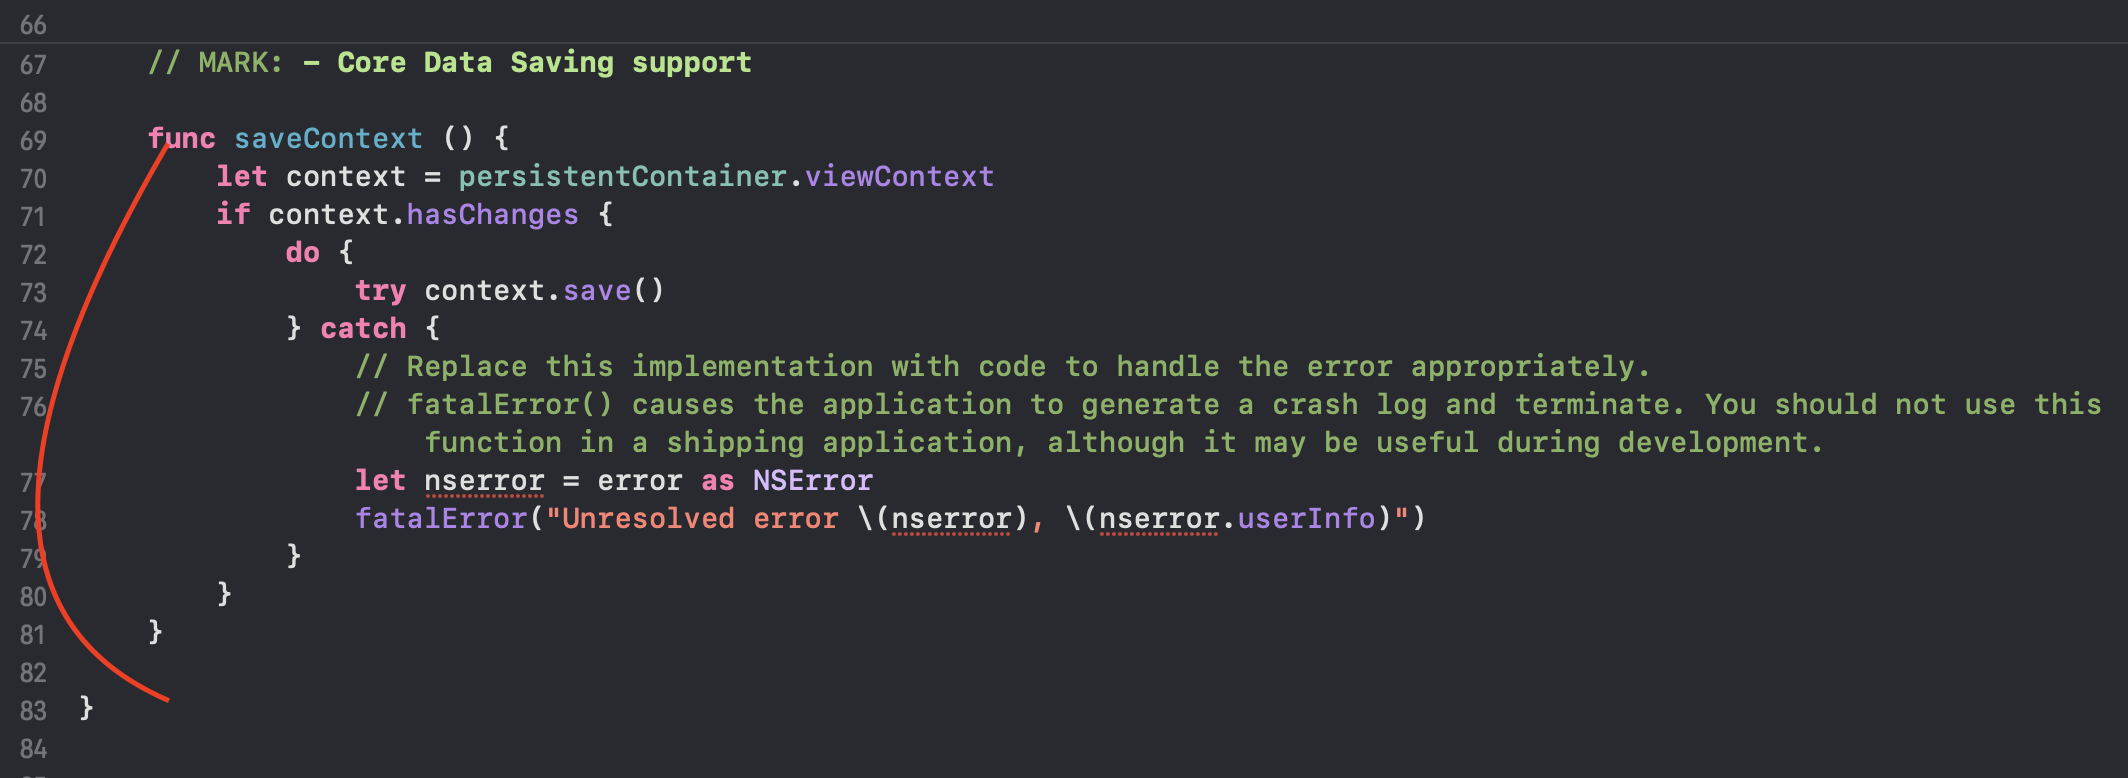
- In the AppDelegate.swift file, you have this NSPersistentContainer type lazy variable. This default persistent container is going to be a SQLite database.
- We are able to access this variable inside other classes in order to persist and save our data into our SQLite database.
- In other words, the NSPersistentContainer is the database that we are going to save data to.
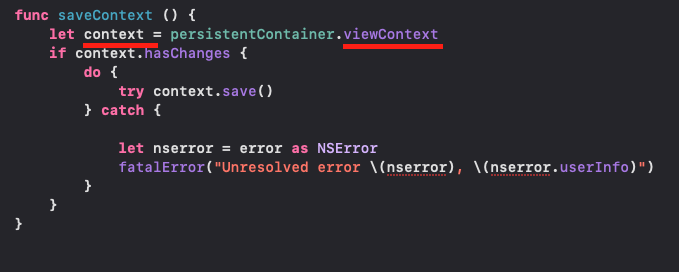
- The context is an area where you can change and update your data, so you can undo and redo until you are happy with your data.
- The context is similar to the "staging area" for Git, that temporary area where we can change things and update the things that we want to commit, and only once we are ready, we "context.save( )", or "commit" the data to source control.
- In other words, this "context" is like a scratch pad, or a temporary area where you can update, change, delete your data until you're happy with the format. Then, we commit it by context.save( ) to permanently save data.