prefers-color-scheme
- 미디어 쿼리(@media)를 이용하여 사용자의 시스템이 light, dark 인지를 탐지하여 적용 가능
- IE 미지원
no-preference : 사용자가 시스템에 사용하는 테마를 알리지 않음
light : 사용자 시스템에서 light theme 를 사용하는 것을 선호
dark : 사용자 시스템에서 dark theme 를 사용하는 것을 선호- App.css
:root {
background-color: #f7f7f7;
/*variables*/
--title-color: #42b983;
--content-color: #777;
}
/* IE 미지원 */
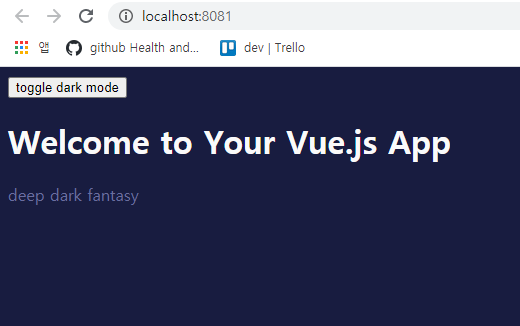
@media (prefers-color-scheme: dark) {
:root {
background-color: #181c40;
/*variables*/
--title-color: #fafafa;
--content-color: #6a6e9e;
}
}
.hello .hello__title {
color: var(--title-color);
font-weight: 600;
}
.hello .hello__content {
color: var(--content-color);
}
- HelloWorld.vue
  <div class="hello">
    <h1 class="hello__title">{{ msg }}</h1>
    <p class="hello__content">
      deep dark fantasy
    </p>
  </div>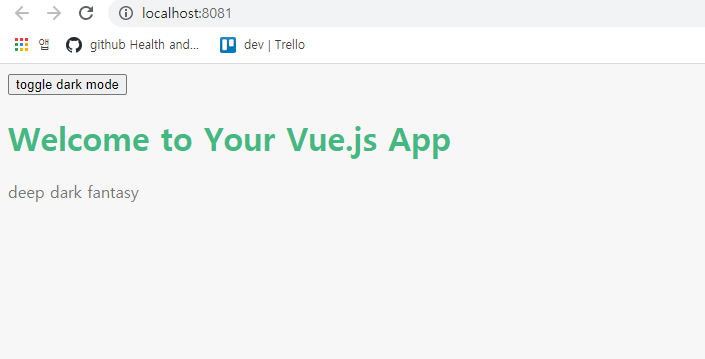

F12(개발자 도구) - 콘솔에서 Ctrl + Shift + p 를 누르면 커맨드창이 나온다.
여기서 Emulate CSS perfers-color-scheme: dark 를 클릭하면 다크모드 테스트가 가능하다.
window.matchMedia('(prefers-color-scheme: dark)').matches;
위 코드를 통해서 확인해보면 dark 모드인 경우에는 true 고 dark 모드가 아닌경우에는 false 가 확인이 가능하다.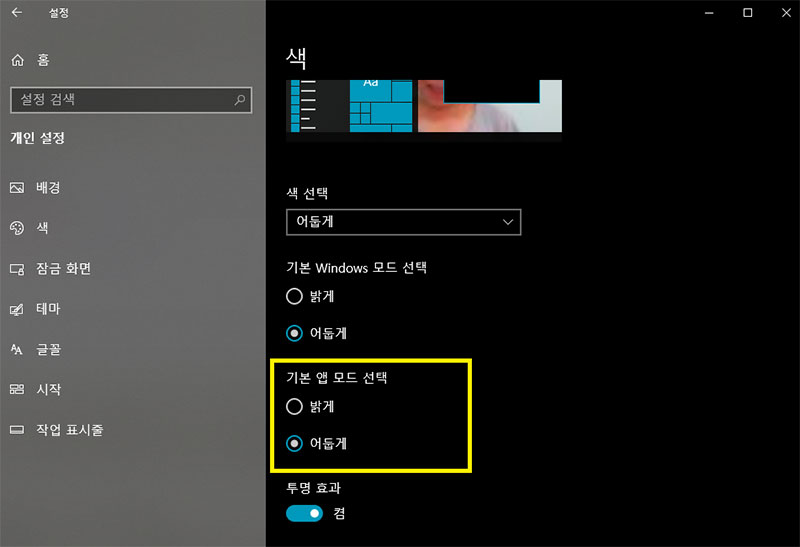
윈도우OS 에서는 위와 같이 시스템에서 다크모드 설정이 가능.
잘 적용이 되는거 같다. 그러면 저 버튼을 눌러서 토글링을 하는 경우에는 어떻게 처리를 해줘야 하는가?
최상위 요소에 최상위 클래스를 부여해서 처리를 한다.
- App.css
:root {
    background-color: #f7f7f7;
    /*variables*/
    --title-color: #42b983;
    --content-color: #777;
}

/* IE 미지원 */
@media (prefers-color-scheme: dark) {
    :root {
        background-color: #181c40;
        /*variables*/
        --title-color: #fafafa;
        --content-color: #6a6e9e;
    }
}

:root.lightmode {
    background-color: #f7f7f7;
    /*variables*/
    --title-color: #42b983;
    --content-color: #777;
}

:root.darkmode {
    background-color: #181c40;
    /*variables*/
    --title-color: #fafafa;
    --content-color: #6a6e9e;
}

.hello .hello__title {
    color: var(--title-color);
    font-weight: 600;
    transition: color 0.15s
}

.hello .hello__content {
    color: var(--content-color);
}
- App.vue
<template>
  <div id="app">
    <button type="button" @click="onToggleDarkMode">toggle dark mode</button>
    <HelloWorld msg="Welcome to Your Vue.js App"/>
  </div>
</template>

<script>
import HelloWorld from './components/HelloWorld.vue';

export default {
  name: 'App',
  components: {
    HelloWorld,
  },
  mounted() {
    if(window && window.matchMedia('(prefers-color-scheme: dark)').matches) {
      document.documentElement.classList.add("darkmode");
    } else {
      document.documentElement.classList.add("lightmode");
    }
  },
  methods: {
    onToggleDarkMode() {
      if (window) {
        console.log(window.matchMedia('(prefers-color-scheme: dark)').matches);

        if (window.matchMedia('(prefers-color-scheme: dark)').matches) {
          if(document.documentElement.classList.contains('darkmode')) {
            document.documentElement.classList.remove("darkmode");
            document.documentElement.classList.add("lightmode");
          } else {
            document.documentElement.classList.remove("lightmode");
            document.documentElement.classList.add("darkmode");
          }
        } else {
          if(document.documentElement.classList.contains('lightmode')) {
            document.documentElement.classList.remove("lightmode");
            document.documentElement.classList.add("darkmode");
          } else {
            document.documentElement.classList.remove("darkmode");
            document.documentElement.classList.add("lightmode");
          }
        }

      }
    },
  }
}
</script>
<style src="./App.css"/>
<style>
#app {
  -webkit-font-smoothing: antialiased;
  -moz-osx-font-smoothing: grayscale;
}
</style>
코드가 생각보다 많이 늘었다. onToggleDarkMode 를 살펴보면, 초기 시스템 테마에 따라 동작하는게 다르다.(토글을 하더라도 시스템 설정을 바뀌지 않기 때문이다.)
그래서 mouted 에서 미디어쿼리 결과에 따라 html 엘리먼트에 추가해주는 class 가 다르다.

현재 Velog 는 운영하지 않습니다 :) 가끔 와서 눈팅