
회사에서 프로젝트 관리 중 취약점 분석과 리포팅까지 자동으로 해준다는 쏠쏠한 플랫폼이 있다고 해서 겸사겸사 도입한 SonarQube(소나큐브)에 대해 소개하고자 합니다.
📌 🤷♀️SonarQube(소나큐브)가 뭐죠?
소나큐브(SonarQube)는 20개 이상의 프로그래밍 언어에서 버그, 코드 스멜, 보안 취약점을 발견할 목적으로 정적 코드 분석으로 자동 리뷰를 수행하기 위한 지속적인 코드 품질 검사용 오픈 소스 플랫폼이다. 소나큐브는 중복 코드, 코딩 표준, 유닛 테스트, 코드 커버리지, 코드 복잡도, 주석, 버그 및 보안 취약점의 보고서를 제공한다. - 위키백과 -
간단히 말하면 실행상태가 아닌 환경에서 소스코드의 버그, 보안 취약점 등을 분석하고 리포팅 해주는 정적 분석도구(static code analysis) 중 하나입니다.
SonarQube(소나큐브) 구성에 대해서 간단하게 살펴보고 넘어가겠습니다.

SonarQube 공식문서에서는 총 3가지의 인스턴스로 분류합니다.
🎯 SonarQube Server
SonarQube 사용자 인터페이스를 제공하는 웹 서버.
Elasticsearch를 기반으로 하는 검색 서버.
코드 분석 보고서를 처리하고 SonarQube 데이터베이스에 저장하는 컴퓨팅 엔진.
🎯 Scanner
프로젝트를 분석하기 위해 빌드 또는 지속적 통합 서버에서 실행되는 하나 이상의 스캐너.
🎯 Database Server
코드 스캔 중에 생성된 코드 품질 및 보안에 대한 메트릭 및 문제점 기록.
공식 문서에서는 SonarQube 서버와 데이터베이스가 별도의 호스트에 설치되어야 한다고 가이드 하고 있으나 저는 SonarQube 서버에 데이터베이스까지 설치해서 진행하도록 하겠습니다.
📌 SonarQube Server 설치 환경 준비
🔗 구축 환경
CentOS 7
OpenJDK 11
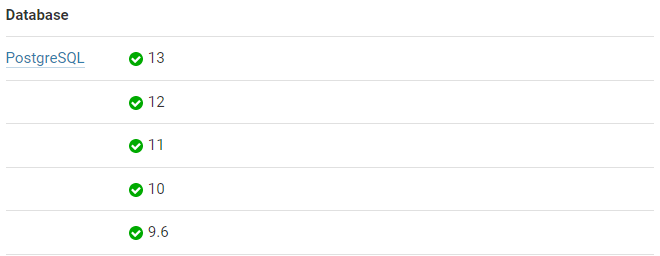
PostgreSQL 13
SonarQube Server 9.5
설치하고자 하는 SonarQube 버전에 따라 지원하는 JDK 및 데이터베이스 버전이 다르니까 꼭 공식 문서에서 지원하는 버전을 확인해주세요.
🔗 SonarQube Server 9.5 호환 버전

💻 데이터베이스(PostgreSQL) 설치
- PostgreSQL Repository 설치와 yum Update
sudo yum -y install https://download.postgresql.org/pub/repos/yum/reporpms/EL-7-x86_64/pgdg-redhat-repo-latest.noarch.rpm
sudo yum -y update- 다운 가능한 Repository 리스트 확인
sudo yum repolist- PostgreSQL 설치
sudo yum -y install postgresql13 postgresql13-server- PostgreSQL 초기화
sudo /usr/pgsql-13/bin/postgresql-13-setup initdb- PostgreSQL 서비스 시작
sudo systemctl start postgresql-13- PostgreSQL 서비스 상태 확인
sudo systemctl status postgresql-13- 재부팅 시 PostgreSQL 서비스 자동 활성화
sudo systemctl enable postgresql-13- DB 접속
su - postgres   #DB 설치 시 자동으로 OS 계정 생성
psql            #DB CLI 접속
\q #DB ClI 종료- DB 접근 계정 생성
저는 패스워드를 sonarqube로 설정했습니다.
su - postgres
psql
CREATE USER sonarqube WITH ENCRYPTED password 'sonarqube';
CREATE DATABASE sonarqube WITH ENCODING 'UTF8' OWNER sonarqube TEMPLATE=template0;
\q
💻 OpenJDK 11 설치
#OpenJdk 11 설치
yum install -y java-11-openjdk-devel.x86_64

#OpenJdk 11 설치 확인
java --version

#javac설치 경로 확인
which javac
> /bin/javac

#/bin/javac에 연결된 원본파일 위치 확인
readlink -f /bin/javac
> /usr/lib/jvm/java-11-openjdk-11.0.15.0.9-2.el7_9.x86_64/bin/javac

#JAVA 환경변수 설정
vi /etc/profile

#파일 최하단에 추가
export JAVA_HOME=/usr/lib/jvm/java-11-openjdk-11.0.11.0.9-1.el7_9.x86_64

#설정 후 반영
source /etc/profile

결과 확인
echo $JAVA_HOME
> /usr/lib/jvm/java-11-openjdk-11.0.15.0.9-2.el7_9.x86_64
📌 SonarQube Server 설치
설치를 하기에 앞서 SonarQube는 root 계정으로는 실행이 불가능하므로 실행을 위해 OS 계정을 추가합니다.
✍ OS 계정 추가
adduser -M -r sonarqubeIf you're running on Linux, you must ensure that:
Linux에서 SonarQube를 설치하기 위해선 다음과 같은 설정이 필요합니다.
vm.max_map_count is greater than or equal to 524288
fs.file-max is greater than or equal to 131072
the user running SonarQube can open at least 131072 file descriptors
the user running SonarQube can open at least 8192 threads
You can see the values with the following commands:
Platform notes
vm.max_map_count 값 >= 524288
fs.file-max 값 >= 131072
SonarQube 실행 유저는 최소 131072 이상의 File descriptors를 열 수 있어야함
SonarQube 실행 유저는 최소 8192 이상의 Threads를 열 수 있어야 함
✍ OS 설정 확인
위와 같은 설정은 다음 명령어로 확인 할 수 있습니다.
sysctl vm.max_map_count
sysctl fs.file-max
ulimit -n
ulimit -u
✍ OS 설정
설정을 위해 명령어를 입력합니다.
sysctl -w vm.max_map_count=524288
sysctl -w fs.file-max=131072
ulimit -n 131072
ulimit -u 8192
💡OS 설정을 하였는데도 이슈가 발생할 때
# vm.max_map_count / fs.file-max 값 설정
# 다음과 같이 에디터로 파일 생성
sudo vi /etc/sysctl.d/99-OS계정.conf

# 명령어 입력 후 저장
vm.max_map_count=524288
fs.file-max=131072

# 설정 리로드
sudo sysctl --system

# 변경된 값 확인
sysctl vm.max_map_count
sysctl fs.file-max


# Open File descriptors / Threads 값 설정
# 다음과 같이 에디터로 파일 생성
sudo vi /etc/security/limits.d/99-OS계정.conf

# 명령어 입력 후 저장
OS계정 - nofile 131072
OS계정 - nproc 8192

# 변경된 값 확인
ulimit -n
ulimit -u
⚙️ SonarQube Server 설치 및 실행
https://www.sonarqube.org/downloads/
#/opt 경로에 다운로드 받은 zip 파일 업로드
pwd
> /opt
# 압축 해제
unzip sonarqube-9.5.0.56709.zip

#unzip 패키지가 없을 경우 설치
sudo yum install -y unzip


# OS계정으로 소유자 및 그룹 권한 변경
sudo chown sonarqube:sonarqube -R sonarqube-9.5.0.56709.zip
sudo chown sonarqube:sonarqube -R sonarqube
저와 동일하게 작업을 하신 분들은 /opt/sonarqube-9.5.0.56709/bin/linux-x86-64/bin/sonar.sh를 실행하시면 바로 SonarQube Server가 실행됩니다.
su - sonarqube
-bash-4.2$ cd /opt/sonarqube-9.5.0.56709/bin/linux-x86-64/bin
-bash-4.2$ ./sonar.sh console
Running SonarQube...
wrapper  | --> Wrapper Started as Console
wrapper  | Launching a JVM...
jvm 1    | Wrapper (Version 3.2.3) http://wrapper.tanukisoftware.org
jvm 1    |   Copyright 1999-2006 Tanuki Software, Inc.  All Rights Reserved.
jvm 1    |
jvm 1    | 2022.07.22 17:07:45 INFO  app[][o.s.a.AppFileSystem] Cleaning or creating temp directory /opt/sonarqube-9.5.0.56709/temp
jvm 1    | 2022.07.22 17:07:46 INFO  app[][o.s.a.es.EsSettings] Elasticsearch listening on [HTTP: 127.0.0.1:9001, TCP: 127.0.0.1:35894]
jvm 1    | 2022.07.22 17:07:46 INFO  app[][o.s.a.ProcessLauncherImpl] Launch process[ELASTICSEARCH] from [/opt/sonarqube-9.5.0.56709/elasticsearch]: /opt/sonarqube-9.5.0.56709/elasticsearch/bin/elasticsearch
💡저와 설정을 다르게 하신 경우
DB 이름이나 사용자 이름을 저와 다르게 하신 분들은 아래 설정을 추가로 해주세요.
/{SonarQube Server Path}/conf/sonar.properties 파일 수정
저는 /opt 경로에 sonarqube 서버를 설치했으므로 경로는 아래와 같습니다.
/opt/sonarqube-9.5.0.56709/conf/sonar.properties
## DB
# DB 접근 계정 암호
sonar.jdbc.username=DB계정명
sonar.jdbc.password=DB계정암호

# JDBC URL 설정
# PostgreSQL의 경우 포트를 입력 안할 경우, 기본값인 5432포트로 인식함
sonar.jdbc.url=jdbc:postgresql://IP:Port/DB명


## (옵션) SonarQube Web Port 변경
SonarQube는 기본값으로 9000 포트를 사용하며, 아래 값 주석해제하여 변경할 수 있음
sonar.web.port=9000
📌 SonarQube Server 접속
설치와 설정이 완료 되었으면 다음과 같이 sonarqube 서버를 실행합니다.
실행은 반드시 root 계정이 아닌 sonarqube용 계정으로 실행시켜주세요. root 계정으로 실행시 오류가 발생합니다.
cd /opt/sonarqube-9.5.0.56709/bin/linux-x86-64
ls
> lib  sonar.sh  wrapper  wrapper.log
./sonar.sh console
>
Running SonarQube...
wrapper  | --> Wrapper Started as Console
wrapper  | Launching a JVM...
jvm 1    | Wrapper (Version 3.2.3) http://wrapper.tanukisoftware.org
jvm 1    |   Copyright 1999-2006 Tanuki Software, Inc.  All Rights Reserved.
jvm 1    |
jvm 1    | 2022.07.25 10:52:10 INFO  app[][o.s.a.AppFileSystem] Cleaning or creating temp directory /opt/sonarqube-9.5.0.56709/temp
jvm 1    | 2022.07.25 10:52:11 INFO  app[][o.s.a.es.EsSettings] Elasticsearch listening on [HTTP: 127.0.0.1:9001, TCP: 127.0.0.1:43068]
jvm 1    | 2022.07.25 10:52:11 INFO  app[][o.s.a.ProcessLauncherImpl] Launch process[ELASTICSEARCH] from [/opt/sonarqube-9.5.0.56709/elasticsearch]: /opt/sonarqube-9.5.0.56709/elasticsearch/bin/elasticsearch
jvm 1    | 2022.07.25 10:52:11 INFO  app[][o.s.a.SchedulerImpl] Waiting for Elasticsearch to be up and running
별 다른 오류 로그 없이 실행되었다면 http://IP:9000으로 접속합니다.
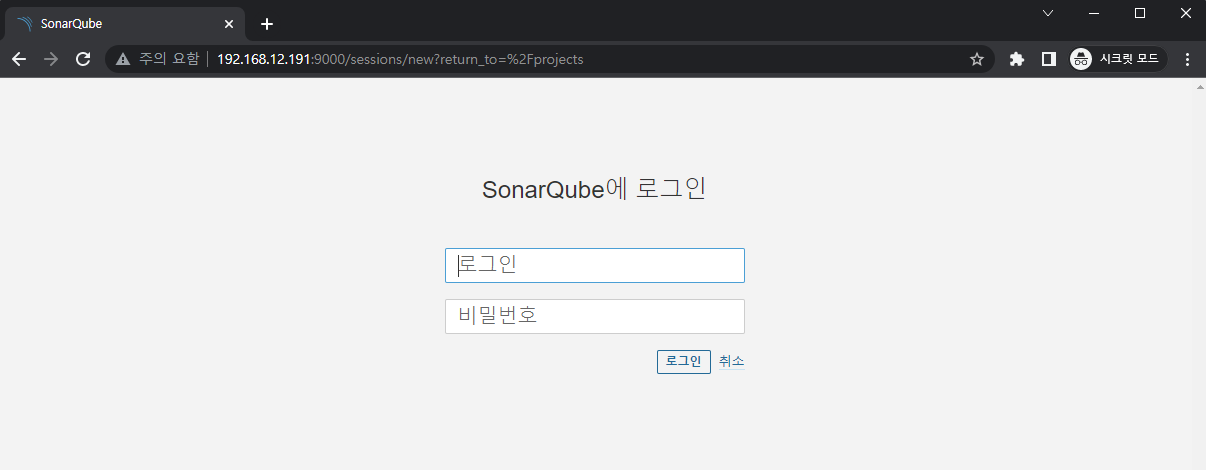
초기 관리자 Id/Password는 admin/admin 입니다!
sonarqube 서버 접속에 성공했습니다 :D
다음 포스트에선 sonarqube scanner 연동방법과 실행방법, sonarqube 한글 플러그인 설치까지 진행해보겠습니다.
긴 글 읽으시느라 고생 많으셨습니다 👏
참고 사이트

와 정말 이해가 잘되는 것 같아요 ㅎㅎ