Ponitor에서는 ATM 사용자의 영상이미지를 저장한다.
관리자 계정에서는 이 영상을 조회할 수 있다.
오늘은 ATM 사용자 등록 기능을 구현할 것이다.
DB구조를 설명하기 전에
하나 짚고 넘어가자면,
✅ Ponitor는 은행과 제휴를 맺어 해당 은행의 ATM에 탑재되는 서비스이다.
따라서 구현한 클라이언트 화면 모두 ATM에서 동작하는 것이며 ATM에 설치되어있는 카메라로 이미지/영상 인풋을 받을 것이다.
✅ 또한 회원가입의 경우 개인이 하지 않고,
지점별로 핀번호를 할당받아 로그인을 진행한다.
✅고객/관리자는 이 로그인하는 핀번호에 따라 구별된다.
✅ 또한 한 지점당 하나의 관리자 계정을 부여하며,
지점별로 최대 3개의 ATM 핀번호를 부여할 수 있다.
즉, 하나의 관리자 화면에서 최대 3개의 atm에서 온 고객 영상을 모두 확인할 수 있다.
✅ 사용자는 메인화면에서 버튼을 클릭했을 때부터 거래 완료시까지 하나의 사용자로 고려하며, ATM 번호+거래 시작시간으로 구분한다.
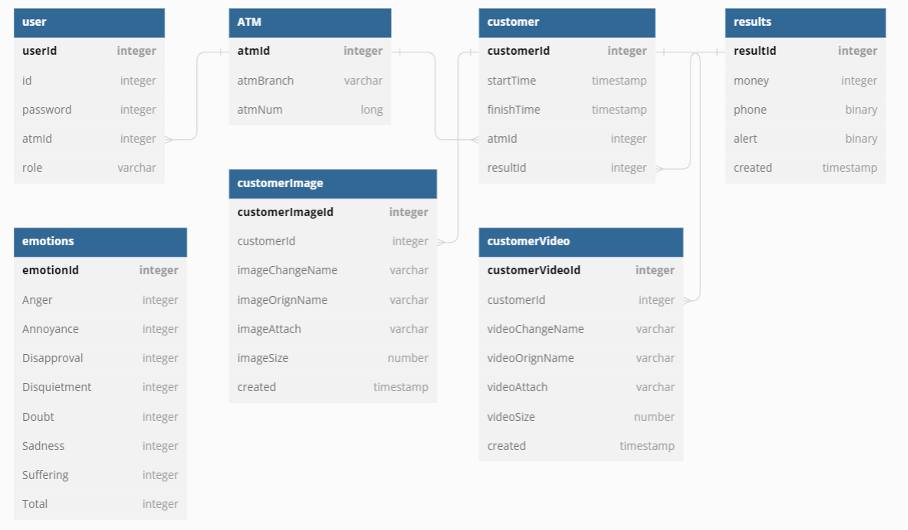
DB 구조
위에 내용을 고려한 Ponitor의 DB구조는 다음과 같다.
Entity 생성
고객 등록 기능을 만들 것이기 때문에 고객Entity를 생성한다.
Customer.java
import lombok.Builder;
import lombok.Getter;
import lombok.NoArgsConstructor;
import org.hibernate.annotations.CreationTimestamp;

import javax.persistence.*;
import java.sql.Timestamp;

@Getter// 클래스내 getter 메소드 자동생성
@NoArgsConstructor //기본 생성자 자동추가
@Entity
public class Customer {

    @Id
    @GeneratedValue(strategy = GenerationType.IDENTITY) //고객 id = auto increment
    private Long customerId;

 //   @CreationTimestamp //insert문 실행시 현재시간 적용
    @Column(nullable = false)
    private LocalDateTime startTime; //Timestamp -> LocalDateTime

//    @UpdateTimestamp update쿼리 실행시 자동 업데이트
    @Column(length = 500) //거래완료시간 = timestamp, 추후 update로 값을 채움
    private LocalDateTime endTime; //Timestamp -> LocalDateTime


    @Column(length = 500, nullable = false)  //atm 번호, not NULL
    private String atmId;

    @Builder
    public Customer(Timestamp startTime, Timestamp endTime, String atmId){
        this.startTime = startTime;
        this.endTime = endTime;
        this.atmId = atmId;
    }

}
📝 고객이 버튼을 클릭한 시작시간과 거래가 종료된 종료시간을 프론트에서 timestamp로 넘겨주기로 해서 날짜 관련 자료형을 많이 서칭해보았다.
LocalDateTime으로 선언해야하나 여러가지 고민을 많이 했지만 어쨋든 프론트언니가 timestamp로 넘겨준다 했으니 그대로 하려고 한다.
➡️ JSON파일 자체와 JSON 변환에 대한 이해도가 낮아서 했던 고민들이었다. 👏공부를 합시다👏
➡️ 결론
startTime, endTime 모두 LocalDateTime으로 선언,
JSON 파일이 String만 지원한다고 String으로 받아서 LocalDateTime으로 변환할 필요 X.
즉, Spring에서 직렬화 가능함
HOW?
관련 DTO의 startTime, endTime에 아래의 어노테이션만 붙여주면 됨
@DateTimeFormat(pattern = "yyyy-MM-dd'T'HH:mm:ss")날짜 관련 자료형과 직렬화 공부하는데 도움이 된 블로그들의 링크는 아래에 첨부하겠다!
날짜 타입 클래스(LocalDate, LocalTime, LocalDateTime)
데이터 직렬화(serialization)는 무엇이고 왜 필요한가?
@DateTimeFormat @JsonFormat
그리고 내가 고민하는 부분을 정확하게 가르쳐주신 조졸두님의 블로그..
절 받으세요🙇♂️
SpringBoot에서 날짜 타입 JSON 변환에 대한 오해 풀기
📝 위의 코드에서 @CreationTimestamp와 @UpdateTimestamp는 주석처리 해놓았는데 프론트랑 연동하면서 startTime과 endTime을 백엔드에서 자동으로 처리해주는게 편할지 아닌지를 얘기해봐야할 것 같다.
➡️ 프론트에서 startTime, endTime 모두 보내주기로!
Entity Repository생성
CustomerRepository.java
import org.springframework.data.jpa.repository.JpaRepository;
import pebite.Ponitor_BE.model.Customer;

public interface CustomerRepository extends JpaRepository<Customer, Long> {

}
Test Code 작성
잘 동작하는지 확인해부쟈~
CustomerRepositoryTest.java
import org.junit.After;
import org.junit.Test;
import org.junit.runner.RunWith;
import org.springframework.beans.factory.annotation.Autowired;
import org.springframework.boot.test.context.SpringBootTest;
import org.springframework.test.context.junit4.SpringRunner;
import pebite.Ponitor_BE.model.Customer;

import java.sql.Timestamp;
import java.util.List;

import static org.assertj.core.api.AssertionsForClassTypes.assertThat;


@RunWith(SpringRunner.class)
@SpringBootTest
public class CustomerRepositoryTest {

    @Autowired
    CustomerRepository customerRepository;

    @After //테스트 단위 끝날때마다 실행
    public void cleanup(){ //테스트 간 데이터 침범 막기위해 다 지움
        customerRepository.deleteAll();
    }

    @Test
    public void 고객정보_불러오기(){
        //given
        Timestamp startTime = Timestamp.valueOf("2023-04-20 03:21:00.000");
        Timestamp endTime = Timestamp.valueOf("2023-04-20 03:25:31.000");
        String atmId = "ewha001";

        customerRepository.save(Customer.builder()
                .startTime(startTime)
                .endTime(endTime)
                .atmId(atmId)
                .build());

        //when
        List<Customer> customerList = customerRepository.findAll();

        //then
        Customer customer = customerList.get(0);
        assertThat(customer.getStartTime()).isEqualTo(startTime);
        assertThat(customer.getEndTime()).isEqualTo(endTime);
        assertThat(customer.getAtmId()).isEqualTo(atmId);

    }


}
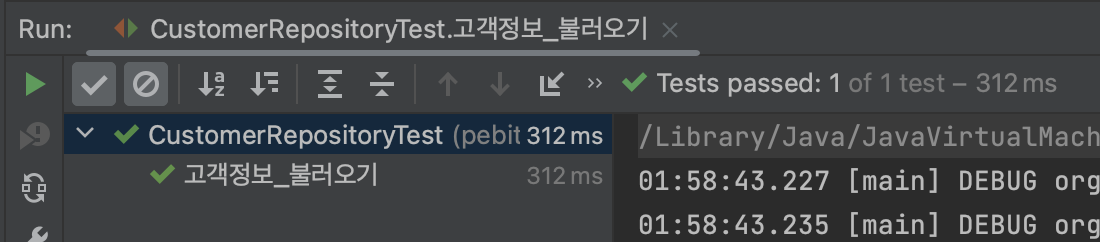
짜잔~ 잘 통과했다
고객 등록 API
‼️ 이제 등록 기능을 만들어보자!
Dto
절대 Entity 클래스를 Request, Response클래스로 사용하면안됨!
여기서 위에 언급했던 JSON변환을 위해 startTime과 endTime에 아래의 어노테이션을 추가했다.
@DateTimeFormat(pattern = "yyyy-MM-dd'T'HH:mm:ss") CustormerSaveRequestDto.java
import lombok.Builder;
import lombok.Getter;
import lombok.NoArgsConstructor;
import pebite.Ponitor_BE.model.Customer;

import java.sql.Timestamp;

@Getter
@NoArgsConstructor
public class CustomerSaveRequestDto {
	@DateTimeFormat(pattern = "yyyy-MM-dd'T'HH:mm:ss")
    private Timestamp startTime;

    @DateTimeFormat(pattern = "yyyy-MM-dd'T'HH:mm:ss")
    private Timestamp endTime;

    private String atmId;

    @Builder
    public CustomerSaveRequestDto(Timestamp startTime,Timestamp endTime, String atmId){
        this.startTime = startTime;
        this.endTime = endTime;
        this.atmId = atmId;
    }

    public Customer toEntity(){
        return Customer.builder()
                .startTime(startTime)
                .endTime(endTime)
                .atmId(atmId).
                build();
    }
}
Service
CustomerService.java
import lombok.RequiredArgsConstructor;
import org.springframework.stereotype.Service;
import org.springframework.transaction.annotation.Transactional;

import pebite.Ponitor_BE.dto.CustomerSaveRequestDto;
import pebite.Ponitor_BE.repository.CustomerRepository;

@RequiredArgsConstructor
@Service
public class CustomerService {
    private final CustomerRepository customerRepository;
    @Transactional
    public Long save(CustomerSaveRequestDto requestDto) {
        return customerRepository.save(requestDto.toEntity()).getCustomerId();
    }
}
Controller
CustomerApiController.java
import lombok.RequiredArgsConstructor;
import org.springframework.web.bind.annotation.PostMapping;
import org.springframework.web.bind.annotation.RequestBody;
import org.springframework.web.bind.annotation.RestController;

import pebite.Ponitor_BE.dto.CustomerSaveRequestDto;
import pebite.Ponitor_BE.service.CustomerService;

@RequiredArgsConstructor
@RestController
public class CustomerApiController {

    private final CustomerService customerService;

    @PostMapping("/users/lists")
    public Long save(@RequestBody CustomerSaveRequestDto requestDto){
        return customerService.save(requestDto);
    }
}
Test
CustomerApiControllerTest.java
import org.junit.After;
import org.junit.Test;
import org.junit.runner.RunWith;
import org.springframework.beans.factory.annotation.Autowired;
import org.springframework.boot.test.context.SpringBootTest;
import org.springframework.boot.test.web.client.TestRestTemplate;
import org.springframework.boot.test.web.server.LocalServerPort;
import org.springframework.http.HttpStatus;
import org.springframework.http.ResponseEntity;
import org.springframework.test.context.junit4.SpringRunner;
import pebite.Ponitor_BE.dto.CustomerSaveRequestDto;
import pebite.Ponitor_BE.model.Customer;
import pebite.Ponitor_BE.repository.CustomerRepository;

import java.sql.Timestamp;
import java.util.List;

import static org.assertj.core.api.AssertionsForClassTypes.assertThat;

@RunWith(SpringRunner.class)
@SpringBootTest(webEnvironment = SpringBootTest.WebEnvironment.RANDOM_PORT)
public class CustomerApiControllerTest {

    @LocalServerPort
    private int port;

    @Autowired
    private TestRestTemplate restTemplate;

    @Autowired
    private CustomerRepository customerRepository;

    @After
    public void tearDown() throws Exception {
        customerRepository.deleteAll();
    }

    @Test
    public void customer_register() throws Exception {

        //given
        Timestamp startTime = Timestamp.valueOf("2023-04-20 03:21:00.000");
        Timestamp endTime = Timestamp.valueOf("2023-04-20 03:25:31.000");
        String atmId = "ewha001";

        CustomerSaveRequestDto requestDto = CustomerSaveRequestDto.builder()
                .startTime(startTime)
                .endTime(endTime)
                .atmId(atmId)
                .build();


        String url = "http://localhost:" + port + "/users/lists";

        //when
        ResponseEntity<Long> responseEntity = restTemplate.postForEntity(url, requestDto, Long.class);

        //then
        assertThat(responseEntity.getStatusCode()).isEqualTo(HttpStatus.OK);
        assertThat(responseEntity.getBody()).isGreaterThan(0L);

        List<Customer> all = customerRepository.findAll();
        assertThat(all.get(0).getEndTime()).isEqualTo(endTime);
        assertThat(all.get(0).getAtmId()).isEqualTo(atmId);
    }


}
요것도 잘 돌아간다!
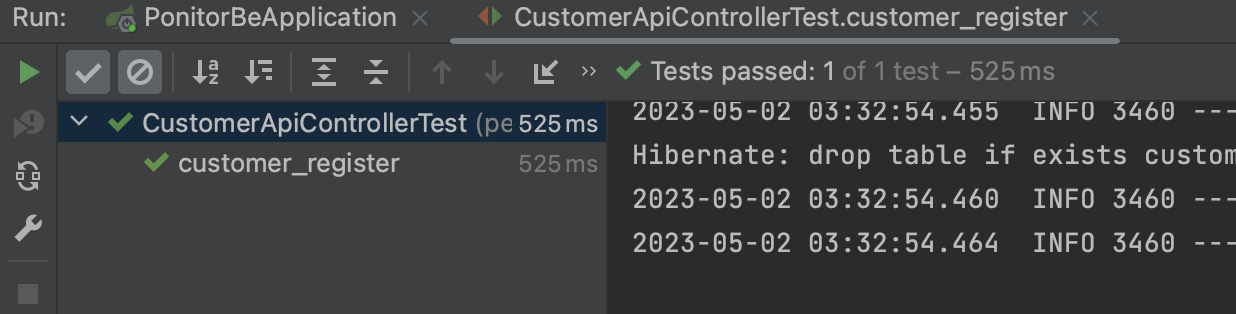
WebEnvironment.RANDOM_PORT로 인한 랜덤 포트 실행이랑

insert 쿼리문 모두 잘 실행된 것을 확인할 수 있다!

이 테스트과정에서 문제가 하나 있었ㄷr...⭐️
customer등록과 맵핑된 url이 원래 "/users/{customer}/lists"이었다.
그런데 restTemplate은 중괄호로 묶인 JSON 데이터를 URI 변수의 자리 표시자로 간주하기 때문에.
즉! url 변수에 대한 값을 제공하지 않아서 url이 완전하지 않기 때문에 오류가 난다...
자세한 건 아래 링크 참조..
Spring RestTemplate Exception: “Not enough variables available to expand”
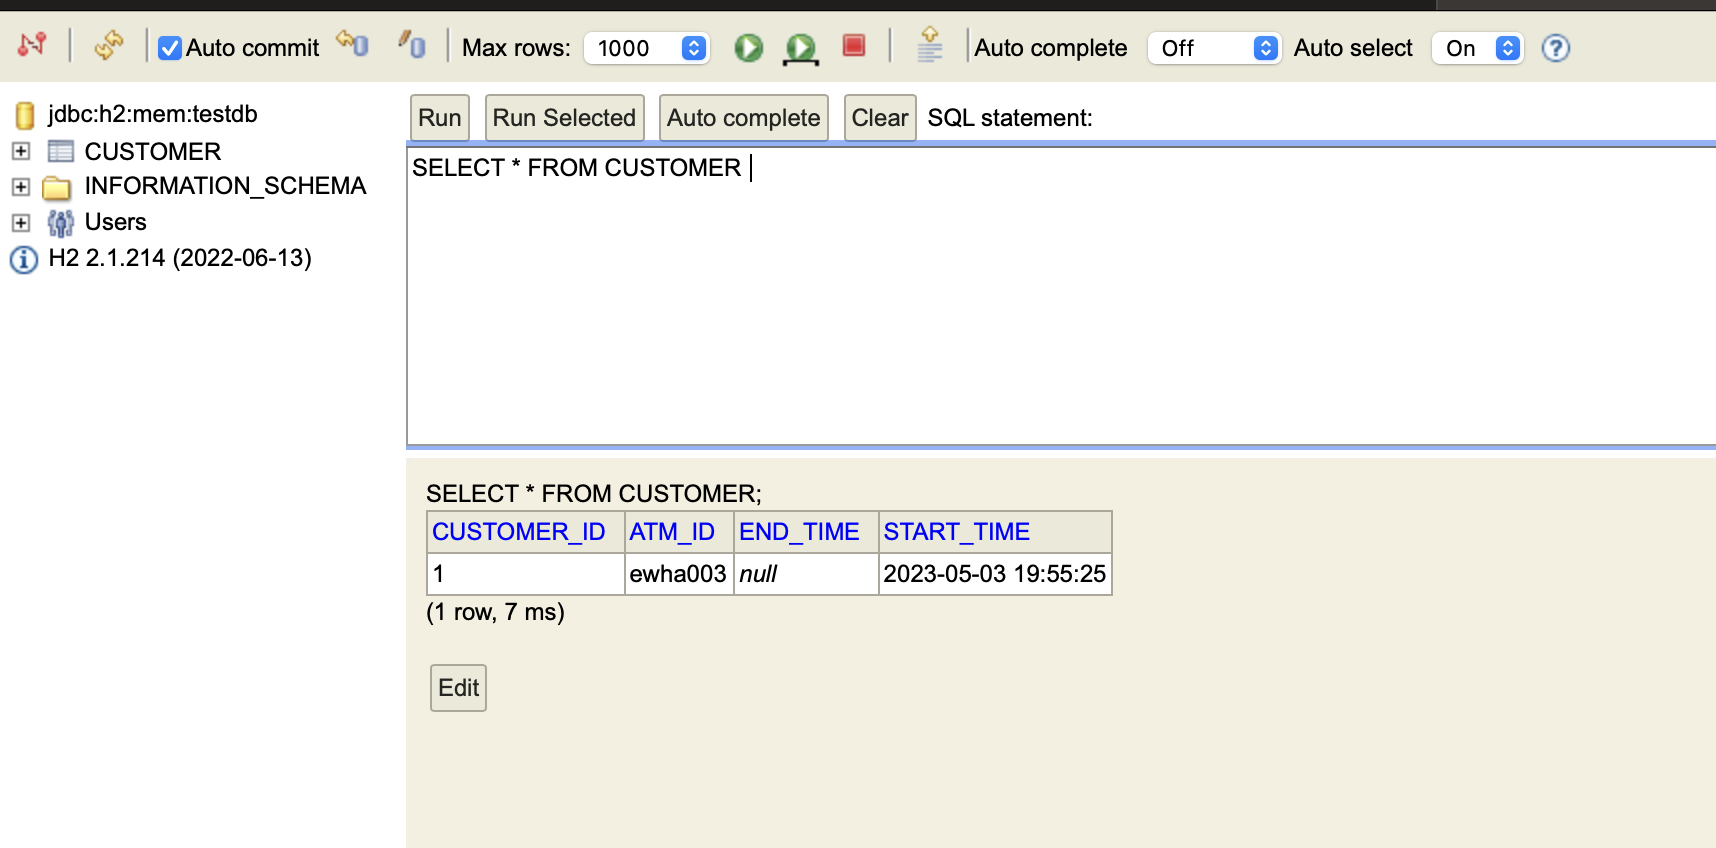
포스트맨으로 POST를 날려보면!
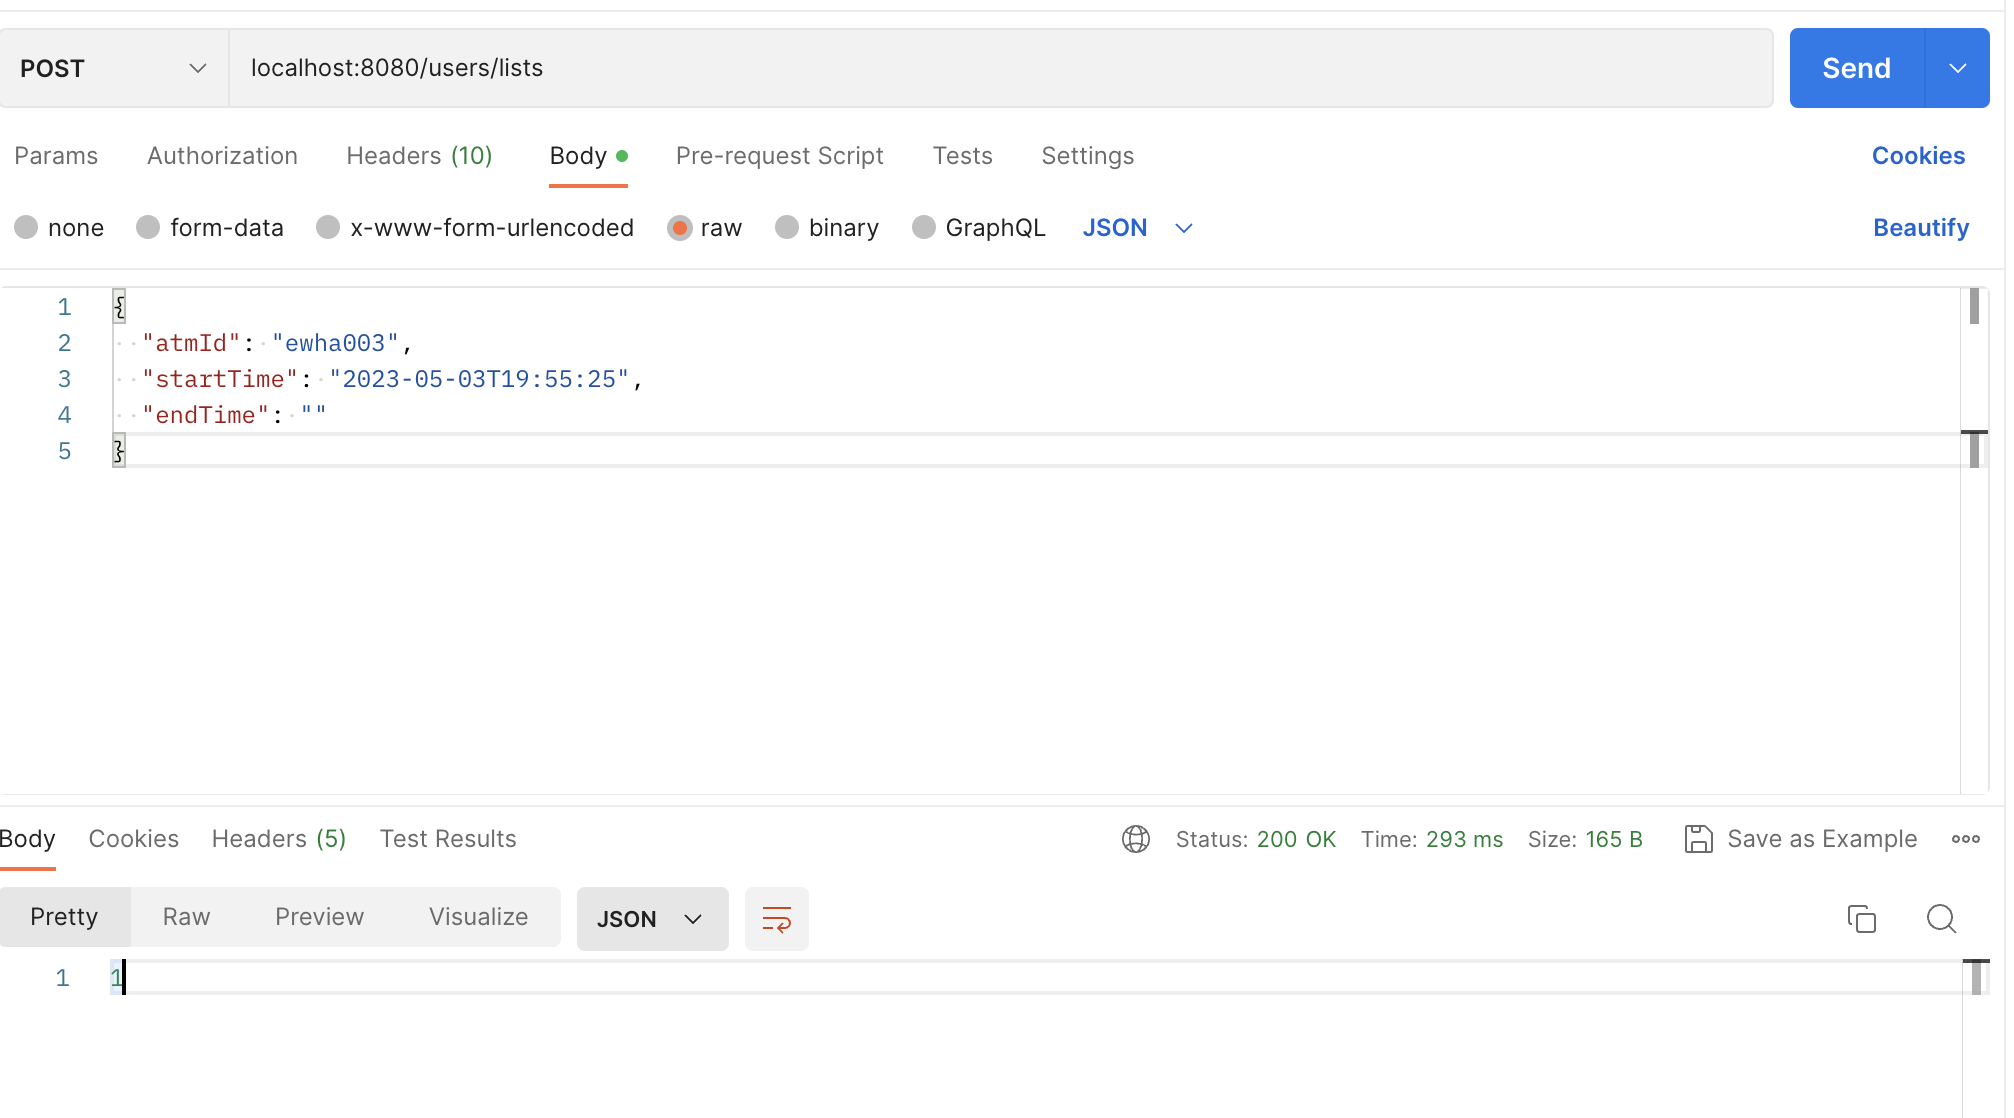
잘 날라가고 있고,
h2 콘솔창을 봐도 잘 저장되고 있는 걸 확인할 수 있다!