1. Custom Hook
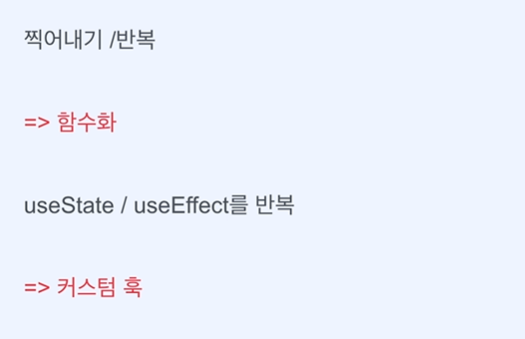
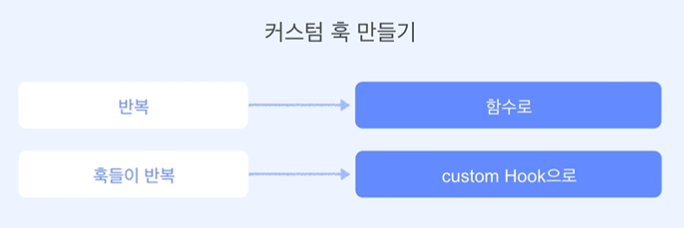
커스텀 훅(Custom Hook)이란 함수 컴포넌트에서 리액트의 기능(useState, useEffect..)들을 사용하게 해주는 함수이다.
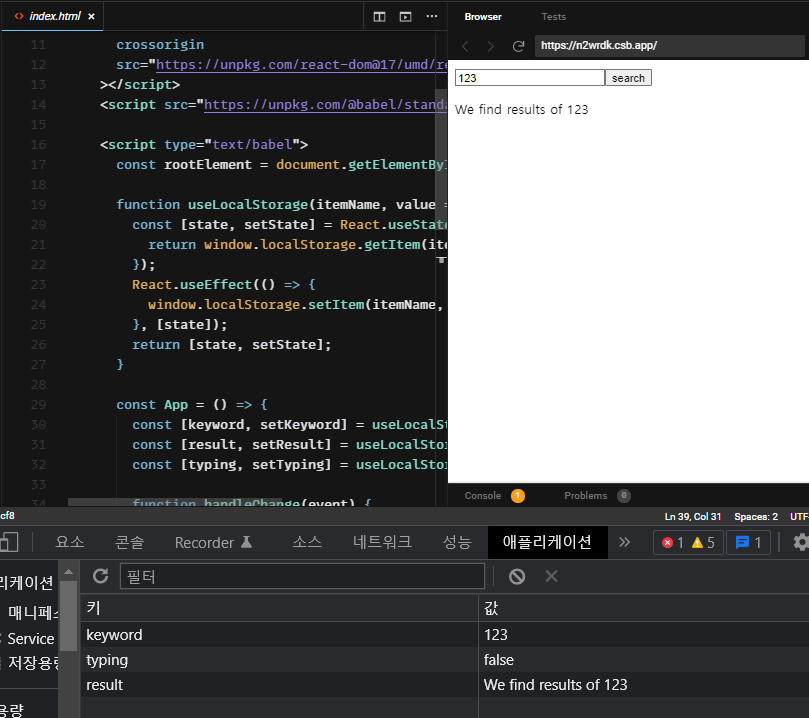
이전에 훅을 이용해 만든 간단한 검색창 예제를 이번엔 커스텀 훅을 만들어서 반복되는 코드를 관리해보자.
예제
useLocalStorage()이라는 커스텀 훅으로 반복되는 코드를 관리하여 효율성을 높인다. 이는 useState와 useEffect 작업을 공통으로 관리하고, 3가지의 state(keyword, result, typing)를 로컬 스토리지에 모두 저장하는 기능을 수행한다.
<script type="text/babel">
      const rootElement = document.getElementById("root");

      function useLocalStorage(itemName, value = "") {
        const [state, setState] = React.useState(() => {
          return window.localStorage.getItem(itemName) || value;
        });
        React.useEffect(() => {
          window.localStorage.setItem(itemName, state);
        }, [state]);
        return [state, setState];
      }

      const App = () => {
        const [keyword, setKeyword] = useLocalStorage("keyword");
        const [result, setResult] = useLocalStorage("result");
        const [typing, setTyping] = useLocalStorage("typing", false);

        function handleChange(event) {
          setKeyword(event.target.value);
          setTyping(true);
        }

        function handleClick() {
          setTyping(false);
          setResult(`We find results of ${keyword}`);
        }

        return (
          <>
            <input onChange={handleChange} value={keyword} />
            <button onClick={handleClick}>search</button>
            <p>{typing ? `Looking for ${keyword}...` : result}</p>
          </>
        );
      };

      ReactDOM.render(<App />, rootElement);
    </script>
👉 결과
정리
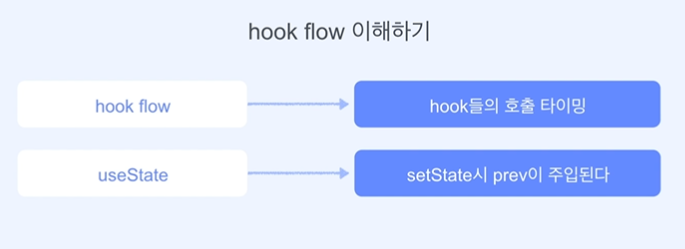
2. Hook Flow 이해하기
훅의 호출 타이밍
예제
- 'Search' 버튼을 클릭하면 input이 나타나고, 다시 누르면 사라진다.
- 검색어를 입력하면 검색창 하단 글자가 쓰여진다.

🤔
useState로 만들어진set함수에는 인자로 이전 값이 들어온다.
즉, 다음 두 코드는 같은 기능을 수행한다는 의미이다.// 1 if (show) { setShow(false); } else { setShow(true); }// 2 (false->true, true->false) setShow(prev => !prev);
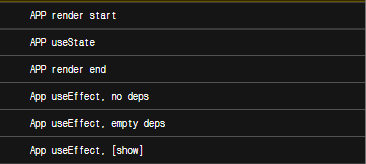
- 아무 dependency를 주지 않은 것은 모든 것에 반응한다.
- 빈 배열을 준 것은 처음 렌더 시에만 반응한다.
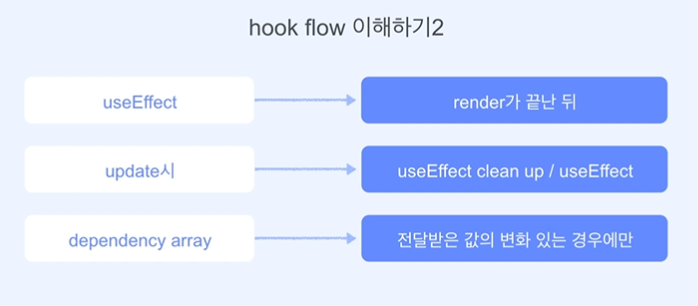
- 배열에 값이 있다면 그 dependency 값이 바뀔 때마다 반응한다.
- 이때,
useEffect는 렌더가 끝난 후 동작한다. 이는 사이드 이펙트이므로 일단 다 그려진 후, 그 이후에 대한 동작들을 기록한다는 의미이다.
// 1
React.useEffect(() => {
  console.log("App useEffect, no deps");
});

// 2
React.useEffect(() => {
  console.log("App useEffect, empty deps");
}, []);

// 3
React.useEffect(() => {
  console.log("App useEffect, [show]");
}, [show]);
정리
useState의prev: 이전 값에!를 붙여 이전 값에서 반대되는 값으로 업데이트 할 수 있도록 만들 수 있다.
부모-자식 호출 타이밍
예제
<script type="text/babel">
      const rootElement = document.getElementById("root");

const Child = () => {
  console.log("   Child render start");
  const [text, setText] = React.useState(() => {
    console.log("   Child useState");
    return "";
  });

  React.useEffect(() => {
    console.log("   Child useEffect, no deps");
  });

  React.useEffect(() => {
    console.log("   Child useEffect, empty deps");
  }, []);

  React.useEffect(() => {
    console.log("   Child useEffect, [text]");
  }, [text]);

  function handleChange(event) {
    setText(event.target.value);
  }

  const element = (
    <>
    <input />
    <p>{text}</p>
    </>
  );

  console.log("   Child render end");
  return element;
};

const App = () => {
  console.log("APP render start");
  const [show, setShow] = React.useState(() => {
    console.log("APP useState");
    return false;
  });

  React.useEffect(() => {
    console.log("App useEffect, no deps");
  });

  React.useEffect(() => {
    console.log("App useEffect, empty deps");
  }, []);

  React.useEffect(() => {
    console.log("App useEffect, [show]");
  }, [show]);

  function handleClick() {
    setShow((prev) => !prev);
  }

  console.log("APP render end");

  return (
    <>
    <button onClick={handleClick}>Search</button>
{show ? <Child /> : null}
  	</>
 );
};

ReactDOM.render(<App />, rootElement);
</script>- APP의 렌더 시작 ->
useState-> 렌더가 끝난 후,useEffect가 동작한다.
- APP의 상태값이 변경되면('Search' 버튼을 누르면) 다시 APP의 렌더를 시작하고 렌더가 끝난다.
- 그 후,
Child가 그려지기 시작한다. - 그리고
Child의useEffect가 발생한다. - 마지막으로, APP의
useEffect가 발생한다.
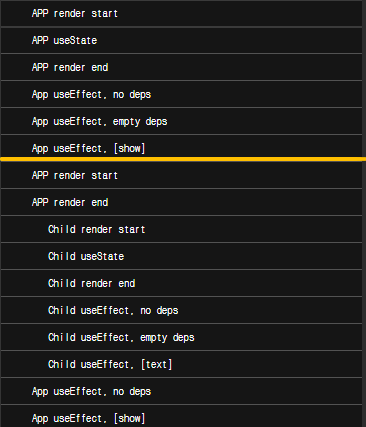
👉 부모의 렌더 시작, 끝 -> 자식의 렌더 시작, 끝 -> 자식의 useEffect(사이드 이펙트) -> 부모의 useEffect(사이드 이펙트) 순서로 일어난다.
🤔 cleanup
useEffect로 동작들을 등록해두었을 때, 종료 시 어떻게 되는지 고민할 필요 없이 리액트가 알아서 cleanup 해준다. (두 번째 실행부터 cleanup -> useEffect, 첫 번째 실행에는 cleanup이 일어나지 않는다.)- 따라서 cleanup 동작에 우리가 하고 싶은 것들을 하면 된다. (로컬 스토리지를 모두 지우고 가라. 등..)
👉 부모-자식 관계에서 cleanup이 먼저 일어나는 것은 부모이다. 부모의 cleanup -> 자식의 cleanup.
정리
3. Element에 스타일 입히기
style props는 객체이며, className보다 적용되는 우선순위가 높다.
예제
HTML, CSS로 작성된 버튼 예제를 리액트를 사용하여 버튼을 커스텀 할 수 있다.
<style>
  .button {
    background-color: #4caf50; /* Green */
    border: none;
    color: white;
    padding: 15px 32px;
    text-align: center;
    text-decoration: none;
    display: inline-block;
    font-size: 16px;
    margin: 4px 2px;
    cursor: pointer;
  }
</style>

<script type="text/babel">
  function Button({ className = "", color, style, ...rest }) {
    return (
    <button
            className={`button ${className}`}
            style={{ backgroundColor: color, borderRadius: 8, ...style }}
            {...rest}
            />
    );
  }

  const element = (
    <>
      <Button style={{ borderRadius: "50%" }}>Green</Button>
      <Button color="blue">Blue</Button>
      <Button color="red">Red</Button>
      <Button color="gray">Gray</Button>
      <Button color="black">Black</Button>
    </>
  );

  ReactDOM.render(element, document.getElementById("root"));
</script>
👉 결과

정리

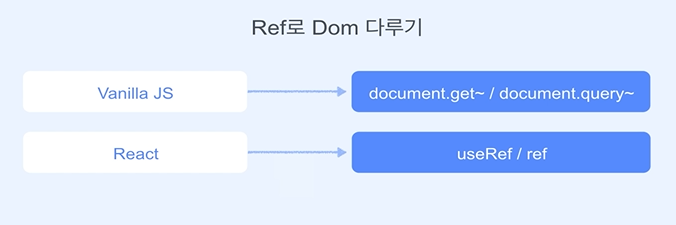
4. Ref로 DOM 다루기
예제 1
Input Element가 있고, 화면이 뜨자마자 focus를 주고 싶다면?
useRef를 이용해서 새로고침 되자마자 포커스되도록 한다.
<script type="text/babel">
  const rootElement = document.getElementById("root");
  const App = () => {
    const inputRef = React.useRef();
    React.useEffect(() => {
      inputRef.current.focus();
      // document.getElementById("input").focus();
    }, []);

    return (
      <>
      <input ref={inputRef} />
      </>
    );
  };

	ReactDOM.render(<App />, rootElement);
</script>
예제 2
상자 색이 brown에서 1초 후에 pink로 바뀌는 예제이다.
<script type="text/babel">
  const rootElement = document.getElementById("root");
  const App = () => {
    const inputRef = React.useRef();
    const divRef = React.useRef();
    React.useEffect(() => {
      inputRef.current.focus();

    setTimeout(() => {
        divRef.current.style.backgroundColor = "pink";
      }, 1000);
    }, []);

    return (
      <>
        <input ref={inputRef} />
        <div
          ref={divRef}
          style={{ height: 100, width: 100, backgroundColor: "brown" }}
        />
      </>
    );
  };

  ReactDOM.render(<App />, rootElement);
</script>
정리
document.getElementById류를 사용하지 않고,useRef라는 별도의 방법을 제공하는 것은 엘리먼트에 직접 도달하게 되면 비효율이 발생할 수 있으므로 제공하는 것이다.Ref가 꼭 엘리먼트 값, 즉, DOM을 다룰 때만 쓰이는 것은 아니다.current안에 가변적인 값을 넣을 수 있으므로 변수를 저장하는 용도로 사용할 수도 있다.
useRef로 생성된 값에는.current로 접근할 수 있다.
5. Form 다루기
Form
기본 Form: label, input, submit
예제 1
HTML로 작성된 예제를 리액트를 사용하여 'Submit' 버튼을 누르면 alert창으로 first name과 last name을 띄워보자.
<script type="text/babel">
const rootElement = document.getElementById("root");
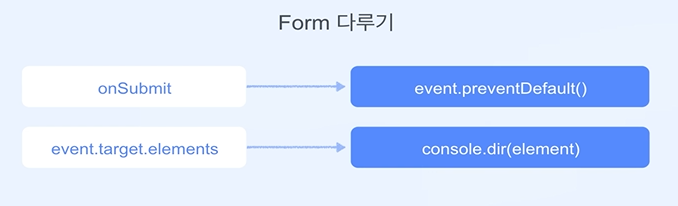
const handleSubmit = (event) => {
event.preventDefault();
alert(
`First Name: ${event.target.elements.fname.value}, Last Name: ${event.target.elements.lname.value}`
);
};
const App = () => {
return (
<form onSubmit={handleSubmit}>
<label htmlFor="fname">First name:</label>
<br />
<input type="text" id="fname" name="fname" defaultValue="John" />
<br />
<label htmlFor="lname">Last name:</label>
<br />
<input type="text" id="lname" name="lname" defaultValue="Doe" />
<br />
<br />
<input type="submit" value="Submit" />
</form>
);
};
ReactDOM.render(<App />, rootElement);
</script>🤔
console.dir()
어떤 값을 꺼내고 싶을 때, 어떻게 접근해야 할지 모르겠다면console.dir()을 통해 우리가 보고싶은 특정 엘리먼트의 자바스크립트 객체 구조를 볼 수 있다.
정리
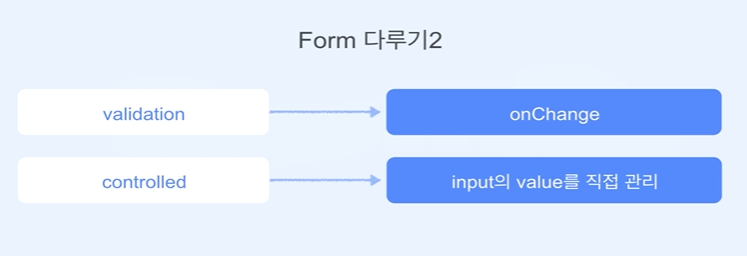
uncontrolled vs controlled
validation, value
예제
Phone Number를 입력받는 input과 Submit 버튼이 있는데, '0'으로 시작하는 숫자를 입력했을 때만 버튼이 활성화 되는 예제이다. (유효성 검사)
input으로 입력되는 값에 따라onSubmit에서 유효성 체크- 입력하자마자 화면에 메시지를 출력
handleChange에서 조건((시작하는 값이 '0'일 때, 아닐 때)에 따라 메시지를 출력
useState값, 즉,setPhoneNumber의 값을 바로 꺼내서 쓰니까 정상적으로 동작하지 않았다. (싱크 문제)- 그래서
event로 온 값을 가지고 비교를 통해setPhoneNumber와setMessage을 지정
    <script type="text/babel">
      const rootElement = document.getElementById("root");

      const App = () => {
        const [message, setMessage] = React.useState("");
        const [phoneNumber, setPhoneNumber] = React.useState("");

        const handleSubmit = (event) => {
          event.preventDefault();
          const phoneNumber = event.target.elements.phone.value;
        };

        const handleChange = (event) => {
          if (event.target.value.startsWith(0)) {
            setMessage("Phone Number is valid");
            setPhoneNumber(event.target.value);
          } else if (event.target.value.length === 0) {
            setMessage("");
            setPhoneNumber("");
          }
          else {
            setMessage("Phone Number should starts with 0");
            setPhoneNumber("");
          }
        };

        return (
          <form onSubmit={handleSubmit}>
            <label htmlFor="phone">Phone Number: </label>
            <br />
            <input id="phone" name="phone" onChange={handleChange} value={phoneNumber} />
            <p>{message}</p>
            <br />
            <br />
            <button
              type="submit"
              disabled={
                phoneNumber.length === 0 || message !== "Phone Number is valid"
              }
            >
              Submit
            </button>
          </form>
        );
      };

      ReactDOM.render(<App />, rootElement);
    </script>
정리
6. Error 다루기
'try-catch문'처럼 에러가 발생하여 코드 전체가 실행되지 않는 것을 방지하고, 에러 발생 시 수행할 동작을 지정한다.
함수형 컴포넌트가 아닌 클래스 컴포넌트를 사용해야 한다. (에러가 발생했을 때 스테이트 값을 에러 값으로 특정할 수 있는 함수를 클래스 컴포넌트에서만 가지고 있으므로 클래스 컴포넌트로 구현한다.)
try {
  ...
} catch (error) {
  ...
}
예제
ErrorBoundary를 사용하지 않았을 때는 전체 에러가 나면서 화면에 아무 것도 나타나지 않음.- 하지만 에러가 발생하는 코드(리액트가 컴포넌트를 그리지 못하는 상황)를
ErrorBoundary내부에 위치하면 에러가 발생하더라도 우리가 지정한 동작은 수행한다.
    <script type="text/babel">
      const rootElement = document.getElementById("root");

      class ErrorBoundary extends React.Component {
        state = { error: null };
        static getDerivedStateFromError(error) {
          return { error };
        }

        render() {
          const {error} = this.state;
          if (error) {
            return this.props.fallback;
          }
          return this.props.children;
        }
      }

      const Child = () => {
        throw new Error();
        return <p>Child...</p>;
      }

      const App = () => {
        return <>
          <p>App</p>
          <ErrorBoundary fallback={<p>There is some Error...</p>}>
            <Child />
          </ErrorBoundary>
        </>;
      };

      ReactDOM.render(<App />, rootElement);
    </script>
정리

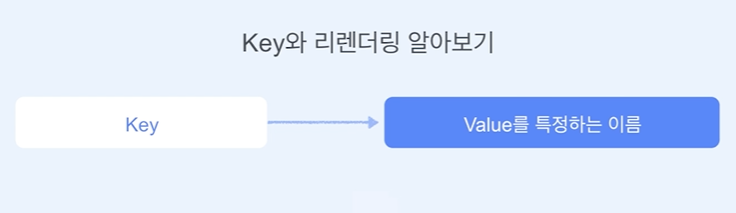
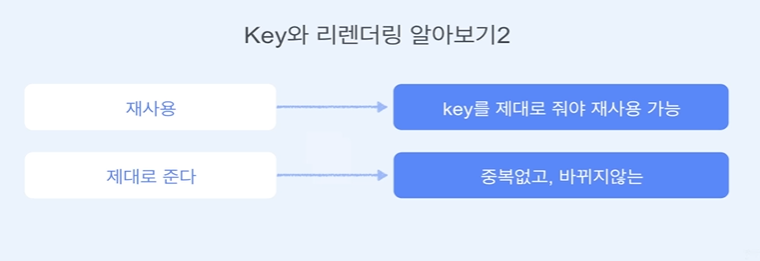
7. Key와 리렌더링
Key-Value: Key는 Value를 특정하는 이름이다.
🤔 for, map
for는 return x
map은 return o
예제 1
Todo list에서 'Done' 버튼을 클릭하면 완료한 항목은 사라지며, 'Restore'를 클릭하면 복구된다.
  <script type="text/babel">
    const rootElement = document.getElementById("root");

      const todos = [
        {id: 1, value: "Wash dishes"},
        {id: 2, value: "Clean the bed"},
        {id: 3, value: "Running"},
        {id: 4, value: "Learning"}
      ];

      const App = () => {
        const [items, setItems] = React.useState(todos);

        const handleDoneClick = (todo) => {
          setItems((items) => items.filter((item) => item !== todo));
        };

        const handleRestoreClick = () => {
          setItems((items) => [
            ...items,
            todos.find((item) => !items.includes(item))
          ]);
        };

        return (
        <>
          {items.map((todo) => (
          <div key={todo.id}>
            <span>{todo.value}</span>
            <button onClick={()=> handleDoneClick(todo)}>Done</button>
          </div>
          ))}
          <button onClick={handleRestoreClick}>Restore</button>
        </>
        );
      };

      ReactDOM.render(<App />, rootElement);
    </script>
정리
예제 1-1
위의 예제에서 리스트를 순서를 바꾸어서 여러 개를 만들고 1초마다 랜덤으로 리스트가 나타나게 했다.
key를 주지 않으면 컴포넌트 자체의 위치가 바뀌는 것이 아닌 버튼은 그대로 있고 글자만 바뀐다.
<div key={todo.id}>
  <span>{todo.value}</span>
  <button onClick={()=> handleDoneClick(todo)}>Done</button>
</div>
👉 결과
⭕ Key가 있는 경우
❌ Key가 없는 경우

🤔 index를
key로 사용?
항목들이 재배열되지 않는다면 인덱스를key로 사용해도 되지만, 재배열되는 경우에는 제대로 동작하지 않을 수 있다.
중복되지 않는 값 -> 만족 ⭕, 바뀌지 않는 값 -> 만족 ❌
정리
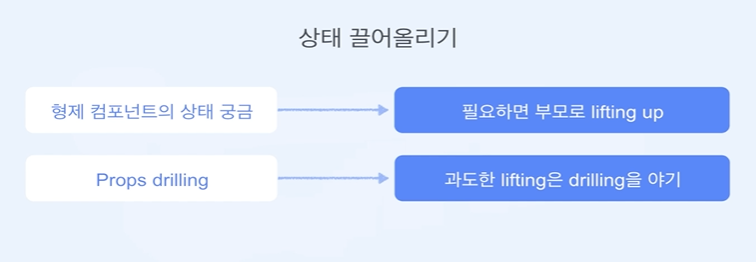
8. 상태 끌어올리기
State lifting up
예제

button 입장에서는 형제들(id, password)의 상태를 알 수 없다. 따라서 '상태 끌어올리기'을 통해 가장 가까운 부모(App)에게 자식 각각의 상태를 끌어올리는 것이다.
    <script type="text/babel">
      const rootElement = document.getElementById("root");

      const Id = ({handleIdChange}) => {
        return <>
          <label>ID: </label>
          <input onChange={handleIdChange} />
        </>;
      }
      const Password = ({handlePwChange}) => {
        return <>
          <label>PW: </label>
          <input type="password" onChange={handlePwChange} />
        </>;
      }

      const App = () => {
        const [id, setId] = React.useState("");
        const [password, setPassword] = React.useState("");

        const handleIdChange = (event) => {
          setId(event.target.value);
          console.log(`id length: ${event.target.value.length > 0}`);
        }
        const handlePwChange = (event) => {
          setPassword(event.target.value);
          console.log(`password length: ${event.target.value.length > 0}`);
        }

        const handleLoginClick = () => {
          alert(`id: ${id}, password: ${password}`);
        };

        return (
          <>
            <Id handleIdChange={handleIdChange} />
            <br />
            <Password handlePwChange={handlePwChange} />
            <button
              disabled={id.length === 0 || password.length === 0}
              onClick={handleLoginClick}>
              Login
            </button>
          </>
        );
      };

      ReactDOM.render(<App />, rootElement);
    </script>
👉 결과
정리
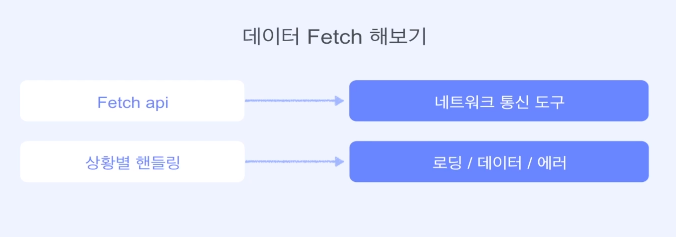
9. 데이터 Fetch
https://developer.mozilla.org/ko/docs/Web/API/Fetch_API
    <script type="text/babel">
      const rootElement = document.getElementById("root");

      const App = () => {
        const [data, setData] = React.useState(null);
        const [flag, setFlag] = React.useState(false);
        const [error, setError] = React.useState(null);

        React.useEffect(() => {
          fetch('https://raw.githubusercontent.com/techoi/raw-data-api/main/simple-api.json')
          .then(function (response) {
            return response.json();
          })
          .then(function (myJson) {
            setData(myJson);
            setFlag(true);
          })
          .catch((error) => {
            setError(error.message);
            console.log(error);
          });
        }, []);

        if (error != null) {
          return <p>{error}</p>;
        }

        // if (data == null) {
        //   return <p>Loading...</p>;
        // }

        return (
          <div>
            <p>People</p>
            {flag && data.data.people.map((person) => (
              <div>
                <span>name: {person.name} </span>
                <span>age: {person.age}</span>
              </div>
            ))}
          </div>
        );
      };

      ReactDOM.render(<App />, rootElement);
    </script>
🤔 ****
정리