프로젝트를 진행하며 undo/redo 기능을 구현하게 되었는데 간단하게나마 남겨둔다면 나중의 나 또는 다른 사람들에게 도움이 되지 않을까 싶어 글을 쓰게 되었다.
기능을 구현하기에 앞서 jotai의 Read Only Atom, Write Only Atom, Read Write Atom에 대해서 잘 알아야 하는데, 나는 아래 velog 글 시리즈를 보고 충분히 공부할 수 있었다. 아주아주 정리가 잘 되어 있다!!
https://velog.io/@taez224/Jotai-Tutorial%EC%9D%98-Tutorial
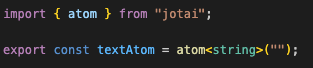
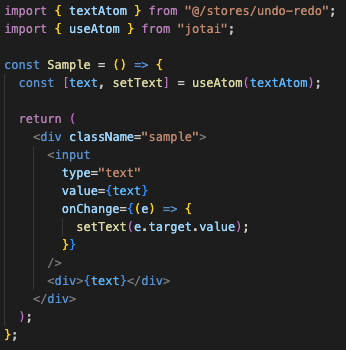
우선 undo/redo 기능을 사용하기 위해 간단한 예제를 만들어 보았다. input에 텍스트를 입력하면 atom에 텍스트를 저장하고, 아래에 있는 div에 텍스트를 출력한다.
undo/redo를 구현하기 위해 textAtom의 상태가 변할 때마다 그 상태를 저장해두는 historyAtom을 생성하고, current라는 지표를 두어 현재의 상태를 가리키도록 했다.

그 다음으로는 기존의 setText 대신에 사용하기 위한 setTextAtom이라는 Write Only Atom을 생성했다. 기존의 setText처럼 textAtom에 전달받은 값을 저장하는 기능이 있고 추가로 historyAtom에도 전달받은 값을 저장하며 current 값을 1만큼 올려주었다.
이렇게 한다면 textAtom의 상태가 업데이트 될 때 동시에 textAtom의 상태를 historyAtom에 추가할 수 있다.

undo 기능을 위한 undoAtom은 값을 저장할 필요가 없고 historyAtom과 textAtom의 값을 변경해주기만 할 것이기 때문에 Write Only Atom으로 생성해주었다.
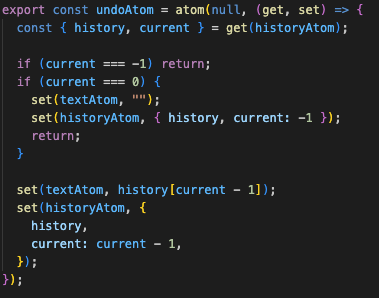
current가 -1일 경우는 이전 상태가 없으므로 아무 동작 없이 종료한다.
current가 0일 경우에는 이전 상태가 첫 상태이므로 textAtom을 초기값으로 설정해주고 historyAtom의 current를 1 작은 값으로 설정해준다.
그 외의 경우에는 textAtom을 이전 상태로 설정하고 historyAtom의 current를 1 작은 값으로 설정해준다.
redo 기능을 위한 redoAtom도 undoAtom과 마찬가지로 Write Only Atom으로 생성해준다.
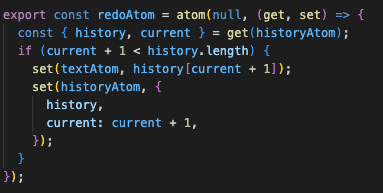
다음 상태가 있을 경우에는 textAtom을 다음 상태로 설정해주고 historyAtom의 current를 1 높은 값으로 설정해준다.
사실 undo만 있다면 historyAtom을 stack으로 구현해서 push/pop만 사용해도 됐을 것 같지만, 이 redo 기능을 구현하기 위해 배열과 current라는 flag를 사용해주었다.
이제 지금까지 작성한 atom들을 컴포넌트에 연결만 해주면 된다!!
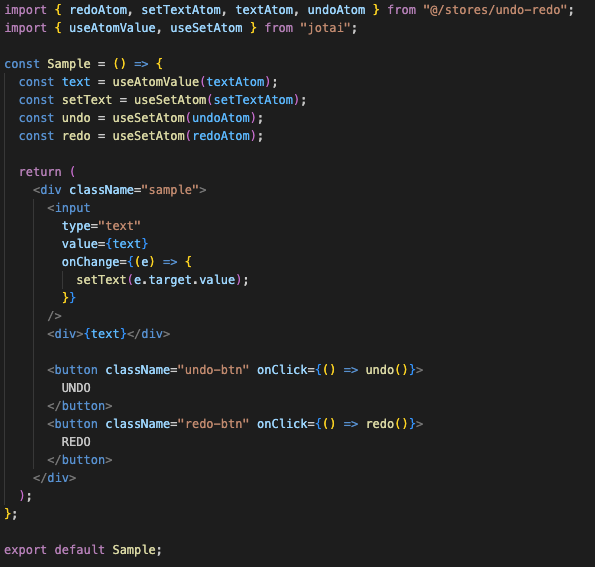
기존의 setText는 제거하고 setTextAtom으로 다시 생성해주었다.
버튼 두 개를 만들어 각각 undo와 redo를 연결해주면
성공!!
최종 코드는 다음과 같다.
textAtom을 다른 atom으로 변경해준다면 얼마든지 다른 atom에도 undo/redo를 구현할 수 있다.
// Sample.jsx
import { redoAtom, setTextAtom, textAtom, undoAtom } from "@/stores/undo-redo";
import { useAtomValue, useSetAtom } from "jotai";

const Sample = () => {
  const text = useAtomValue(textAtom);
  const setText = useSetAtom(setTextAtom);
  const undo = useSetAtom(undoAtom);
  const redo = useSetAtom(redoAtom);

  return (
    <div className="sample">
      <input
        type="text"
        value={text}
        onChange={(e) => {
          setText(e.target.value);
        }}
      />
      <div>{text}</div>

      <button className="undo-btn" onClick={() => undo()}>
        UNDO
      </button>
      <button className="redo-btn" onClick={() => redo()}>
        REDO
      </button>
    </div>
  );
};

export default Sample;
// undo-redo.ts
import { atom } from "jotai";
export const textAtom = atom<string>("");
export const historyAtom = atom<{ history: string[]; current: number }>({
history: [],
current: -1,
});
export const setTextAtom = atom(null, (get, set, value: string) => {
const { history, current } = get(historyAtom);
if (current + 1 < history.length) history[current + 1] = value;
else history.push(value);
set(textAtom, value);
set(historyAtom, {
history,
current: current + 1,
});
});
export const undoAtom = atom(null, (get, set) => {
const { history, current } = get(historyAtom);
if (current === -1) return;
if (current === 0) {
set(textAtom, "");
set(historyAtom, { history, current: -1 });
return;
}
set(textAtom, history[current - 1]);
set(historyAtom, {
history,
current: current - 1,
});
});
export const redoAtom = atom(null, (get, set) => {
const { history, current } = get(historyAtom);
if (current + 1 < history.length) {
set(textAtom, history[current + 1]);
set(historyAtom, {
history,
current: current + 1,
});
}
});