이번에는 실제 프로젝트를 만들면서 알아보도록 하겠습니다.
프로젝트 구성:
-
App : 전체 컴포넌트 및 Router 등을 제어하는 역할
-
Main :
<main>Router에 따라서main에 views 중 1가지Component가 들어옴 -
Nav :
<nav>클릭시 이동 -
Views/Counter, Data, Home, Settings :
Main에 들어갈Components -
Index.js
import App from "./App.js";
import { router } from "./router/index.js";

new App();

const { useRouter, navigateTo } = router();

// 뒤로가기등을 눌렀을 때, 페이지를 새롭게 로드하지 않고 useRouter를 실행
window.addEventListener("popstate", useRouter);

// Dom 들이 로드가 완료되면, a Tag에 이벤트를 등록한다. 페이지를 새롭게 로드하지 않도록 (pushState) 사용
document.addEventListener("DOMContentLoaded", () => {
  document.body.addEventListener("click", (e) => {
    if (e.target.matches("[data-link]")) {
      e.preventDefault();
      navigateTo(e.target.href);
    }
  });

  useRouter();
});
App 인스턴스를 생성하여 만든다. 각종 Event를 등록한다.
App.js
import Main from "./Components/Main/index.js";
import Nav from "./Components/Nav/index.js";
import { Counter, Data, Home, Settings } from "./Components/views/index.js";
import { router } from "./router/index.js";
import { Application } from "./core/index.js";

export default class App extends Application {
  constructor() {
    super({ target: document.querySelector("#app") });
    this.$state = {
      count: 0,
      name: "",
    };
    this.init();
  }

  // 각 컴포넌트에 Event를 Set 한다.

  bindEvents() {
    // "view" ==> 하위 컴포넌트에서 uesEvent("view") 를 하면, main 컴포넌트에 하위 컴포넌트를 연결한다.
    Object.keys(this.$routes).forEach((path) => {
      this.$routes[path].setEvent("view", () => {
        this.$components["main"].setView(this.$routes[path].render());
      });
    });

    // "setName" => App.js state 의 name 을 넘겨받은 name 으로 변경한다.
    // setState 가 실행되면, 그 state를 구독 하고 있는 컴포넌트의 setState를 실행시켜
    // 변경점을 반영한다.
    this.$routes["/datas"].setEvent("setName", ({ name }) => {
      this.setState({ name });
    });

    this.$routes["/settings"].setEvent("setName", (name) => {
      this.setState({ name });
    });
  }

  init() {
    const { useRouter, setRouterState } = router();

    this.setComponents({
      name: "nav",
      component: new Nav({ parent: this.$target }),
    });

    this.setComponents({
      name: "main",
      component: new Main({ parent: this.$target }),
    });

    this.setRoutes({
      path: "/",
      component: new Home({
        props: {
          name: this.$state.name,
          count: this.$state.count,
        },
      }),
    });

    this.setRoutes({
      path: "/counter",
      component: new Counter({
        props: {
          count: this.$state.count,
          setCounter: () => this.setState({ count: this.$state.count + 1 }),
        },
      }),
    });

    this.setRoutes({
      path: "/settings",
      component: new Settings({ props: { name: this.$state.name } }),
    });

    this.setRoutes({
      path: "/datas",
      component: new Data({ props: {} }),
    });

    this.bindEvents();

    // 라우팅 설정 => 렌더링
    setRouterState({
      routes: Object.keys(this.$routes).map((path) => ({
        path: path,
        view: this.$routes[path],
      })),
      parent: this.$components["main"].$target,
    });

    useRouter();
  }
}
BindEvents()
bindEvents() 함수는 모든 컴포넌트 들이 App 의 변수에 입력이 되어야 Event 들을 Set 할 수 있다. 따라서, 모든 Component, Routes 들을 Set 입력 한다음에 bindEvents() 를 실행 시킬 수 있도록 한다.
useRouter()
useRouter()는 setRouterState 에 입력된 routes 에 따라 설정이 되기 때문에, setRouterState 를 한 후 실행 시킬 수 있도록 한다.
-
개선할 점: 각
Routes들의view(Component)가 속하게 될 상위 컴포넌트를Route에 따라 다르게 할 때도 있을 것 같다. ex) Settings는 Footer에, Counter는 Main에 Home은 document.body ...- 이러한 점을 하기 위해서 routes 들을 설정 할 때, 상위 컴포넌트도 입력 할 수 있게 하면 좋을 것 같다. ex)
match.route.view.useEvent('view', match.route.parent)으로 사용
- 이러한 점을 하기 위해서 routes 들을 설정 할 때, 상위 컴포넌트도 입력 할 수 있게 하면 좋을 것 같다. ex)
Main.js
import { Component } from "../../core/index.js";

export default class Main extends Component {
  constructor({ parent, initialState = { view: "" } }) {
    super({ parent, initialState });
    this.init();
  }

  static createElement() {
    const main = document.createElement("main");

    return main;
  }

  init() {
    this.$target = Main.createElement();
    this.$parent.appendChild(this.$target);
  }

  // view를 입력 받으면, 해당 view의 타입에 따라서 하위 컴포넌트로 넣어준다.
  setView(view) {
    this.setState({ view });
    if (typeof this.$state.view === "string") {
      this.$target.innerHTML = this.$state.view;
    }

    // string 값으로 넣으면 eventListner가 정상작동 하지 않을 때가 있어, elem 요소로 넘겨 줄 때 있기 때문에 Html Dom object 형식으로 넘겨 주게 된다.
    if (typeof this.$state.view === "object") {
      this.$target.innerHTML = "";
      this.$target.appendChild(this.$state.view);
    }
  }

  render() {}
}
역할
Main 아래에 routing에 따라 보여주고 싶은 view를 설정한다. 그 view의 값에 따라서 main에 넣어준다.
- 앞서 말 했던 것 처럼 굳이 main에만 넣어줄 필요 없이 여러 상위 컴포넌트를 만들고
그에 따라서 routing view를 설정해주어도 괜찮을 것 같다.
App.js 에서 setView() 를 실행한다. 이에 따라서 view 값이 바뀐다.
-
실행 순서
-
useRouter() 에서 해당 pathname을 갖고 있는 component 에서 useEvent("view") 실행
-
실행 됨에 따라
App.js에서 callback 함수로 설정한main컴포넌트의setView()를 실행
-
Nav.js
import { Component } from "../../core/index.js";

export default class Nav extends Component {
  constructor({ parent }) {
    super({ parent });
    this.init();
  }

  static createElement() {
    const nav = document.createElement("nav");
    const tags = [
      { href: "/", content: "Dashboard" },
      { href: "/counter", content: "Counter" },
      { href: "/settings", content: "Settings" },
      { href: "/datas", content: "Datas" },
    ];

    nav.classList.add("nav");

    nav.innerHTML = tags
      .map((tag) => {
        return `
            <a href=${tag.href} class="nav__link" data-link>${tag.content}</a>
        `;
      })
      .join("");

    return nav;
  }

  init() {
    this.$target = Nav.createElement();
    this.$parent.appendChild(this.$target);
  }
}
역할
Nav Bar 생성 해당 <a> 태그를 클릭하면 index.js 에서 이벤트를 등록한 것 과 같이 페이지를 새롭게 로드 하지 않고 페이지를 이동한다. 해당하는 내용이 Main.js 내 view 에 들어가게 된다.
views
Counter.js
import { Component } from "../../core/index.js";
export default class Couter extends Component {
constructor({ props }) {
super({ props });
this.$state = { ...props };
document.title = "Counter";
this.init();
}
init() {
this.bindEvents();
}
bindEvents() {
document.querySelector("main").addEventListener("click", (e) => {
if (e.target.classList.contains("up-btn")) {
this.$props.setCounter();
this.useEvent("view");
}
});
}
render() {
return `
<button class="up-btn">UP</button>
<p>${this.$props.count}</p>
`;
}
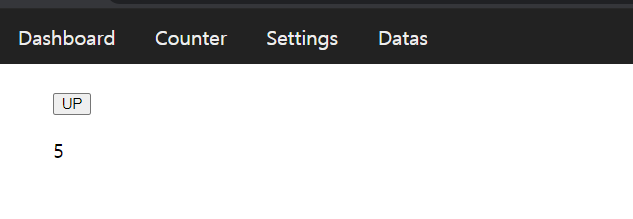
}Up 버튼을 누르면 App.js 에서 가지고 있는 내려준 Props의 count 값을 1증가 시킨다.
App.js 의 state/count가 변경되며, 그 값을 구독하고 있는 해당 Counter 컴포넌트에 즉시 반영이 된다.
Data.js
import { request } from "../../api/index.js";
import { Component } from "../../core/index.js";

export default class Data extends Component {
  constructor({ props }) {
    super({ props, initialState: { data: [], isLoading: true } });
    this.init();
  }

  async getData() {
    return await request(3);
  }

  async setData() {
    const data = await this.getData();
    this.setState({ data, isLoading: false });
  }

  async init() {
    this.bindEvents();
    await this.setData();
    // render 가 Data를 먼저 입력 된 후에, 다시 한번 되도록
    // Main.js 의 view 값을 변경 하는 useEvent("view")를 한번더 실행한다.
    this.useEvent("view");
    this.useEvent("setName", { name: this.$state.data[0].profile.name });
  }

  render() {
    if (this.$state.isLoading) return `Loading...`;
    const { id, profile } = this.$state?.data[0];
    return `
        <div>
            <img src=${profile?.image}>
        </div>
        <div>${id}- ${profile?.nickName}</div>
        <div>${profile?.name}</div>
    `;
  }
}
const __URL__ = "https://my-json-server.typicode.com/jaewoong2/Fake_api/";
export const request = async (id = 1) => {
const data = await fetch(__URL__ + id, {
method: "GET",
});
return await data.json();
};해당 url /datas 에 방문하게 되면, 데이터를 불러와서 컴포넌트 state에 받아오는 컴포넌트.
- setData를 한 후에, 한번더 Main 컴포넌트에 상태를 업데이트 시켜주는 것이 중요하다.
Setting.js
import { Component } from "../../core/index.js";

export default class Settings extends Component {
  constructor({ props }) {
    super({ props, initialState: { name: "" } });
    this.$target = Settings.createElement();
    document.title = "Settings";
    this.init();
  }

  static createElement() {
    const container = document.createElement("div");
    const form = document.createElement("form");
    const input = document.createElement("input");
    const button = document.createElement("button");

    form.id = "form";
    input.id = "input";

    form.appendChild(input);
    form.appendChild(button);
    container.appendChild(form);

    button.innerText = "Set";
    input.placeholder = "Name";
    input.type = "text";

    return container;
  }

  setProps(props) {
    this.$props = { ...this.$props, ...props };
    this.setState({ ...props });
  }

  bindEvents() {
    const form = this.$target.querySelector("form");
    const input = this.$target.querySelector("input");

    form.addEventListener("submit", (e) => {
      e.preventDefault();
      if (input.value.trim() === "" || this.$state?.name.trim() === "") return;
      this.useEvent("setName", this.$state.name);
      input.value = "";
    });

    input.addEventListener("change", (e) => {
      this.setState({ name: e.target.value });
    });
  }

  init() {
    this.bindEvents();
    this.render();
  }

  render() {
    if (this.$state.name) {
      this.$target.querySelector("input").value = this.$state.name;
    }

    // outerHTML 로 return 하면 eventListner가 사라진다.
    // => element 로 반환
    return this.$target;
  }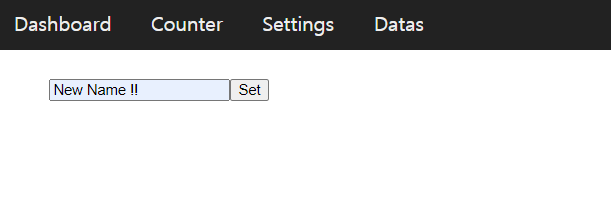
}input에 name을 입력하면, App.js 의 name을 변경시키는 컴포넌트이다. Data에서 먼저 setName이 되면 App.js 에 입력이 되는데 그것을 props로 받아온다.
addEventListener를 input과 form에 연결하였기 때문에, string 타입이 아닌 html element 로 넘겨줘야 한다.
Home
import { Component } from "../../core/index.js";
export default class Home extends Component {
constructor({ props }) {
super({ props });
this.$state = {
...props,
};
this.init();
document.title = "Home";
}
setState(state) {
this.$state = { ...this.$state, ...state };
this.render();
}
init() {
this.bindEvents();
}
bindEvents() {}
render() {
return `
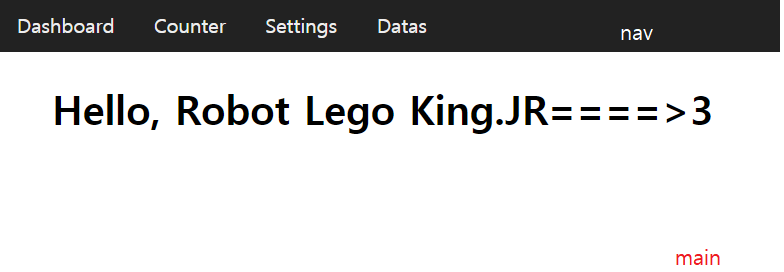
<h1> Hello, ${this.$props.name + "====>" + this.$props.count}</h1>
`;
}
}App.js에서 받은 state (props) 값을 보여주는 컴포넌트 이다. 다른 컴포넌트에서 상태를 변화 시키고 Home 을 보면 변경이 됐음을 알 수 있다.

