Naver Clova를 통한 OCR 스프링 예제가 많이 보이지도 않고 혼자 공부할 겸 적어보는 글입니다..
로컬에 저장된 이미지를 읽어오는 예제와 HTML에서 submit으로 전송받은 이미지를 OCR하는 예제 두개를 다뤄볼 예정이다.
1. 이용신청 하기
이용신청은 사실 어려운게 없다 https://www.ncloud.com/product/aiService/ocr 여기서 이용신청하기 버튼 눌러주면 된다.
회원가입도 어차피 네이버 계정으로 되기 때문에 신경쓸 필요 없다.
약간 꼬이기 시작하는게(나만..) 도메인 생성부터인데 이건 설명을 굉장히 잘해놓은 블로그가 있어서 링크를 남겨볼까한다..
https://davelogs.tistory.com/39
위 블로그에서 설명하는대로 하면 된다.
2. Code
어차피 다들 이거보러 와짜나!
필자는 Maven을 사용했기 때문에 Gradle 사용하시는 분들은 알아서 바꿔쓰길 바란다..
resources/static밑에 image 폴더를 만들어 OCR하고자 하는 이미지를 저장해주도록 하자 필자는 test.jpg로 저장했다.
pom.xml
현재 프로젝트에 필요없는 의존성도 몇개 있지만 실행하는데 별 문제 없다.
본인이 나중에 사용해야돼서 넣어둔 의존성이니까 그냥 복붙해도 상관은 없다.
<?xml version="1.0" encoding="UTF-8"?>
<project xmlns="http://maven.apache.org/POM/4.0.0" xmlns:xsi="http://www.w3.org/2001/XMLSchema-instance"
         xsi:schemaLocation="http://maven.apache.org/POM/4.0.0 https://maven.apache.org/xsd/maven-4.0.0.xsd">
    <modelVersion>4.0.0</modelVersion>
    <parent>
        <groupId>org.springframework.boot</groupId>
        <artifactId>spring-boot-starter-parent</artifactId>
        <version>2.7.15</version>
        <relativePath/> <!-- lookup parent from repository -->
    </parent>
    <groupId>kopo</groupId>
    <artifactId>poly</artifactId>
    <version>0.0.1-SNAPSHOT</version>
    <name>Test</name>
    <description>Test</description>
    <properties>
        <java.version>1.8</java.version>
    </properties>
    <dependencies>
        <!-- 제이슨 파싱 -->
        <dependency>
            <groupId>com.googlecode.json-simple</groupId>
            <artifactId>json-simple</artifactId>
            <version>1.1.1</version>
        </dependency>
        <dependency>
            <groupId>org.springframework.boot</groupId>
            <artifactId>spring-boot-starter-thymeleaf</artifactId>
        </dependency>
        <dependency>
            <groupId>org.springframework.boot</groupId>
            <artifactId>spring-boot-starter-web</artifactId>
        </dependency>
        <dependency>
            <groupId>org.mybatis.spring.boot</groupId>
            <artifactId>mybatis-spring-boot-starter</artifactId>
            <version>2.3.1</version>
        </dependency>

        <dependency>
            <groupId>org.mariadb.jdbc</groupId>
            <artifactId>mariadb-java-client</artifactId>
            <scope>runtime</scope>
        </dependency>
        <dependency>
            <groupId>org.projectlombok</groupId>
            <artifactId>lombok</artifactId>
            <optional>true</optional>
        </dependency>
        <dependency>
            <groupId>org.springframework.boot</groupId>
            <artifactId>spring-boot-starter-test</artifactId>
            <scope>test</scope>
        </dependency>
        <dependency>
            <groupId>org.mybatis.spring.boot</groupId>
            <artifactId>mybatis-spring-boot-starter-test</artifactId>
            <version>2.3.1</version>
            <scope>test</scope>
        </dependency>
    </dependencies>

    <build>
        <plugins>
            <plugin>
                <groupId>org.springframework.boot</groupId>
                <artifactId>spring-boot-maven-plugin</artifactId>
                <configuration>
                    <excludes>
                        <exclude>
                            <groupId>org.projectlombok</groupId>
                            <artifactId>lombok</artifactId>
                        </exclude>
                    </excludes>
                </configuration>
            </plugin>
        </plugins>
    </build>

</project>
application.properties
여긴 진짜 별거없다.
#WAS
spring.profiles.active=prod
server.port=11000

#thymeleaf Setting
spring.thymeleaf.cache=false
spring.thymeleaf.check-template-location=true
spring.thymeleaf.prefix=classpath:/templates/
spring.thymeleaf.suffix=.html
# DEBUG 이건 지워도된다.
spring.thymeleaf.mode=DEBUG

# Value 어노테이션을 위해 기술
naver.service.url=gateway 설정하면서 발급 받은 url 쓰면 됨.
naver.service.secretKey= gateway 설정하면서 발급받은 Key 쓰면 됨
여기까지 했으면 준비 끝났다 이제 코드를 써보자
NaverOcrApi
구글링 해서 찾은 코드가 컴파일 에러가 많이 떠서 컴파일 에러만 잡아준 코드이다.
api를 호출하고 파싱하는 코드이다.
@Slf4j
@Component
public class NaverOcrApi {
    @Value("${naver.service.url}")
    private String url;

    /**
     * 네이버 ocr api 호출한다
     * @param {string} type 호출 메서드 타입
     * @param {string} filePath 파일 경로
     * @param {string} naver_secretKey 네이버 시크릿키 값
     * @param {string} ext 확장자
     * @returns {List} 추출 text list
     */
    public  List<String> callApi(String type, String filePath, String naver_secretKey, String ext) {
        String apiURL = url;
        String secretKey = naver_secretKey;
        String imageFile = filePath;
        List<String> parseData = null;

        log.info("callApi Start!");

        try {
            URL url = new URL(apiURL);
            HttpURLConnection con = (HttpURLConnection)url.openConnection();
            con.setUseCaches(false);
            con.setDoInput(true);
            con.setDoOutput(true);
            con.setReadTimeout(30000);
            con.setRequestMethod(type);
            String boundary = "----" + UUID.randomUUID().toString().replaceAll("-", "");
            con.setRequestProperty("Content-Type", "multipart/form-data; boundary=" + boundary);
            con.setRequestProperty("X-OCR-SECRET", secretKey);

            JSONObject json = new JSONObject();
            json.put("version", "V2");
            json.put("requestId", UUID.randomUUID().toString());
            json.put("timestamp", System.currentTimeMillis());
            JSONObject image = new JSONObject();
            image.put("format", ext);
            image.put("name", "demo");
            JSONArray images = new JSONArray();
            images.add(image);
            json.put("images", images);
            String postParams = json.toString();

            con.connect();
            DataOutputStream wr = new DataOutputStream(con.getOutputStream());
            File file = new File(imageFile);
            writeMultiPart(wr, postParams, file, boundary);
            wr.close();

            int responseCode = con.getResponseCode();
            BufferedReader br;
            if (responseCode == 200) {
                br = new BufferedReader(new InputStreamReader(con.getInputStream()));
            } else {
                br = new BufferedReader(new InputStreamReader(con.getErrorStream()));
            }
            String inputLine;
            StringBuffer response = new StringBuffer();
            while ((inputLine = br.readLine()) != null) {
                response.append(inputLine);
            }
            br.close();

            parseData = jsonparse(response);


        } catch (Exception e) {
            System.out.println(e);
        }
        return parseData;
    }
    /**
     * writeMultiPart
     * @param {OutputStream} out 데이터를 출력
     * @param {string} jsonMessage 요청 params
     * @param {File} file 요청 파일
     * @param {String} boundary 경계
     */
    private static void writeMultiPart(OutputStream out, String jsonMessage, File file, String boundary) throws
            IOException {
        StringBuilder sb = new StringBuilder();
        sb.append("--").append(boundary).append("\r\n");
        sb.append("Content-Disposition:form-data; name=\"message\"\r\n\r\n");
        sb.append(jsonMessage);
        sb.append("\r\n");

        out.write(sb.toString().getBytes("UTF-8"));
        out.flush();

        if (file != null && file.isFile()) {
            out.write(("--" + boundary + "\r\n").getBytes("UTF-8"));
            StringBuilder fileString = new StringBuilder();
            fileString
                    .append("Content-Disposition:form-data; name=\"file\"; filename=");
            fileString.append("\"" + file.getName() + "\"\r\n");
            fileString.append("Content-Type: application/octet-stream\r\n\r\n");
            out.write(fileString.toString().getBytes("UTF-8"));
            out.flush();

            try (FileInputStream fis = new FileInputStream(file)) {
                byte[] buffer = new byte[8192];
                int count;
                while ((count = fis.read(buffer)) != -1) {
                    out.write(buffer, 0, count);
                }
                out.write("\r\n".getBytes());
            }

            out.write(("--" + boundary + "--\r\n").getBytes("UTF-8"));
        }
        out.flush();
    }
    /**
     * 데이터 가공
     * @param {StringBuffer} response 응답값
     * @returns {List} result text list
     */
    private static List<String> jsonparse(StringBuffer response) throws ParseException {
        //json 파싱
        JSONParser jp = new JSONParser();
        JSONObject jobj = (JSONObject) jp.parse(response.toString());
        //images 배열 obj 화
        JSONArray JSONArrayPerson = (JSONArray)jobj.get("images");
        JSONObject JSONObjImage = (JSONObject)JSONArrayPerson.get(0);
        JSONArray s = (JSONArray) JSONObjImage.get("fields");
        //
        List<Map<String, Object>> m = JsonUtill.getListMapFromJsonArray(s);
        List<String> result = new ArrayList<>();
        for (Map<String, Object> as : m) {
            result.add((String) as.get("inferText"));
        }

        return result;
    }
}
네이버에서 제공해주는 도큐먼트를 읽어본 결과 아래 코드부분이 중요한 것 같아서 주석문을 추가했다. api 요청 시에 header에 담길 녀석들인 것 같다.
 con.setRequestProperty("Content-Type", "multipart/form-data; boundary=" + boundary); // HTTP 요청 헤더를 설정합니다.
            con.setRequestProperty("X-OCR-SECRET", secretKey); // 시크릿 키를 설정합니다.

            JSONObject json = new JSONObject(); // JSON 객체를 생성합니다.
            json.put("version", "V2"); // JSON 객체에 버전 정보를 추가합니다.
            json.put("requestId", UUID.randomUUID().toString()); // JSON 객체에 요청 ID를 추가합니다.
            json.put("timestamp", System.currentTimeMillis()); // JSON 객체에 타임스탬프를 추가합니다.
            JSONObject image = new JSONObject(); // JSON 객체를 생성합니다.
            image.put("format", ext); // 이미지 형식 정보를 추가합니다.
            image.put("name", "demo"); // 이미지 이름을 추가합니다.
            JSONArray images = new JSONArray(); // JSON 배열을 생성합니다.
            images.add(image); // JSON 배열에 이미지 정보를 추가합니다.
            json.put("images", images); // JSON 객체에 이미지 배열을 추가합니다.
            String postParams = json.toString(); // JSON 객체를 문자열로 변환합니다.
여기까지 했으면 거의 다한거나 마찬가지다
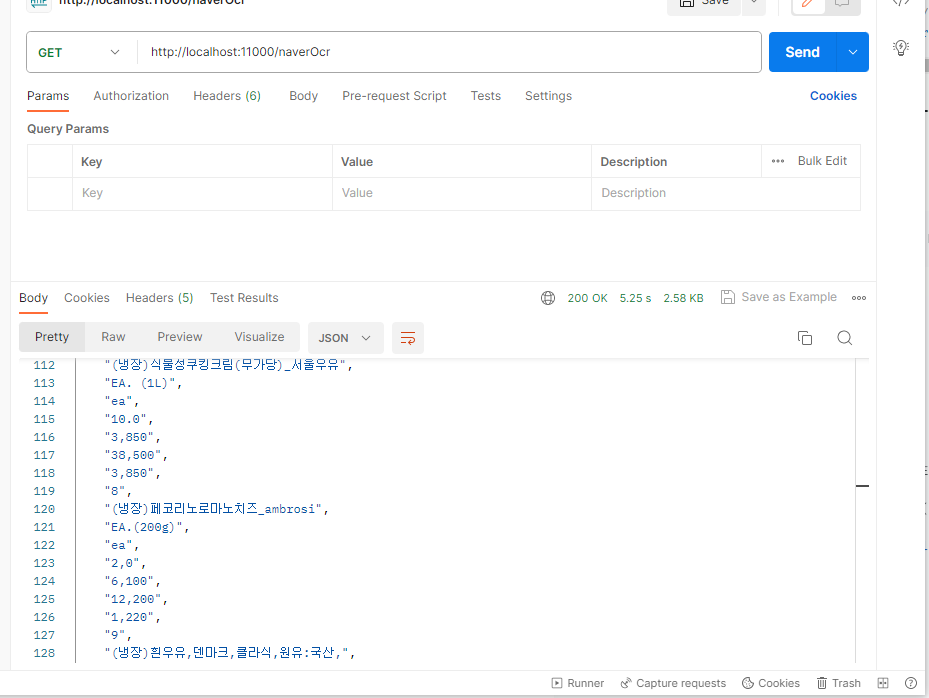
CheckController - 로컬에 저장된 이미지 OCR
엔드포인트에 대한 GET 요청을 처리하는 메서드이다.
@RestController
@Slf4j
@RequiredArgsConstructor
public class CheckController {
private final NaverOcrApi naverApi;
@Value("${naver.service.secretKey}")
private String secretKey;
@GetMapping("/naverOcr")
public ResponseEntity ocr() throws IOException {
String fileName = "test.jpg"; // 파일 이름
File file = ResourceUtils.getFile("classpath:static/image/"+fileName);
List<String> result = naverApi.callApi("POST", file.getPath(), secretKey, "jpg");
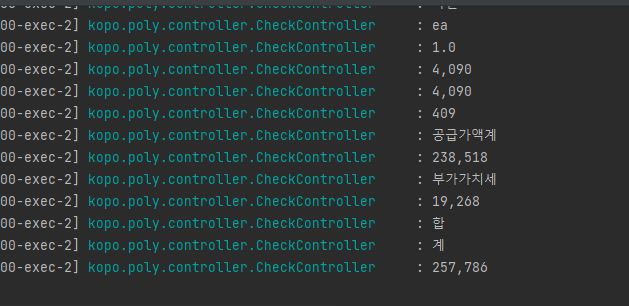
if(!result.equals(null)){
for(String s : result){
log.info(s);
}
}else{
log.info("null");
}
return new ResponseEntity(result, HttpStatus.OK);
}
실행 결과 - 로컬
Submit 이미지 OCR
UploadContoller
package kopo.poly.controller;

import kopo.poly.infra.naver.ocr.NaverOcrApi;
import lombok.RequiredArgsConstructor;
import lombok.extern.slf4j.Slf4j;
import org.springframework.beans.factory.annotation.Value;
import org.springframework.stereotype.Controller;
import org.springframework.ui.Model;
import org.springframework.web.bind.annotation.GetMapping;
import org.springframework.web.bind.annotation.PostMapping;
import org.springframework.web.bind.annotation.RequestParam;
import org.springframework.web.multipart.MultipartFile;

import java.io.File;
import java.io.IOException;
import java.util.List;

@Controller
@Slf4j
@RequiredArgsConstructor
public class UploadController {
    @Value("${naver.service.secretKey}")
    private String secretKey;
    private final NaverOcrApi naverApi;

    // 파일 업로드 폼을 보여주기 위한 GET 요청 핸들러 메서드
    @GetMapping("/upload-form")
    public String uploadForm() throws Exception {
        return "/upload-form"; // HTML 템플릿의 이름을 반환 (upload-form.html)
    }

    // 파일 업로드 및 OCR 수행을 위한 POST 요청 핸들러 메서드
    @PostMapping("/uploadAndOcr")
    public String uploadAndOcr(@RequestParam("file") MultipartFile file, Model model) throws IOException {
        if (file.isEmpty()) {
            return "error"; // 파일이 비어있을 경우 에러를 처리하는 HTML 템플릿으로 이동
        }

        String naverSecretKey = secretKey; // 본인의 네이버 Clova OCR 시크릿 키로 대체

        File tempFile = File.createTempFile("temp", file.getOriginalFilename());
        file.transferTo(tempFile);

        List<String> result = naverApi.callApi("POST", tempFile.getPath(), naverSecretKey, "jpg");

        tempFile.delete(); // 임시 파일 삭제

        model.addAttribute("ocrResult", result); // OCR 결과를 HTML 템플릿에 전달

        return "ocr-result"; // OCR 결과를 표시하는 HTML 템플릿 이름 반환
    }
}
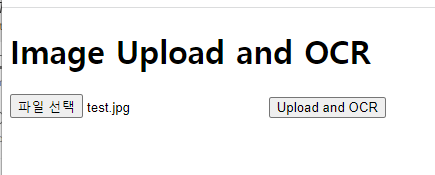
실행 결과 - Submit
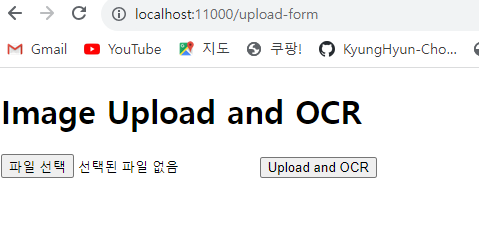
아래처럼 파일이름이 표시되면 정상적으로 파일이 선택된 것.
이제 Upload and OCR을 누르면 서버로 전송되어 OCR을 수행한다.
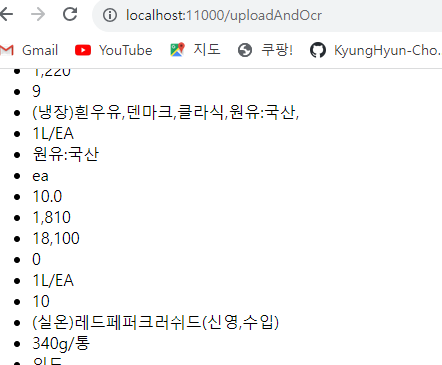
위와 같은 느낌으로 출력이 되는데 상남자는 CSS같은거 모른다.
HTML 코드
upload-form
<!DOCTYPE html>
<html lang="en" xmlns:th="http://www.thymeleaf.org">
<head>
  <meta charset="UTF-8">
  <meta name="viewport" content="width=device-width, initial-scale=1.0">
  <title>Image Upload and OCR</title>
</head>
<body>
<h1>Image Upload and OCR</h1>
<form action="/uploadAndOcr" method="post" enctype="multipart/form-data">
  <input type="file" name="file" accept=".jpg, .jpeg, .png">
  <button type="submit">Upload and OCR</button>
</form>
</body>
</html>
ocr-result
<!DOCTYPE html>
<html lang="en" xmlns:th="http://www.thymeleaf.org">
<head>
  <meta charset="UTF-8">
  <meta name="viewport" content="width=device-width, initial-scale=1.0">
  <title>OCR Result</title>
</head>
<body>
<h1>OCR Result</h1>
<ul>
  <!-- Loop through the OCR result and display each item -->
  <li th:each="result : ${ocrResult}" th:text="${result}"></li>
</ul>
</body>
</html>