
핵클 사용하여 A/B 구성 설정
그룹A와 그룹B로 나뉘어져
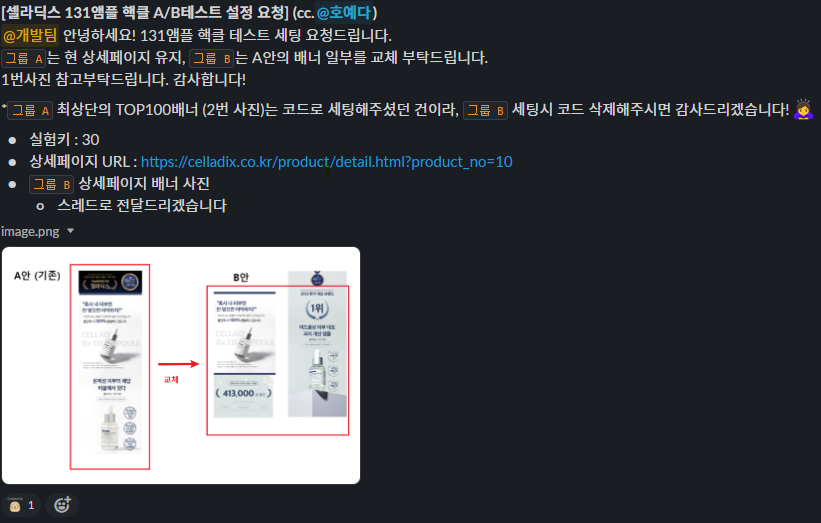
그룹A는 현 상세페이지 유지, 그룹B는 수정된 상세페이지를 노출시키려 한다.
두가지의 시안을 A그룹과 B그룹이 각자 각기 다른 상세페이지를 볼 수 있도록 설정하는것!
많이 쓰이는거니 기억해두자!!
해당 시안이었으며 이것을 토대로 정리해보려 한다.
💡 hackle이라는 건 js라이브러리이고 분류,테스트를 할 수 있는 플랫폼이다.
- 카페24의 PC/MO 버전 각각 설정해야 하며, 우선 PC 코드편집으로 들어간다.
- header.html 파일을 찾아 들어가면 import에 hackle.js를 찾아 활성화( js 앞에 @표시를 !!) 시키고 클릭한다.
( 그냥 hackle.js와 hackle_new가 있는데 hackle_new을 클릭해야 한다. 그냥 hackle은 옛날꺼 ) - 아래와 같은 코드의 창이 열린다.
$(function(){
    $('#variationA, #variationB').hide();1️⃣

    hackleClient.onReady(() => {
        const variation = hackleClient.variation(30);2️⃣ //131앰플
        if($('#pdNum').length > 0){
            var pdNo = $('#pdNum').attr('rel');
        }else if($('meta[property="product:productId"]').length > 0){
            var pdNo = $('meta[property="product:productId"]').attr('content');
        }else{
            var pdNo = getQueryString('product_no');
        }
        var now_url = window.location.href;
        var ab_type = now_url.split('&type=');4️⃣

        if(pdNo == 10){
            if(variation == "B" || ab_type[1] == "b"){3️⃣
                $('#variationA').hide();
                $('#variationB').show();
                $('.brand_top').hide();
                /*
                $('.brand_top img').attr('src','/web/img/231212_ab.jpg');
                setInterval(function(){
                    $('.xans-product-detail .imgArea .keyImg img').attr('src','/web/img/231212_thumb.jpg');
                },1000)
                $('#variationB').show();
                $('#variationA').hide();
                */
            	//window.location.replace('/product/detail.html?product_no=66');
            }else{
                $('#variationB').hide();
                $('#variationA').show();
            }
        }
    });
});
여기서 알아둬야 할건 몇가지면 된다. ( 코드는 한번 쓱 훑어보자 )
- 1번에서는 #variationA, #variationB의 두개의 ID값을 숨겨두었다.
여기에서 varA와 varB는 최상단에서 언급한 그룹A와 B를 의미한다. 즉, 현재는 A,B에게 모두 숨기는 상태인 것이다. - 2는 hackle 라이브러리에서 데이터 값을 불러오는 것이다.
아래에서 보다시피 요청사항에서 실험키는 30 , 즉! hackle이라는 프로그램에서 30번째에 있는 설정을 해당 페이지에 적용을 시키겠다는 말이다.
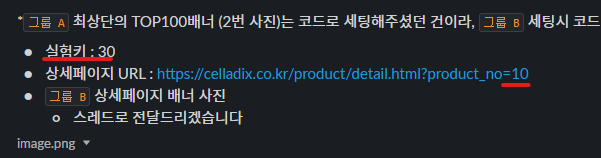
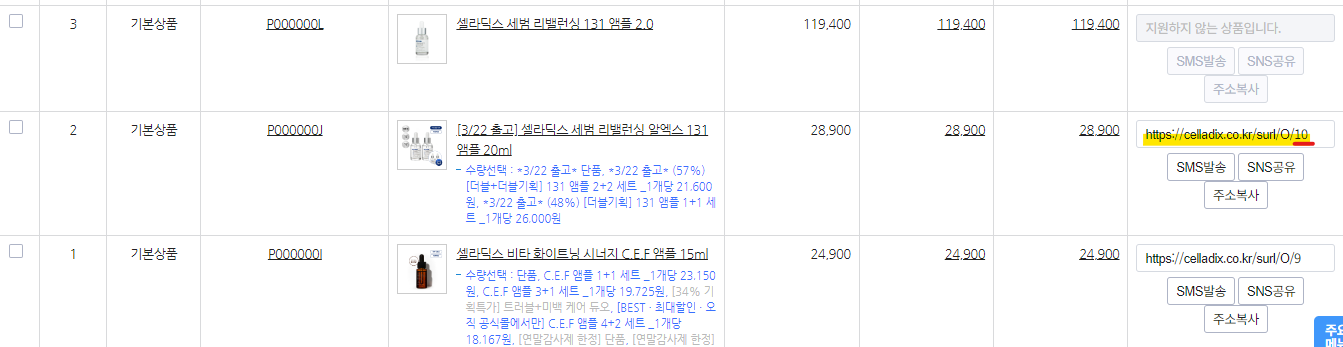
- 상세페이지의 URL의 가장 뒤의 숫자를 의미하는건 각각 제품들의 URL에 찍히는 번호인데,
이건 상품 → 상품목록 → 바로구매URL을 보면 확인이 가능하다.
- 해당 url의 제품을 클릭하면 상품 수정 페이지가 노출된다.
수정페이지를 스크롤하면 상세페이지 부분이 보이는데그림판표시를 누르면 이미지를 넣을 수 있고,<>를 누르면 해당 페이지의 코드가 나타나고, 좌측 하단의전체화면을 누르면 창이 넓어져 보기 수월해진다.
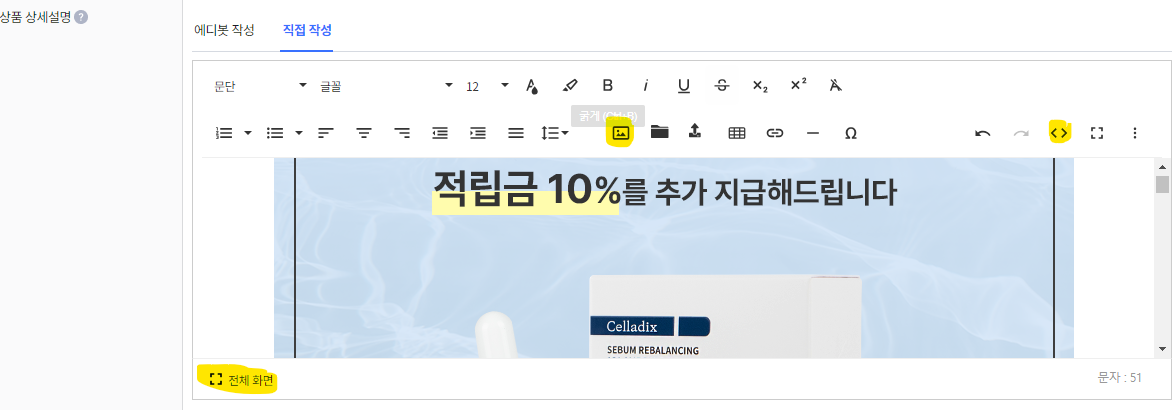
그림판표시를 눌러 새로 추가된 이미지 및 gif를 순서대로 잘 정렬해 넣는다.<>를 누른 후 코드들이 나열되는데 방금 추가한 이미지의 태그들을 찾는다. 그리고 요청사항 별로 A와B에서 각각 보여지고 싶은 이미지를 분류한다.
위의 코드상에서 숨긴 표시를 한 #variationA와 #variationB가 여기에 쓰인다.
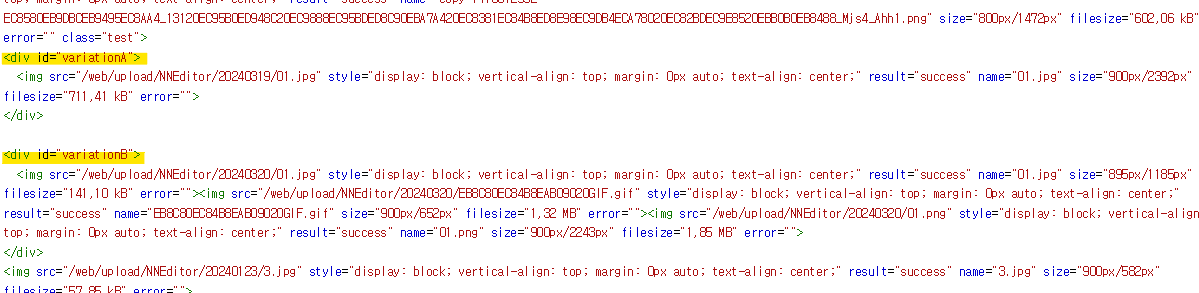
💡 현재는 작업 수정된 후의 코드이다. 수정 전에는 #variationA와 #variationB가 분류되어 있지 않다.
- variationA에 필요로한 이미지 태그를 분류해 넣고, #variationB에도 동일하게 분류해 태그를 정리해 둔다.
- 최종적으로 적용이 되었는지 확인하기 위한 방법으론 상단의 코드에서 4️⃣에서 쓰였다시피
상세페이지 링크 끝에&type=a&type=bA와 B그룹을 적어 각각 확인하면 확인가능하다. - 3을 설명하는게 더 이해가 쉬울거 같다. variation의 값이 B거나 type의 값이 B면 A가 숨겨지고 B는 나타나는 구조로 설정되어 있어
type= $을 사용해 확인이 가능한 것!
variation == "B" || ab_type[1] == "b"){3️⃣
                $('#variationA').hide();
                $('#variationB').show();

웹 퍼블리셔의 코딩 일기