여러가지 쿼리방식
Query기능이 단순 조회만 있는게 아니고 다양한 방식으로 쓰인다. UseQuery를 페이지가 열릴때만 불러오는게 아니라 버튼을 누르고나서나 특정 장소에 값을 담는데 쓰일수도 있다.
useQuery, useLazyQuery, useApolloClient 로 예시로 들어보자
로그인에서의 예시
로그인 요청을 위해서 이메일, 패스워드를 보내고 토큰을 글로벌 스테이트에 저장, 그리고 나서
fetchUserLoggedin을 통해서 로그인에 대한 정보를 가져옴(query)
근데 로그인 정보를 가져오는 요청을 하지 않고 가지고 오고 싶다면??
const result = fetchUserLoggedIn()
setUserInfo(result.data?.fetchUserLoggedIn)
유저로그인정보를 result에 담고 가져올 수는 없을까?
-> 그냥 useQuery로는 할 수 없음, 근데 해야함
const result = await axios.get("koreanjson.com/post/1")이런 방식으로 원하는 곳에서 useQuery필요
이런 용도에 사용할 수 있게 하는게 useApolloClient라는 것, 내가 원하는 곳에서 API 요청을 할 수 있게됨
useApolloClient 적용해보기
function 안에
const client = useApolloClient()그리고
import {useApolloClient } from "@apollo/client";이러면 axios처럼 쓸 수 있다.
const resultUserInfo = await client.query({
        query: FETCH_USER_LOGGED_IN
      })
      // 물론 FETCH_USER_LOGGED_IN의 gql은 가져와야한다.
setUserInfo(resultUserInfo.data.fetchUserLoggedIn)
import { GlobalContext, setUserInfo} from "../_app";
setUserInfo라는 글로벌 컨텍스트로 보낼것(이러면 import도 해야한다)
그리고 로그인 성공 화면에서는 글로벌 콘텍스트만 가져온다
import { useContext } from "react";
import { withAuth } from "../../src/commons/hocs/withAuth";
import { GlobalContext } from "../_app";


function LoginSuccessPage() {
  const { setAccessToken, setUserInfo } = useContext(GlobalContext);

  return (
    <>
      <div>로그인에 성공하였습니다!!!!!</div>
      <div>{userInfo?.name}님 환영합니다!!!</div>
    </>
  );
}
export default withAuth(LoginSuccessPage);
그런데 이러면 아직 안된다. 왜냐
로그인하면 토큰을 받고 토큰은 글로벌 콘텍스트로 감
이후 FETCH_USER_LOGGED_IN작동하는데 결과는 받아올 수 없음
여태 headers: { authorization: Bearer ${myAcessToken} } 방식으로 넣어줬기 때문
그래서 이제 강제로 넣어줄 수 있다.
import { ChangeEvent, useContext, useState } from "react";
import { gql, useApolloClient, useMutation } from "@apollo/client";
import {
IMutation,
IMutationLoginUserArgs,
} from "../../src/commons/types/generated/types";
import { GlobalContext } from "../_app";
import { useRouter } from "next/router";
const LOGIN_USER = gql`
mutation loginUser($email: String!, $password: String!) {
loginUser(email: $email, password: $password) {
accessToken
}
}
`;
const FETCH_USER_LOGGED_IN = gql`
query fetchUserLoggedIn {
fetchUserLoggedIn {
email
name
picture
}
}
`;
export default function LoginPage() {
const router = useRouter();
const { setAccessToken, setUserInfo } = useContext(GlobalContext);
const [myEmail, setMyEmail] = useState("");
const [myPassword, setMyPassword] = useState("");
const [loginUser] = useMutation<
Pick<IMutation, "loginUser">,
IMutationLoginUserArgs
>(LOGIN_USER);
const client = useApolloClient();
function onChangeMyEmail(event: ChangeEvent<HTMLElement>) {
setMyEmail(event.target.value);
}
function onChangeMyPassword(event: ChangeEvent<HTMLElement>) {
setMyPassword(event.target.value);
}
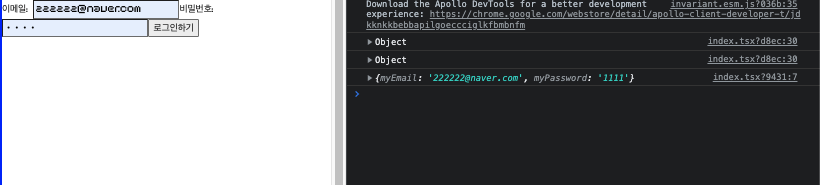
async function onClickLogin() {
const result = await loginUser({
variables: {
email: myEmail,
password: myPassword,
},
});
const accessToken = result.data?.loginUser.accessToken || "";
localStorage.setItem("accessToken", accessToken);
setAccessToken?.(accessToken); // 여기서 setAccesToken 필요! (글로벌 스테이트에...)
const resultUserInfo = await client.query({
query: FETCH_USER_LOGGED_IN,
context: {
headers: {
authorization: `Bearer ${accessToken}`,
},
},
});
setUserInfo(resultUserInfo.data.fetchUserLoggedIn);
// 로그인 버튼을 클릭했을 때
// 이메일과 비밀번호 요청,
// 그리고 setAccessToken을 글로벌스테이트에 저장
// fetchUserLoggedin으로 사용자 정보를 받아옴
// const result = fetchUserLoggedIn()
// setUserInfo(result.data?.fetchUserLoggedIn)
// const result = await axios.get("koreanjson.com/post/1")이런 방식으로 원하는 곳에서 useQuery필요
// 그리고 유저인포도 따로 저장함 <- 이게 안되면 유저 정보가 필요한 곳에 fetch요청을해야함(로그인성공페이지)
// 그런데 한군데서만 필요한 것이 아님
// 로그인 성공된 페이지로 이동시키기!!
router.push("/24-02-login-success");
}
return (
<>
이메일:
<input type="text" onChange={onChangeMyEmail} />
비밀번호:
<input type="password" onChange={onChangeMyPassword} />
<button onClick={onClickLogin}>로그인하기!!</button>
</>
);
}
그럼 로그인 완료페이지로 가본다
context:{
        headers:{
          authorization: `Bearer ${result.data?.loginUser.accessToken}`
        }
      }
복잡해보이니까 accessToken이란걸 선언해서 넣어준다.
const accessToken = result.data?.loginUser.accessToken || "";
완료버전
import { useContext } from "react";
import { withAuth } from "../../src/commons/hocs/withAuth";
import { GlobalContext } from "../_app";

function LoginSuccessPage() {
  const { userInfo } = useContext(GlobalContext);

  return (
    <>
      <div>로그인에 성공하였습니다!!!!!</div>
      <div>{userInfo?.name}님 환영합니다!!!</div>
    </>
  );
}
export default withAuth(LoginSuccessPage);
useLazyQuery
useQuery는 페이지가 시작되자마자 바로 요청하고 찍히는게 자동이지만
LazyQuery는 usemutation처럼 특정 버튼을 눌렀을 때 실행됨
그리고 fetchUser를 요청 해야 들어감, 그리고 data로 들어감
원하는대로 변수에 담을 수가 없음,
아까 apolloclient는 원하는 변수에 담고 원하는 곳에서 실행이었지만
lazy는 원하는 곳에서 실행만 된다
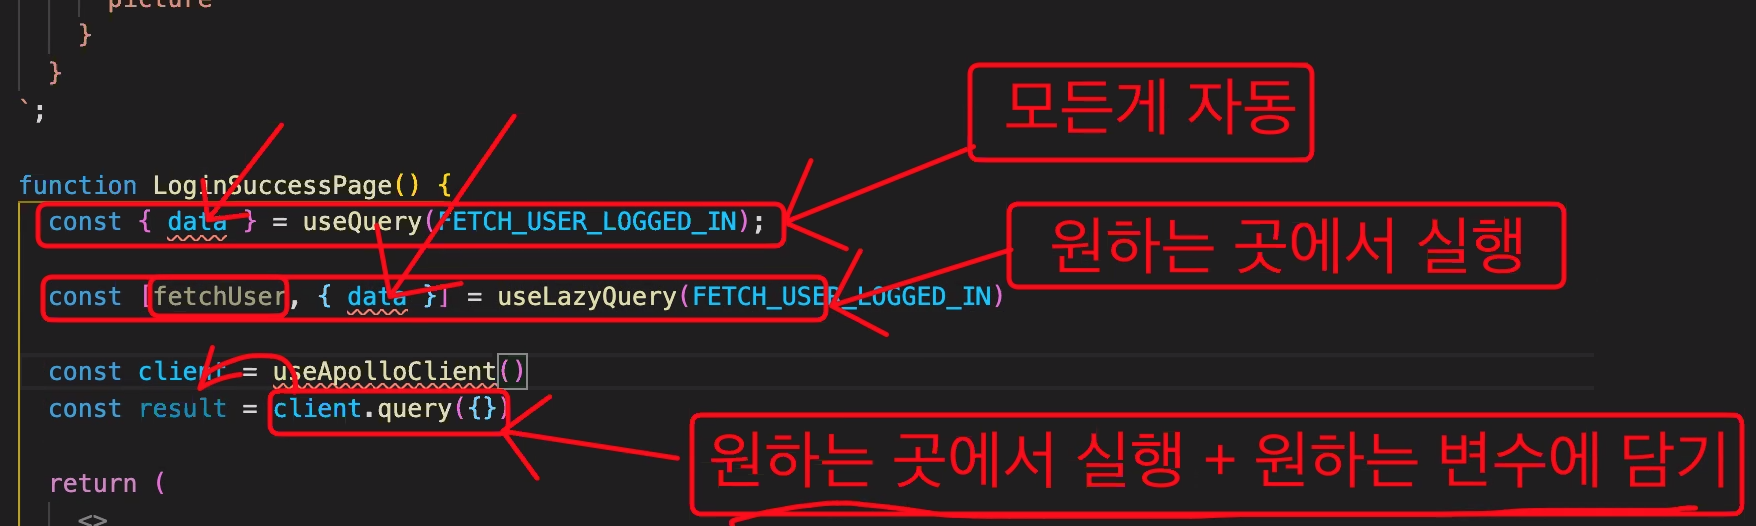
3줄요약
useQuery : 모든게 자동
useLazyQuery : 원하는 곳에서 실행
useApolloClient : 원하는 곳에서 실행, 원하는 변수에 담기
폼 라이브러리
React-form
Redux-form
Formik
React-hook-form
다양한 라이브러리가 있었지만 React-hook-form이 나오면서 서서히 묻히게되었다.
React-hook-form은 비제어 컴포넌트,
다른 컴포넌트는 제어 컴포넌트인것에 비해 비교됨.
입력할 때 제어 컴포넌트는 ㅇ ㅏ ㄴ ㄴ ㅕ ㅇ ㅎ ㅏ 이렇게 하나씩 state에저장됨
비제어 컴포넌트는 state와 상관없이 input만 바뀌고 버튼이 바꿀 때에 input에 담긴걸 꺼내오는것
**무조건 비제어 컴포넌트가 좋은가??
꼭 그렇지도 않다
비제어컴포넌트의 경우
장문의 글을 쓸 때 버벅거릴 수 있음 (글이 너무 커질 경우)
또한 제어 컴포넌트의 경우 100% state에 저장되는 경우에 반해서
글이 틀려질 수 있음(안정성이 조금 떨어짐) 그래서 글자가 절대 틀리면 안되는것들, 예시 : 카드번호
그런거는 제어 컴포넌트로 쓰는 것이 좋다.
아무튼 비제어 컴포넌트인 React-hook-form 사용해보기
사이트, get started를 가보면 상세히 설명되어있다(타입도 있음)
yarn add react-hook-form
이후 index 페이지 작성해보기
import {useForm} from 'react-hook-form'
사용은 const{기능} = useForm()으로 한다
handleSubmit이나 register을 예시로 써봄
import { useForm } from "react-hook-form";

export default function ReactHookFromPage() {
  const { handleSubmit, register } = useForm();

  function onClickLogin(data) {
    console.log(data);
    // loginUser API 요청하기!!
  }

  return (
    <form onSubmit={handleSubmit(onClickLogin)}>
      이메일: <input type="text" {...register("myEmail")} />
      비밀번호: <input type="password" {...register("myPassword")} />
      <button>로그인하기</button>
    </form>
  );
}
이제는 로그인 버튼에 onClick 함수를 실행했으나
지금은 form 태그로 쌓여있으므로 handleSubmit 옆에
<form onSubmit={handleSubmit(onClickLogin)}>이런 식으로 넣는다
register도 사용방법에 맞게 넣어야 한다.
너무도 간단하게 됐음 😦
검증 라이브러리
yup - 에러 라이브러리
react-hook-form 만 아니고 다른 라이브러리와도 같이 쓸 수 있음 (그니까 연습하기)
설치하기
yarn add yup
index.tsx에 import as yup from 'yup'
(은 전부를 가져온다는 뜻, 이름을 as 뒤에 붙여서 가짜 이름을 붙여준거다)
const schema = yup.object().shape({
  myEmail: yup
    .string()
    .email("이메일 형식이 적합하지 않습니다.")
    .required("반드시 입력해야하는 필수 사항입니다."),

  myPassword: yup
    .string()
    .min(4, "비밀번호는 최소 4자리 이상입니다.")
    .max(15, "비밀번호는 최대 15자리까지 입니다!!")
    .required("비밀번호는 반드시 입력해주세요!!"),
});
.object -대상들
.shape - 모습을 정하겠다
.string - 문자열타입
.email("이메일형식이 적합하지 않습니다") - 이메일 형식이고 형식이 안맞으면 안의 메세지 출력
.required("비밀번호는 반드시 입력해주세요!!") - 무조건 입력받아야함, 안됐으면 메세지 출력
.min(4, "비밀번호는 최소 4자리 이상입니다.") - 4자리 최소값을 받음, 아니면 메세지 출력
.max - 최대값 지정
이제 react-hook-form 이랑 연결해야한다.
yarn add @hookform/resolvers
import { yupResolver } from "@hookform/resolvers/yup/dist/yup";
이후 useForm 부분에 resolver:yupResolver(schema)로 사용 및 schema를 가져온다
에러를 formState를 담는다고 생각하고 에러에 관한 div를 만든다.
<div>{formState.errors.myEmail?.message}</div>완성본
import { useForm } from "react-hook-form";
import * as yup from "yup";
import yupResolver from "@hookform/resolvers/yup/dist/yup";
// import { yupResolver } from "@hookform/resolvers/yup/dist/yup.js";

const schema = yup.object().shape({
  myEmail: yup
    .string()
    .email("이메일 형식이 적합하지 않습니다.")
    .required("반드시 입력해야하는 필수 사항입니다."),

  myPassword: yup
    .string()
    .min(4, "비밀번호는 최소 4자리 이상입니다.")
    .max(15, "비밀번호는 최대 15자리까지 입니다!!")
    .required("비밀번호는 반드시 입력해주세요!!"),
});

interface FromValues {
  myEmail: string;
  myPassword: string;
}

export default function ReactHookFromPage() {
  const { handleSubmit, register, formState } = useForm({
    mode: "onChange",
    resolver: yupResolver.yupResolver(schema),
  });

  function onClickLogin(data: FromValues) {
    console.log(data);
    // loginUser API 요청하기!!
  }

  return (
    <form onSubmit={handleSubmit(onClickLogin)}>
      이메일: <input type="text" {...register("myEmail")} />
      <div>{formState.errors.myEmail?.message}</div>
      비밀번호: <input type="password" {...register("myPassword")} />
      <div>{formState.errors.myPassword?.message}</div>
      <button>로그인하기</button>
    </form>
  );
}
비밀번호가 조건에 맞지 않으면 메세지가 출력되는 것을 볼 수있다.
색깔도 바꿔보자
버튼 안에 isValid를 formState.isValid를 하면 된다.
import { useForm } from "react-hook-form";
import * as yup from "yup";
import { yupResolver } from "@hookform/resolvers/yup/dist/yup";
// import { yupResolver } from "@hookform/resolvers/yup/dist/yup.js";
import styled from "@emotion/styled";

interface ImyButtonProps {
  isValid: boolean;
}

const MyButton = styled.button`
  background-color: ${(props: ImyButtonProps) =>
    props.isValid ? "yellow" : ""};
`;

const schema = yup.object().shape({
  myEmail: yup
    .string()
    .email("이메일 형식이 적합하지 않습니다.")
    .required("반드시 입력해야하는 필수 사항입니다."),

  myPassword: yup
    .string()
    .min(4, "비밀번호는 최소 4자리 이상입니다.")
    .max(15, "비밀번호는 최대 15자리까지 입니다!!")
    .required("비밀번호는 반드시 입력해주세요!!"),
});

interface FromValues {
  myEmail: string;
  myPassword: string;
}

export default function ReactHookFromPage() {
  const { handleSubmit, register, formState } = useForm({
    mode: "onChange",
    resolver: yupResolver(schema),
  });

  function onClickLogin(data: FromValues) {
    console.log(data);
    // loginUser API 요청하기!!
  }

  return (
    <form onSubmit={handleSubmit(onClickLogin)}>
      이메일: <input type="text" {...register("myEmail")} />
      <div>{formState.errors.myEmail?.message}</div>
      비밀번호: <input type="password" {...register("myPassword")} />
      <div>{formState.errors.myPassword?.message}</div>
      <MyButton isValid={formState.isValid}>로그인하기</MyButton>
    </form>
  );
}
이렇게 하면 굉장히 짧아진다
심지어 chema나 emotion, types, validation 등등 컴포넌트 들으로 빼고나면 30줄 내외밖에 안된다.
!! button 에는 버튼 타입이 존재함
여태까지는 그냥 쓰면 함수가 실행됐었는데 알고보면 submit타입이 붙어있었어서 그렇게 실행된 것.
  return (
    <form onSubmit={handleSubmit(onClickLogin)}>
      이메일: <input type="text" {...register("myEmail")} />
      <div>{formState.errors.myEmail?.message}</div>
      비밀번호: <input type="password" {...register("myPassword")} />
      <div>{formState.errors.myPassword?.message}</div>
      <MyButton isValid={formState.isValid}>로그인하기</MyButton>
      {/* <button type = "button" onClick={onClickMove}목록으로 이동하기</button> */}
      {/* <button type = "reset">초기화하기</button> */}
    </form>
  );
}
그래서 button type = "button"이라고 따로 붙여주지 않으면 여기서는 submit이 되어버리기 때문에 조심해야한다
공통 컴포넌트
한번 분리를 해보면
컨테이너/프리젠터 뿐만아니라
input이나 button도 공통 컴포넌트로 뺄 수 있다
type또한 props로 뺄 수 있는데 넘길 때 props.type으로 가져와야함.
마찬가지로 register또한 ...props.register으로 가져와야함
이렇게되면 컴포넌트 재사용성, 모든곳에 가져다 쓸 수 있게됨
나누고 import를 잘 해오는게 문제임
실제로는 만드는 건 더 잘하는 선임이나 상급자, 나는 보통 import를 하게 될텐데.. 연습해라
useApolloClient
React-hook-form
라이브러리