css-in-js형태의 styled-component를 주로 사용하다가
점점 추세가 증가한다는 tailwind css 를 사용해봐야겠다는 생각이 들었다.
이번 연습 프로젝트에서 다뤄보면서
장단점을 느껴보고 기본적인 사용법과 함께 정리해두려고 한다.
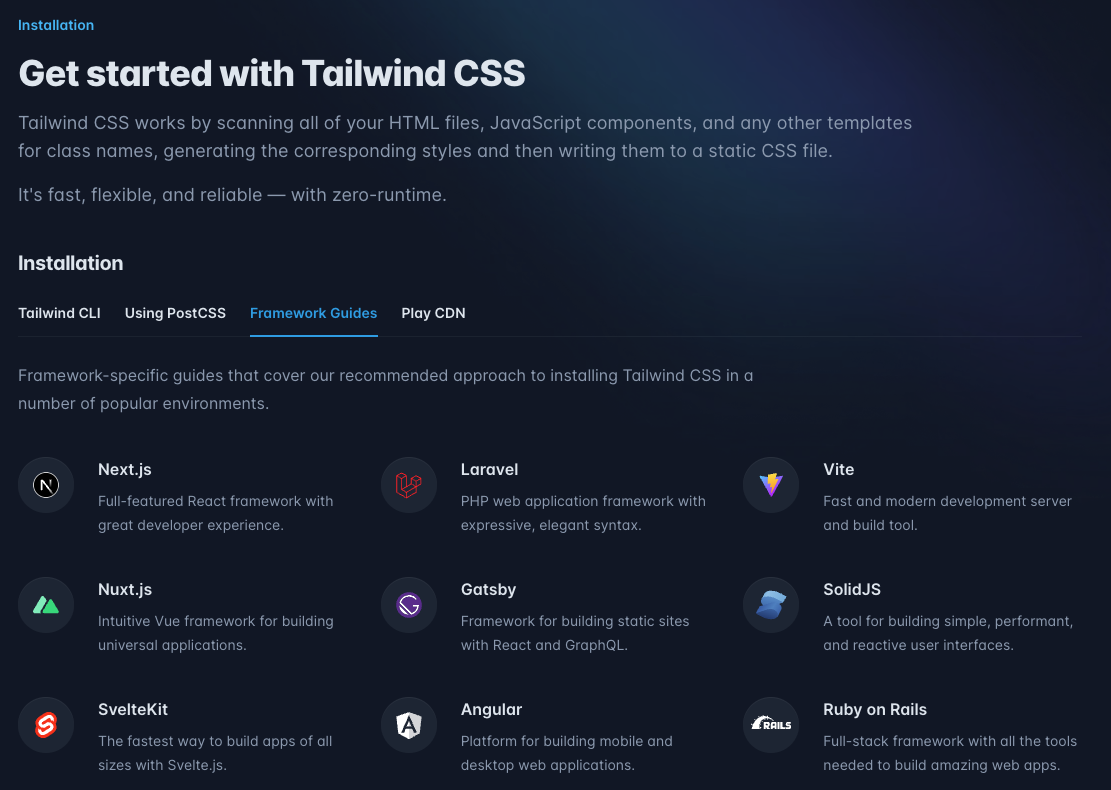
설치
tailwind 공식문서에 잘 나와있다.
몇가지 설치 방법이 있는데
3번째 탭에 보면 프로젝트에서 사용하는 프레임워크 별 설치 방법이 있다.
이번 프로젝트에서 vite + typescript를 사용하기 때문에 해당 부분을 참고해서 설치했다.
https://tailwindcss.com/docs/installation/framework-guides
prettier 설정
먼저, dev 환경에 종속성을 설치하고
npm i -D prettier prettier-plugin-tailwindcss프로젝트 루트 디렉토리에
prettier config(설정) 파일을 만들어 설정해준다.
// prettier.config.cjs

module.exports = {
  plugins: [require("prettier-plugin-tailwindcss")],
}
가끔 prettier 적용이 안되고 경고 밑줄이 표시되는 경우가 있는데
vscode를 껐다가 재시작하니 해결되었다.
전역 폰트 설정
특정 HTML 요소에 대한 고유한 기본 스타일을 추가하려면 지시문을 사용하여 @layer해당 스타일을 Tailwind의 base레이어에 추가해준다.
https://tailwindcss.com/docs/adding-custom-styles#adding-base-styles
@layer와 base 지시문을 사용하여 전역 폰트를 설정해주었다.
https://tailwindcss.com/docs/adding-custom-styles#using-css-and-layer
https://tailwindcss.com/docs/functions-and-directives#apply
width, height, 폰트 등 일반 HTML 요소에 적용되는 기본 스타일과 같은 항목을 위한 것이어서 base 수준으로 layer화하여 설정해주었다.
// index.css

// 구글 폰트에서 사용할 폰트 설정
@import url("https://fonts.googleapis.com/css2?family=DM+Sans:wght@400;700&family=Montserrat:wght@700&display=swap");

@tailwind base;
@tailwind components;
@tailwind utilities;

// html 요소에 필요한 기본 스타일을 base 수준으로 레이어에 추가
@layer base {
  html,
  body,
  #root,
  .app {
    height: 100%;
    width: 100%;
    font-family: "DM Sans", sans-serif;
    @apply text-gray-500;
  }
}

// 또는 인라인 방식으로 이렇게 작성해도 적용되었다.
@layer base {
  html,
  body,
  #root,
  .app {
    @apply w-full h-full font-dmsans text-gray-500;
  }
}
커스터마이징 파일 설정
설치를 통해 생성된 tailwind.config.js 파일에서
프로젝트에 사용할 유틸리티 클래스를 커스텀하게 설정해줄 수 있다.
https://tailwindcss.com/docs/configuration
// tailwind.config.js

/** @type {import('tailwindcss').Config} */
export default {
  content: ['./index.html', './src/**/*.{js,ts,jsx,tsx}'],
  theme: {
    extend: {
      colors: {
        "gray-20": "#F8F4EB",
        "gray-50": "#EFE6E6",
        "gray-100": "#DFCCCC",
        "gray-500": "#5E0000",
        "primary-100": "#FFE1E0",
        "primary-300": "#FFA6A3",
        "primary-500": "#FF6B66",
        "secondary-400": "#FFCD5B",
        "secondary-500": "#FFC132",
      },
      backgroundImage: {
        "gradient-yellowred": "linear-gradient(90deg, #FF616A 0%, #FFC837 100%)",
        "mobile-home": "url('./assets/(파일명).png')"
      },
      fontFamily: {
        dmsans: ["DM Sans", "sans-serif"],
        montserrat: ["Montserrat", "sans-serif"]
      },
      content: {
        evolvetext: "url('./assets/(파일명).png')",
        abstractwaves: "url('./assets/(파일명).png')",
        sparkles: "url('./assets/(파일명).png')",
        circles: "url('./assets/(파일명).png')",
      },
    },
    screens: {
      xs: "480px",
      sm: "768px",
      md: "1060px",
    }
  },
  plugins: [],
};
커스텀 설정한 클래스 사용하기
기본 유틸리티 클래스에 연계해서 사용(커스텀 컬러)
bg-secondary-500 => background color 를 커스텀 컬러로 설정
text-primary-500 => font color를 커스텀 컬러로 설정
// ...

const ActionButton = ({ children, setSelectedPage }: Props) => {
  return (
    <AnchorLink
      className="bg-secondary-500 hover:bg-primary-500 hover:text-white"
      onClick={() => setSelectedPage(SelectedPage.ContactUs)}
      href={`#${SelectedPage.ContactUs}`}
    >
      {children}
    </AnchorLink>
  );
};

export default ActionButton;
커스텀 설정에 저장후 클래스에서 바로 사용(커스텀 배경)
그라디언트 이미지를 여러 곳에 적용할 때 편리하다.
원하는 클래스에 문법을 적용할 때 다소 클래스 네이밍이 길어지는 부분이 있는데,
미리 커스텀 설정에 정해두면 필요한 곳에서 바로 클래스에 적용해서 사용할 수 있다.
그리고 그라데이션 이미지가 아닌 일반 이미지도 적용해놓고 클래스에서 적용해서 사용할 수 있다.
https://tailwindcss.com/docs/background-image#linear-gradients
커스텀 설정한 폰트도 바로 클래스에 적용
font-montserrat => 커스텀 설정한 montserrat 폰트를 적용
type Props = {
  children: React.ReactNode;
};

const Htext = ({ children }: Props) => {
  return (
    <h1 className="basis-3/5 font-montserrat text-3xl font-bold">{children}</h1>
  );
};

export default Htext;
의사 요소에 들어갈 내용을 커스텀 해놓고 사용할 수 있음
content는 의사 요소의 내용을 제어하는 속성인데,
커스텀 파일에 content 속성을 확장 설정해놓고
의사요소(before, after) 사용 시에 클래스에서 바로 적용할 수 있다.
https://tailwindcss.com/docs/content
const Benefits = ({ setSelectedPage }: Props) => {
  return (
    <section id="benefits" className="mx-auto min-h-full w-5/6 py-20">
	// ...
      {/* Button */}
            <div className="relative mt-16">
              <div className="before:absolute before:z-[-1] before:content-sparkles">
                <ActionButton setSelectedPage={setSelectedPage}>
                  Join Now
                </ActionButton>
              </div>
            </div>
    // ...
    </section>
  );
};

export default Benefits;
반응형 작업시 범위를 설정하고 적용
기본적으로 유틸리니 클래스에 미디어쿼리 설정 범위가 적용되어있지만,
https://tailwindcss.com/docs/responsive-design#targeting-a-breakpoint-range
커스텀 파일에서 별도 설정하여 사용할 수 있음.
https://tailwindcss.com/docs/screens
md:w-3/5 => 화면이 1060px 이상이면 width를 60%로 적용
const OurClasses = ({ setSelectedPage }: Props) => {
return (
<section id="ourclasses" className="w-full bg-primary-100 py-40">
<motion.div
onViewportEnter={() => setSelectedPage(SelectedPage.OurClasses)}
>
//...
<div className="md:w-3/5">
<Htext>OUR CLASSES</Htext>
<p className="py-5">
//...
</p>
</div>
//...
</motion.div>
</section>
);
};
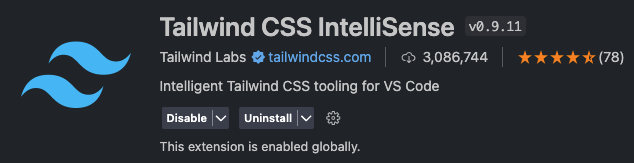
export default OurClasses;유용한 익스텐션
1. Tailwind CSS IntelliSense
tailwind를 사용시 오토컴플릿(자동완성), 문법 강조, 린트 같은 기능으로 빠른 코드 작성에 도움을 준다.
2. Tailwind Documentation
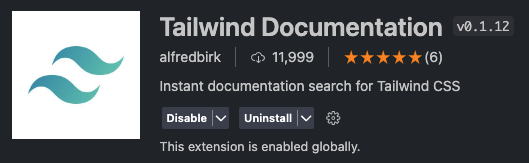
tailwind를 사용할 때 자체적으로 정해놓은 클래스를 사용하는데,
처음에는 익숙지 않고 기억이 안나는 경우다 종종 있다.
vscode에서 이 확장프로그램을 설치하고
cmd + ctrl + t (tailwind인듯)를 사용해서
코드 작성 중에 빠르고 쉽게 궁금한 걸 찾아볼 수 있다!
참고자료
- TailwindCSS 사용하기
https://leekihyun.tistory.com/entry/TailwindCSS-%EC%82%AC%EC%9A%A9%ED%95%98%EA%B8%B0 - Tailwind CSS의 설치와 활용
https://blog.rhostem.com/posts/2021-06-05-tailwind-css - TailwindCSS로 전역 폰트 설정하기
https://velog.io/@ddhhss0603/Portfolio-TailwindCSS%EB%A1%9C-%EC%A0%84%EC%97%AD-%ED%8F%B0%ED%8A%B8-%EC%84%A4%EC%A0%95%ED%95%98%EA%B8%B0 - tailwind css를 vite react project에 도입하기
https://xionwcfm.tistory.com/277 - Tailwind CSS 사용기
https://fe-developers.kakaoent.com/2022/220303-tailwind-tips/