document.getElementById();
HTML의 Id를 가져온 후 해당 Id로 소속되어있는 element를 제어할 수 있다.
const title = document.getElementById("title");

title.innerText = "got you!"-
getElementsByClassName(): 많은 element를 가져올때 씀(array를 반환) -
getElementsByTagName(): name을 할당할 수 있음(array를 반환) -
querySelector: element를 CSS selector방식으로 검색할 수 있음 (ex.h1:first-child)
단 하나의 element를 return해줌
⇒ hello란 class 내부에 있는 h1을 가지고 올 수 있다(id도 가능함)
- 첫번째 element만 가져옴
- 조건에 맞는 세개 다 가져오고 싶으면
querySelectorAll
⇒ 세개의 h1이 들어있는 array를 가져다 줌
querySelector("#hello);와getElementById("hello");는 같은 일을 하는 것임
하지만 후자는 하위요소 가져오는 것을 못하므로 전자만 쓸거다
const title = document.querySelector(".hello:first-child h1");


function handleTitleClick(){
    title.style.color = "blue";
    console.log("title was clicked");
}

title.addEventListener("click", handleTitleClick);-
지금 js파일이 있기 때문에 js를 통해 html의 내용을 가져올 수 있는 거임
-
document가 html이 js파일을 load하기 때문에 존재 → 그 다음에 browser가 우리가 document에 접근할 수 있게 해줌
-
element의 내부를 보고 싶으면
console.dir()
기본적으로 object로 표시한 element를 보여줌(전부 js object임)
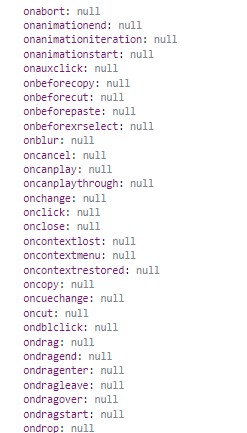
그 element 중 앞에 on이 붙은 것들은 event임
- event: 어떤 행위를 하는 것
모든 event는 js가 listen할 수 있음
eventListener: event를 listen함 → js에게 무슨 event를 listen하고 싶은 지 알려줘야 함title.addEventListener("click"): 누군가가 title을 click하는 것을 listen할 거임 → 무언가를 해줘야함
const title = document.querySelector("div.hello:first-child h1");

function handleTitleClick(){
	title.style.color = "blue";
}

title.addEventListener("click",handleTitleClick);
//click하면 handleTitleClick이라는 function이 동작하길 원함
//그래서 handle~ 함수에 () 를 안넣은 것임
//즉, js가 대신 실행시켜주길 바라는 것임!-
function이 js에게 넘겨주고 유저가 title을 click할 경우에 js가 실행버튼을 대신 눌러주길 바라는 것임( 직접
handleTitleClick();이렇게 하는 것이 아니라) -
함수에서 () 이 두 괄호를 추가함으로써 실행버튼을 누를 수 있는 거임
listen하고 싶은 event를 찾는 방법
-
구글에 찾고 싶은 element의 이름, 예를 들어
h1element를 Mozilla Developer Network인 MDN에 검색한다.

-
간단히 찾는 방법은 element를
console.dir로 출력해서 on~ 이라고 적혀있는걸 사용하면 됨.
(실제 사용시엔 on빼고 사용)
const title = document.querySelector(".hello:first-child h1");

console.dir(title); //객체의 속성을 계층구조로 출력

function handleTitleClick(){
    title.style.color = "blue";
}

function handleMouseEnter(){
    title.innerText = "Mouse is here!"
}

function handleMouseLeave(){
    title.innerText = "Mouse is gone!"
}

title.addEventListener("click", handleTitleClick);
title.addEventListener("mouseenter", handleMouseEnter);
title.addEventListener("mouseleave", handleMouseLeave);- 아래에 있는 첫줄처럼 작성할 수 있고 두 코드는 동일하나
addEventListener를 선호하는 이유는removeEventListener을 통해서 event listener을 제거할수있기 때문이다.
title.onclick = handleMouseEnter;
title.addEventListener(“mouseenter” , handleMouseEnter);
**window는 기본제공
resize
const h1 = document.querySelector(".hello:first-child h1");

function handleWindowResize(){
    document.body.style.backgroundColor = "tomato"; //화면크기가 바뀌면 bg컬러 바뀜
}

window.addEventListener("resize", handleWindowResize); //resize-화면크기가 바뀜
document에서 body,head,title 은 중요해서 언제든 ex) document.body 로 가져올수있지만
div나 h1등 element 들은 querySelector getElementById등으로 찾아야한다.
ex) document.querySelector(“h1”);
copy
const h1 = document.querySelector(".hello:first-child h1");


function handleWindowCopy(){
    alert("copier!")
}

window.addEventListener("copy", handleWindowCopy); //copy- 유저가 복사 시 이벤트 발생
offline, online
-
wifi 연결여부 확인 후 이벤트 발생
-
로컬PC에서 확인 시 wifi연결 여부 확인이 안되기 때문에
f12 (개발자도구) -> Network -> No throttling을 offline으로 변경하여 확인
const h1 = document.querySelector(".hello:first-child h1");

function handleWindowOffline(){
    alert("SOS no WIFI")
}

function handleWindowOnline(){
    alert("ALL GOOOD")
}

window.addEventListener("offline", handleWindowOffline);
window.addEventListener("online", handleWindowOnline);
이 글은 패스트캠퍼스 노마드코더 '바닐라 JS로 크롬 앱 만들기'을 수강하며 정리한 노트입니다.
https://nomadcoders.co/javascript-for-beginners/lobby