ReactNative에서 Typescript 설치
공식문서에 잘 나와있다. Reactnative 공식문서 - Using Typescript
Reactnative 프로젝트를 만들면서 설치하려면 아래 처럼하면 하면 된다고 하는데 자꾸 실패해서, 따로 설치하는 것으로 하였다.
npx react-native init MyApp --template react-native-template-typescript
공식문서 예제 - 일반 js
공식문서에 있는 예제를 js 형식으로 먼저 바꾼후 tsx로 어떻게 바뀌면 어떻게 해야 하는지 보고자 한다.
HelloJS.js라는 파일을 만들었다.
//HelloJS.js
import React from 'react';
import { Button, StyleSheet, Text, View } from 'react-native';
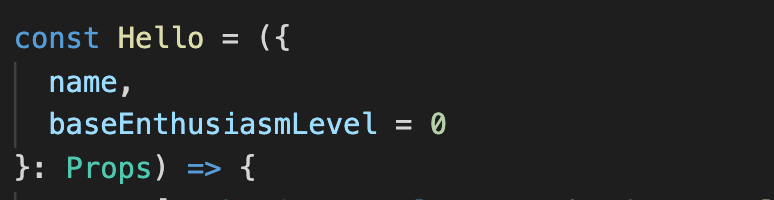
const HelloJS = ({
name,
baseEnthusiasmLevel = 0
}) => {
const [enthusiasmLevel, setEnthusiasmLevel] = React.useState(
baseEnthusiasmLevel
);
const onIncrement = () =>
setEnthusiasmLevel(enthusiasmLevel + 1);
const onDecrement = () =>
setEnthusiasmLevel(
enthusiasmLevel > 0 ? enthusiasmLevel - 1 : 0
);
const getExclamationMarks = (numChars) =>
numChars > 0 ? Array(numChars + 1).join('!') : '';
return (
<View>
<Text style={styles.greeting}>
Hello {name}
{getExclamationMarks(enthusiasmLevel)}
</Text>
<View>
<Button
title="Increase enthusiasm"
accessibilityLabel="increment"
onPress={onIncrement}
color="blue"
/>
<Button
title="Decrease enthusiasm"
accessibilityLabel="decrement"
onPress={onDecrement}
color="red"
/>
</View>
</View>
);
};
const styles = StyleSheet.create({
greeting: {
fontSize: 20,
fontWeight: 'bold',
margin: 16
}
});
export default HelloJS;메인의 App.tsx(그냥 App.js라고 놔도 무방)은 다음과 같이 작성
//App.tsx
import React from 'react';
import {
StyleSheet,
View,
} from 'react-native';
import Hello from './Hello';
import MyForm from './MyForm';
import HelloJS from './HelloJS'
const App = () => {
return (
<View style={styles.container}>
<HelloJS name={"BigMouse"} />
</View>
);
};
const styles = StyleSheet.create({
container: {
flex: 1,
alignItems: 'center',
justifyContent: 'center'
}
});
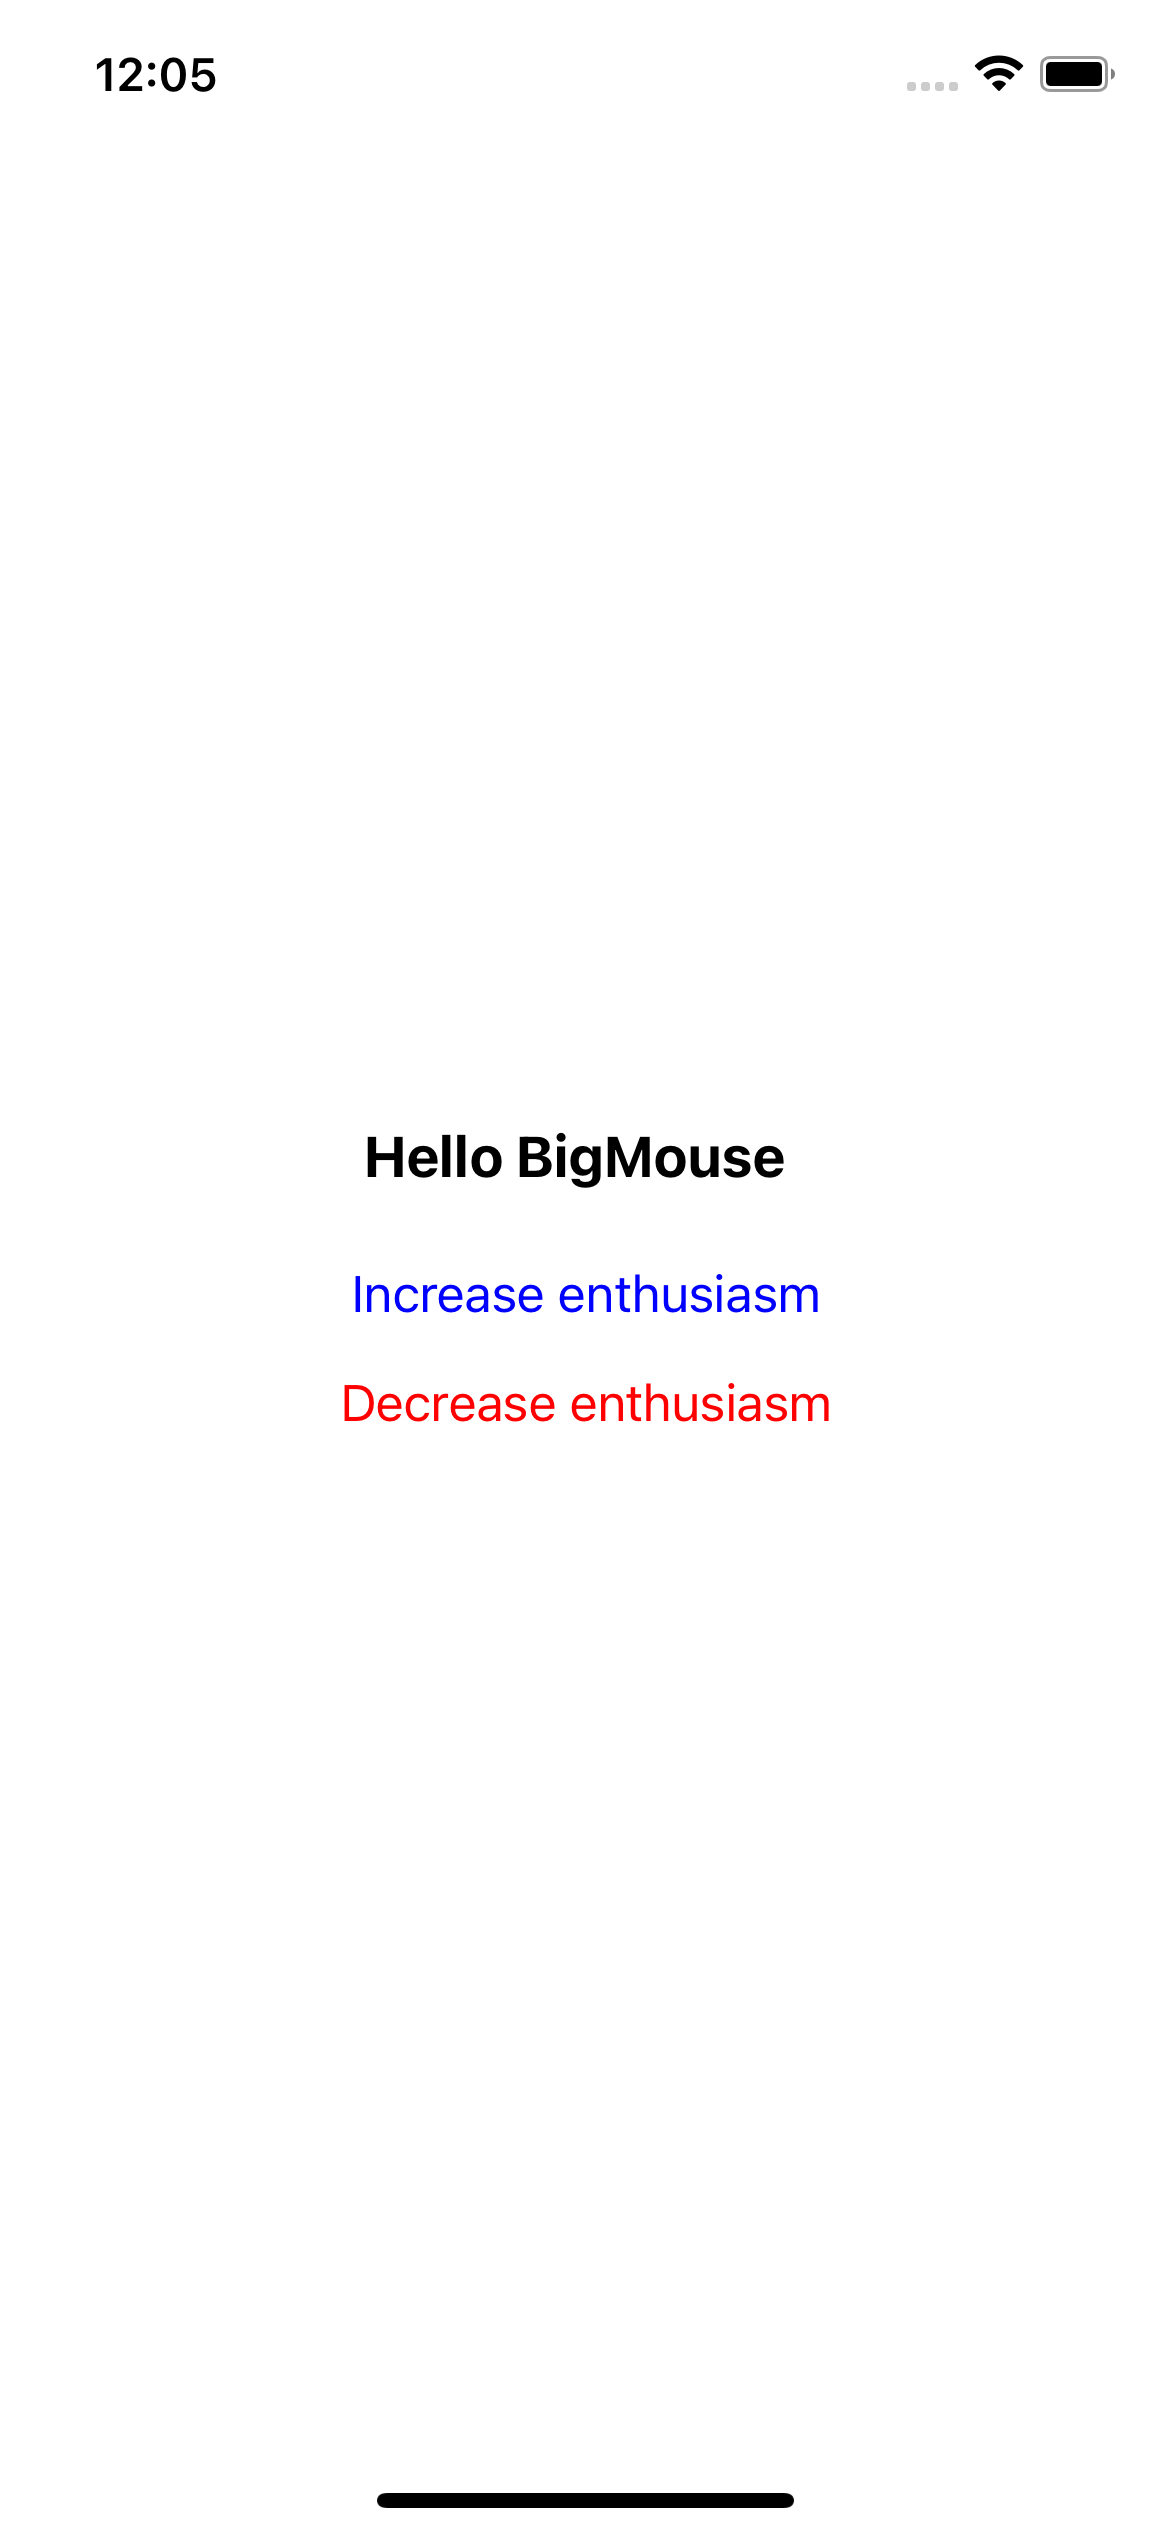
export default App;실행해 보면 아래와 같은 화면이 나오고 버튼을 클릭하면 '!'이 증가하거나 감소한다.
Typescript 파일로 변환
HelloTSX.tsx를 하나 생성하고, 위에 HelloJS.js를 카피해서 넣어 보면, VSCode에서 빨간줄을 볼 수 있다.
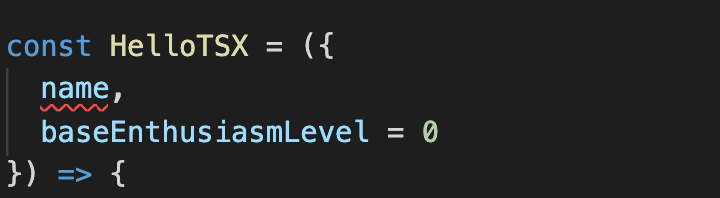

공식 홈페이지에 나온 것 처럼 HelloTSX props type을 정의 해주고 그 type을 사용하면 된다. 그리고 getExclamationMarks에 매개변수도 타입을 정확히 해주면 된다.
먼저 props에 사용될 타입을 아래와 같이 정의해 줍니다.
export type Props = {
  name: string;
  baseEnthusiasmLevel?: number;
};

보면 빨간 줄이 없어 졌습니다.
HelloTSX.tsx전체 코드는 아래와 같이 되고, App.tsx에서 불러 오면 됩니다.
//HelloTSX.tsx
import React from 'react';
import { Button, StyleSheet, Text, View } from 'react-native';

export type Props = {
    name: string;
    baseEnthusiasmLevel?: number;
  };

const HelloTSX = ({
  name,
  baseEnthusiasmLevel = 0
}: Props) => {
  const [enthusiasmLevel, setEnthusiasmLevel] = React.useState(
    baseEnthusiasmLevel
  );

  const onIncrement = () =>
    setEnthusiasmLevel(enthusiasmLevel + 1);
  const onDecrement = () =>
    setEnthusiasmLevel(
      enthusiasmLevel > 0 ? enthusiasmLevel - 1 : 0
    );

  const getExclamationMarks = (numChars: number) =>
    numChars > 0 ? Array(numChars + 1).join('!') : '';

  return (
    <View>
      <Text style={styles.greeting}>
        Hello {name}
        {getExclamationMarks(enthusiasmLevel)}
      </Text>
      <View>
        <Button
          title="Increase enthusiasm"
          accessibilityLabel="increment"
          onPress={onIncrement}
          color="blue"
        />
        <Button
          title="Decrease enthusiasm"
          accessibilityLabel="decrement"
          onPress={onDecrement}
          color="red"
        />
      </View>
    </View>
  );
};

const styles = StyleSheet.create({
  greeting: {
    fontSize: 20,
    fontWeight: 'bold',
    margin: 16
  }
});

export default HelloTSX;
I'm working on GM TCK(old, GM Korea). I'm just starting Mobile App Development. Previously I've worked at various Vehicle Development Area