현재 작업중인 안드로이드앱은 사용자가 정해져 있기 때문에 play store 에 등록할 수 없고, 링크를 통해서만 설치가 가능하다. 따라서 업데이트도 store를 통해서가 아니라 사용자가 앱을 실행시킬 때마다 앱의 버전이 최신화인지 확인한 후, 업데이트를 진행하게 된다. 네이티브 코드를 건드려야 하는데 다행히 해당 기능을 지원하는 라이브러리가 있어서 적용해보았다.
세팅이 조금 까다로운 부분이 있어서 여러모로 삽질을 조금 하였는데, 라이브러리 깃헙에 예제가 굉장히 잘 되어있어 많은 도움이 되었다.
하기는 only 안드로이드용 세팅만 포함하고 있다.
설치
npm install rn-update-apk --save의존하고 있는 react-native-fs 라이브러리도 함께 설치하고 link해준다.
npm i react-native-fs --savereact-native link react-native-fs세팅
Android Api24 이상부터는 파일을 다운받기 위해서 권한을 설정해주어야한다.
android/app/src/main/AndroidManifest.xml

    <!-- Define a FileProvider for API24+ -->
    <!-- note this is the authority name used by other modules like rn-fetch-blob, easy to have conflicts -->
    <provider
        android:name="androidx.core.content.FileProvider"
        android:authorities="${applicationId}.provider"
        android:exported="false"
        android:grantUriPermissions="true">
        <!-- you might need the tools:replace thing to workaround rn-fetch-blob or other definitions of provider -->
        <!-- just make sure if you "replace" here that you include all the paths you are replacing *plus* the cache path we use -->
      <meta-data
          android:name="android.support.FILE_PROVIDER_PATHS"
          android:resource="@xml/filepaths" />
    </provider>
    </application>
api25 이상인 경우에는 권한도 추가해주어야한다.
  <!-- use permission REQUEST_INSTALL_PACKAGES for target API25+ -->
  <uses-permission android:name="android.permission.REQUEST_INSTALL_PACKAGES"/>
상단 부분에도 tools를 설정해준다.
<manifest xmlns:android="http://schemas.android.com/apk/res/android"
  xmlns:tools="http://schemas.android.com/tools"  <---추가
  package="com.update_apk">
filepaths.xml 파일을 생성해서 file path를 지정해준다.
android/app/src/main/res/xml/filepaths.xml

<?xml version="1.0" encoding="utf-8"?>
<paths xmlns:android="http://schemas.android.com/apk/res/android">


  <!-- Select one of the following based on your apk location -->

  <!-- cache dir is always available and requires no permissions, but space may be limited -->
  <cache-path name="cache" path="/" />
  <!-- <files-path name="name" path="/" />  -->

  <!-- External cache dir is maybe user-friendly for downloaded APKs, but you must be careful. -->
  <!-- 1) in API <19 (KitKat) this requires WRITE_EXTERNAL_STORAGE permission. >=19, no permission -->
  <!-- 2) this directory may not be available, check Environment.isExternalStorageEmulated(file) to see -->
  <!-- 3) there may be no beneifit versus cache-path if external storage is emulated. Check Environment.isExternalStorageEmulated(File) to verify -->
  <!-- 4) the path will change for each app 'com.example' must be replaced by your application package -->
  <!-- <external-cache-path name="external-cache" path="/data/user/0/com.example/cache" /> -->

  <!-- Note that these external paths require WRITE_EXTERNAL_STORAGE permission -->
  <!-- <external-path name="some_external_path" path="put-your-specific-external-path-here" />  -->
  <!-- <external-files-path name="external-files" path="/data/user/0/com.example/cache" />  -->
  <!-- <external-media-path name="external-media" path="put-your-path-to-media-here" />  -->
</paths>
테스트를 위해서 필요한 것은 업데이트 되어야 할 최신버전의 앱 apk파일과 업데이트 설정을 해 줄수 있는 json데이터를 담고있는 링크이다.
앱이 실행될 때, 해당 링크에 접속하여 json파일을 확인하여 현재 실행중인 앱의 versionCode 와 비교하여 현재실행중인 versionCode < json 파일 상의 versionCode 인 경우 apkUrl에 올려져있는 apk파일을 내려받아 업데이트를 진행하게 된다.
나의 경우 라이브러리의 example과 동일하게 json파일과 apk파일 모두 깃헙에 올려서 테스트를 진행하였다.
forceUpdate는 강제설치 여부이다.
{
  "versionName":"2.0",
  "versionCode": "2",
  "apkUrl":"https://github.com/..(생략)",
  "forceUpdate": false
}
이후에는 코드를 작성해서 앱이 최초 실행될 때 업데이트 체크 후 업데이트를 진행하도록 하였다.
const App: () => React$Node = () => {
const [downloadProgress, setDownloadProgress] = useState(-1);
const [allApps, setAllApps] = useState([]);
const [allNonSystemApps, setAllNonSystemApps] = useState([]);
let updater = new UpdateAPK.UpdateAPK({
apkVersionUrl:
'https://raw.githubusercontent.com/jivyyy/update_apk/main/test-version.json?token=AOWNM5JUQYK4YCJOT373KCLBMUML6',
apkVersionOptions: {
method: 'GET',
headers: {},
},
//이 부분은 자기 패키지 명에 맞게 수정해야함
fileProviderAuthority: 'com.update_apk.provider',
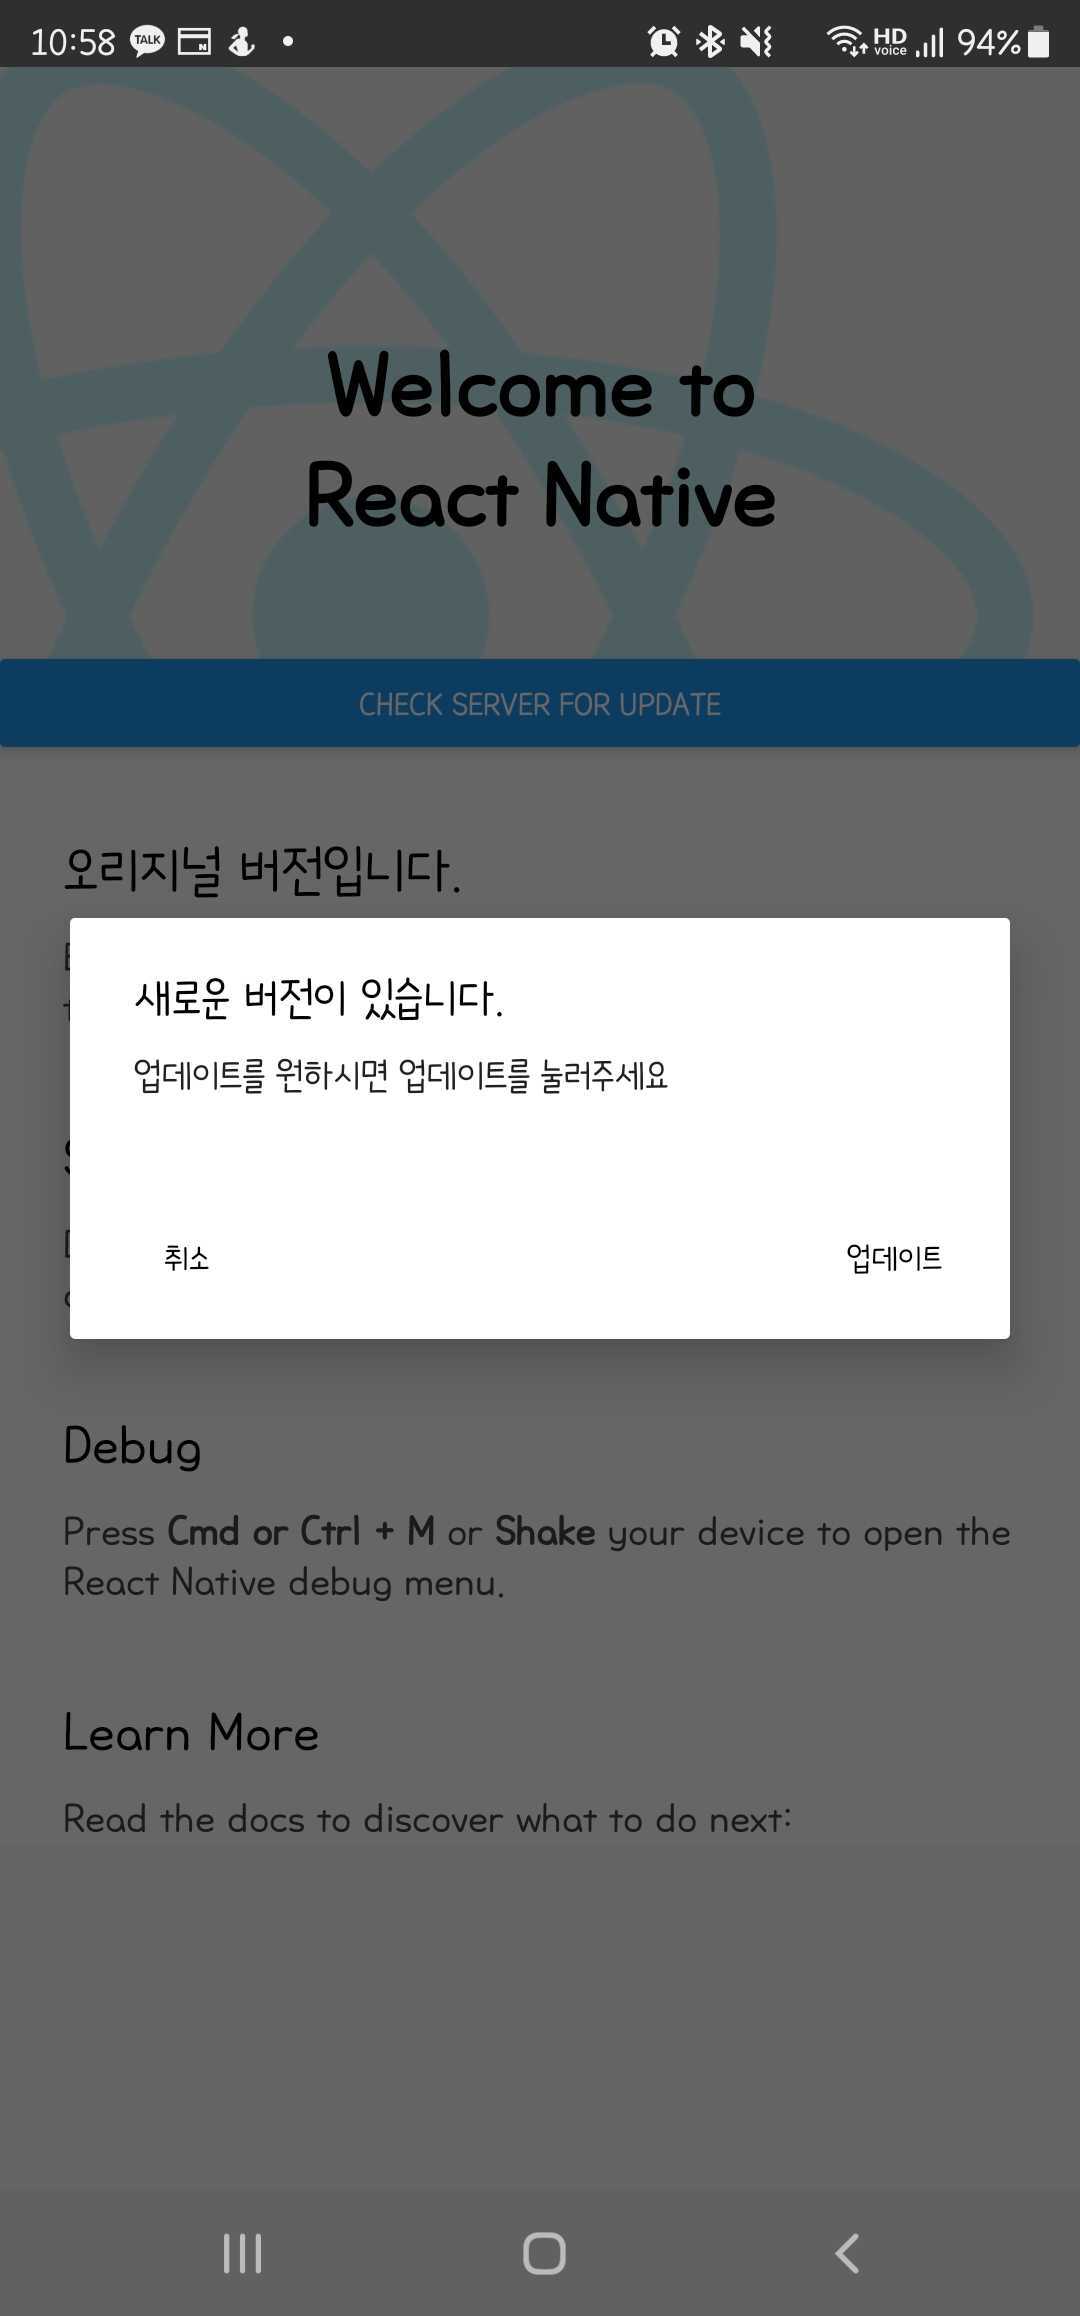
needUpdateApp: performUpdate => {
Alert.alert(
'새로운 버전이 있습니다.',
'업데이트를 원하시면 업데이트를 눌러주세요',
[
{text: '취소', onPress: () => {}},
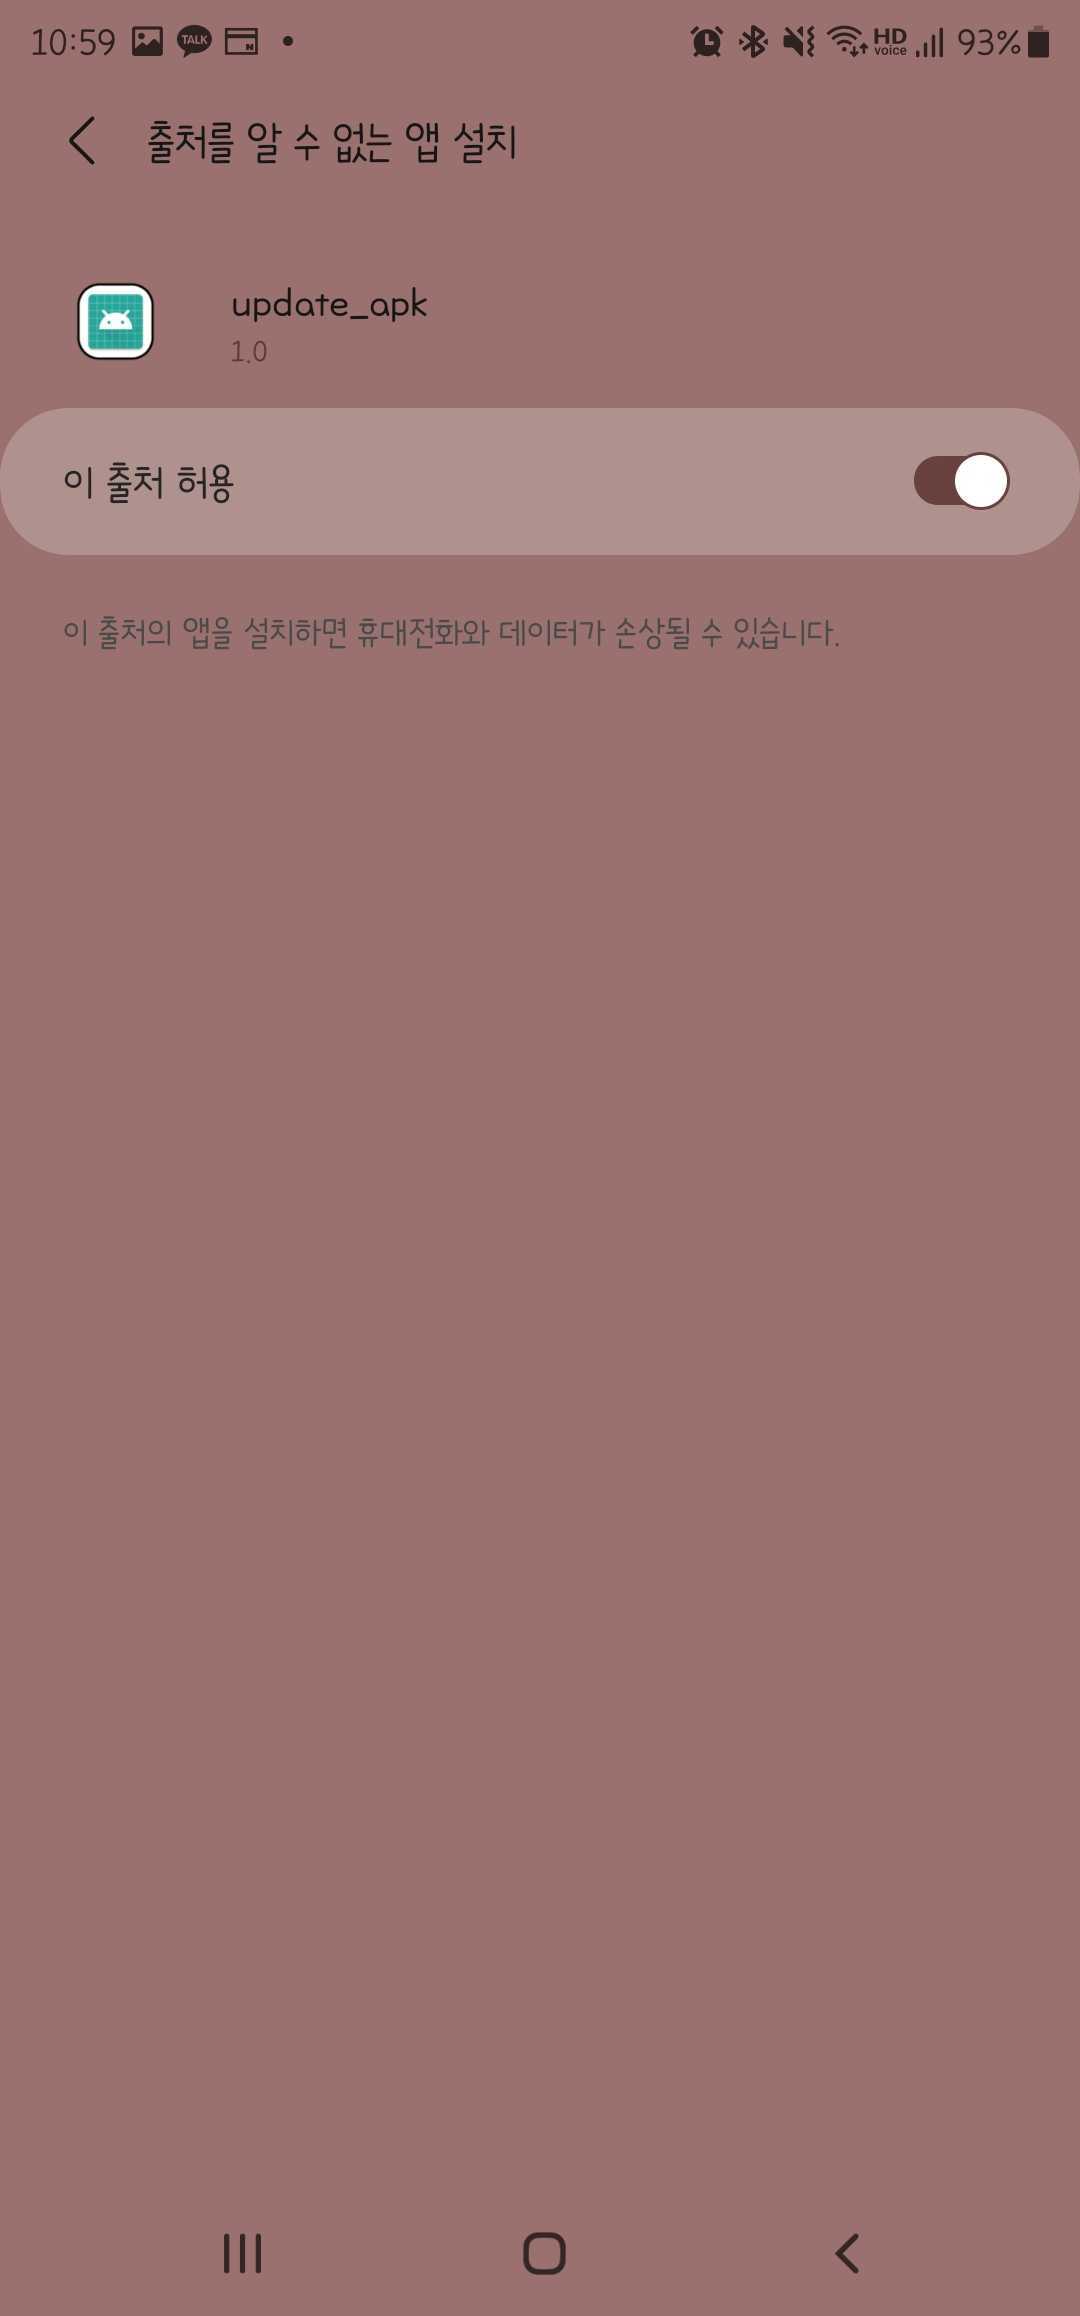
// Note, apps can be large. You may want to check if the network is metered (cellular data) to be nice.
// Note that the user will likely get a popup saying the device is set to block installs from uknown sources.
// ...you will need to guide them through that, maybe by explaining it here, before you call performUpdate(true);
{text: '업데이트', onPress: () => performUpdate(true)},
,
],
);
},
// This will be called before the download/update where you defined forceUpdate: true in the version JSON
forceUpdateApp: () => {
console.log('forceUpdateApp callback called');
},
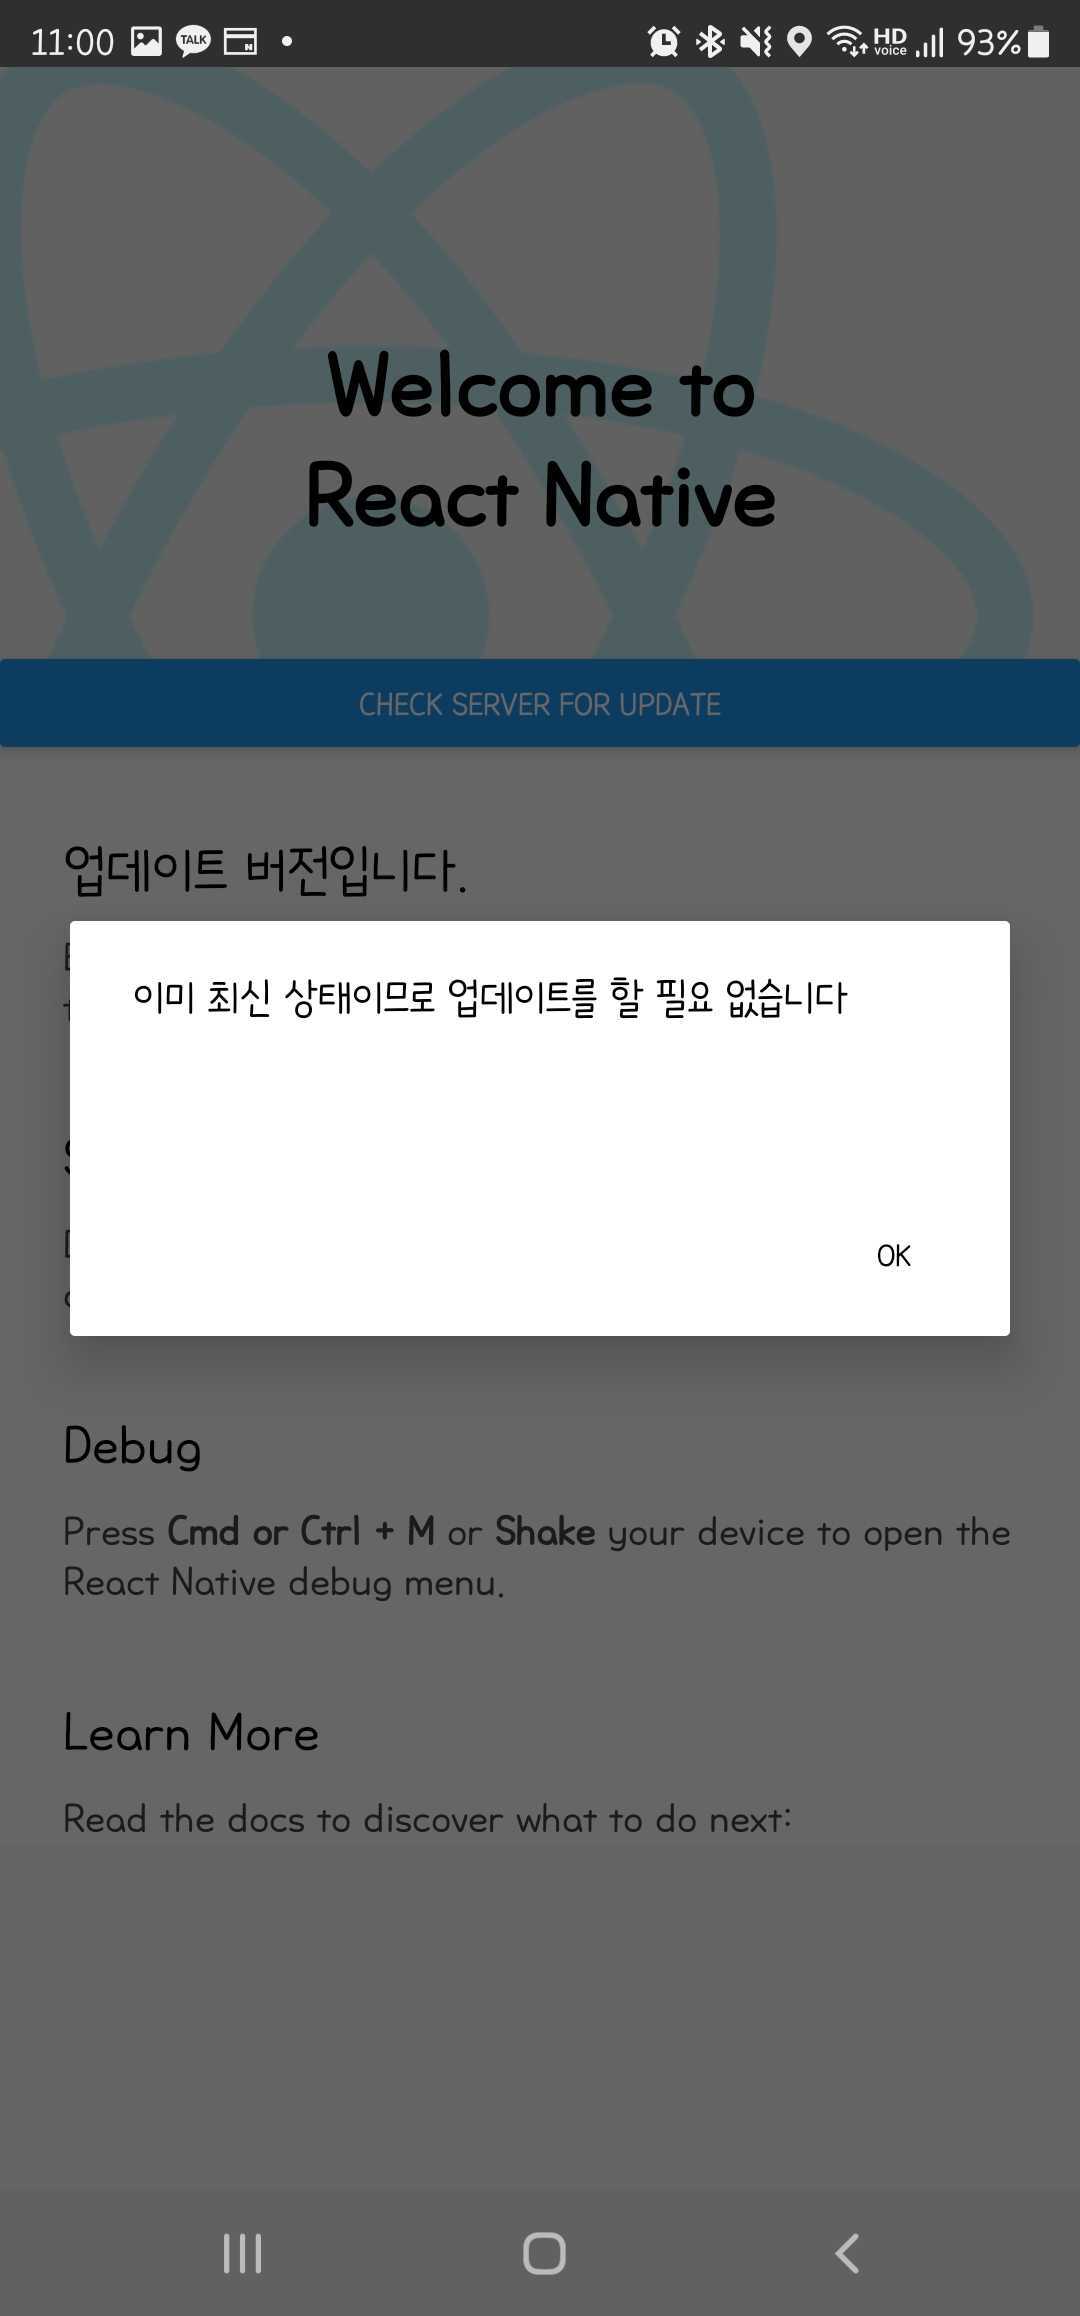
// Called if the current version appears to be the most recent available
notNeedUpdateApp: () => {
Alert.alert('이미 최신 상태이므로 업데이트를 할 필요 없습니다');
console.log('notNeedUpdateApp callback called');
},
// This is passed to react-native-fs as a callback
downloadApkStart: () => {
console.log('downloadApkStart callback called');
},
// Called with 0-99 for progress during the download
downloadApkProgress: progress => {
console.log(`downloadApkProgress callback called - ${progress}%...`);
// This is your opportunity to provide feedback to users on download progress
// If you hae a state variable it is trivial to update the UI
setDownloadProgress(progress);
},
// This is called prior to the update. If you throw it will abort the update
downloadApkEnd: () => {
// This could be an opportunity to check the APK signature thumbprints,
// If they mismatch your update will fail, the user will have to uninstall first.
// If you implement SHAsums on the file you could detect tampering here as well
// Finally for APK25+ you should check REQUEST_INSTALL_PACKAGES permission
// prior to the attempt at some point, and provide guidance about "unknown sources" etc
console.log('downloadApkEnd callback called');
},
// This is called if the fetch of the version or the APK fails, so should be generic
onError: err => {
console.log('onError callback called', err);
Alert.alert('There was an error', err.message);
},
});
const onCheckServerVersion = () => {
console.log('checking for update');
updater.checkUpdate();
};
useEffect(() => {
UpdateAPK.getApps()
.then(apps => {
console.log('Installed Apps: ', JSON.stringify(apps));
setAllApps(apps);
})
.catch(e => console.log('Unable to getApps?', e));
UpdateAPK.getNonSystemApps()
.then(apps => {
console.log('Installed Non-System Apps: ', JSON.stringify(apps));
setAllNonSystemApps(apps);
})
.catch(e => console.log('Unable to getNonSystemApps?', e));
onCheckServerVersion();
/* eslint-disable react-hooks/exhaustive-deps */
}, []);
fileProviderAuthority: 'com.update_apk.provider' -> 여기도 작업하는 패키지명으로 변경해 주어야 한다.
앱 versionCode & versionName 변경하기
versionCode와 versionName을 함께 변경해 주어야 다음 버전과 비교하고 업데이트를 진행할 수 있으므로 앱을 빌드할 때 이를 적용해준다.
android studio로도 가능하고, visual studio에서도 가능하다.
안드로이드스튜디오

visual studio
android/app/build.gradle 파일 내부에서 versionCode/versionName 변경

    defaultConfig {
        applicationId "com.update_apk"
        minSdkVersion rootProject.ext.minSdkVersion
        targetSdkVersion rootProject.ext.targetSdkVersion
        versionCode 1
        versionName "1.0"
    }
테스트 결과
추가 Issue
임시로 깃헙 링크로 테스트를 마친 후, 실제 사용하기 위해 백엔드쪽에서 json을 보내주는 url과 update된 apk를 받을 수 있는 링크를 전달받아서 작업을 하는데, 크롬에서 링크를 통해 apk를 다운받을때는 정상적이나 앱상에서는 다운로드 속도가 비정상적으로 느린것을 확인했다.(25mb 남짓한 파일을 내려받는데 5분 이상이 소요됨)
라이브러리 파일에서 콘솔을 찍어 확인해보니 아래와 같이 contentLength 가 정상적이지 않은 것을 확인했고, 서버쪽 담당자분께 이야기하니 응답을 줄 때 contentLength를 따로 설정해서 보내시지 않는다고 하셨다.
LOG data {“bytesWritten”: 7862, “contentLength”: -1, “jobId”: 1}다운로드 링크에서 content-Length를 함께 보내달라고 요청을 드린 후 byteWritten 으로 확인할 수 있듯 속도가 정상적으로 돌아온 것을 확인했다.
data {bytesWritten: 370966, contentLength: 24694890, jobId: 1}