Intro
이번 미션에서 typescript를 사용할 때 최대한 type assertion을 지양한다.는 목표를 가지고 임했다.
그 과정에서 다양한 방법의 타입 가드(type narrowing)를 사용했다.
타입 가드(type narrowing)가 무엇인지, 사용하지 않는다면 어떤 문제가 있는지, 타입을 좁히기 위한 어떤 방법들이 있는지 알아보자.
타입 가드
변수 또는 표현식의 타입 범위를 더 작은 범위를 좁혀나가는 것
타입스크립트에선 타입 들을 집합의 관점에서 표현하기도 한다.
대표적인 예시로 union 타입과 intersection 타입이 있다.
타겟이 폭넓은 타입(string, object 등)일 때, 조건문이나 특정 API를 사용하는데 어려움을 겪곤한다. (ex - DOM API)
말로만 들었을 때는 정확히 파악하긴 힘든거 같으니 예제를 통해 한번 살펴보자.
/*
Argument of type 'string | number' is not assignable to parameter of type 'number'.
Type 'string' is not assignable to type 'number'.
*/
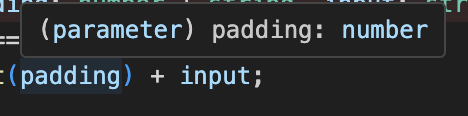
function padLeft(padding: number | string, input: string): string {
return " ".repeat(padding) + input;
}padLeft의 경우 input에 대해 padding 만큼의 공백을 왼쪽에 추가하는 함수이다.
매개 변수 타입 중 padding의 경우 number와 string의 union 타입인 것을 알 수 있다.
padLeft('ㅋㅋㅋㅋ', 'hi'); // 'hi'padding의 경우 number 뿐 아니라 string 타입으로도 들어올 수 있기 때문에 위와 같은 사항을 방지하기 위해 타입스크립트는 런타임 전에 검사하여 이러한 사항을 방지한다.
function padLeft(padding: number | string, input: string): string {
  return " ".repeat(padding as number) + input;
}
타입스크립트가 런타임 전 일으키는 에러를 방지하기 위해 우리는 type assertion(as)를 사용해 볼 수도 있다.
padLeft('ㅋㅋㅋㅋ', 'hi'); // 'hi'하지만 이 경우 타입을 강제로 설정하는 것이기 때문에 사실상 타입스크립트를 사용하지 않는 것과 동일한 결론을 맞이 할 수 있다.
이 때, 타입 가드를 통해 타입을 좁힘으로써 더 정확한 타입으로 추론하여 이러한 사항을 방지할 수 있다.
타입 가드를 위한 다양한 방법들에 대해 한번 살펴보자.
typeof
typeof의 경우 자바스크립트에서 제공하는 연산자다.
우선 위의 예시를 해결하기 위한 방법에 대해 살펴보자.
function padLeft(padding: number | string, input: string): string {
  if(typeof padding === 'number') {
  	return " ".repeat(padding) + input;
  } else {
    // 다른 처리
  }
}
padLeft를 다시 살펴보면 typeof 연산자를 통해 반환된 값이 number 라면 padding의 경우 number 타입으로 추론된다.
이처럼, 타입스크립트는 자바스크립트의 typeof 연산자를 이해할 수 있다.
즉, 조건문에 typeof 연산자를 사용하면, 해당 조건문 블록 내에서는 해당 변수의 타입이 다르다는 것(=좁혀진 범위의 타입)을 이해하여 타입을 좁혀주는 형태다.
typeof의 여러 case 들은 [mdn] - typeof 에서 확인해볼 수 있다.
instanceof
instanceof는 자바스크립트의 연산자로 흔히 a instanceof b의 형태로 a가 b의 prototype chain에 속하는지 확인한다.
이번 미션에서 사용했던 코드를 예시로 들어보자.

이 코드는 changeTab이라는 custom event가 발생하면, Tab 컴포넌트의 현재 tab state를 update 하는 함수인 것을 확인할 수 있다.
하지만, 현재 event의 타입이 Event이기 때문에 CustomEvent에 있는 detail에 접근할 수 없는 것을 알 수 있다.
이 경우 instanceof를 통해 리팩터링 해볼 수 있다.
private handleChangeTabStatus(event: Event) {
  if (!(event instanceof CustomEvent)) return;

  this.tabStatus = event.detail;

  this.connectedCallback();
}
변경된 함수를 살펴보면 event가 CustomEvent가 아니면 early return 하는 것을 알 수 있다.
이 경우 타입스크립트가 인지하여 타입을 좁혀주기 때문에 다음과 같이 event의 타입이 CustomEvent로 좁혀진 것을 알 수 있다.
in
in 연산자도 마찬가지로 자바스크립트의 연산자이며, a in b의 형태로 b 객체 내 a 속성이 있는지 확인할 수 있다.
간단한 예시를 한번 살펴보자.
interface A {
  x: number;
}
interface B {
  y: string;
}

function doStuff(q: A | B) {
  if ('x' in q) {
  // q: A
  }
  else {
  // q: B
  }
}
doStuff 함수는 A or B 타입인 q를 매개변수로 받는다.
이 때, x 속성이 q에 존재한다면 타입스크립트는 B 인터페이스에 x 속성이 없다는 걸 파악하여 q가 A 타입임을 추론하게 된다.
반대로 존재하지 않는다면 타입스크립트는 A 인터페이스에서 x 속성이 존재하기 때문에 제외시킨 후 x 속성이 없는 B 인터페이스로 추론하게 된다.
literal
literal type을 통해 타입을 추론하는 것 또한 가능하다.
===, ==, !==, !=의 형태로 나누어 추론할 수 있다.
간단한 예시를 확인해보자.
type TriState = "yes" | "no" | "unknown";

function logOutState(state: TriState) {
  if (state == "yes") {
    console.log(state, "사용자가 yes를 골랐습니다");
  } else if (state == "no") {
    console.log(state, "사용자가 no를 골랐습니다");
  } else {
    console.log(state, "사용자가 아직 결정을 내리지 않았습니다.");
  }
}
TriState는 yes, no, unknown 3가지의 literal type을 가지는 union 타입이다.
이는 logOutState 함수에서 마치 switch - case의 형태로 활용해볼 수 있다.
state가 yes라면 state는 yes 리터럴 타입으로 좁혀지며 no도 동일하다.
이 2가지 케이스 모두 아니라면 남은 타입인 unknown으로 좁혀지게 된다.
literal 타입을 통한 타입 가드는 흔히 태그드 유니온의 형태로 표현하기도 한다.
// ...

interface Layer {
  type : 'fill' | 'line' | 'point';
  layout: FillLayout | LineLayout | PointLayout
  paint: FillPaint | LinePaint | PointPaint
}Layer는 벡터를 그리는 프로그램 내 기하학적 타입을 가지는 계층의 인터페이스이다.
현재의 Layer에서 layout이 LineLayout이면서, paint가 FillPaint 타입의 조합을 가지도록 허용할 경우 라이브러리 에서는 오류가 발생할 수 있고, 인터페이스를 다루기도 어려울 것이다.
interface FillLayer {
  type : 'fill'
  layout: FillLayout
  paint: FillPaint
}
interface LineLayer {
  type : 'line'
  layout: LineLayout
  paint: LinePaint
}
interface PointLayer {
  type : 'point'
  layout: PointLayout
  paint: PointPaint
}

type Layer = FillLayer | LineLayer | PointLayer
이렇게 각 Layer에 대해 type, layout, paint 타입을 설정 후 이 Layer 타입들을 유니온 타입으로 만들면 잘못된 조합을 만들지 않아도 되어 더 type-safe 하게 모델링이 가능하다.
function drawLayer(layer: Layer) {
  if (layer.type === 'fill') {
    const { paint } = layer // Type is FillPaint
    const { layout } = layer // Type is FillLayout
  } else if (layer.type === 'line') {
    const { paint } = layer // Type is LinePaint
    const { layout } = layer // Type is LineLayout
  } else {
    const { paint } = layer // Type is PointPaint
    const { layout } = layer // Type is PointLayout
  }
}
타입을 태그드 유니온으로 만들면 다음과 같이 layer의 type 속성에 따라 type narrowing이 가능하여 type-safe한 함수를 설계할 수 있다는 장점이 있다.
null & undefined
타입스크립트는 nullable 한 타입들도 쉽게 타입을 좁힐 수 있다.
간단한 예시를 함께 살펴보자.
function foo(a?: number) {
  console.log(a);
}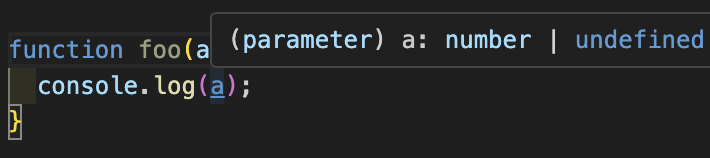
foo는 현재 매개변수인 a를 optional 하게 받아온다.
즉, a는 number | undefined인 상태이다.
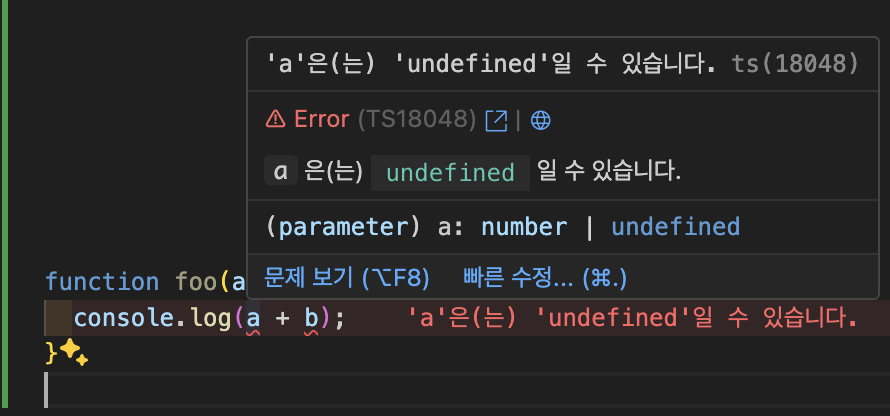
만약 연산을 하려고 할 경우 타입스크립트가 의도하지 않은 연산으로 판단해서 에러를 뱉어내게 된다.


typeof와 truthy한 값으로 추론하는 방법 모두 타입을 잘 좁혀주는 것을 확인할 수 있다.
하지만 현재는 a, b 모두 number or undefined 타입이기 때문에 nullable한 타입만 제외시켜주면 쉽게 number 타입 추론이 가능해지는 것 또한 확인할 수 있다.
상황에 맞게 유동적으로 사용해보면 좋을거 같다.
type predicate function
객체에 특정 속성 또는 속성 집합이 있는지 확인하는 타입 어설션을 위한 함수
이 함수의 경우 주로 사용자 정의 타입으로 명확히 추론하기 위해 사용되곤 한다.
예시를 통해 한번 살펴보자.
private createFormDataToRestaurantDetail() {
  const formElement = $(ELEMENT_SELECTOR.restaurantAddForm);

  if (formElement instanceof HTMLFormElement) {
    const formData = new FormData(formElement);

    const userInputValues: Record<string, FormDataEntryValue> = {};

    for (const [key, value] of formData.entries()) {
      userInputValues[key] = value;
    }

    return { ...userInputValues, isFavorite: false };
  }
}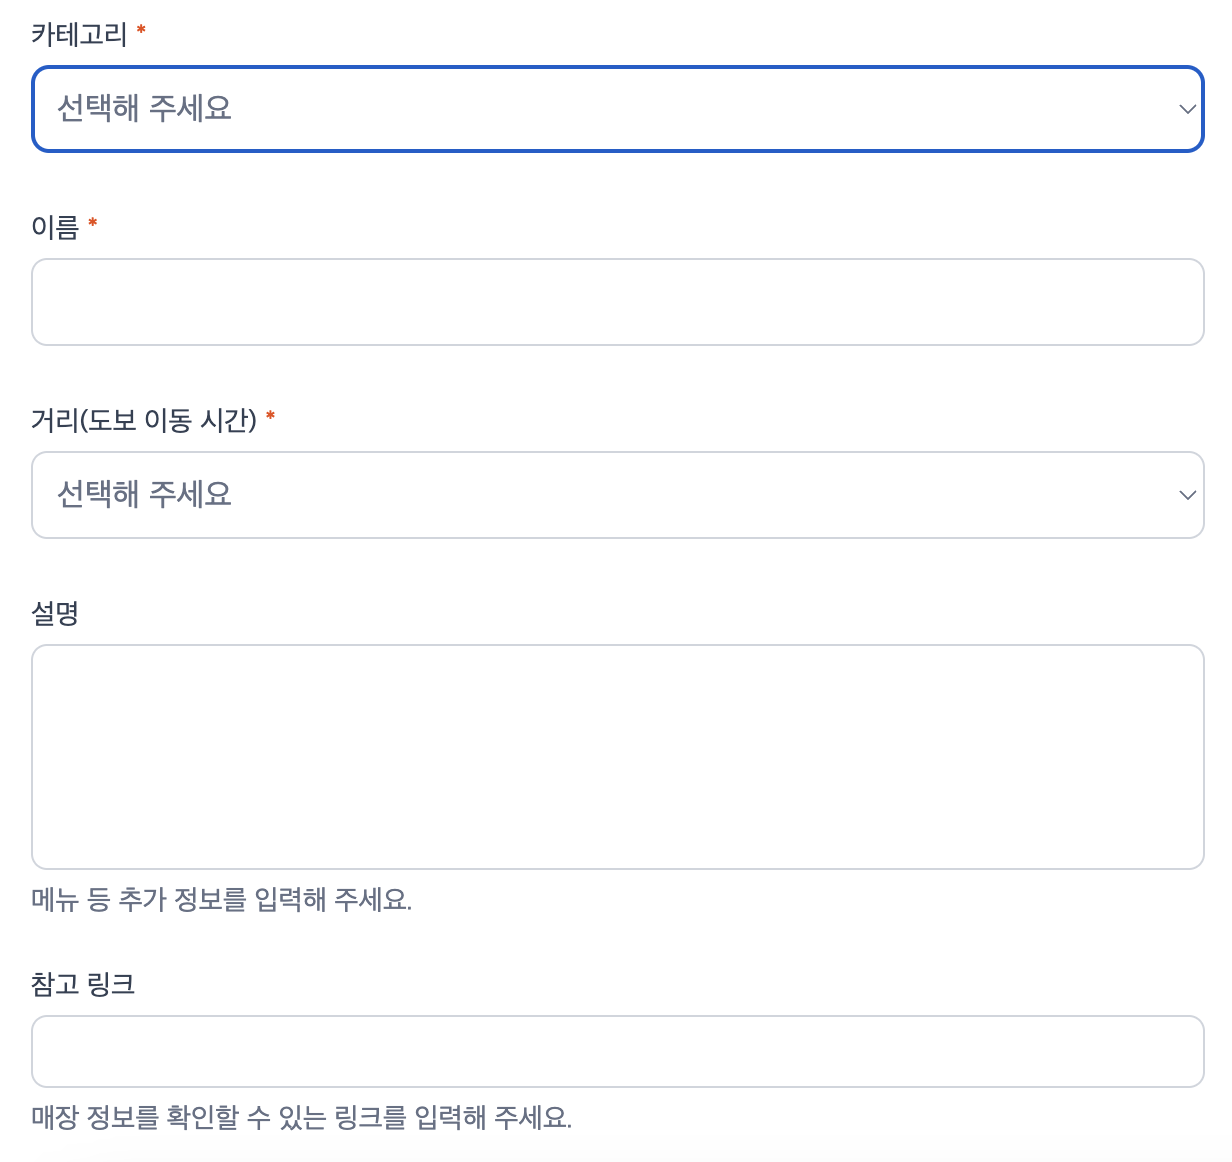
이 함수는 form을 submit 했을 때 입력했던 formData 들을 userInputValues 객체에 채운 후 isFavorite 항목을 추가하여 반환하고 있다.
export interface RestaurantDetail {
  category: MenuCategoryWithoutAll;
  name: string;
  distance: Distance;
  description?: string;
  url?: string;
  isFavorite: boolean;
}
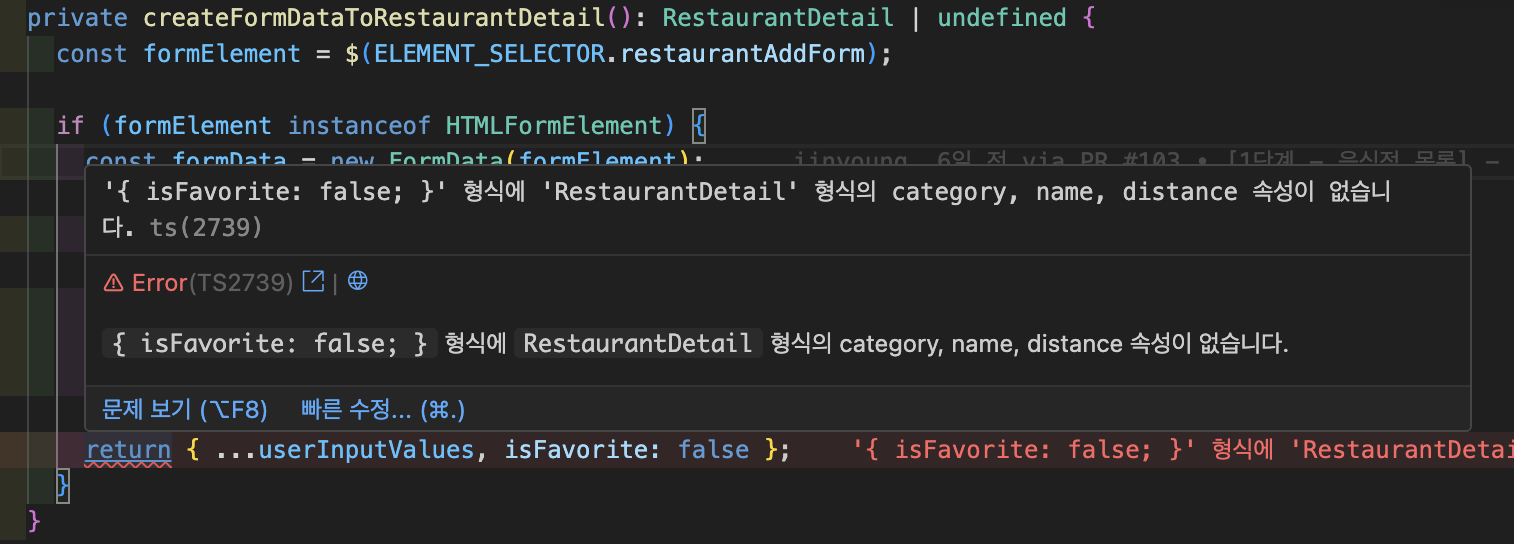

원래라면 RestaurantDetail 타입으로 추론 되어야 하지만 createFormDataToResturantDetail의 반환 타입이 예상과 다르게 {isFavorite : boolean} | undefined로 추론되고 있는 것을 알 수 있다.
이 때, type predicate function을 통해 RestaurantDetail 타입으로 추론할 수 있다.
is
기본적으로 타입스크립트에서 type predicate function을 만들 때 사용하는 키워드이다.
export const isUserInputValues = (
  userInputValues: object
): userInputValues is RestaurantDetail => {
  return Object.keys(userInputValues).every((key) =>
    ["category", "name", "distance", "description", "url"].includes(key)
  );
};
다음과 같이 리턴 타입에 a is b의 형태로 사용하며, 반환되는 값이 true라면 userInputValues는 RestaurantDetail 타입으로 타입스크립트가 추론하게된다.
private createFormDataToRestaurantDetail() {
  const formElement = $(ELEMENT_SELECTOR.restaurantAddForm);

  if (formElement instanceof HTMLFormElement) {
    const formData = new FormData(formElement);

    const userInputValues: Record<string, FormDataEntryValue> = {};

    for (const [key, value] of formData.entries()) {
      userInputValues[key] = value;
    }

    if (isUserInputValues(userInputValues))
      return { ...userInputValues, isFavorite: false };
  }

  throw new Error("잘못 입력하셨습니다. 다시 입력해주세요.");
}
이렇게 type predicate function을 통해 사용자 정의 타입으로 쉽게 추론할 수 있다.
주의 할 점은 true일 때 타입을 자유롭게 지정이 가능하기 때문에, 위와 같이 잘못된 추론이 발생할 수 있다.
즉, true가 되는 대상을 명확히 해야 이 함수가 빛을 발할 수 있다.
Exhaustiveness checking
타입스크립트에서 유니온 타입이나 태그드 유니온을 사용할 때, 모든 가능한 case 들을 처리했는지 확인하는 방법
아래와 같은 상황을 가정해보자.
type ProductPrice = "10000" | "20000" | "5000";

const getProductName = (productPrice: ProductPrice): string => {
  if (productPrice === "10000") return "상품권 1만원";
  if (productPrice === "20000") return "상품권 2만원";
  // if (productPrice === "5000") return "상품권 5천원";

  return "상품권";
};

getProductName('5000') // 상품권
만약, 실수로 productPrice가 5000임을 체킹하지 못했을 때, getProductName에 5000을 넣어 호출하면 기대했던 상품권 5천원이 아닌 상품권을 반환하게 된다.
개발자가 실수임을 인지하고 수정해서 다시 반영한다 하더라도 언제든 이런 문제가 다시 발생할 수도 있다.
이 때, Exhaustiveness checking이 빛을 발하게 된다.
const getProductName = (productPrice: ProductPrice): string => {
  if (productPrice === "10000") return "상품권 1만원";
  if (productPrice === "20000") return "상품권 2만원";
  // if (productPrice === "5000") return "상품권 5천원";

  exhaustiveCheck(productPrice)

  return "상품권";
};

const exhaustiveCheck = (param: never) => {
  throw new Error("type error!");
};
exhaustiveCheck 함수는 인자를 never로 받는데, never 타입은 타입스크립트에서 에러 타입 이외 잘 쓰이지 않기 때문에 왜 사용하는지 의문이 들수도 있다.
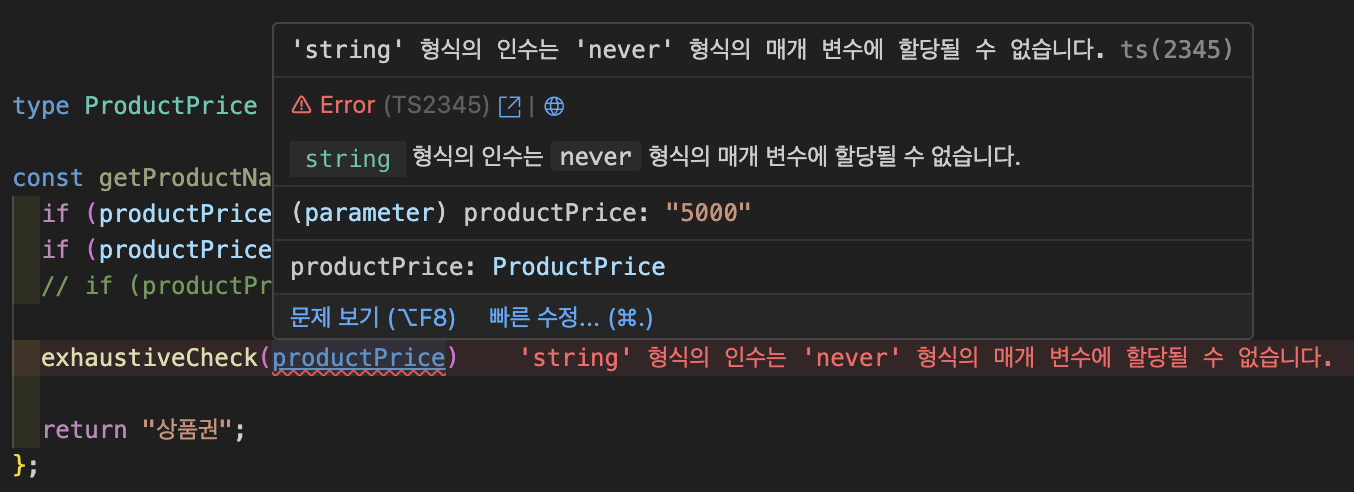
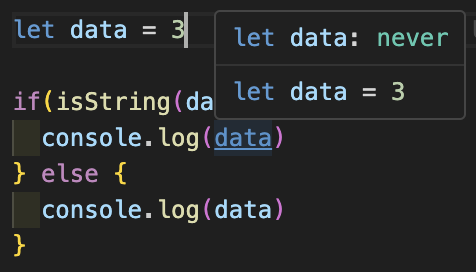
다음과 같이 남은 경우의 수(5000)이 존재하여 productPrice가 string 타입이라면, exhaustiveCheck의 매개변수 타입은 never이기 때문에, 에러 타입과 never 이외 어떠한 타입도 받을 수 없어 컴파일 에러가 발생하게 된다.
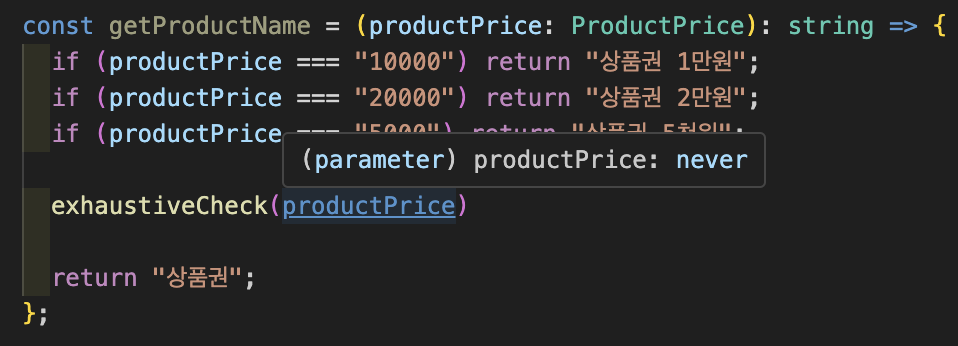
하지만, 모든 케이스에 대응한다면 productPrice은 never 타입으로 추론되기 때문에 컴파일 에러가 발생하지 않는다.
또한, early return 되고 있기 때문에, 해당 라인의 코드가 실행될 일은 존재하지 않는다.
이처럼 Exhaustiveness checking는 human error를 최소화 시킬 수 있으며, 주로 switch - case나 if 문으로 여러 가지 case 들을 처리 할 때 활용한다.
레퍼런스