들어가기
login, register부분의 front부분을 알아본다.
front부분은 redux를 사용하기 떄문에,
어려울 수 있는데, 이번 로직으로 확실히 배워보자.
0. redux setting.
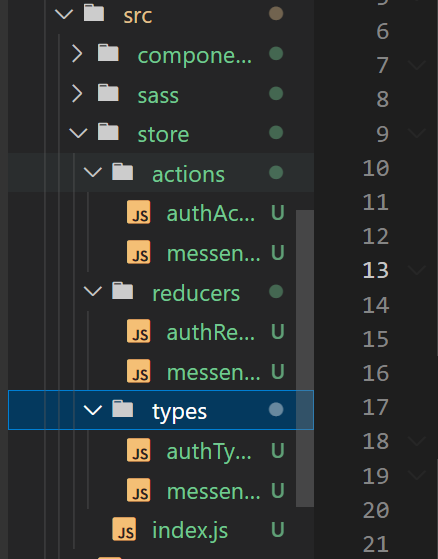
-client부분의 src폴더 안에 store를 만든다.
-store안에 actions, reducers, types 폴더와 index.js파일을 만든다.
1. index.js
import { createStore, compose, combineReducers, applyMiddleware } from 'redux'
import thunkMiddleware from 'redux-thunk'
import { authReducer } from './reducers/authReducer'
import { messengerReducer } from './reducers/messengerReducer'

const rootReducer = combineReducers({
  auth: authReducer,
  messenger: messengerReducer,
})
///새로운 reducer를 만들때마다, rootReducer에
///넣어줌.

const middleware = [thunkMiddleware]

const store = createStore(
  rootReducer,
  compose(
    applyMiddleware(...middleware),
    window.__REDUX_DEVTOOLS_EXTENSION__ && window.__REDUX_DEVTOOLS_EXTENSION__()
  )
)
///최종적으로 store를 만들어서 store에
///rootReducer, applyMiddleware, REDUX_DEV_TOOLS를
///넣어줌.
///App.js에서 store를 import할 예정.
///import 되는 부분은 package.json을 참조한다.

export default store
기본작인 redux의 index.js 세팅임.
크롬 브라우저에서 REDUX_DEVTOOLS_EXTENSION을 검색에서
브라우저에 설치해줌.
2. package.json / index.js(root)
///package.json
  "dependencies": {
    "@testing-library/jest-dom": "^5.16.5",
    "@testing-library/react": "^13.4.0",
    "@testing-library/user-event": "^13.5.0",
    "axios": "^1.2.1",
    "icons": "^1.0.0",
    "jwt-decode": "^3.1.2",
    "moment": "^2.29.4",
    "node-sass": "^7.0.3",
    "react": "^18.2.0",
    "react-alert": "^7.0.3",
    "react-alert-template-basic": "^1.0.2",
    "react-dom": "^18.2.0",
    "react-hot-toast": "^2.4.0",
    "react-icons": "^4.7.1",
    "react-redux": "^8.0.5",
    "react-router-dom": "^6.4.5",
    "react-scripts": "5.0.1",
    "redux": "^4.1.2",
    "redux-thunk": "^2.4.2",
    "socket.io-client": "^4.5.4",
    "web-vitals": "^2.1.4"
  },


 ///index.js
import React from 'react'
import ReactDOM from 'react-dom/client'
import './index.css'
import App from './App'
import reportWebVitals from './reportWebVitals'
import './main.scss'
import { Provider } from 'react-redux'
import store from './store/index.js'

import { positions, transitions, Provider as AlertProvider } from 'react-alert'
import alertTemplate from 'react-alert-template-basic'

const options = {
  timeout: 5000,
  positions: positions.BOTTOM_CENTER,
  transitions: transitions.SCALE,
}

const root = ReactDOM.createRoot(document.getElementById('root'))
root.render(
  <Provider store={store}>
  ///여기서 store를 import한다.
    <AlertProvider template={alertTemplate} {...options}>
      <App />
    </AlertProvider>
  </Provider>
)

// If you want to start measuring performance in your app, pass a function
// to log results (for example: reportWebVitals(console.log))
// or send to an analytics endpoint. Learn more: https://bit.ly/CRA-vitals
reportWebVitals()
3. types/authType.js, messengerType.js
///authType.js
export const REGISTER_FAIL = 'REGISTER_FAIL'
export const REGISTER_SUCCESS = 'REGISTER_SUCCESS'
export const SUCCESS_MESSAGE_CLEAR = 'SUCCESS_MESSAGE_CLEAR'
export const ERROR_CLEAR = 'ERROR_CLEAR'
export const USER_LOGIN_SUCCESS = 'USER_LOGIN_SUCCESS'
export const USER_LOGIN_FAIL = 'USER_LOGIN_FAIL'

///messengerType.js
export const FRIEND_GET_SUCCESS = 'FRIEND_GET_SUCCESS'

///action, reducer 및 component에서 사용하고 만들
///aciotn 및 reducer의 type을 미리 만들어 놓는다.
4. store/actios/authAction.js
import axios from 'axios'
import {
  REGISTER_FAIL,
  REGISTER_SUCCESS,
  USER_LOGIN_SUCCESS,
  USER_LOGIN_FAIL,
} from '../types/authType'

///userRegister action.
///기본형태는 component Page에서 data를 받아서
///함수가 실행되는 구조
///return 부분에 async(dispatch)부분을 집중해서 봐둘것.

export const userRegister = (data) => {
  return async (dispatch) => {
    const config = {
      headers: {
        'Content-Type': 'multipart/form-data',
      },
    }
    ///server로 userInfo를 보내기 위해서 config에
    ///header를 설정한다.
    ///page에서 fomrData로 만들었기 떄문에,
    ///'multipart/form-data'로 설정한다.

    try {
      const response = await axios.post(
        '/api/messenger/user-register',
        data,
        config
      )
      ///userRegister action은 server의
      ///'/api/messgenger/user-register'로
      /// data와 config를 넣어서 axios로 날려준다.

      localStorage.setItem('chatToken', response.data.token)
      ///server에서 받은 token을 localStorage에
      ///'chatToken'이란 이름으로 저장해준다.

      dispatch({
        type: REGISTER_SUCCESS,
        payload: {
          successMessage: response.data.successMessage,
          token: response.data.token,
        },
      })
      ///마지막으로 dispatch로 type을 넣어주고,
      ///payload에는 successMessage와 token을 넣어준다.

    } catch (error) {
      dispatch({
        type: REGISTER_FAIL,
        payload: {
          error: error.response.data.error.errorMessage,
        },
      })
      ///try가 실패한경우 type이랑, payload를 담아준다.
    }
  }
}

///userLogin action임,
export const userLogin = (data) => {
///먼저 front에서 보내주는 data를 data오 받는다.
  return async (dispatch) => {
    const config = {
      headers: {
        'Content-Type': 'application/json',
      },
    }
    ///config에 headers를 설정해 준다.
    try {
      const response = await axios.post(
        '/api/messenger/user-login',
        data,
        config
      )
      ///register와 마찬가지로, server에 req를 보내고,
      ///보낼때, front에서 받은 data와 config를 넣어준다.

      localStorage.setItem('chatToken', response.data.token)
      ///localStorage에 token을 담아준다.

      dispatch({
        type: USER_LOGIN_SUCCESS,
        payload: {
          successMessage: response.data.successMessage,
          token: response.data.token,
        },
      })
      ///가장 중요한 부분.
      ///dispatch해서 type과 payload를 만들어 준다.
      ///payload에는 successMessage와 token을 담아준다.

    } catch (error) {
      dispatch({
        type: USER_LOGIN_FAIL,
        payload: {
          error: error.response.data.error.errorMessage,
        },
      })
      ///try에 error 발생시, type과 payload를 설정해준다.

    }
  }
}
5. store/reducers/authReducer.js
import {
  ERROR_CLEAR,
  REGISTER_FAIL,
  REGISTER_SUCCESS,
  SUCCESS_MESSAGE_CLEAR,
  USER_LOGIN_FAIL,
  USER_LOGIN_SUCCESS,
} from '../types/authType'
///action과 마찬가지로 type을 모두 불러준다.

import deCodeToken from 'jwt-decode'
///token을 decode하기 위해서 jwt-decode를 불러준다.

const authState = {
  loading: true,
  authenticate: false,
  error: '',
  successMessage: '',
  myInfo: '',
}
///authState를 만들고 내용은 위와 같이 만들어준다.
///action에서 받는 payload임.

const tokenDecode = (token) => {
  const tokenDecoded = deCodeToken(token)
  const expTime = new Date(tokenDecoded.exp * 1000)
  if (new Date() > expTime) {
    return null
  }
  return tokenDecoded
}
///tokenDecode를 만들어서 server에서 받은 token을
///decode한다.
///token이 현재 시간보다 지난 시간이면 return null을 한다.

const getToken = localStorage.getItem('chatToken')
if (getToken) {
  const getInfo = deCodeToken(getToken)
  if (getInfo) {
    authState.myInfo = getInfo
    authState.authenticate = true
    authState.loading = false
  }
}
///localStorage의 token을 get해서 decode한 다음,
///위에서 만든 authState에 값을 담아준다.
///즉, state의 초기상태를 만들어준다.

export const authReducer = (state = authState, action) =>
///첫번쨰 argu는 state(즉, 초기 state)두번쨰 argu는 action
{
  const { payload, type } = action
  ///action에서 보내주는 payload와 type을 받는다.

  if (type === REGISTER_FAIL || type === USER_LOGIN_FAIL) {
    return {
      ...state,
      error: payload.error,
      authenticate: false,
      myInfo: '',
      loading: true,
    }
  }
  ///type이 REGISTER_FAIL, LOGIN_FAIL일 경우,
  ///아래와 같이 state에 입력되게 한다.
  ///type로 action와 reducer가 connect됨.

  if (type === REGISTER_SUCCESS || type === USER_LOGIN_SUCCESS) {
    const myInfo = tokenDecode(payload.token)
    return {
      ...state,
      myInfo: myInfo,
      successMessage: payload.successMessage,
      error: '',
      authenticate: true,
      loading: false,
    }
  }
  ///type이 REGISTER_SUCCESS, LOGIN_SUCCESS일 경우,
  ///위와 같이 return해 준다.
  ///reducer는 state를 관리, action은 함수를 관리.

  ///아래부분은 message관련 부분이므로, 추후 정리할 예정.
  ///이제 page(components)에서 action이랑 연결시켜본다.

  if (type === SUCCESS_MESSAGE_CLEAR) {
    return {
      ...state,
      successMessage: '',
    }
  }
  if (type === ERROR_CLEAR) {
    return {
      ...state,
      error: '',
    }
  }

  return state
}
6. src/components/register.jsx
onChange, onSubmit, dispatch부분을 다 다루어본다.
import React, { useState, useEffect } from 'react'
import { Link, useNavigate } from 'react-router-dom'
import { useDispatch, useSelector } from 'react-redux'
import { userRegister } from '../store/actions/authAction'
import { useAlert } from 'react-alert'
import { ERROR_CLEAR, SUCCESS_MESSAGE_CLEAR } from '../store/types/authType'

const Register = () => {
  const alert = useAlert()
  const navigate = useNavigate()

  const { loading, authenticate, error, successMessage, myInfo } = useSelector(
    (state) => state.auth
  )
  ///매우중요!!
  ///useSelector를 이용해서 authReducer에 담긴 state를
  ///불러온다.
  ///store/index.js에 rootReducer에
  /// auth:authReducer로 rename해 놓았음.
  ///state를 전역에서 useSelector를 이용해서 불러들일 수 있음

  const dispatch = useDispatch()
  ///dispatch 사용을 위해서 useDispatch를 불러들임

  const [state, setState] = useState({
    userName: '',
    email: '',
    password: '',
    confirmPassword: '',
    image: '',
  })
///useState로 값을 만들어 놓음

  const [loadImage, setLoadImage] = useState('')
  ///click한 이미지를 화면에 바로 띄우기 위해서 만듬

  const inputHandle = (e) => {
    setState({
      ...state,
      [e.target.name]: e.target.value, ///html의 name과 연결
    })
  }
  ///위에서 만든 state에 html에서 write되는 값들이 담기게 함.
  ///text(json)부분만ㅁ 다룸

  const fileHandle = (e) => {
    if (e.target.files.length !== 0) {
      setState({
        ...state,
        [e.target.name]: e.target.files[0],
      })
    }
    const reader = new FileReader()
    reader.onload = () => {
      setLoadImage(reader.result)
    }
    reader.readAsDataURL(e.target.files[0])
  }
  ///html에서 select한 file을 State에 담아주고,
  /// fileReader를 이용해서 loadImage에 담아서,
  /// 화면에 바로 뿌려줌.

  const register = (e) => {
    const { userName, email, password, confirmPassword, image } = state
    ///state에 담긴 값들을 불러들임

    e.preventDefault()
    ///새로고침 되는부분 막음.

    const formData = new FormData()
    ///formData를 만들어서 html에서 입력되는 state를
    ///다 받음.

    formData.append('image', image)
    formData.append('userName', userName)
    formData.append('email', email)
    formData.append('password', password)
    formData.append('confirmPassword', confirmPassword)

    dispatch(userRegister(formData))
  }
  ///actions의 userRegister를 불러들여서 data로
  ///formData를 넘겨줌.


  useEffect(() => {
    if (error) {
      error.map((err) => alert.error(err))
      dispatch({ type: ERROR_CLEAR })
      return
    }
    ///error가 있을 경우, reducer의 ERROR_CLEAR를
    ///dispatch함.

    if (authenticate) {
      navigate('/')
    }
    ///authenticate가 true이면 바로 home path로 넘어감.

    if (successMessage) {
      alert.success(successMessage)
      dispatch({ type: SUCCESS_MESSAGE_CLEAR })
    }
  }, [successMessage, error])
	///sueeceeMessage가 있으면, reducer의
    ///SUCCESS_MESSAGE_CLEAR를 dispatch함.

  return (
    <div className="register">
      <div className="card">
        <div className="card-header">
          <h3>Register</h3>
        </div>

        <div className="card-body">
          <form onSubmit={register}>
          ///register 함수 불러줌.
            <div className="form-group">
              <label htmlFor="username">User Name</label>
              <input
                type="text"
                className="form-control"
                placeholder="User Name"
                id="username"
                onChange={inputHandle}
                name="userName"
                value={state.userName}
              />
              ///name과 value를 설정해주고,
              ///value는 state.userName으로 설정해줌.
              ///onChange는 위에서 만든 inputHandle로 설정
              ///id는 label의 htmlFor과 connect된다.
            </div>

            <div className="form-group">
              <label htmlFor="email">Email</label>
              <input
                type="email"
                className="form-control"
                placeholder="Email"
                id="email"
                onChange={inputHandle}
                name="email"
                value={state.email}
              />
               ///name과 value를 설정해주고,
              ///value는 state.email 설정해줌.
              ///onChange는 위에서 만든 inputHandle로 설정
              ///id는 label의 htmlFor과 connect된다.
            </div>

            <div className="form-group">
              <label htmlFor="password">Password</label>
              <input
                type="password"
                className="form-control"
                placeholder="Password"
                id="password"
                onChange={inputHandle}
                name="password"
                value={state.password}
              />
            </div>

            <div className="form-group">
              <label htmlFor="confirmPassword">Confirm Password</label>
              <input
                type="password"
                className="form-control"
                placeholder="Confirm Password"
                id="confirmPassword"
                onChange={inputHandle}
                name="confirmPassword"
                value={state.confirmPassword}
              />
            </div>

            <div className="form-group">
              <div className="file-image">
                <div className="image">
                  {loadImage ? <img src={loadImage} alt="avatar" /> : ''}
                </div>
                ///이미지 미리보기 설정해줌.
                <div className="file">
                  <label htmlFor="image">Select Image</label>
                  <input
                    type="file"
                    className="form-control"
                    id="image"
                    name="image"
                    onChange={fileHandle}
                    ///파일은 fileHandle로 해 줌.
                  />
                </div>
              </div>
            </div>

            <div className="form-group">
              <input type="submit" value="register" className="btn" />
              ///type을 submit으로 해 준다.
              ///클릭하면, 맨 위 폼의 submit={register}가
              ///실행됨.
            </div>

            <div className="form-group">
              <span>
                <Link to="/messenger/login"> Login Your Account </Link>
                ///클릭시 login page로 넘어감.
              </span>
            </div>
          </form>
        </div>
      </div>
    </div>
  )
}

export default Register
7. src/components/login.jsx
import React, { useEffect, useState } from 'react'
import { Link, useNavigate } from 'react-router-dom'
import { userLogin } from '../store/actions/authAction'
import { useAlert } from 'react-alert'
import { useDispatch, useSelector } from 'react-redux'
import { ERROR_CLEAR, SUCCESS_MESSAGE_CLEAR } from '../store/types/authType'

const Login = () => {
  const alert = useAlert()
  const navigate = useNavigate()

  const { loading, authenticate, error, successMessage, myInfo } = useSelector(
    (state) => state.auth
  )
	///reducer에 담긴 state를 useSelector을 이용해서
    ///불러준다.

  const dispatch = useDispatch()

  const [state, setState] = useState({
    email: '',
    password: '',
  })
  ///state를 만들어준다.

  const InputHandle = (e) => {
    setState({
      ...state,
      [e.target.name]: e.target.value,
    })
  }
  ///onChange에 붙여줄 함수

  const login = (e) => {
    e.preventDefault()
    dispatch(userLogin(state))
  }
  ///onSubmit에 활용될 함수.
  ///state를 넣어서 action의 userLogin을 호출(dispatch)한다.

  useEffect(() => {
    if (error) {
      error.map((err) => alert.error(err))
      dispatch({ type: ERROR_CLEAR })
      return
    }
    if (authenticate) {
      navigate('/')
    }
    if (successMessage) {
      alert.success(successMessage)
      dispatch({ type: SUCCESS_MESSAGE_CLEAR })
    }
  }, [successMessage, error])
///error혹은 successMessage가 있을 경울,
///type으로 reducer의 state를 dispatch해 준다.


  return (
    <div className="register">
      <div className="card">
        <div className="card-header">
          <h3>Login</h3>
        </div>

        <div className="card-body">
          <form onSubmit={login}>
          ///버튼 클릭시 login함수 실행됨.
            <div className="form-group">
              <label htmlFor="email">Email</label>
              <input
                type="email"
                onChange={InputHandle}
                className="form-control"
                placeholder="Email"
                id="email"
                value={state.email}
                name="email"
              />
            </div>

            <div className="form-group">
              <label htmlFor="password">Password</label>
              <input
                onChange={InputHandle}
                type="password"
                className="form-control"
                placeholder="Password"
                id="password"
                value={state.password}
                name="password"
              />
            </div>

            <div className="form-group">
              <input type="submit" value="login" className="btn" />
            </div>

            <div className="form-group">
              <span>
                <Link to="/messenger/register"> Don't have any Account </Link>
              </span>
            </div>
          </form>
        </div>
      </div>
    </div>
  )
}
export default Login
이상으로 redux reducer dispatch 등을 알아보았음..
action은 함수, reducer는 state관리.
reducer는 rootReducer에서 관리됨.
복습이 살길이다.

코딩하는초딩쌤