학원에서는 Nest 프레임워크를 이용한 GraphQL 형태만 배웠지만,
swagger와 REST 형식으로 프로젝트를 만들어 보려고 한다.
1. nestjs에 swagger 다운받아 주기
npm install --save @nestjs/swagger2. main.ts에 swaggerModule, Document 코드 추가해주기
Main.ts(Swagger 적용 전)
import { NestFactory } from '@nestjs/core';
import { AppModule } from './app.module';

async function bootstrap() {
  const app = await NestFactory.create(AppModule);
  await app.listen(3000);
}
bootstrap();
Main.ts(Swagger 적용 후)
import { NestFactory } from '@nestjs/core';
import { SwaggerModule, DocumentBuilder } from '@nestjs/swagger';
import { AppModule } from './app.module';
async function bootstrap() {
const app = await NestFactory.create(AppModule);
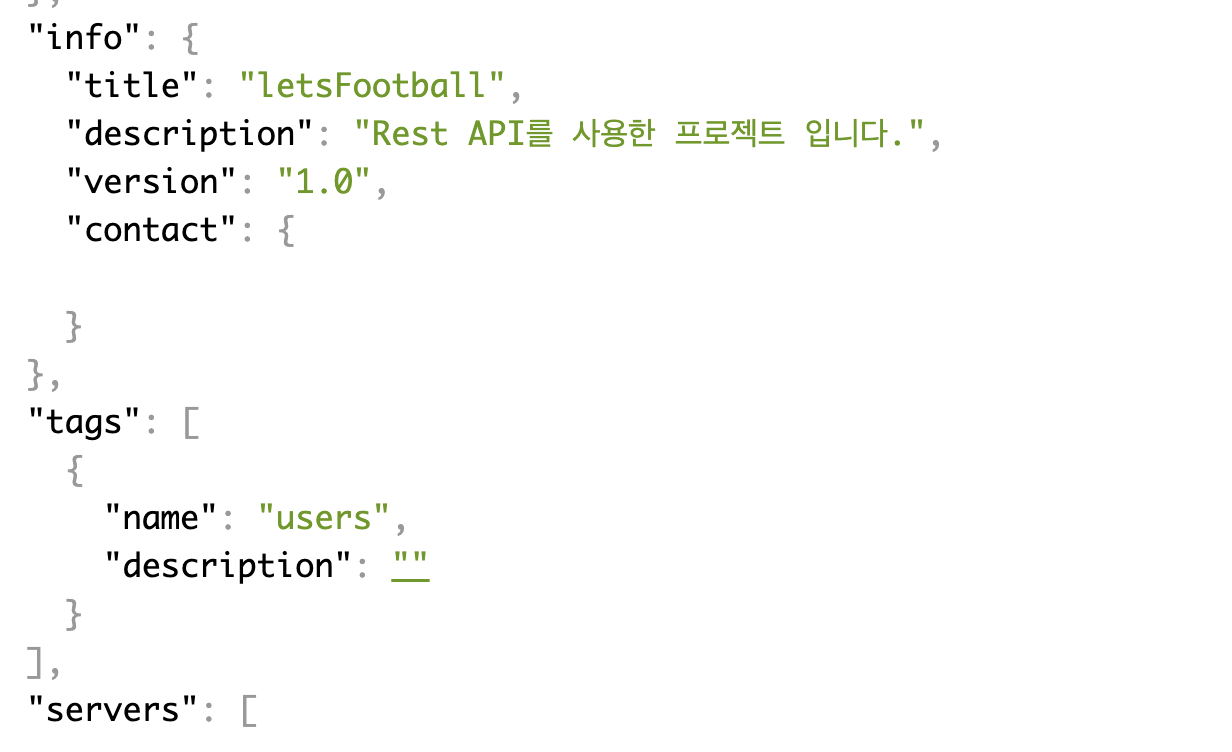
const config = new DocumentBuilder()
.setTitle('letsFootball')
.setDescription('Rest API를 사용한 프로젝트 입니다.')
.setVersion('1.0')
.addTag('users')
.build();
const document = SwaggerModule.createDocument(app, config);
SwaggerModule.setup('api', app, document);
await app.listen(3000);
}
bootstrap();Docs를 참고해서 코드를 작성해 준 후에 서버를 켜고,
http://localhost:3000/api로 들어가준다.
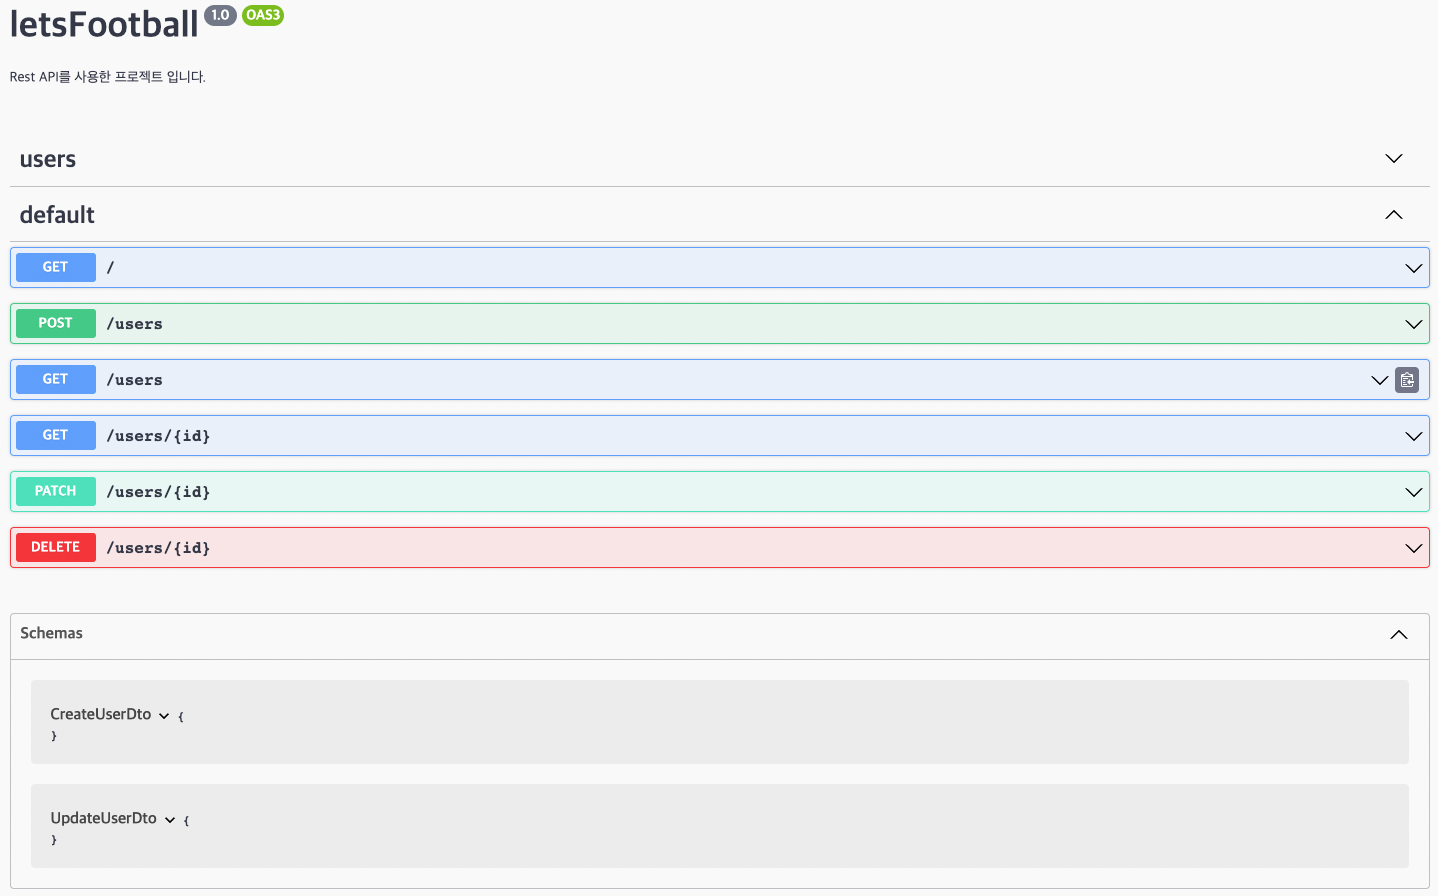 Swagger 기본 뼈대가 완성되었다...!
JSON, YAML 형식을 이용해서도 Swagger를 만들 수 있고,
서버가 켜져 있다면
http://localhost:3000/api-json으로 접속하여 json형식으로도 확인할 수 있다.
api-json을 통해서 json파일 형태로 확인한 모습