알람 채널
이번에는 Firebase cloud message를 수신하는 알림을 만든다.
Anroid 8.0 API 26이상 부터 알람은 특정 채널에 포함되어야하고 채널별로 알람을 중지할 수 있다.
8이상은 중요도를 채널에서 결정하고 그 밑의 버전에서는 알람마다 설정해줘야한다.
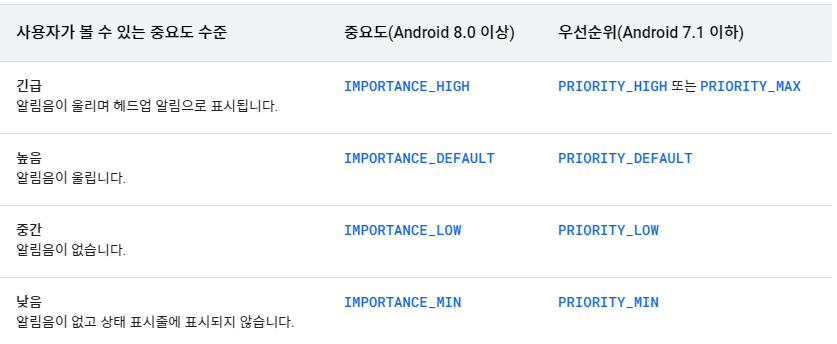
중요도는 위와같이 4가지가 있다
createNotificationChannel()
NotificationChannel을 만들어 준다.
NotificationChannel() 은 인자로 id 이름 중요도를 받는다.
채널 Id와 이름 그리고 설명을 상수로 선언해 놓는다.
    companion object {
        private const val CHANNEL_NAME = "Emoji Party"
        private const val CHANNEL_DESCRIPTION = "Emoji party를 위한 채널 "
        private const val CHANNEL_ID = "Channel_Id"
    }
중요도는 NotificationManager에서 선택할 수 있다.
NotificationChannel(CHANNEL_ID, CHANNEL_NAME,NotificationManager.IMPORTANCE_DEFAULT)
위와 같이 채널 설정
    private fun createNotificationChannel() {
        if (Build.VERSION.SDK_INT >= Build.VERSION_CODES.O) {
            val channel = NotificationChannel(
                CHANNEL_ID,
                CHANNEL_NAME,
                NotificationManager.IMPORTANCE_DEFAULT
            )
            channel.description = CHANNEL_DESCRIPTION
            //채널을 notification 매니저에 추가
            (getSystemService(Context.NOTIFICATION_SERVICE) as NotificationManager)
                .createNotificationChannel(channel)

        }
    }
오레오 버전 위로는 notification 채널에 중요도를 성절해주고 아닌경우에는 알람 각각에 중요도를 설정해준다.
위의 방식으로 message를 받으면 채널을 생성해준다.
알람 콘텐츠
    override fun onMessageReceived(remoteMessage: RemoteMessage) {
        super.onMessageReceived(remoteMessage)

        createNotificationChannel()

        val title = remoteMessage.data["title"]
        val message = remoteMessage.data["message"]


        val notificationBuilder = NotificationCompat.Builder(this, CHANNEL_ID)
            .setSmallIcon(R.drawable.ic_baseline_notifications_24)
            .setContentTitle(title)
            .setContentText(message)
            .setPriority(NotificationCompat.PRIORITY_DEFAULT)

        NotificationManagerCompat.from(this)
            .notify(1,notificationBuilder.build())
    }
NotificationCompat.Builder(context, 채널 ID)
를 통해서 알람을 만들어 준다.
setSmaillIcon -> 알림의 좌측상단의 icon
setContentTitle -> 알람 제목
setContentText -> 알람 내용
NotificationManagerCompat 를 이용해서 notify해준다.
메세지를 보내는것은 앞에서 했던 api 사용해보기를 이용해서 보낸다.
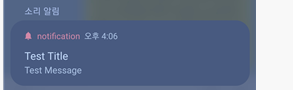
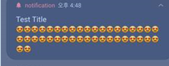
보내면 이렇게 핸드폰에서 알람을 볼 수 있다.
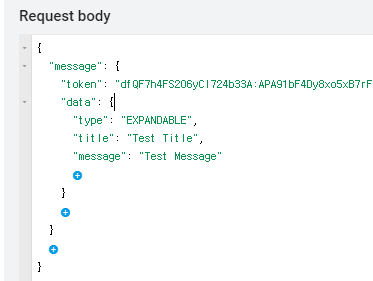
알람 타입
일반, 확장형, custom 타입의 알람을 설정해준다.
NotificationType.kt enum class를 만든다.
enum class NotificationType(val title:String,val id:Int) {
   NORMAL("일반 알림",0),
   EXPANDABLE("확장형 알림",1),
   CUSTOM("커스텀 알림",3)
}
다시 MyFirebaseMessageingService.kt 에서
val type = remoteMessage.data["type"]?.let {
            NotificationType.valueOf(it)
        }
type ?: return
타입을 nullable로 선언해주고 type이 null이면 더이상 진행하지 않고 return 하도록 만들어준다.
위에 만들어놨던 알람 생성 라인을 함수로 바꾼다.
private fun createNotification(
type: NotificationType,
title: String?,
message: String?
): Notification {
val notificationBuilder = NotificationCompat.Builder(this, CHANNEL_ID)
.setSmallIcon(R.drawable.ic_baseline_notifications_24)
.setContentTitle(title)
.setContentText(message)
.setPriority(NotificationCompat.PRIORITY_DEFAULT)
when (type) {
NotificationType.NORMAL -> Unit
NotificationType.EXPANDABLE -> {
notificationBuilder.setStyle(
NotificationCompat.BigTextStyle().bigText(
"엄청 긴 문장을 넣어보자 "
)
)
}
NotificationType.CUSTOM -> {
notificationBuilder.setStyle(
NotificationCompat.DecoratedCustomViewStyle()
).setCustomContentView(
RemoteViews(
packageName, R.layout.view_custom_notification
).apply { //setText로 바로 못한다.
setTextViewText(R.id.txt_title, title)
setTextViewText(R.id.txt_message, message)
}
)
}
}
return notificationBuilder.build()
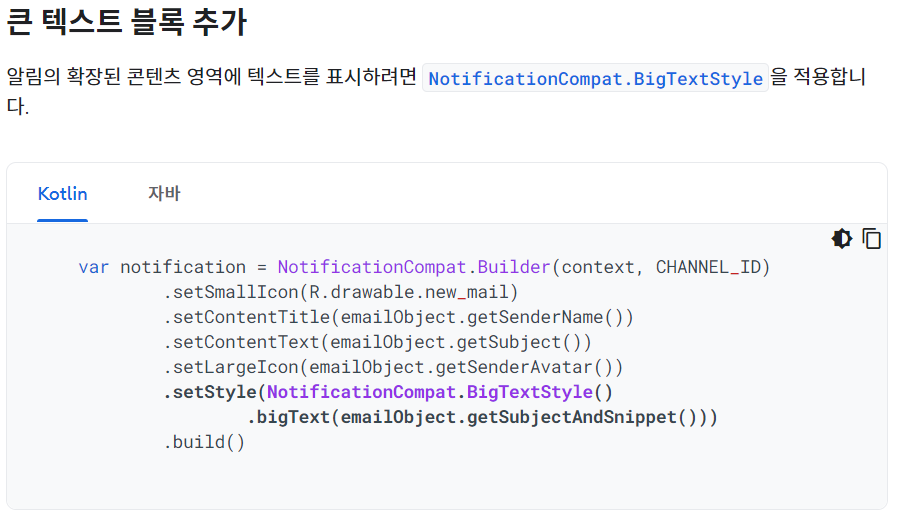
}expandable 알람
여러가지를 추가할수 있다. 강의에서는 큰 text block을 추가한다.
custom 알람
맞춤 알림 공식문서
많이 쓰이지는 않지만 자체적으로 layout을 만들수있다.
다양한 기기에서 호환이 잘될지 확인하기가 어렵다!
별도 앱에서 다를수있는 class 위젯과 customNotification에서 자주 쓰인다.
remoteView에서 쓸 xml layout을 만들어준다. constraint layout은 remoteView에서 지원하지 않기 때문에 LinearLayout으로 만든다.
view_custom_notification.xml
<LinearLayout xmlns:android="http://schemas.android.com/apk/res/android"
    android:layout_width="match_parent"
    android:layout_height="match_parent"
    android:gravity="center"
    xmlns:tools="http://schemas.android.com/tools"
    android:orientation="vertical">

    <TextView
        android:id="@+id/txt_title"
        style="@style/TextAppearance.Compat.Notification.Title"
        tools:text="title"
        android:textSize="25sp"
        android:layout_width="wrap_content"
        android:layout_height="wrap_content" />

    <TextView
        android:id="@+id/txt_message"
        android:layout_width="wrap_content"
        android:layout_height="wrap_content"
        tools:text="message"
        android:layout_marginTop="10dp"
        style="@style/TextAppearance.Compat.Notification"
        />

</LinearLayout>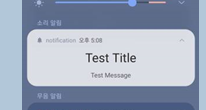
알람 click event 만들기
class MainActivity : AppCompatActivity() {

    private val resultTextView: TextView by lazy {
        findViewById(R.id.resultTextView)
    }

    private val firebaseToken: TextView by lazy {
        findViewById(R.id.firebaseTokenTextView)
    }

    override fun onCreate(savedInstanceState: Bundle?) {
        super.onCreate(savedInstanceState)
        setContentView(R.layout.activity_main)

        initFirebase()
        updateResult()
    }

    override fun onNewIntent(intent: Intent?) {
        super.onNewIntent(intent)

        setIntent(intent)
        updateResult(true)
    }

    private fun initFirebase() {
        FirebaseMessaging.getInstance().token.addOnCompleteListener { task ->
            if (task.isSuccessful) {

                firebaseToken.text = task.result
            }
        }
    }

    private fun updateResult(isNewIntent: Boolean = false) {
        resultTextView.text =
            intent.getStringExtra("notificationType") ?: "앱 런처" + if (isNewIntent) {
                "(으)로 갱신했습니다"
            } else {
                "(으)로 실행했습니다."
            }

    }

}
알림의 tab 작업 Intent를 이용한다.
createNotification 함수안에 intent를 선언해준다.
intent의 flag를 FLAG_ACTIVITY_SINGLE_TOP으로 선언
flag
- standard 방식
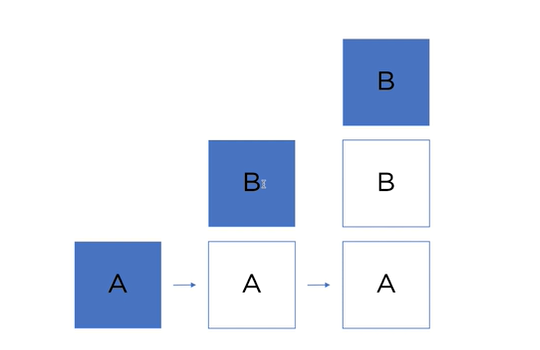 (출저 -패스트캠퍼스 강의)
색칠된 것은 화면에 보이고있는 activity이다.
- single top 방식
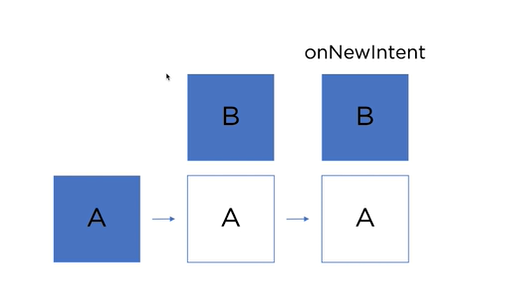
같은게 있을경우에 이전에 있던걸 다시 활용한다.
onNewIntent를 호출하면서 다시 활용
PendingIntent
누군가에게 intent를 다룰수 있는 권한을 준다는 개념
 val intent = Intent(this, MainActivity::class.java).apply {
            putExtra("notificationType", "${type.title} 타입")
            addFlags(Intent.FLAG_ACTIVITY_SINGLE_TOP)
        }
        val pendingIntent = PendingIntent.getActivity(this, type.id, intent, FLAG_UPDATE_CURRENT)
type별로 pendingIntent를 다르게 만든다.
notificationBuilder에
.setContentIntent(pendingIntent)
.setAutoCancel(true)
이 두가지를 추가해준다.
setAutoCancel(true)는 알람을 tap 했을때 알람이 사라지게 만들어주는 것이다.
    private fun updateResult(isNewIntent: Boolean = false) {
        resultTextView.text =
            intent.getStringExtra("notificationType") ?: "앱 런처" + if (isNewIntent) {
                "(으)로 갱신했습니다"
            } else {
                "(으)로 실행했습니다."
            }

    }
이러한 방식으로 notificationType에 따라 앱에서 어떤 type인지 알려준다.
실행화면
알람을 다시 누르면 text가 잘바뀌는걸 확인할 수 있다.
클라우드 쓰는법과 알람 만드는 법에 대해서 배웠다. 타입별로 처리하는거 다르게 하는것도 유용한거 같고...firebase쓰는법도 유용한거 같다. 강의가좀 어렵다ㅠㅠ 화이팅하자!!